Custom Widget Tutorial
This page walks you though the steps for building a custom widget. We decided to cover a very simple case: a sample widget that displays profile information for a user in GitHub. This widget doesn't perform any complex operations, like authentication and authorization in a third-party service, nor does it have complex style elements. Still, we hope that this tutorial helps you grasp the basic concept behind a custom widget.
This tutorial describes the following steps:
- Building the widget manifest
- Creating an entry point for your widget
- Writing a script for the widget
- Testing the widget
- Uploading the widget to YouTrack
- Uploading the widget to the JetBrains Plugins Repository
Create the Widget Manifest
As the first step, we create the manifest.json file. This file defines the attributes for the custom widget.
For YouTrack Standalone to read and display the attributes in the widget manifest:
The file must be named
manifest.json.The file must be stored in the top-most level of the ZIP archive.
Here is the manifest file for our sample widget:
Our widget manifest contains definitions for just a few attributes. For a complete list of the attributes that you need to define in the manifest file, see Widget Manifest.
Create an index.html File
Second step is to create an entry point for your widget: an index.html file. This is a standard HTML5 file. Here, we include a reference to the hub-dashboard-addons library. This library allows communication between the widget and the page that it is plugged into in YouTrack. The file also contains CSS styles that manipulate the presentation of data retrieved from the GitHub profile. The body element includes the widget script itself (index.js).
Create the Script
The third step is to create the script itself. In our case, the script retrieves and displays the user profile of a specified GitHub user.
Test the Widget
To test the widget, we need to load it in the Widgets Playground. First, we run a static server on the local directory with the custom widget files. In our case, we use npm http-server that requires Node.js. To simplify the matters even more, we use a YouTrack Standalone service that is available over HTTP. If you have YouTrack Standalone running over HTTPS, then you need to host your widget over HTTPS as well. In this case, you can use a service like https://ngrok.com. For more information, see Testing Widgets over a Secure Connection.
To serve the widget over HTTP:
Install the HTTP server:
npm i http-server -gFrom the custom widget directory, run the HTTP server with the following command:
http-server . --cors -c-1 -p 9033The HTTP server starts and serves the content on the current directory. In the response, you see the IP addresses (both internal and external) at which the HTTP server is accessible. For example:
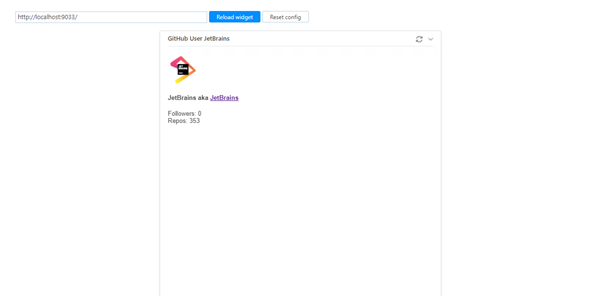
We run the YouTrack service locally, so we can load the widget into the widgets playground from the http://localhost:9033/ address.
To load your widget in the widgets playground:
- Open the Widgets Playground page in YouTrack.
In the Server Settings section of the Administration menu, select Custom Widgets.
Click the Widgets playground link in the header.
Enter the web address for your custom widget in the input field. In our case,
http://localhost:9033/- Click the Load widget button.
If you modify the code and upload these changes to your web server, use the Reload widget button to refresh the widget content and test the updates.
To learn more about testing custom widgets, see Test a Custom Widget.
Upload the Widget to YouTrack
Now that we successfully tested the widget in the playground, we can upload it to the production environment.
First, we create a ZIP archive with the widget files. You can use any archive application to your liking. Just remember that manifest.json and index.html files must be located on the top-most level of the zip file.
For example, we used command line prompt in macOS to create the archive. Our sample widget contains only three files and all of them are located in the same directory without any subdirectories. Thus the command to create the archive is very simple (run in the custom widget directory):
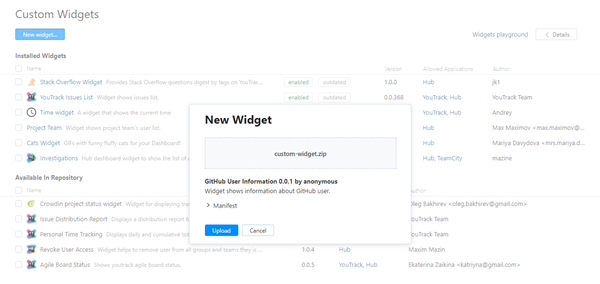
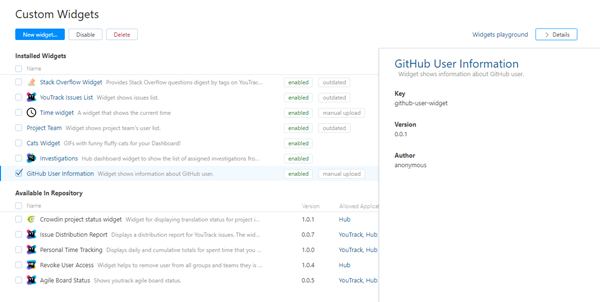
We created the custom-widget.zip file. Now we just need to upload it to the production environment:
To upload your widget:
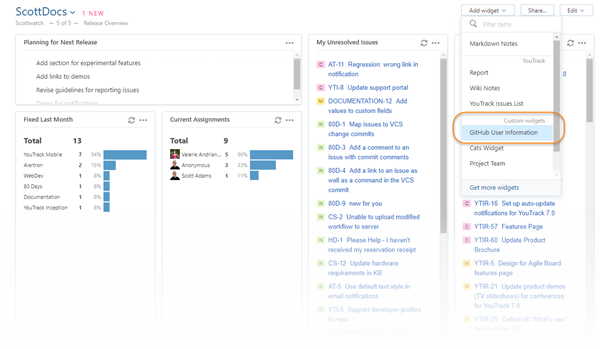
That's it! Users can add the new custom widget to their dashboards in YouTrack.
Upload the Widget to the JetBrains Plugins Repository
The final and optional step is to share your widget with other companies who are working with YouTrack by uploading your widget to the JetBrains Plugins Repository.
To upload your widget to the repository:
In your web browser, access the JetBrains Plugins Repository.
- Click the Sign In button in the header.
If you already have a JetBrains Account, enter your email address and password.
If you don't have a JetBrains Account, register with your email address and create an account.
- From the header, select .
The YouTrack Widgets page opens.
- Click the Upload Widget button in the header.
The Adding new widget page opens.
Select a Category from the drop-down list.
Click the Choose File button and select the ZIP archive that contains your custom widget.
- Click the Upload New Plugin button.
Your custom widget is uploaded to the JetBrains Plugins Repository.
When a moderator has reviewed the widget and approved it for publication, the widget is added to the directory.


