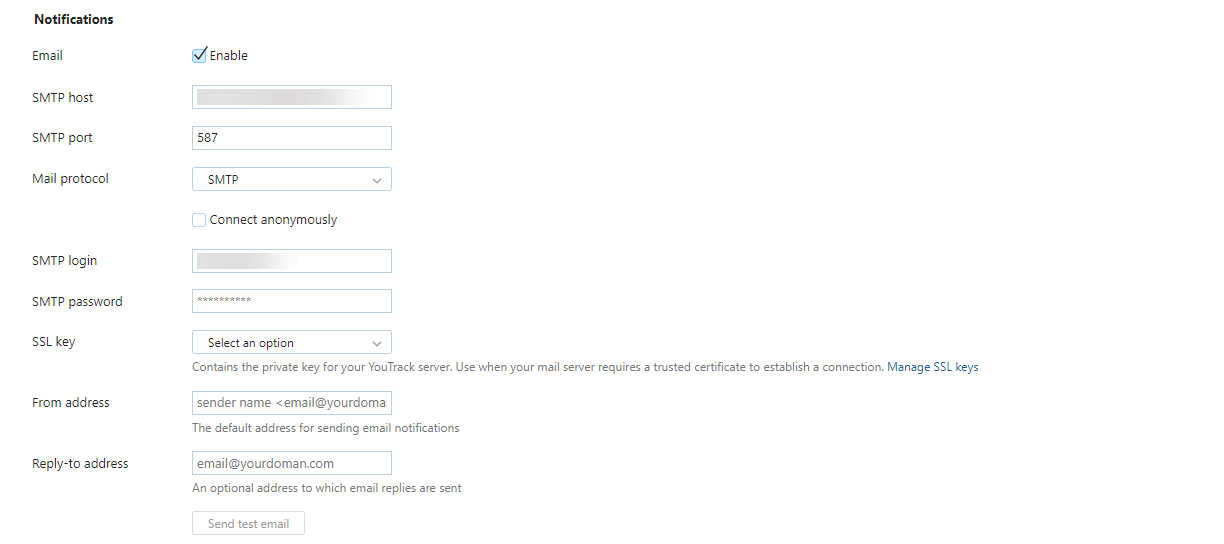
Enable Email Notifications
On the Global Settings page, you configure the connection between YouTrack and a mail server. This enables notifications in YouTrack over email.

To enable email notifications:
Select the Enable checkbox for Email.
Enter values for the following settings:
Setting
Description
SMTP host
Enter the server address of your SMTP server.
SMTP port
Enter the connection port for the SMTP server.
Mail protocol
Select the protocol that is used by your SMTP server.
Connect anonymously
If your SMTP server does not require authentication, enable this option.
When enabled, YouTrack connects to your SMTP server without sending a login and password. The input fields for SMTP login and SMTP password are disabled. Values that are stored in these settings are ignored.
SMTP login
Enter the username of the account that is used to access the SMTP server.
SMTP password
Click the Change password button to specify the password for account that is used to access the SMTP server.
SSL key
Select a previously uploaded SSL key or trusted certificate for secure connection to your mail server. For details, see SSL Keys.
From address
Enter the address that you want to use to send email notifications. For more information about email addresses, see From and Reply-to Addresses.
Reply-to address
Enter an optional address that you want to use for email replies. For more information about email addresses, see From and Reply-to Addresses.
When finished, click the Save button.
Test the connection.
Check the email account that you sent the test message to and verify that the message was delivered.
If successful, the connection to your external mail service is configured and ready for use.
If unsuccessful, update your settings and test the connection until the message delivery is successful.
