Upgrade with a JAR Distribution
Prerequisites
Before you upgrade, perform the following prerequisite tasks:
Create a backup of your current database. YouTrack Standalone does not provide forward database compatibility. Your database is migrated to the format that is compatible with the latest version during the upgrade procedure. This means that you cannot revert to a previous version and continue to use the database that was processed during the upgrade.
Copy the backup of your current database to a secure location just in case you encounter problems with the upgrade and need to roll back to the previous version.
Verify that your YouTrack license supports the upgrade. To view the license limitations, click the Global Settings link in the Administration menu. If your free update period has expired, you need to extend your subscription.
Mind the recommended upgrade path. The current version of your installation is shown at the bottom of any page in the application.
Recommended upgrade path
Existing version | Upgrade to version |
|---|---|
6.5 or earlier | YouTrack 7.0 |
7.0 | 2017.1 |
2017.x | 2018.x |
Upgrade an Existing JAR Installation
If you run YouTrack as a standalone Java process with the JAR distribution, the upgrade procedure is quite straightforward.
To upgrade YouTrack with the JAR distribution:
-
Run the new JAR file from the command line. If you run YouTrack jar with a script, then deploy the new JAR and start the server.
Make sure to run the new JAR file with the same user account that you used for the previous version.
If you experience a problem during the upgrade, please create an issue. Describe the problem and attach your logs to the issue. Restore the previous YouTrack version with the pre-upgrade database backup.
Upgrade a non-JAR Installation with JAR
This section describes how you can upgrade your existing non-JAR YouTrack installation using the JAR distribution.
To upgrade an existing YouTrack installation:
Create and download a fresh backup of your current database.
Use your operating system tools to verify that all Java processes that are launched by YouTrack are no longer running. If there are YouTrack-related Java processes that are still running, kill the outstanding process trees.
In a command-line interface, enter a command to start the upgrade:
java -jar youtrack-<version>.jarFor details about running YouTrack JAR, see Run YouTrack JAR.
The web-based Configuration Wizard starts.
Open the web-based Configuration Wizard.
If you have a browser installed on the host machine, the Configuration Wizard opens automatically.
If you do not have a web browser installed on the host machine, open the URL of the wizard in a web browser on another workstation. The wizard URL is printed in the console output:
JetBrains YouTrack <version> will be available on [<YouTrack Base URL>/bundle/starting?wizard_token=<value>] after start
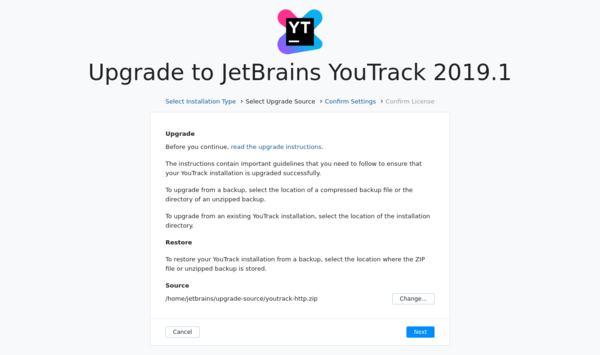
On the Select Upgrade Source page, click the Select button and select the backup file of your current database that you have created.

When done, click Next.
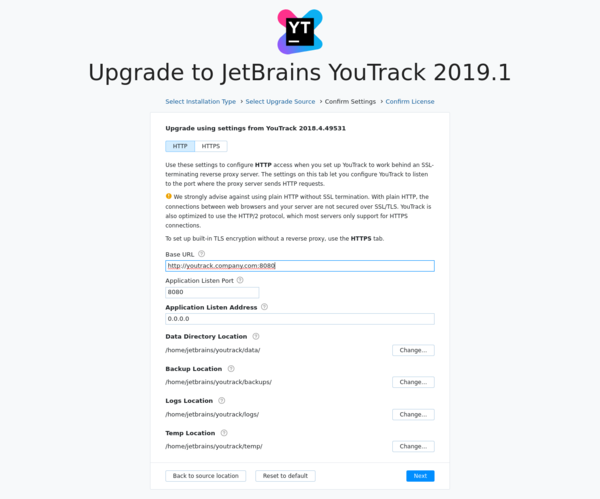
On the Confirm Settings page, confirm or change your system settings and the location of system directories.

Here you can also enable the built-in TLS to secure the network connection for the server. For detailed procedure, read the Upgrade Scenarios with Built-in TLS page.
When done, click Upgrade.
YouTrack launches its components.
Do not close the page in the browser until the setup is complete.
When the YouTrack Standalone server is ready, the Dashboard opens. Your YouTrack Standalone instance is upgraded and ready for use.
