Edit an Article
Writing an article for the knowledge base is rarely accomplished in one sitting. You'll probably have a round or editing or two before it's ready for publication. Any edits made prior to publication are saved in the background automatically.
Update an Article Draft
Every author has his or own style when it comes to revisions. Some prefer to write everything in one go, while others prefer to revisit, read, ponder, and rewrite their content prior to publication.
No matter which style you follow, YouTrack lets you make an unlimited number of edits to your article content and publish only when you think the time is right.
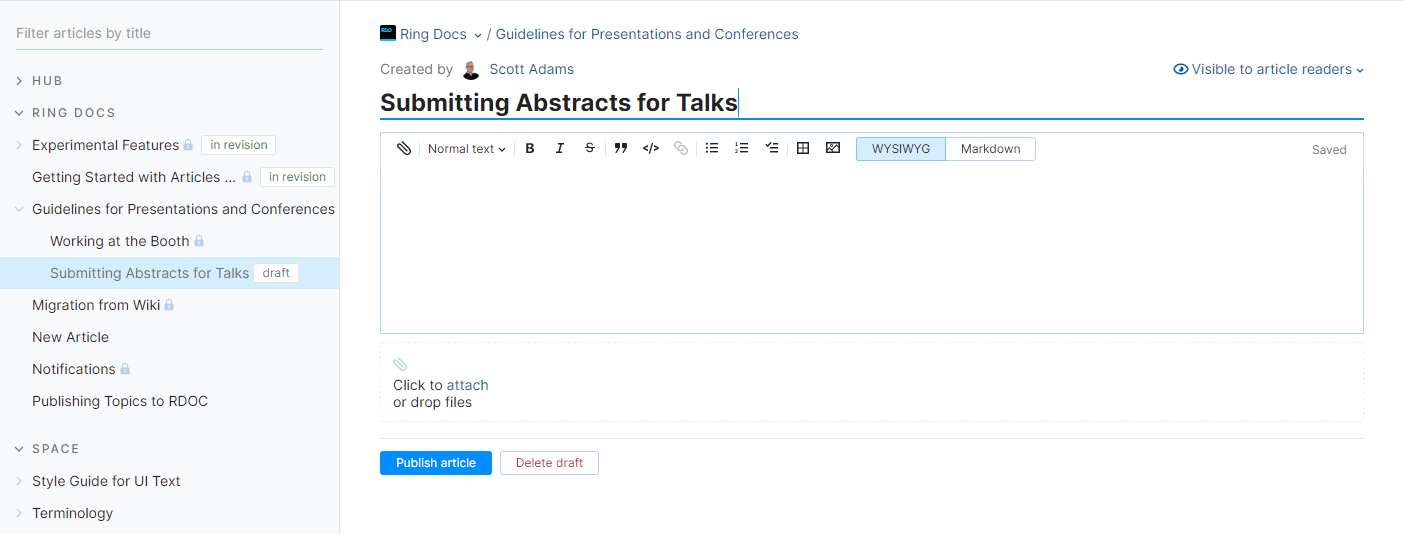
To edit an article draft:
Select an article draft in the table of contents.
The article opens in the content editor.

Update the article content or set the values for other issue attributes.
To set or change the project that the article belongs to, open the project selector at the top of the page. Use the filter to find a project by its name.
Restrict the visibility of the draft to specific users, groups and teams prior to publication. For details, see Article Visibility.
Attach files. To learn more, see Attach Files to Articles.
When you're satisfied the content, click the Publish article button.
Revise a Published Article
Even the most perfectly polished articles require updates from time to time. Policies change, goals require recalibration, and processes evolve. Luckily, users who have the proper permissions can update published articles at any time.
If an article has already been published, edits are recorded and displayed in the version history for the article. This history is available to anyone who has permission to read the article. If a user introduced unwanted changes, or you want to roll back to a specific published version of the article, a user with sufficient permission can restore to a previous version. For details, see Review Version History.
To edit a published article:
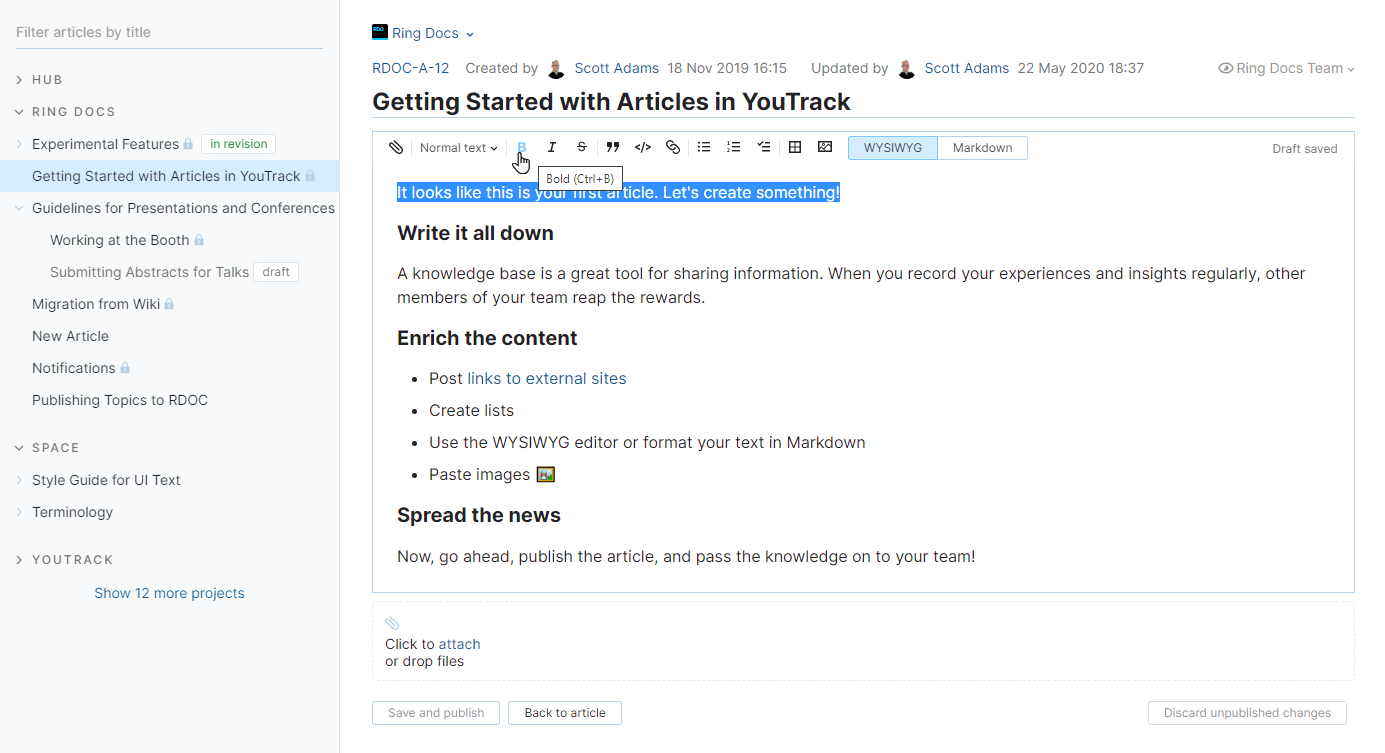
WYSIWYG Editor
YouTrack supports two modes for formatting article content. The first is a WYSIWYG framework, which means that "What You See Is What You Get". In this mode, you can format the text in such a way that it closely resembles how the content should appear when published.
In this mode, you enter the content in the editor and use the controls in the toolbar to stylize the text.

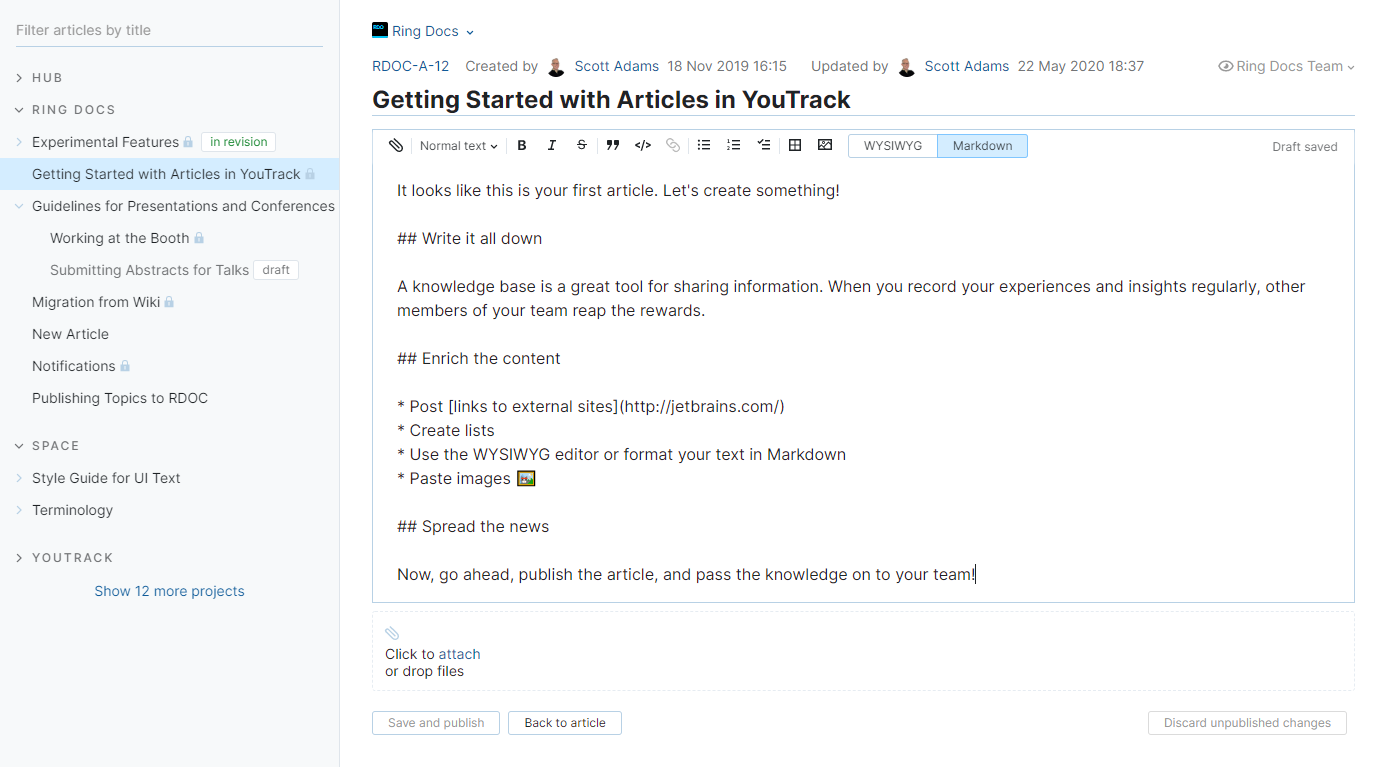
Markdown Mode
The second mode that is supported for styling content in articles is Markdown. Markdown is a lightweight markup language that is used to apply formatting to plain text. To learn how to format text using Markdown in YouTrack, see Markdown Syntax.

In Markdown mode, you always see the content written in plain text. However, the options that can be used to format text in WYSIWIG mode are still available. When you click a formatting button in the toolbar, the corresponding Markdown characters are inserted at the current cursor position.
If you're not familiar with Markdown syntax, it may be hard to predict what your article will look like when published. For a quick preview that shows you what the article will look like when published, you can switch to WYSIWYG whenever you want. You can continue to edit the content in either mode according to your personal preference
Syntax Highlights for Code Blocks
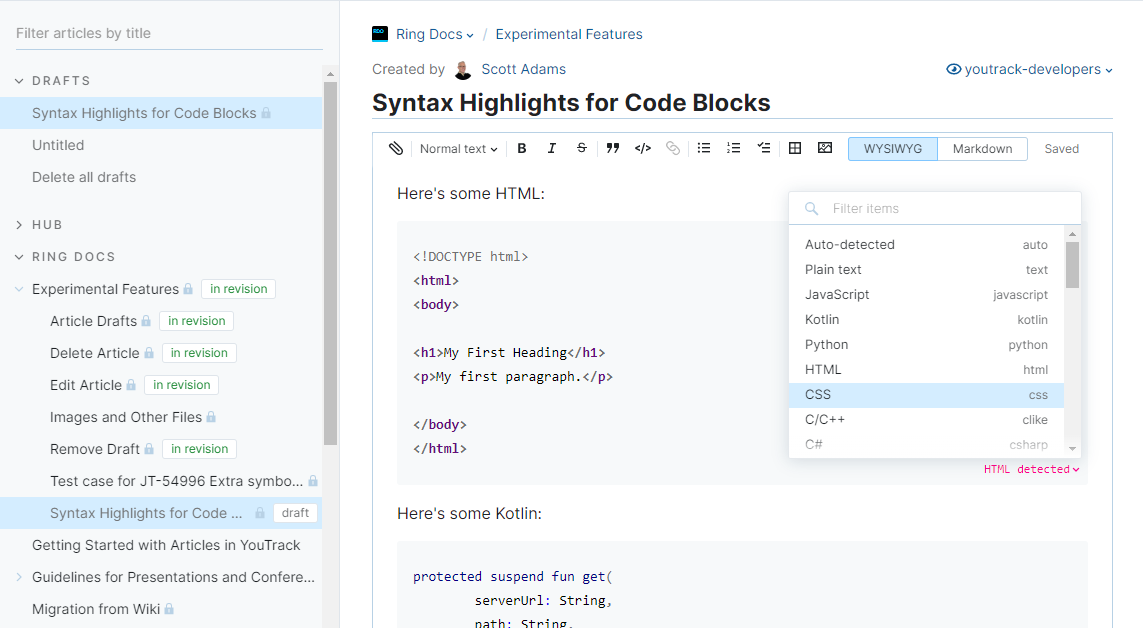
When you add a code snippet to an article in WYSIWYG mode, YouTrack tries to detect which language the code is written in and apply the appropriate syntax highlights. The name of the detected language appears in the lower-right corner of the code block.

If the actual language is different from the language that is detected automatically, open the selection menu and select the correct language from the list.
