The Issues List
The Issues list displays a list of the issues that have been created in your YouTrack installation. The unfiltered list shows you all of the issues that belong to the projects for which you have the Read Issue permission.
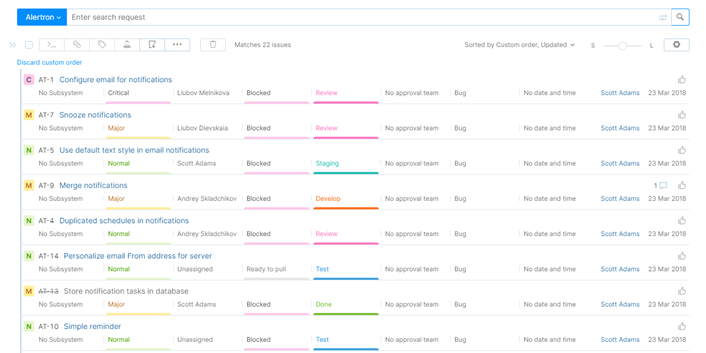
Search Bar
To get the most out of this view, it’s good to know how to filter this list and find the issues that are relevant to your work. The search bar at the top of the Issues list has two controls that help you limit the number of issues that are shown on the page.
The Search Context limits the search results to a set of issues that belong to a single project, match a saved search query, or are labeled with a specific tag. Once you have selected a search context, you can specify a search query in the Search Box to further limit the results.
To learn more about the search context, see Search Context.
The Search Box is a free-form input field for entering a search query. You can search for arbitrary strings of text or find issues that contain specific values for predefined attributes.
To learn more about the search box, see Search.
Query Syntax Highlights
When you enter a query in the search box, YouTrack applies visual indicators to the query string. This formatting helps you understand how your search query is interpreted by the search engine.
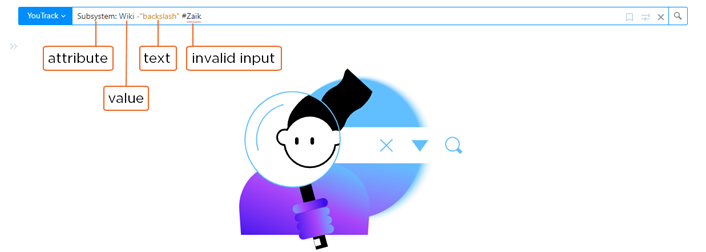
Issue attributes are shown as normal text without formatting.
Attribute values are shown in blue text.
Words that are parsed as text search are shown in gold.
Invalid parameters are underlined in red.
To learn how YouTrack handles different types of search input, see Attribute-based Search and Text Search.
Saving Search Queries
Any time you have a query string in the search box, you can click the bookmark icon to save and share your current search criteria. Saved searches give you quick access to collections of issues that you watch on a regular basis.
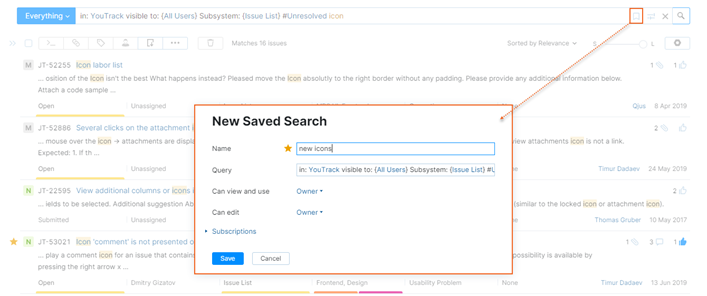
To learn more about saved searches in YouTrack, see Saved Searches.
Smart Filters
The filter icon in the right-hand section of the search box lets you show and hide a collection of smart filters. These filters help you find issues that match predefined search criteria without having to enter the query by hand.
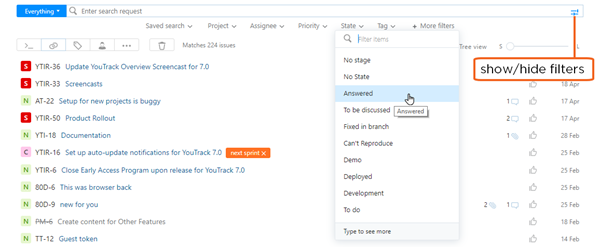
Use the following controls to work with filters:
Toggle the visibility of the filters by clicking the filter icon in the search bar.
Select a value from the list for a filter attribute. There are pre-defined filters for Project, Assignee, Priority, State, and Tag. When you select a value, the attribute and value are added to the current search query and the query is applied to the Issues list. The values that are shown in these lists is filtered to show only options that are relevant to issues that are returned by the current search query.
If a pre-defined filter is not relevant to the current search query, it is hidden. For example, if you select a project as the search context, the Project filter is hidden. If you filter for issues in a project that doesn't use the State field, the State filter is hidden, and so on.
Use the More Filters option to select additional search attributes. When you select an attribute from the list, the list of available values for the selected attribute is shown. Select a value from the list to add this filter to your search query.
Resolved Issue Filter
A dedicated control in the search box lets you apply a filter that hides resolved issues in one click.

The status of this filter is stored in the internal preferences for your user account. Once you activate the filter, resolved issues are excluded from subsequent search requests until you remove the filter.

If you enter a search query that explicitly references resolved states while this filter is active, no matches are shown. To show issues that match the query, you need to manually remove the resolved issue filter.
Highlights in Search Results
When you search for issues that contain specific strings of text, all of the word forms that match the words that are specified in the query are highlighted in the list.
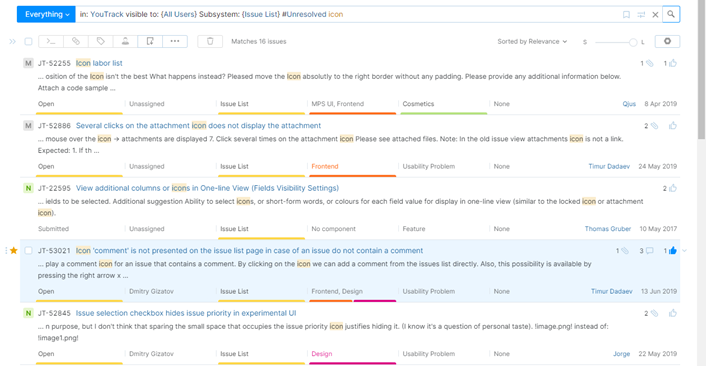
This makes it easier to find the exact issues that you were hoping to find with your search query.
Sidebar
The sidebar provides a set of links that show issues for your favorite projects, saved searches, and tags. The counters show the total number of projects, saved searches, and tags that are available to you based on your access rights for projects and the sharing settings for saved searches and tags.
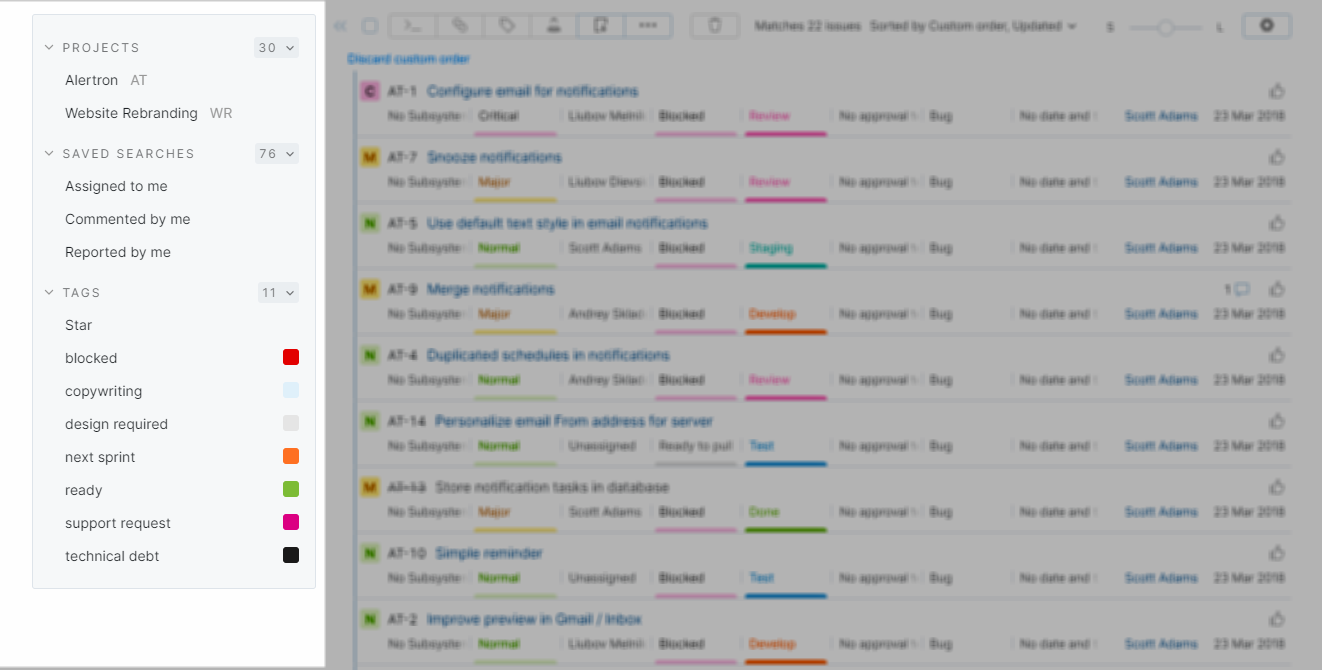
The sidebar shows links that correspond to the projects, saved searches, and tags that you have marked as your personal favorites. These links provide access to a list of issues that match the corresponding search query.
To add an item to the sidebar, expand the list of available items and click the star icon.
Click the edit icon to update the corresponding saved search or tag.
Click the link at the bottom of the drop-down list to create a new saved search or tag.
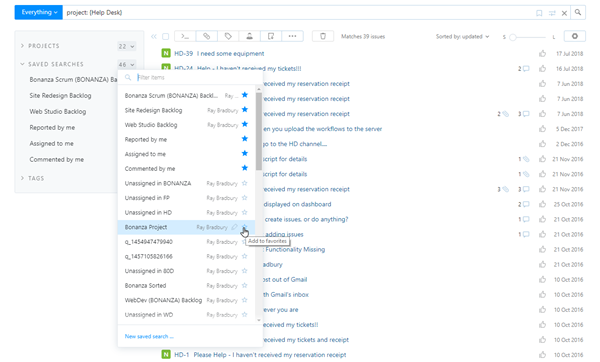
You can choose whether to show or hide the sidebar by clicking the control in the header or using one of these keyboard shortcuts:
For Windows and Linux operating systems, press Ctrl + Shift + Backspace
For macOS, press Control + Shift + Delete
Issue Toolbar
The toolbar on the Issues list lets you access operations that can be applied to multiple issues in the list.

The following controls are available:
Control | Description |
|---|---|
Select all issues | Selects all of the issues that are displayed on the current page. For more information, see Selecting Multiple Issues. |
Open command dialog | Opens a dialog that lets you apply one or more commands to the current issue. For a list of supported commands, see Command Reference. |
Link issue | Opens a list from which you can select an issue link type. When you select an issue link type, a dialog for linking the selected issue to one or more target issues opens. To learn more about adding links to issues, see Link Issues. |
Add tag | Opens a list of tags that are available to you. Select a tag from the list to add the tag to the current issue. To learn more about tags, see Tag Issues. |
Assign issue | Opens a list of users to whom the issue can be assigned. Select a user from the list to update the value in the Assignee field. To learn more about assigning issues in YouTrack, see Assignees. |
Export issue data | Opens a list of options for exporting issue data. For details, see Exporting Issue Data. |
Show more | Displays a list of additional actions. This menu also contains custom actions that are supported by workflows. |
Delete issue | Deletes all of the issues that are currently selected in the Issues list, following a confirmation prompt. To learn more about deleting issues, see Delete Issues. |
Selecting Multiple Issues
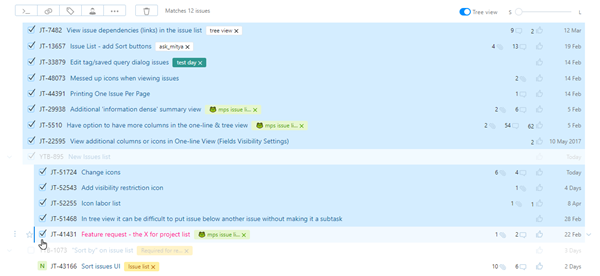
One of the controls in the toolbar on the Issues list lets you select all of the issues that are shown on the current page.
Select the checkbox in the header to select all of the issues on the current page.

When all of the issues on the current page are selected, you see the option to select all of the issue that match the current search query in the toolbar.

When all of the issues that match the search query are selected, you see the option to clear the selection in the toolbar.

You can also cycle through these three states with these keyboard shortcuts:
For Windows and Linux operating systems, press Ctrl + A
For macOS, press ⌘ + A
You can also select a range of issues by pressing the Shift key and clicking an issue. This inclusively selects all of the issues from the issue that currently has focus to the issue that you click to select the range.
Exporting Issue Data
Another control in the toolbar lets you export data for the current list of issues. The following options are available:
Option | Description |
|---|---|
Export in XSLX | Exports issue data in Microsoft Excel format (.xlsx). Exports in Excel format preserve data types for values in custom fields and other issue attributes. |
Export in CSV | Exports issue data to a CSV file (.csv). Exports in CSV format do not preserve data types. |
These options are available when you click the Export issue data button in the toolbar.

Use these options to upload issues to another application or use third-party software to compile custom reports.
The maximum number of issues that you can export is determined by the Max Issues to Export setting on the Global Settings page. The default value is 500. If the number of issues that you want to export exceeds the global limit, ask an administrator to increase this value. For more information, see System.
When you select an export option, the list of issues is filtered to match the current search query and context. The export file contains the following details for each issue:
Item | Description |
|---|---|
Issue ID | The ID that is assigned to the issue in the project. |
Project | The project that the issue belongs to. |
Tags | A list of tags that are attached to the issue. |
Summary | The issue summary. |
Reporter | The full name of the user who reported the issue. |
Created | The date and time the issue was created. |
Updated | The date and time when the issue was last updated. |
Resolved | The date and time when the issue was resolved. |
Custom Fields | The value that is set for each custom field in the issue. |
Description | The issue description. |
Votes | The current number of votes for the issue. |
Issue Count
The number of issues that match the current query is shown at the top of the list of issues, in line with the toolbar.

When you display the list of issues in tree view, this number shows how many issues that match the current search criteria. Non-matching parent issues are not included in this count. Parent issues that don't match the current search criteria are dimmed in the list.
Sort Options
This collection of controls lets you sort the issues in the list using a wide range of sort criteria. The default sort order depends on the search type.
If all of the arguments in the search query are attribute based, the issues are sorted by last update, in descending order.
If the query searches for text, issues are sorted by relevance.
To apply a different sort order, click the current sort options in the toolbar. This opens the Sort Attributes menu.

The following controls are available in this menu:
Control | Description |
|---|---|
Add a sort attribute | Lets you select additional attributes for sorting issues and apply them to the list. |
Remove sort attribute | Removes unwanted sorting options from the list. |
Change sort direction | Determines whether issues are sorted in ascending or descending order for the values that are stored in the corresponding attribute. |
Drag to change order | Determines the priority with which the sorting options are applied to issues in the list. Attributes that appear higher in the list are assigned greater sort priority. |
To learn more about sorting search results in the Issues list, see Sorting by Relevance and Sort Attributes.
View Modes
A slider at the top of the list lets you select one of three levels of detail. These levels are represented by the letters S (one-line), M (compact), and L (detailed).

The following table describes what level of detail is available for each size.
Size | Description |
|---|---|
S | Each issue is shown on a single line in the list. In this view, the following information is shown for each issue:
|
M | This view displays the same information that is visible in S mode, with a second line that shows values for custom fields and a link to the user who reported the issue. The set of custom fields that are shown for each issue is determined by your Visible Fields settings. To learn more about these settings, see List Settings. |
L | This view shows the highest level of detail. In addition to the information that is visible in M mode, you see the first two to three lines of the issue description. |
Viewing Single Issues
You can use the following actions to view additional information for single issues.
Click the Expand issue icon (or press the Right Arrow key) to expand the detail for the current issue and view the complete description. When you expand a second issue, the previously expanded issue collapses automatically.

Double-click an issue (or press the F3 key) to open the current issue in view mode. Use this action to view the entire issue — including the activity stream — without navigating away from the page.
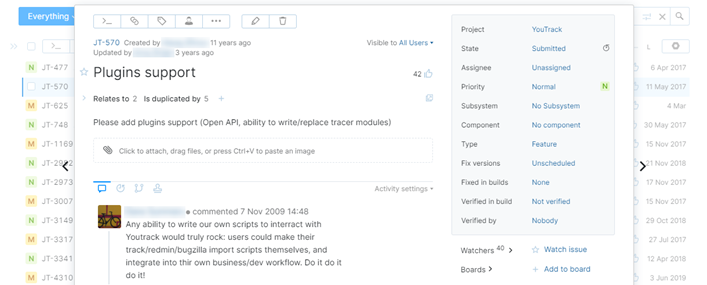
Once you have activated view mode, you can page through issues in the list by clicking the arrows to the left or right of the issue overlay.
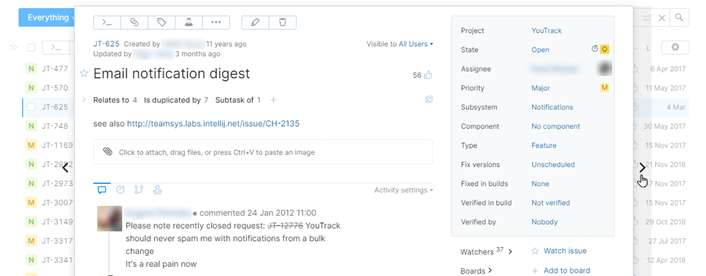
This navigation is also supported by the following keyboard shortcuts:
Windows/Linux
macOS
Description
Ctrl + Left Arrow
Control + Shift + Left Arrow
Show previous issue.
Ctrl + Right Arrow
Control + Shift + Right Arrow
Show next issue.
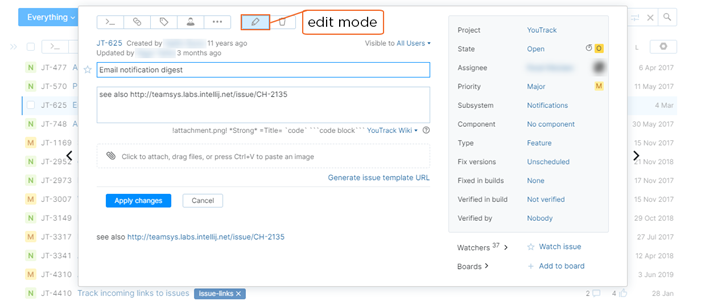
Press F2 to open the current issue in edit mode. When the issue is open in edit mode, you have direct access to update the issue summary and description.
List Settings
The List Settings menu lets you define your personal preferences for viewing issues in the list.
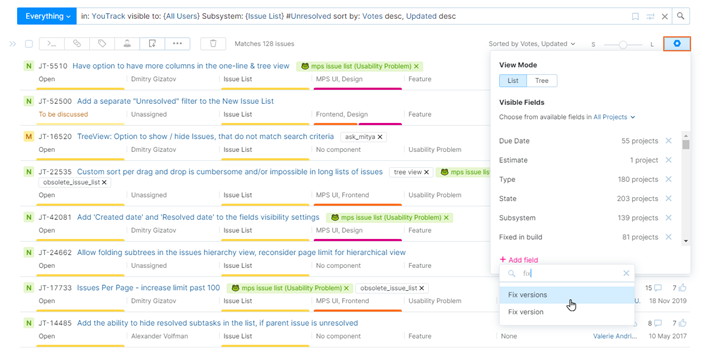
The following options are available:
Option | Description |
|---|---|
List View | Toggles between a flat list of issues and a tree view. Tree view shows the relationship between parent issues and their subtasks. |
Visible Fields | Determines which custom fields are shown for each issue in the list.
Values for custom fields are only visible when the level of detail is set to M (compact) or L (detailed). |
Manually Ordered Lists
When you work with issues in the Issues list, you have the option to sort these issues manually. Many teams use this functionality to prioritize issues in their product backlog or simply agree to resolve issues in a specific order.
Issues that are sorted in a custom order are represented by a vertical line to the left of the list. This line indicates where the custom order begins and ends.
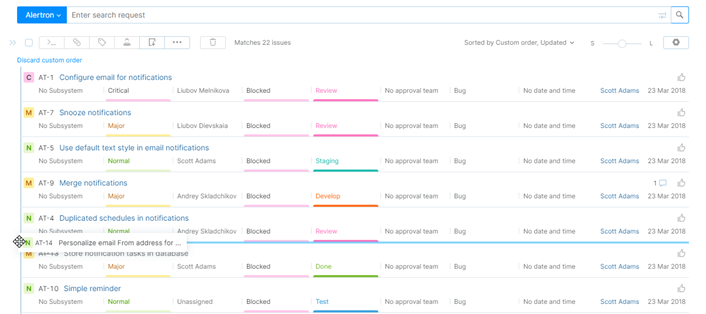
To modify the custom order:
Move your pointer over the handles to the left of an issue.
Press and hold the mouse button.
Drag the issue to the desired position in the list.
Manual sorting is only available when the search context is set to a project, saved search, or tag.
If you are the owner of the project, saved search, or tag, the custom sort order is visible to any user who has access to issues in the project or has permission to view and use the saved search or tag. The custom order is shown when the user sets the context to the project, saved search, or tag.
If you are not the owner of the project, saved search, or tag, the custom sort order is stored locally for your user account. Other users can apply a separate custom order independent from the order that you apply to your local copy of the list.
To learn more about manually sorting issues, see Reorder Issues Manually.
Reports Menu
Using the Reports menu in the application header, you can generate reports that display issues that match the current search context and query in the Issues.
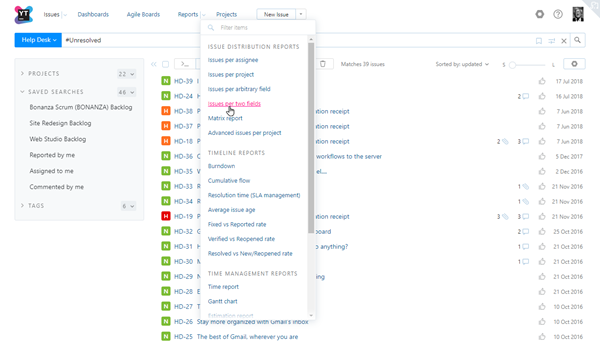
The following actions are performed when you select a report from the list:
If you have a project selected in the search context, this project is pre-selected in the Projects setting for the new report.
If you have a saved search or tag in the search context, the context is copied to the Issue filter setting.
The current search query is copied to the Issue filter setting. If you have a search query in addition to a saved search or tag in the search context, these values are combined and added to the report filter.
Live Updates
Issues that are currently visible in the Issues list are updated in real time. You can see changes applied to the summary, description, and custom fields without refreshing the page. You also see incremental updates to the counters for attachments, comments, and votes and changes when other users add or remove tags.
However, you won't see any changes applied to the search results. When you first open the page or enter a search query, the issues that match the current search context and search query are shown and sorted either in the default order or in the order that is specified by the query.
When a change is applied that causes an issue to stop matching the current search criteria, the change is shown in the issue, but the issue is not removed from the list.
Similarly, when a change causes an issue to match the query, it not added to the list in real time.
Changes that would cause an issue to appear higher in the list are also shown in each issue, but the sort order is not updated.
To realize updates that affect the search results, you need to refresh the page or re-execute the search query.