Manage Authentication Tokens
YouTrack lets users create a range of authentication tokens that they use in turn to log in to YouTrack through external client applications. These authentication variables are shown on the Authentication tab for each user in their Hub account.
Permanent tokens let developers access and perform operations securely using REST API calls in their scripts and applications without having to implement more complicated OAuth 2.0 authentication flows.
Application passwords give an app or device permission to access YouTrack. Users who have enabled 2FA can generate these passwords to log into third-party applications that don't support the second factor for logging in.
Refresh tokens are automatically generated by YouTrack for connected services that support OAuth 2.0 authentication.
As an administrator, you can view and manage the collection of authentication tokens that are available to other users in YouTrack.
Generate Permanent Tokens for Other Users
You can generate permanent tokens on behalf of other users. To prevent permission escalation, the permissions that are assigned to your account must be greater than or equal to the permissions that are available to the user for whom you want to create the token.
Generally, users can manage their own authentication tokens. The most common reason for generating an authentication token on behalf of another user is when the Hub account belongs to a bot. Developers often use dedicated bot accounts with limited permissions to automate basic tasks. By generating a permanent token on behalf of the bot account, the developer can use this token for authentication even when the bot account belongs to a group that requires 2FA for logins.
To generate a permanent token for another user account:
From the Administration menu, select .
Select the user for whom you want to generate a permanent token.
Select the Authentication tab.
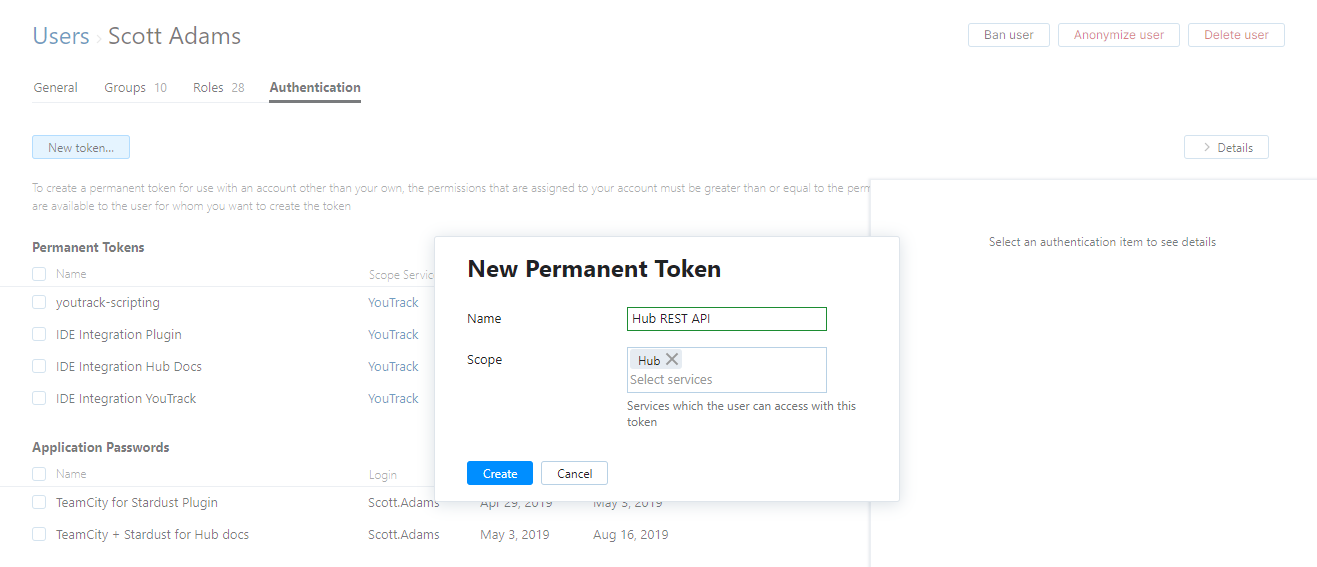
Click the New token button.
In the New Permanent Token dialog, specify a name for the new token and the access scope for it. The scope for the token is a list of services that the user is allowed to access with this new token.

Click the Create token button.
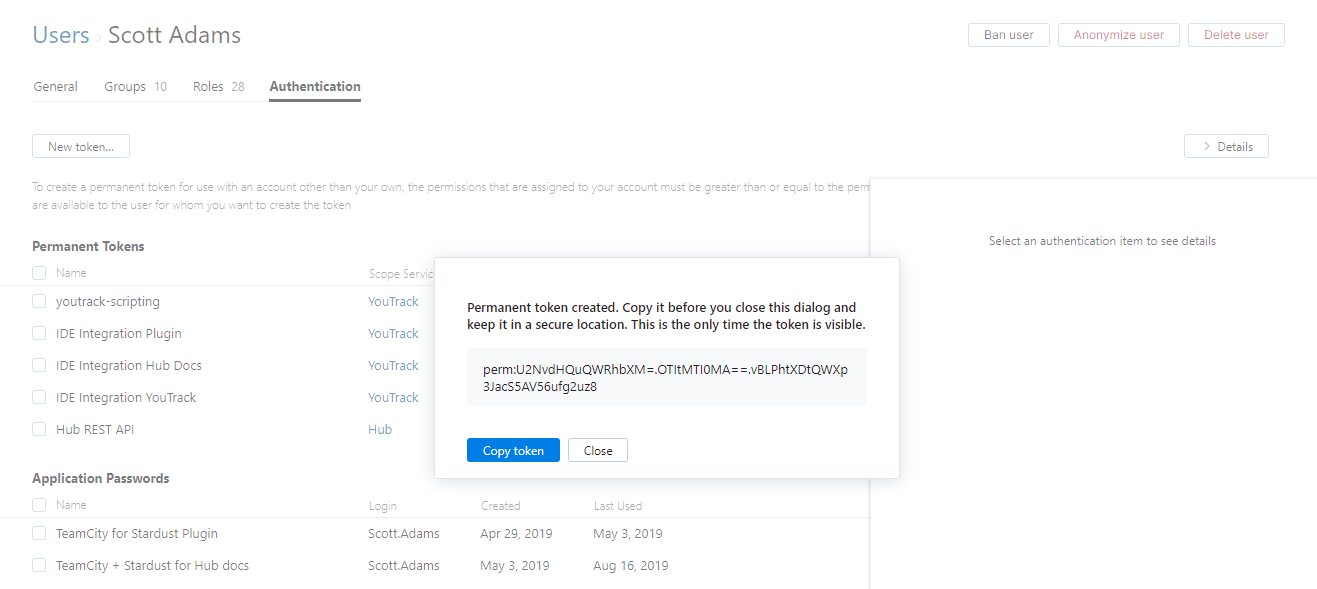
A dialog window with the new token is displayed.

Copy the token and store it in a secure location. Use either of these two actions to copy the token:
Click the Copy token button.
Select the token with your pointer and use the standard keyboard shortcut for your operating system to copy the current selection to the clipboard.
After you copy the token, close the dialog.
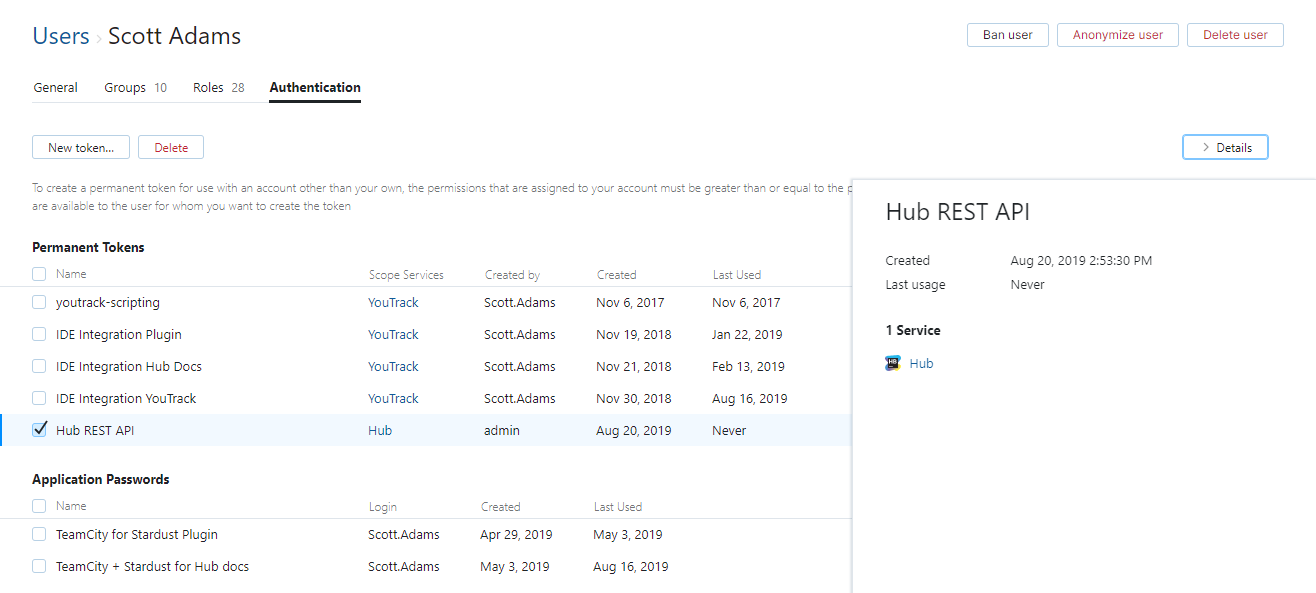
A new token is associated with the current account and is displayed in the list in the Authentication tab.
The login for your Hub account is shown in the Created by column for the new token.

Delete Authentication Tokens
Most authentication tokens don't have an expiration date. If you suspect that an authenticated service has been compromised, you can delete this authentication token in the Hub accounts of the users who work with this service.
To delete an authentication token:
From the Administration menu, select .
Select the user for whom you want to delete an authentication token.
Select the Authentication tab.
In the list of tokens, select the token that you want to revoke.
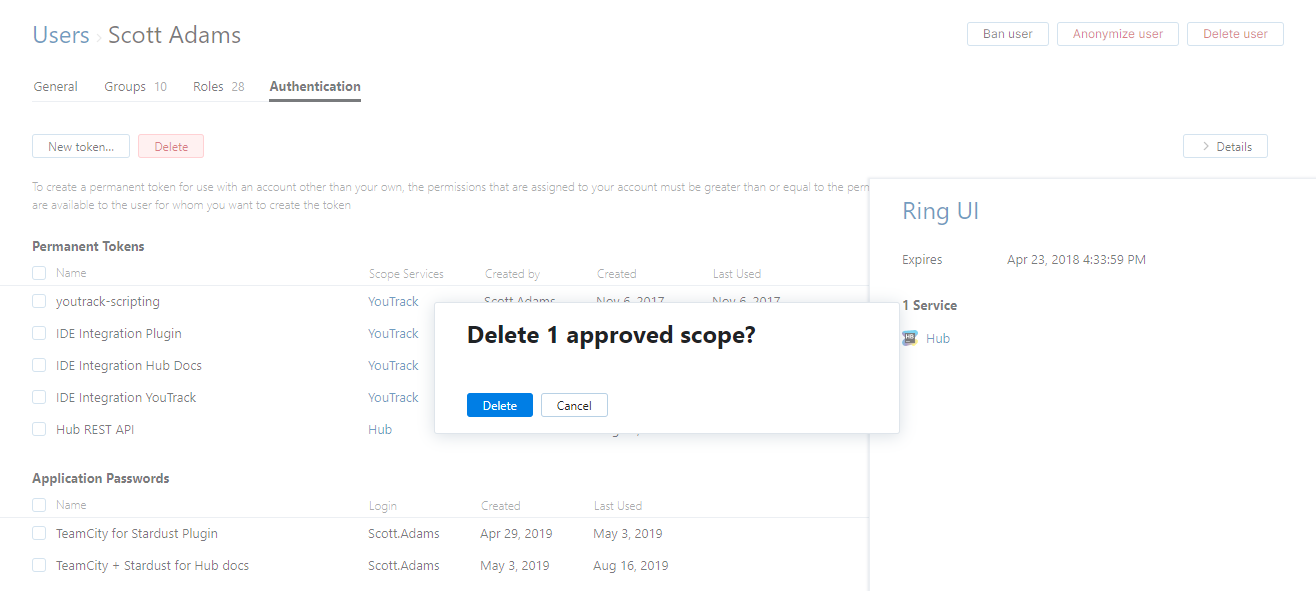
Click the Delete button.

A confirmation dialog is displayed.
Click the Delete button.
The selected permanent token is deleted and removed from the list.