Workflow Tutorial
Workflows are the ultimate option for customizing YouTrack. You can apply sets of rules to issues in a project and automate changes in issue states to make YouTrack adapt to your process.
This tutorial shows you how to create a workflow and define its rules using the Workflow Constructor.
Before You Start
Before you start building your own workflows in YouTrack, take a minute to make sure you meet the following prerequisites:
You have permission to create and edit workflows. These tasks require that you have the Update Project permission in at least one project.
If you have Low-level Admin Write permission, you can create workflows and edit any workflow in the system.
You have verified that the existing workflows do not support your use case. It's always a good idea to check the list of default workflows and any custom workflows that have already been added to your installation. If the workflow that fits your use case already exists, just attach it to your project and be done with it.
Use Case
Assume there's one person on your team who is responsible for handling purchase requests for the office. Purchase requests are expected to be reviewed and either approved or rejected within 2 weeks.
Your task is to create a workflow that assigns new purchase requests to this person automatically and adds a tag to overdue issues. You also want to give the responsible person a mechanism for postponing requests that require further investigation.
Set Up the Project
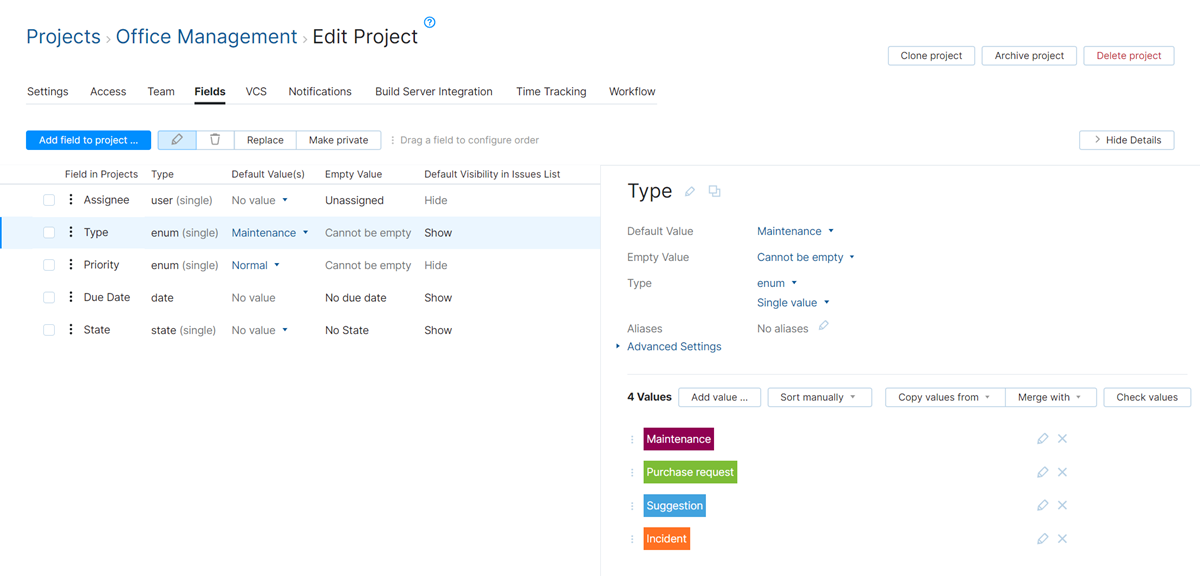
For this scenario, let's assume that you have a project named Office Management. This project uses the following issue fields:
Field | Description |
|---|---|
Assignee | This is the default field that stores the user who is responsible for the issue. You should be able to assign an issue to any member of the Office Management team. |
Type | This is the default field that stores the issue type. The set of values for this field in the Office Management project includes the value Purchase request. |
Due date | This field stores the target date for approving or rejecting the purchase request. |
State | This is the default field that stores the state of the issue. The set of values for this field in the Office Management project includes the following values:
|
Create the Workflow
Workflows are really nothing more than a container for a collection of rules. First, you create the workflow, then you add rules to it.
For this scenario, we'll create one rule for each type: on-change rule, on-schedule, state-machine, and action.
To create a workflow:
From the Administration menu, select Workflows.
Click the New workflow button, then select Workflow Constructor.
The workflow constructor displays an unsaved workflow that contains an on-change rule named Rule 1.
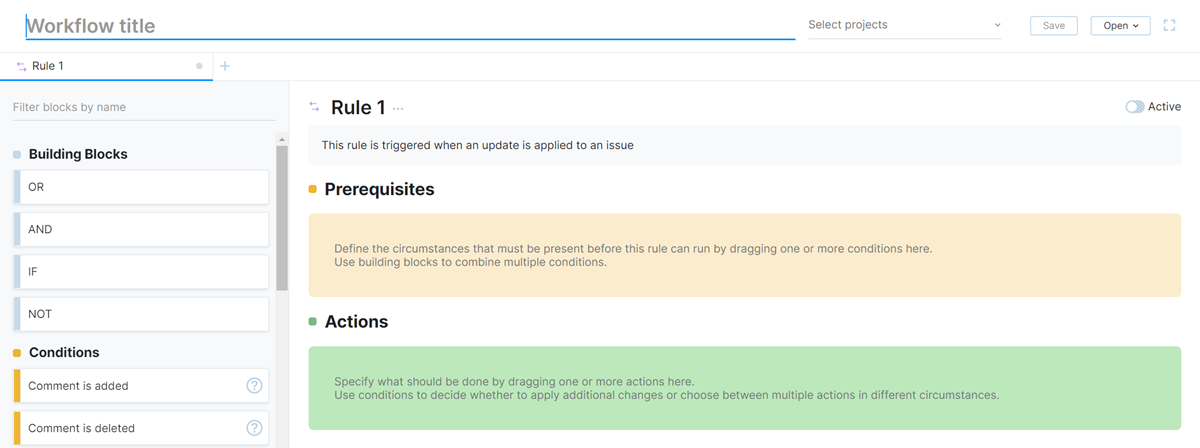
For the title, enter Office Management.
Select the Office Management project from the drop-down list.
Click the Save button.
The workflow is added to YouTrack.
Build an On-change Rule
The first rule automatically assigns all purchase requests to the responsible person.
When you created the workflow in the previous step, it automatically added an on-change rule named Rule 1. Use this rule as the starting point for building a rule that supports your use case.
To build the on-change rule:
First, change the name of the rule to something that helps you recognize its purpose. For example, Assign purchase requests.
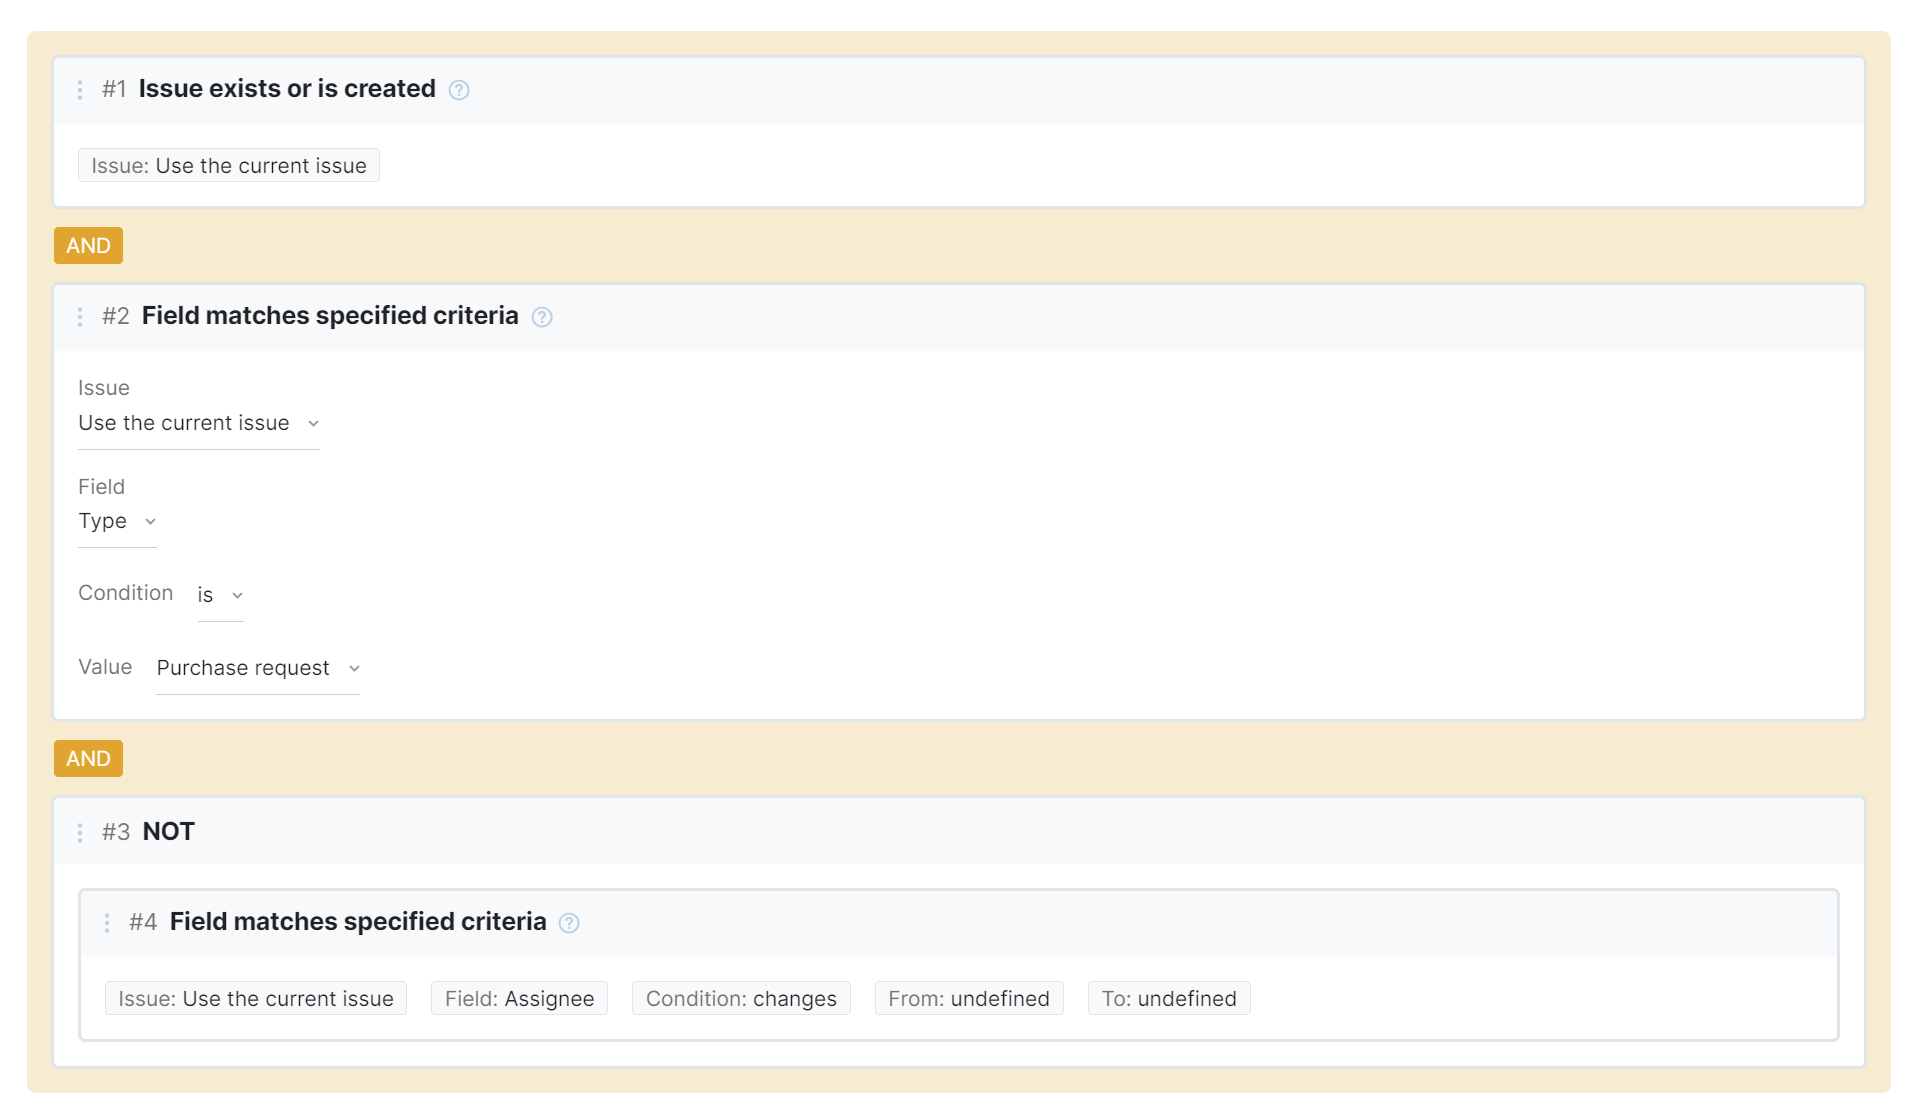
Define the prerequisites for applying this rule. To handle issues that are created as purchase requests or are later assigned Purchase request as an issue type, drag the following blocks to the Prerequisites section of the workflow rule:
For the Issue setting, use Use the current issue.
Field Matches Specified Criteria
Configure the settings for this block as:
Issue: Use the current issue
Field: Type
Condition: is
Value: Purchase request
These two blocks will automatically be joined with an AND operator, meaning that both of these conditions must be met for the rule to apply.
We'll add another block to the rule just to make the workflow aware of conditions that we would rather ignore. For example, when we want to reassign an issue in situations where the responsible person is unavailable.
First, drag a NOT block from the Building Blocks section in the sidebar to the Prerequisites section of the workflow rule.
Then drag an Field Matches Specified Criteria block to the NOT section of the rule.
Configure the settings for this block as:
Issue: Use the current issue
Field: Assignee
Condition: changes
From: Any value
to: Any value
The Preconditions section of your on-change rule should look something like this:
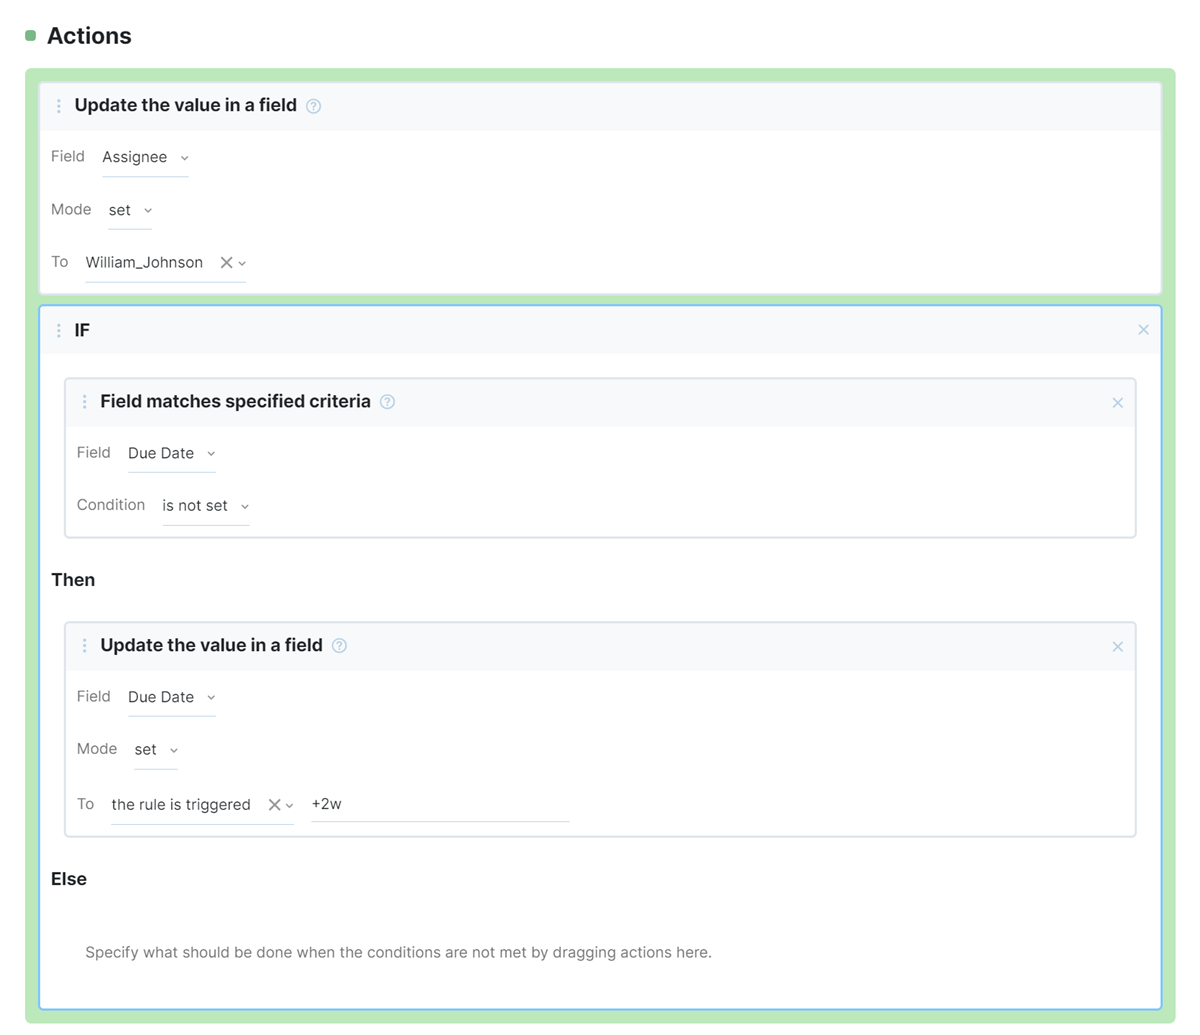
Drag a Update the Value in a Field block to the Actions section of the workflow rule.
Configure the settings for this block as:
Field: Assignee
Mode: set
To: select the user who is responsible for handling purchase requests.
Drag an IF block from the Building Blocks section in the sidebar to the Prerequisites section of the workflow rule.
Drag a Field Matches Specified Criteria block to the IF section of the IF block.
Configure the settings for this block as:
Field: Due Date
Condition: is not set
Drag an Update the Value in a Field block to the Then section of the IF block.
Configure the settings for this block as:
Field: Due Date
Mode: set
To: the rule is triggered
For the setting that stores the time offset from the specified date, enter +2w.
The Actions section of your on-change rule should look something like this:
Click the Save button.
Your changes to the workflow rule are saved.
The rule is active and will check for relevant changes in any issue that is created or updated in the project.
Create an On-schedule Rule
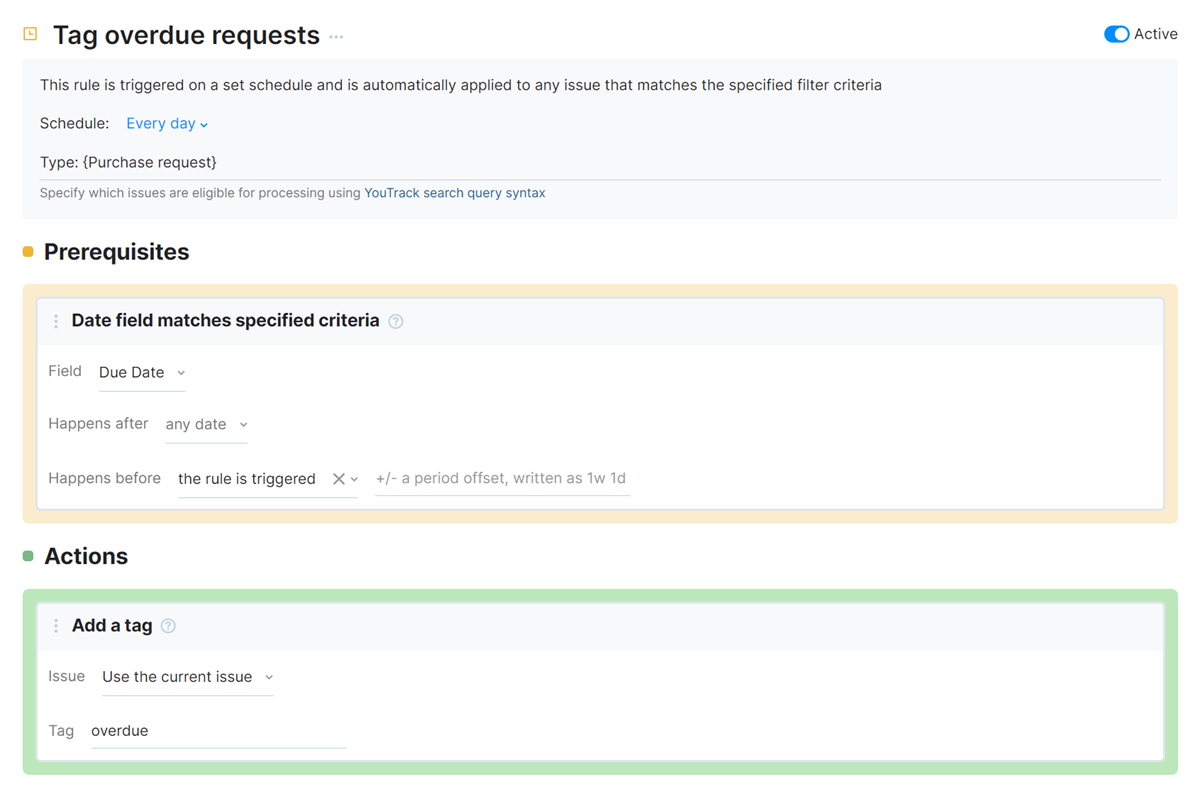
The next step is to create the on-schedule rule. This rule checks all of the issues in the project on a set schedule and increases the priority for issues that are overdue.
To add the on-schedule rule:
Click the Add rule icon in the header, then select On-schedule from the Rule Type dialog.
Enter a Name that helps you recognize the purpose of the rule. For example,
Tag overdue requests.To edit the name of the rule, click the current name and overwrite it with your own text.
For the Schedule setting, keep the default Every day setting.
To make sure that the workflow doesn't inadvertently update unrelated issues, set a filter. The filter ensures that you only update issues that match the specified criteria.
The following search query makes sure that the updates are only applied to purchase requests:
Type: {Purchase request}Drag a Date Field Matches Specified Criteria block to the Prerequisites section of the rule.
Configure the settings for this block as:
Field: Due Date
Happens after: any date
Happens before: the rule is triggered
Drag an Add a Tag block to the Actions section of the rule.
Configure the settings for this block as:
Issue: Use the current issue
Tag: enter whatever tag you want to add to issues that meet this condition. For example, overdue.
Click the Save button.
Your changes to the workflow rule are saved.
The rule is active and will update and tag overdue issues in the selected project on a daily basis.
When done, your on-schedule rule should look something like this:
Create a State-machine Rule
Now let's create a state-machine rule for your project. This rule regulates transitions between values of a state-type custom field for the issues in the project.
For more details about this rule type, see State-machine Rules.
To create a state-machine rule:
Click the Add rule icon in the header, then select State-machine from the Rule Type dialog.
Enter a Name that helps you recognize it as a state machine. For example, State flow.
To edit the name of the rule, click the current name and overwrite it with your own text.
From the states panel, select the field State.
Drag all of the state values from the dropdown to the canvas, starting with the Open state.
The state blocks with the values of the State custom field are placed on the canvas.
The Open state is marked as the initial state value.
On the right side of the Open state block, click the Add transition button.
Click the In progress state block.
A transition from the Open to the In progress state is added.
The name of the transition is set to In progress according to the name of the target state.
The transition name can be used to set this value in a command and is also shown in the list of values for a custom field.
You can rename the transition by clicking the Edit transition button on the right side of its name.
Repeat the steps 5 and 6 to create the following transitions:
Current State
Target State
In progress
Fixed
Fixed
Verified
Open
In progress
Open
To be discussed
To be discussed
Open
Verified
Open
Click the Save button.
Your changes to the workflow rule are saved.
The rule is active and will regulate all updates of the State custom field values in issues in this project.
When done, your state-machine rule should look something like this:

For more information on creating state-machine rules in the Workflow Constructor, see State Machines.
Create an Action Rule
The last thing you want to do is give the person who is responsible for handling these requests the ability to postpone the due date for issues that require further investigation. For this use case, we'll add an action rule to the workflow.
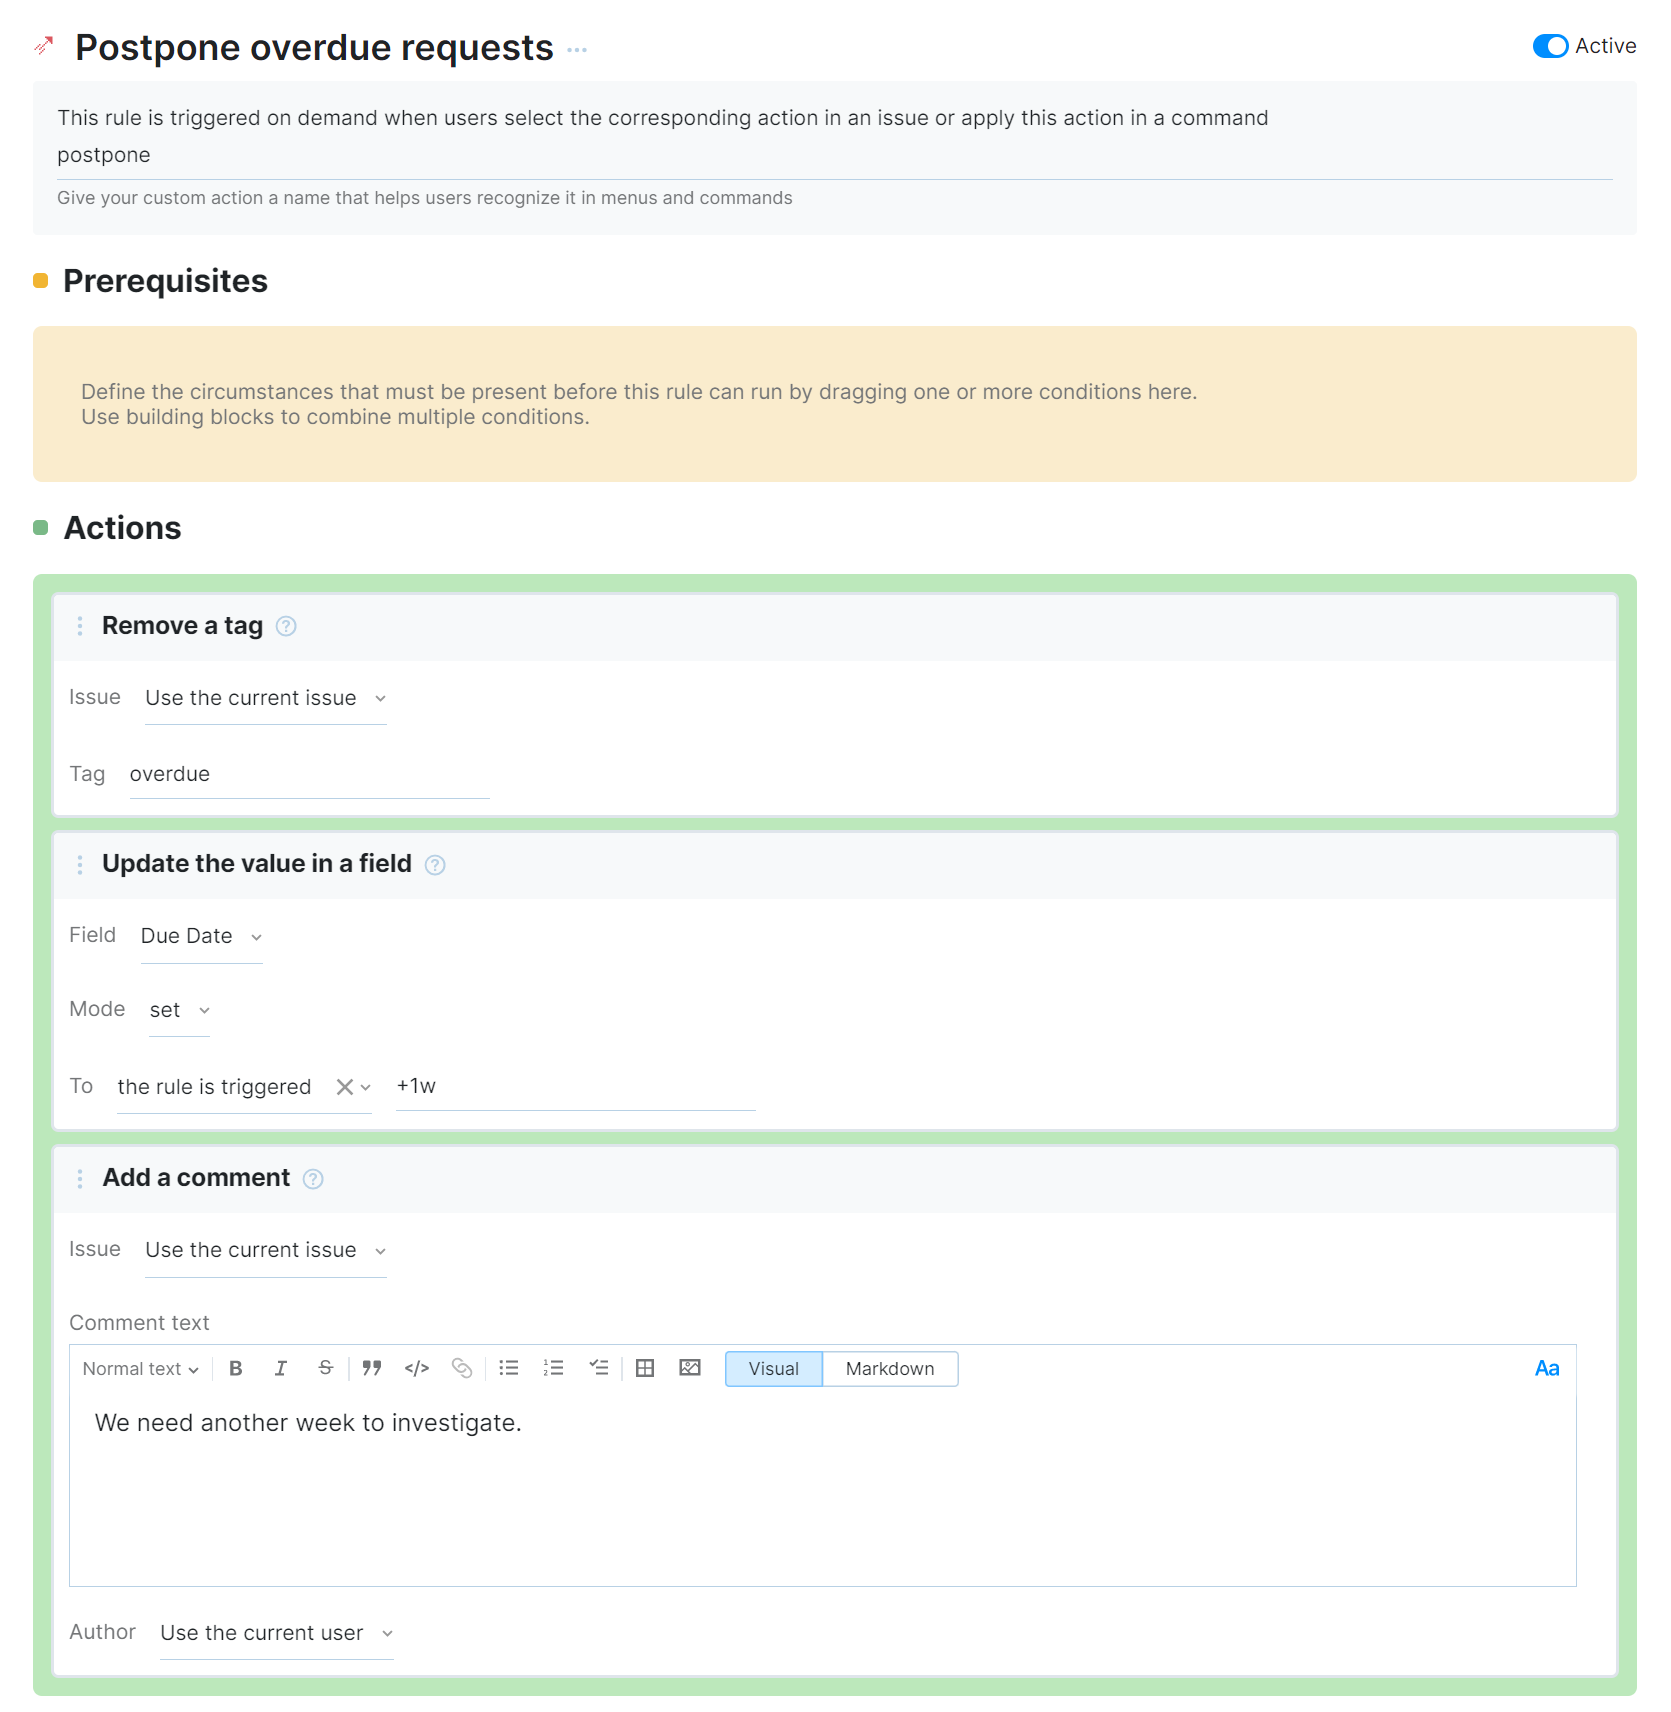
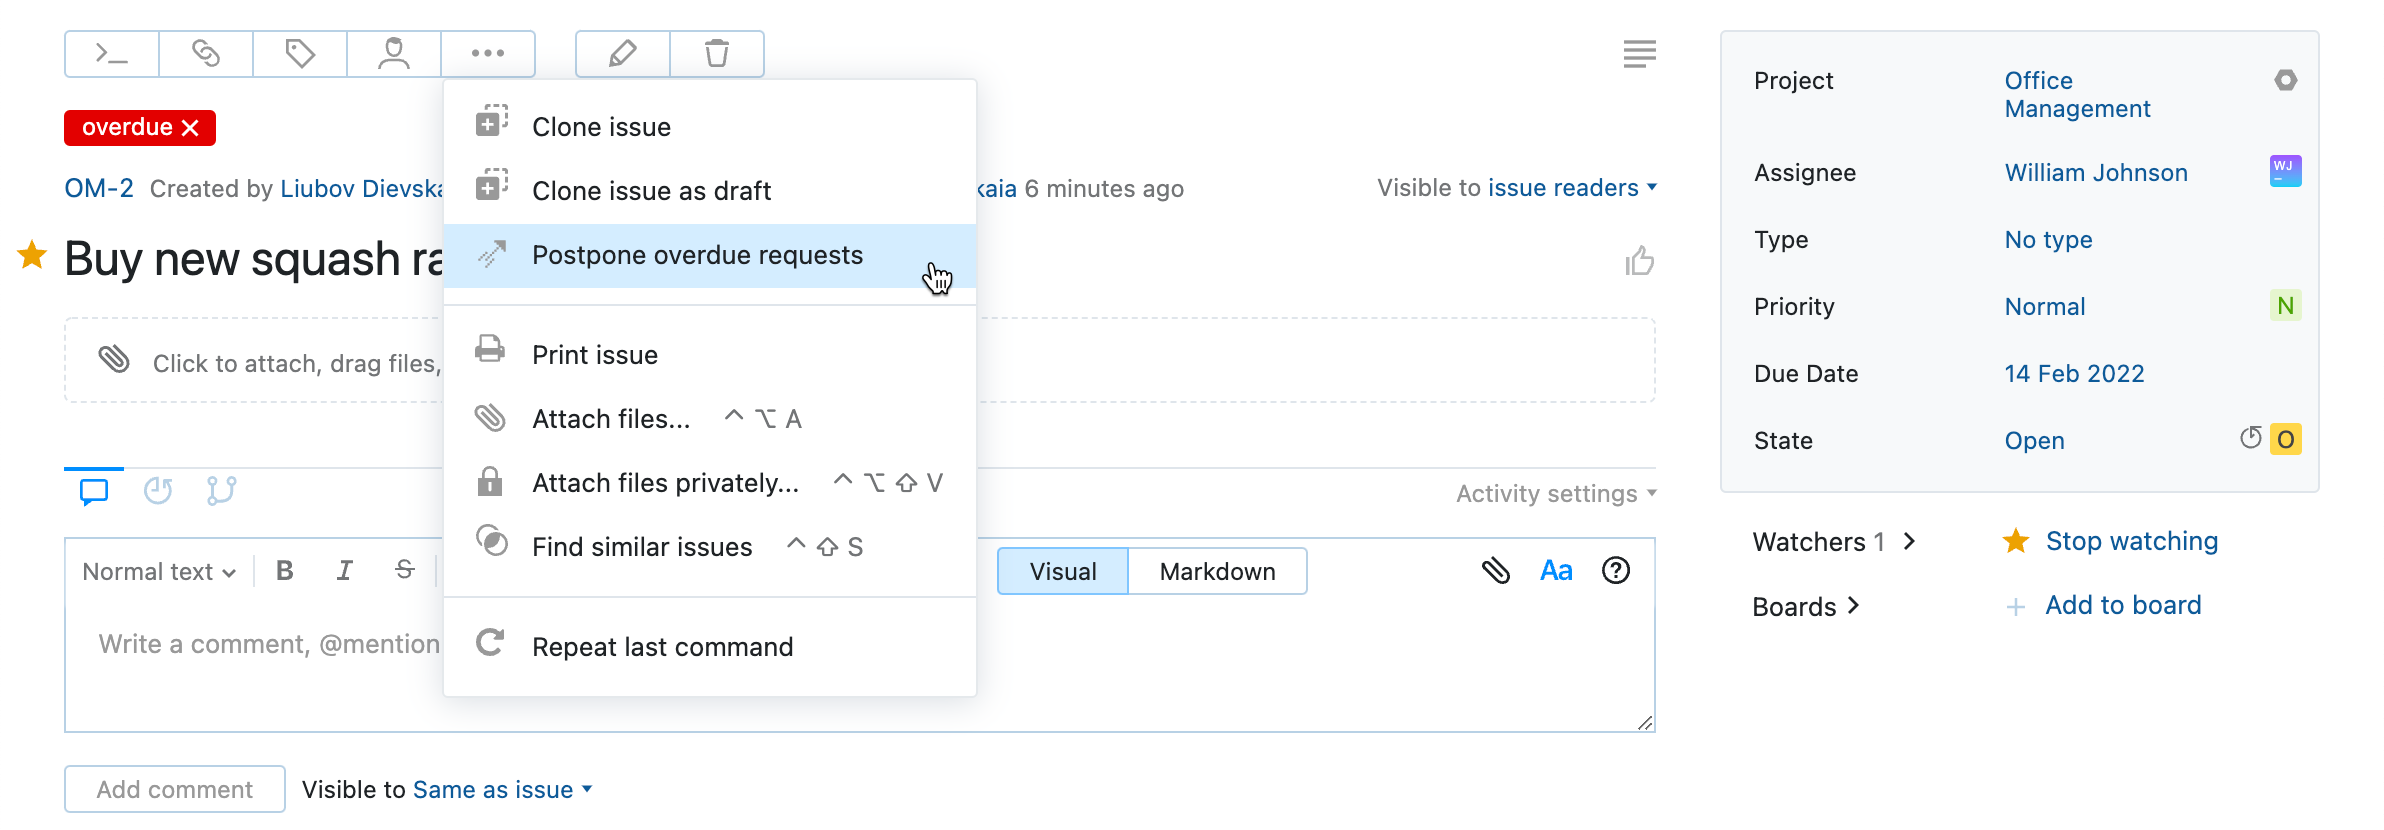
This action rule gives the responsible person the ability to postpone the due date for any purchase request by applying a command to the issue or selecting the custom action from the issue toolbar.
To add the action rule:
Click the Add rule icon in the header, then select Action from the Rule Type dialog.
Enter a Name that helps you recognize the purpose of the rule. For example,
Postpone overdue requests.To edit the name of the rule, click the current name and overwrite it with your own text.
For the Action setting, enter the name that you want to use for the custom action. For example, postpone.
Leave the Prerequisites block empty. This means that the person responsible for purchase requests can apply this action as a command to any issue in the project when needed.
Drag an Remove a Tag block to the Actions section of the rule.
Configure the settings for this block as:
Issue: Use the current issue
Tag: enter the name of the tag you added to overdue issues in the previous operation. For example, overdue.
Drag an Update the Value in a Field block to the Actions section of the rule.
Configure the settings for this block as:
Field: Due Date
Mode: set
To: the rule is triggered
For the setting that stores the time offset from the specified date, enter +1w.
Drag an Add a Comment block to the Actions section of the rule.
Configure the settings for this block as:
Issue: Use the current issue
Comment text: enter an explanation for postponing the due date, for example: We need more time to investigate.
Author: Use the current user
Click the Save button.
Your changes to the workflow rule are saved.
The rule is active. Users can postpone overdue issues dynamically by applying the postpone command or selecting the corresponding action from the issue toolbar.
When done, your action rule should look something like this:
Workflows in Action
Now that you have built these workflow rules, they are immediately active in the Office Management project. Here's how these workflows automate routine activities for the office management team.
Any time a new purchase request is created in the Office Management project, it is automatically assigned to the person who is responsible for handling this type of request. The same logic applies to an existing issue that is assigned the Purchase request type.
The workflow also sets the value for the Due Date field automatically.
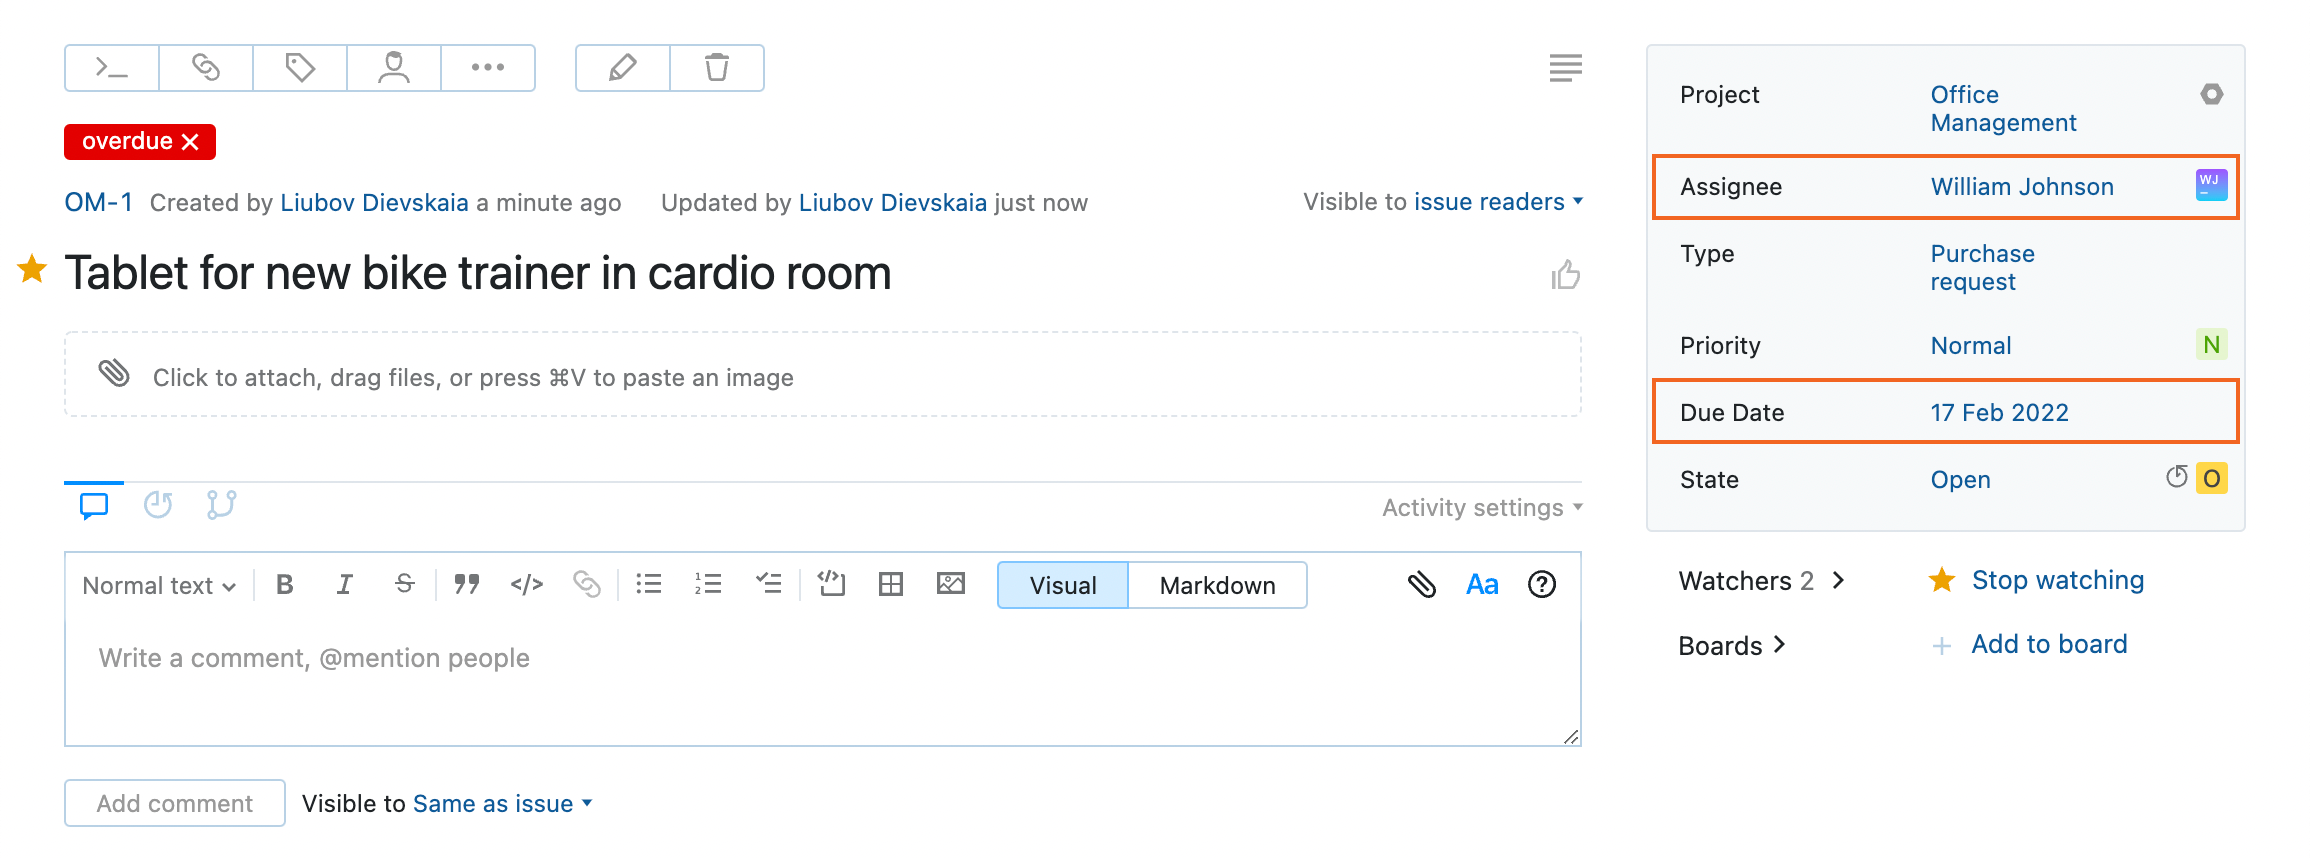
When a purchase request reaches its due date, the workflow automatically tags the issue as overdue.
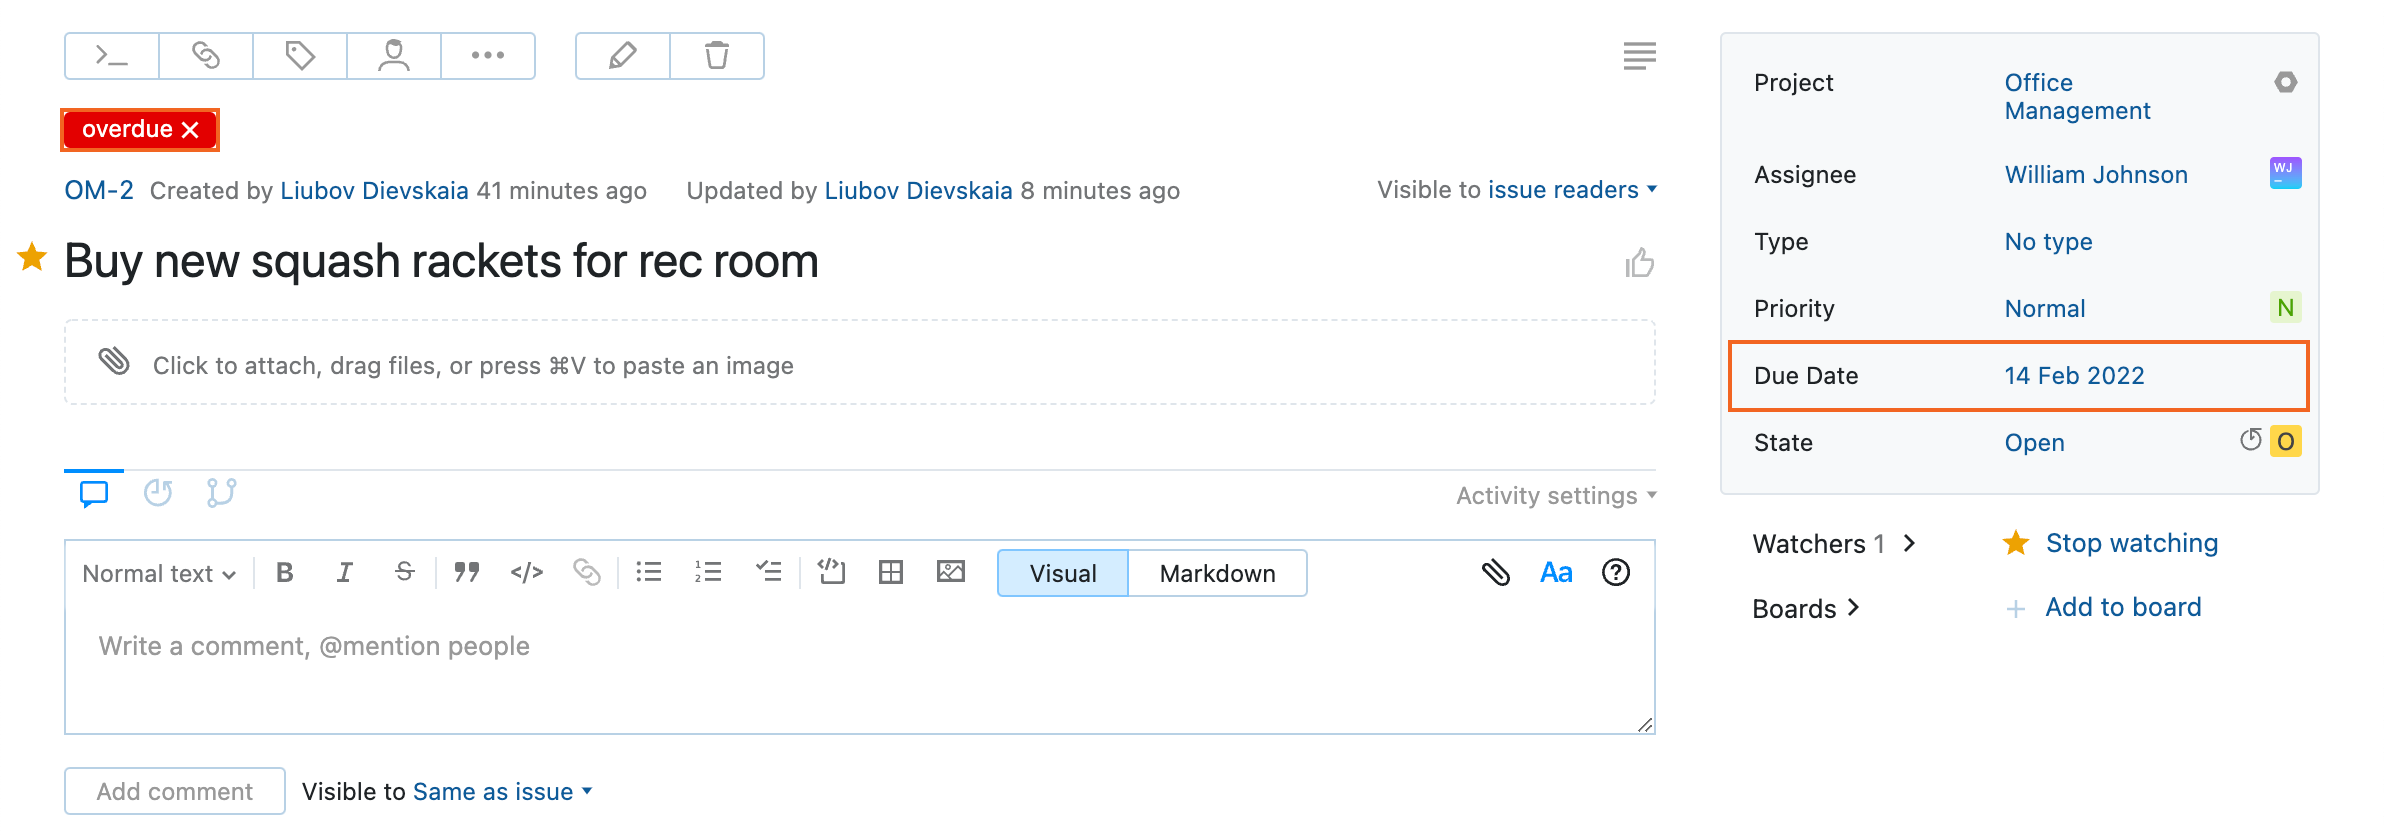
When the person who is responsible for purchase requests needs more time to investigate the issue, they can automatically postpone the due date for another week and add a comment by applying a single command.
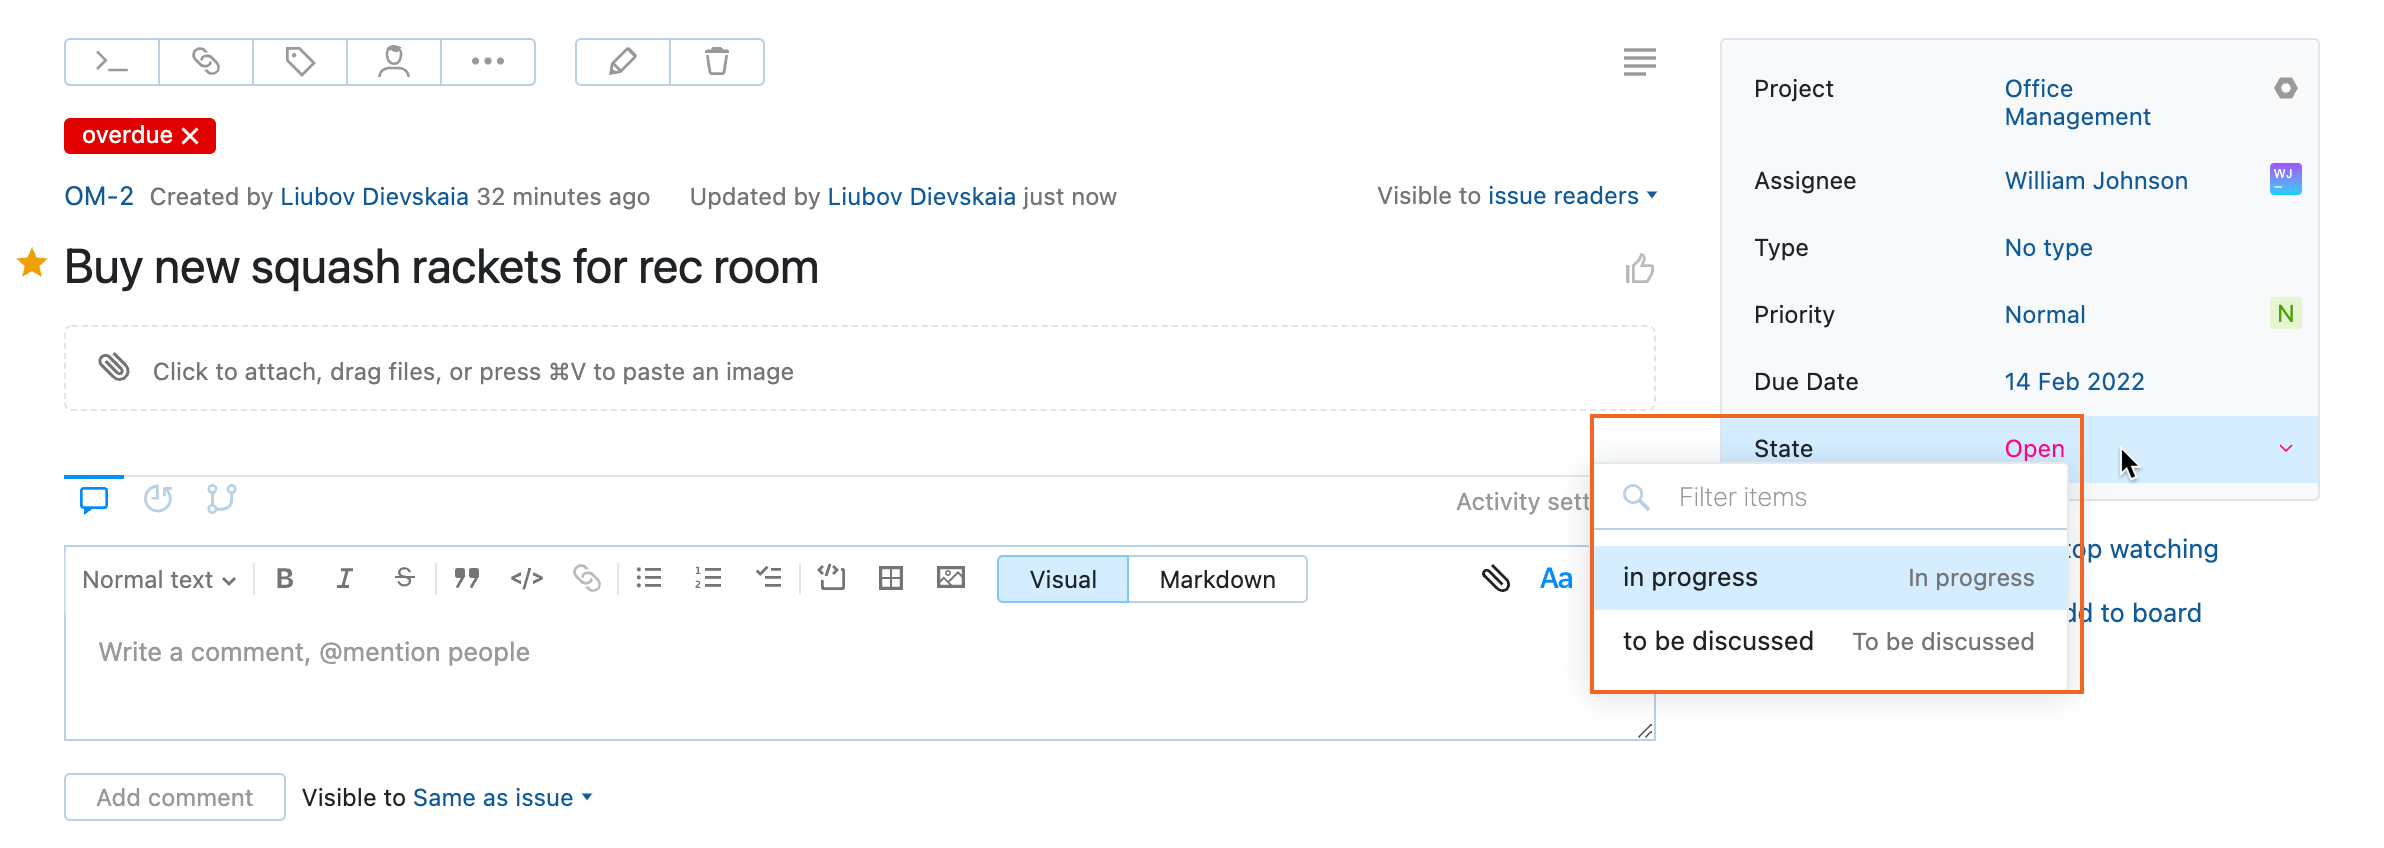
When a person wants to change the state of an issue, the state-machine rule defines possible transitions of the State custom field values.
Is that all you can do with workflows? Of course not!
This is just one example of what you can to do streamline your issue reporting and automate redundant tasks with workflows.
To find other potential uses for workflows, see Use Cases for Workflows.
To see the list of use cases that are covered by workflows that are included by default with every YouTrack installation, see Default Workflows.
