Demo Projects
Demo projects are a great way to learn about YouTrack in a safe environment. You can also use them to experiment with various configuration options before you start work on a new project or apply the configuration to a project that is already underway.
The demo project contains a preconfigured set of sample issues that help you become more familiar with key features in YouTrack. The demo project also includes a collection of agile boards, reports, and a dashboard.
For new installations, a demo project is created automatically. The user who installs or registers the application is given the option to keep the demo project or discard the project and work with an empty YouTrack installation.
Your YouTrack installation supports an unlimited number of demo projects. Consider using demo projects to support the following scenarios:
If you're evaluating YouTrack as a potential solution for managing projects in your organization, use the demo project to get first-hand experience with a range of features with minimal downtime for setup and configuration.
Use demo projects to test workflows and integrations before using them in active projects.
Create demo projects for new employees as part of their onboarding experience.
Create a Demo Project
The demo project is based on a project template just like any other project in YouTrack. The template defines which custom fields, workflows, and time tracking settings are used in the project right from the start.
The ability to create projects is limited to users who have the Create Project permission. If you want to use demo projects to onboard new users who don't have this permission, someone will need to create the project for them and grant them access to it. For more information, see Manage the Project Team.
To create a demo project:
From the main navigation menu, select
Projects.
On the Projects page, click the New project button.
The first page of the project setup assistant opens.
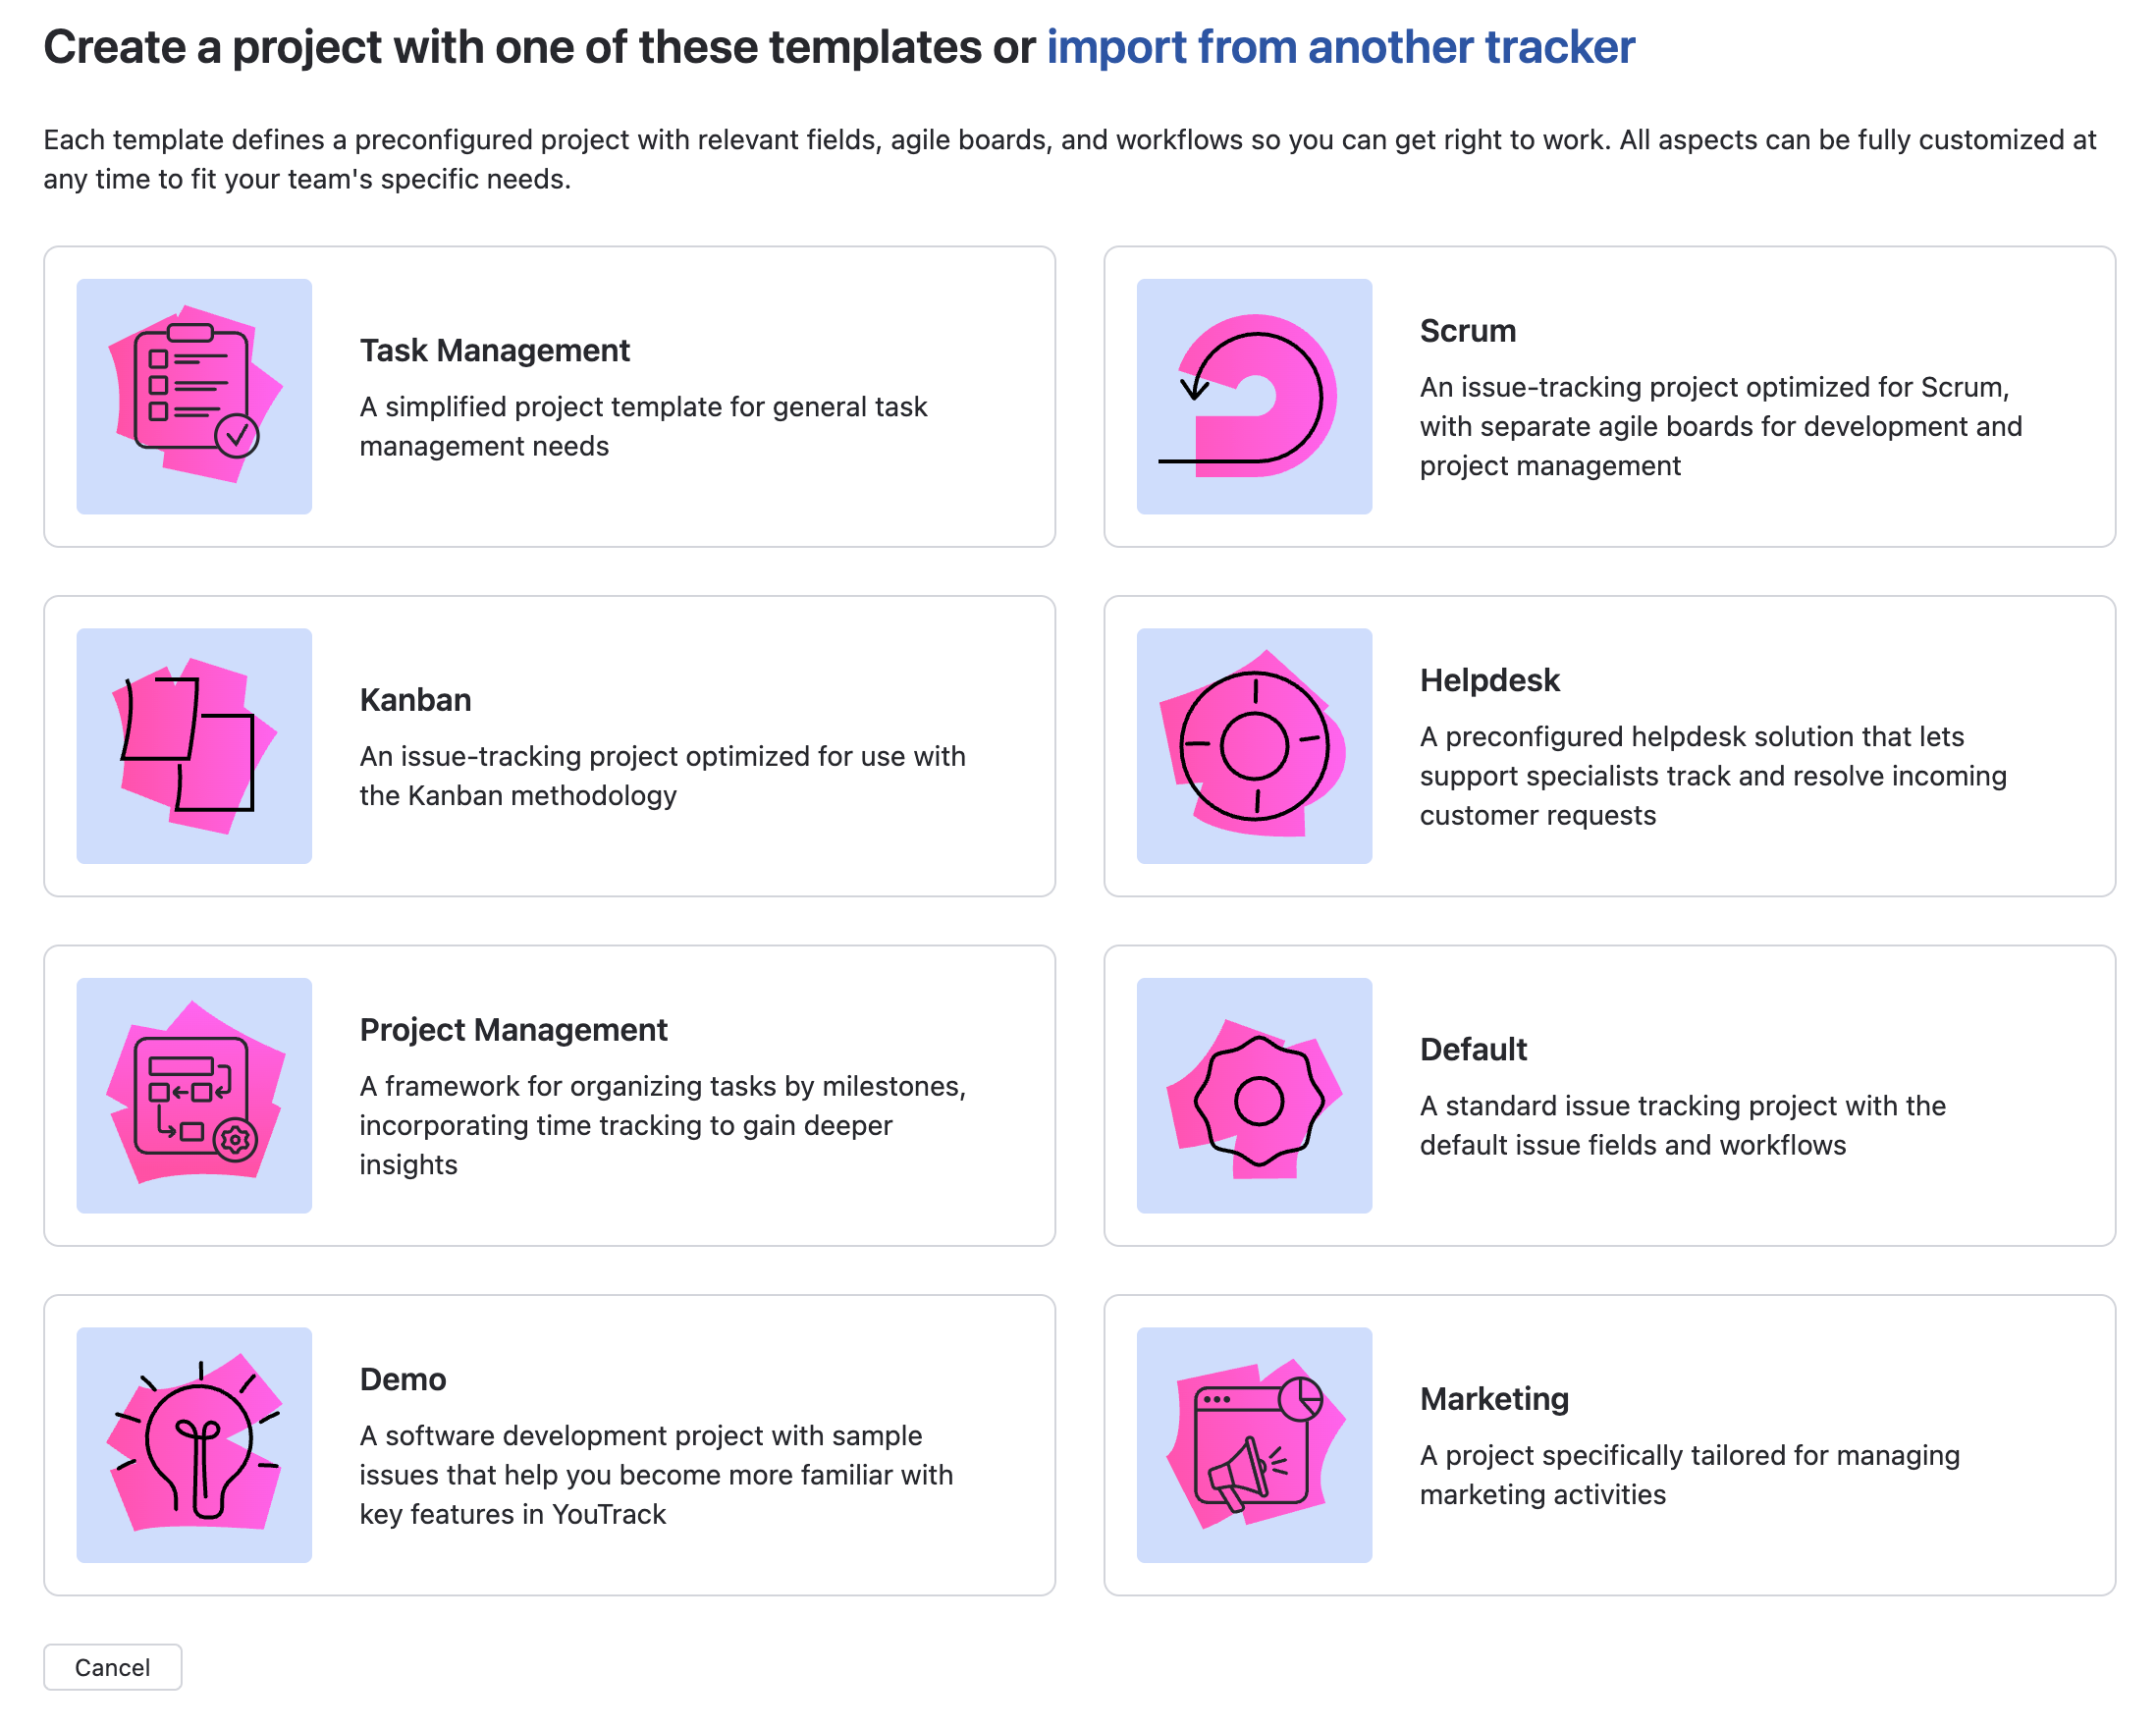
Select the Demo template.
A dialog box opens with additional information about the Demo template.
Click the Use this template button.
Enter a name for the demo project and click Create project.
A new demo project is created.
Additional features of the demo project are generated automatically.
YouTrack shows the overview page for the new project.
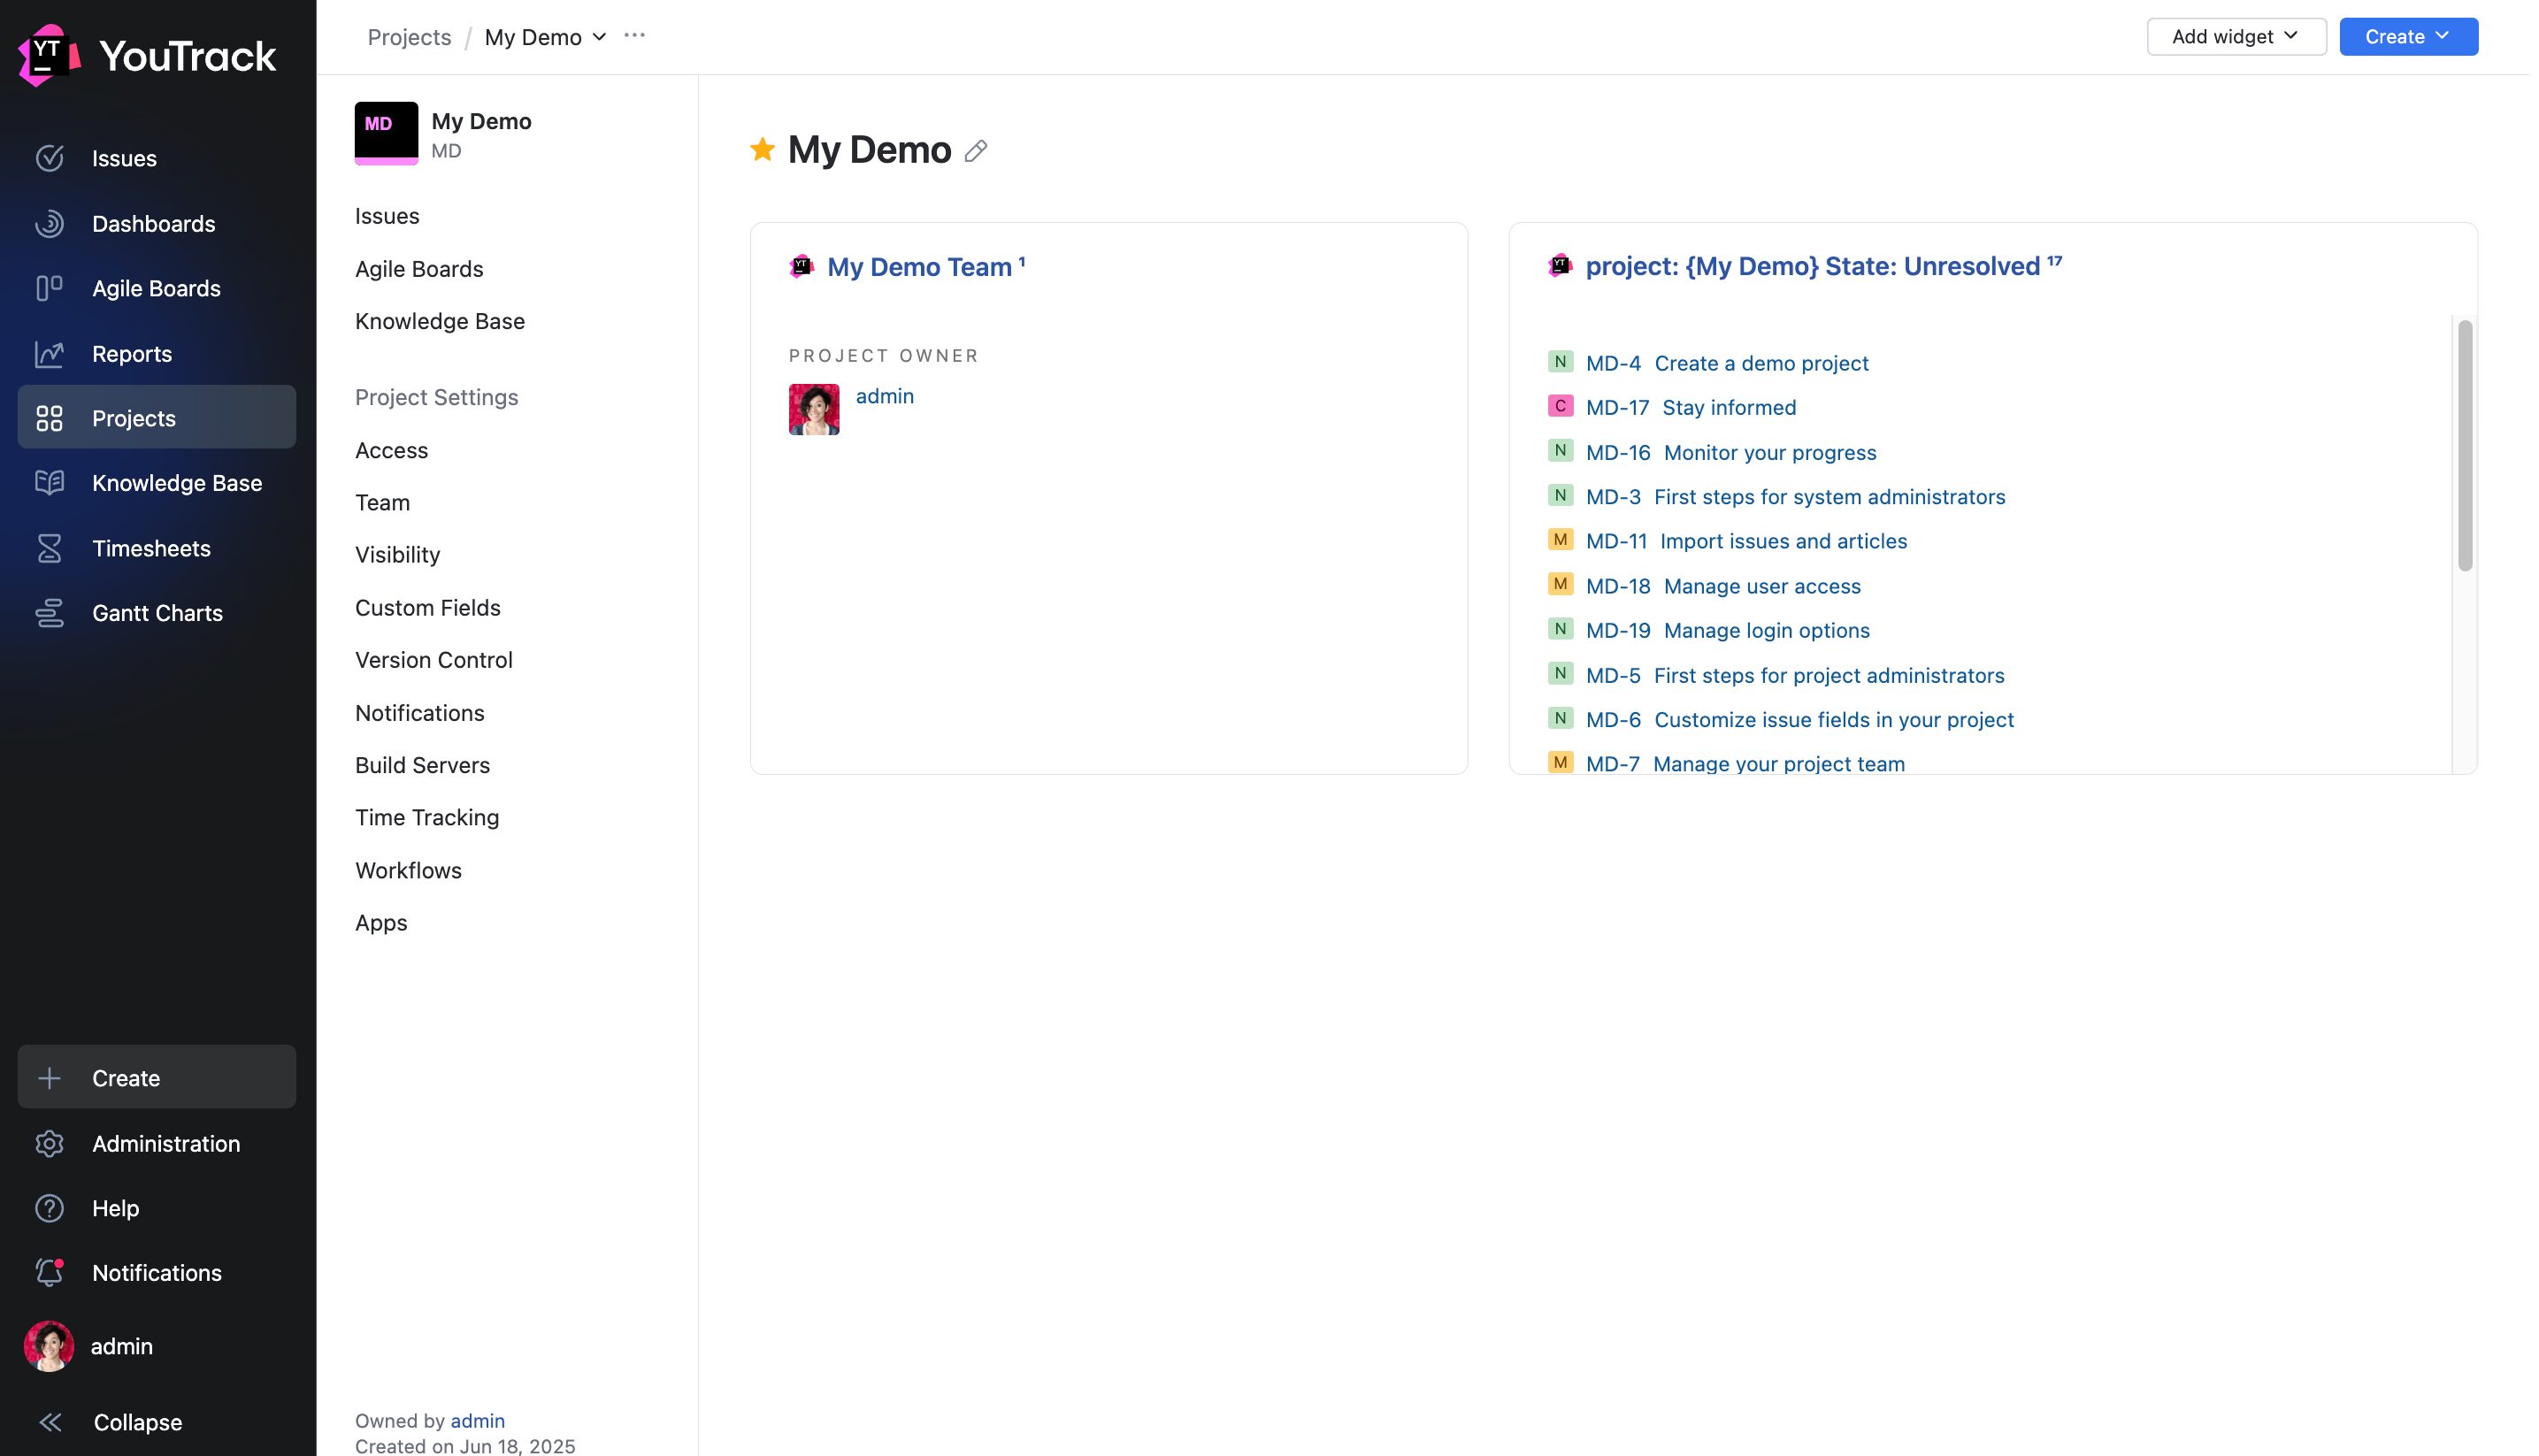
Demo Project Features
When you create a demo project, YouTrack generates a predefined collection of issues and issue views. These help you navigate through the application and become familiar with its features. These features of the demo project are accessible from the navigation links in the main menu.
Issues
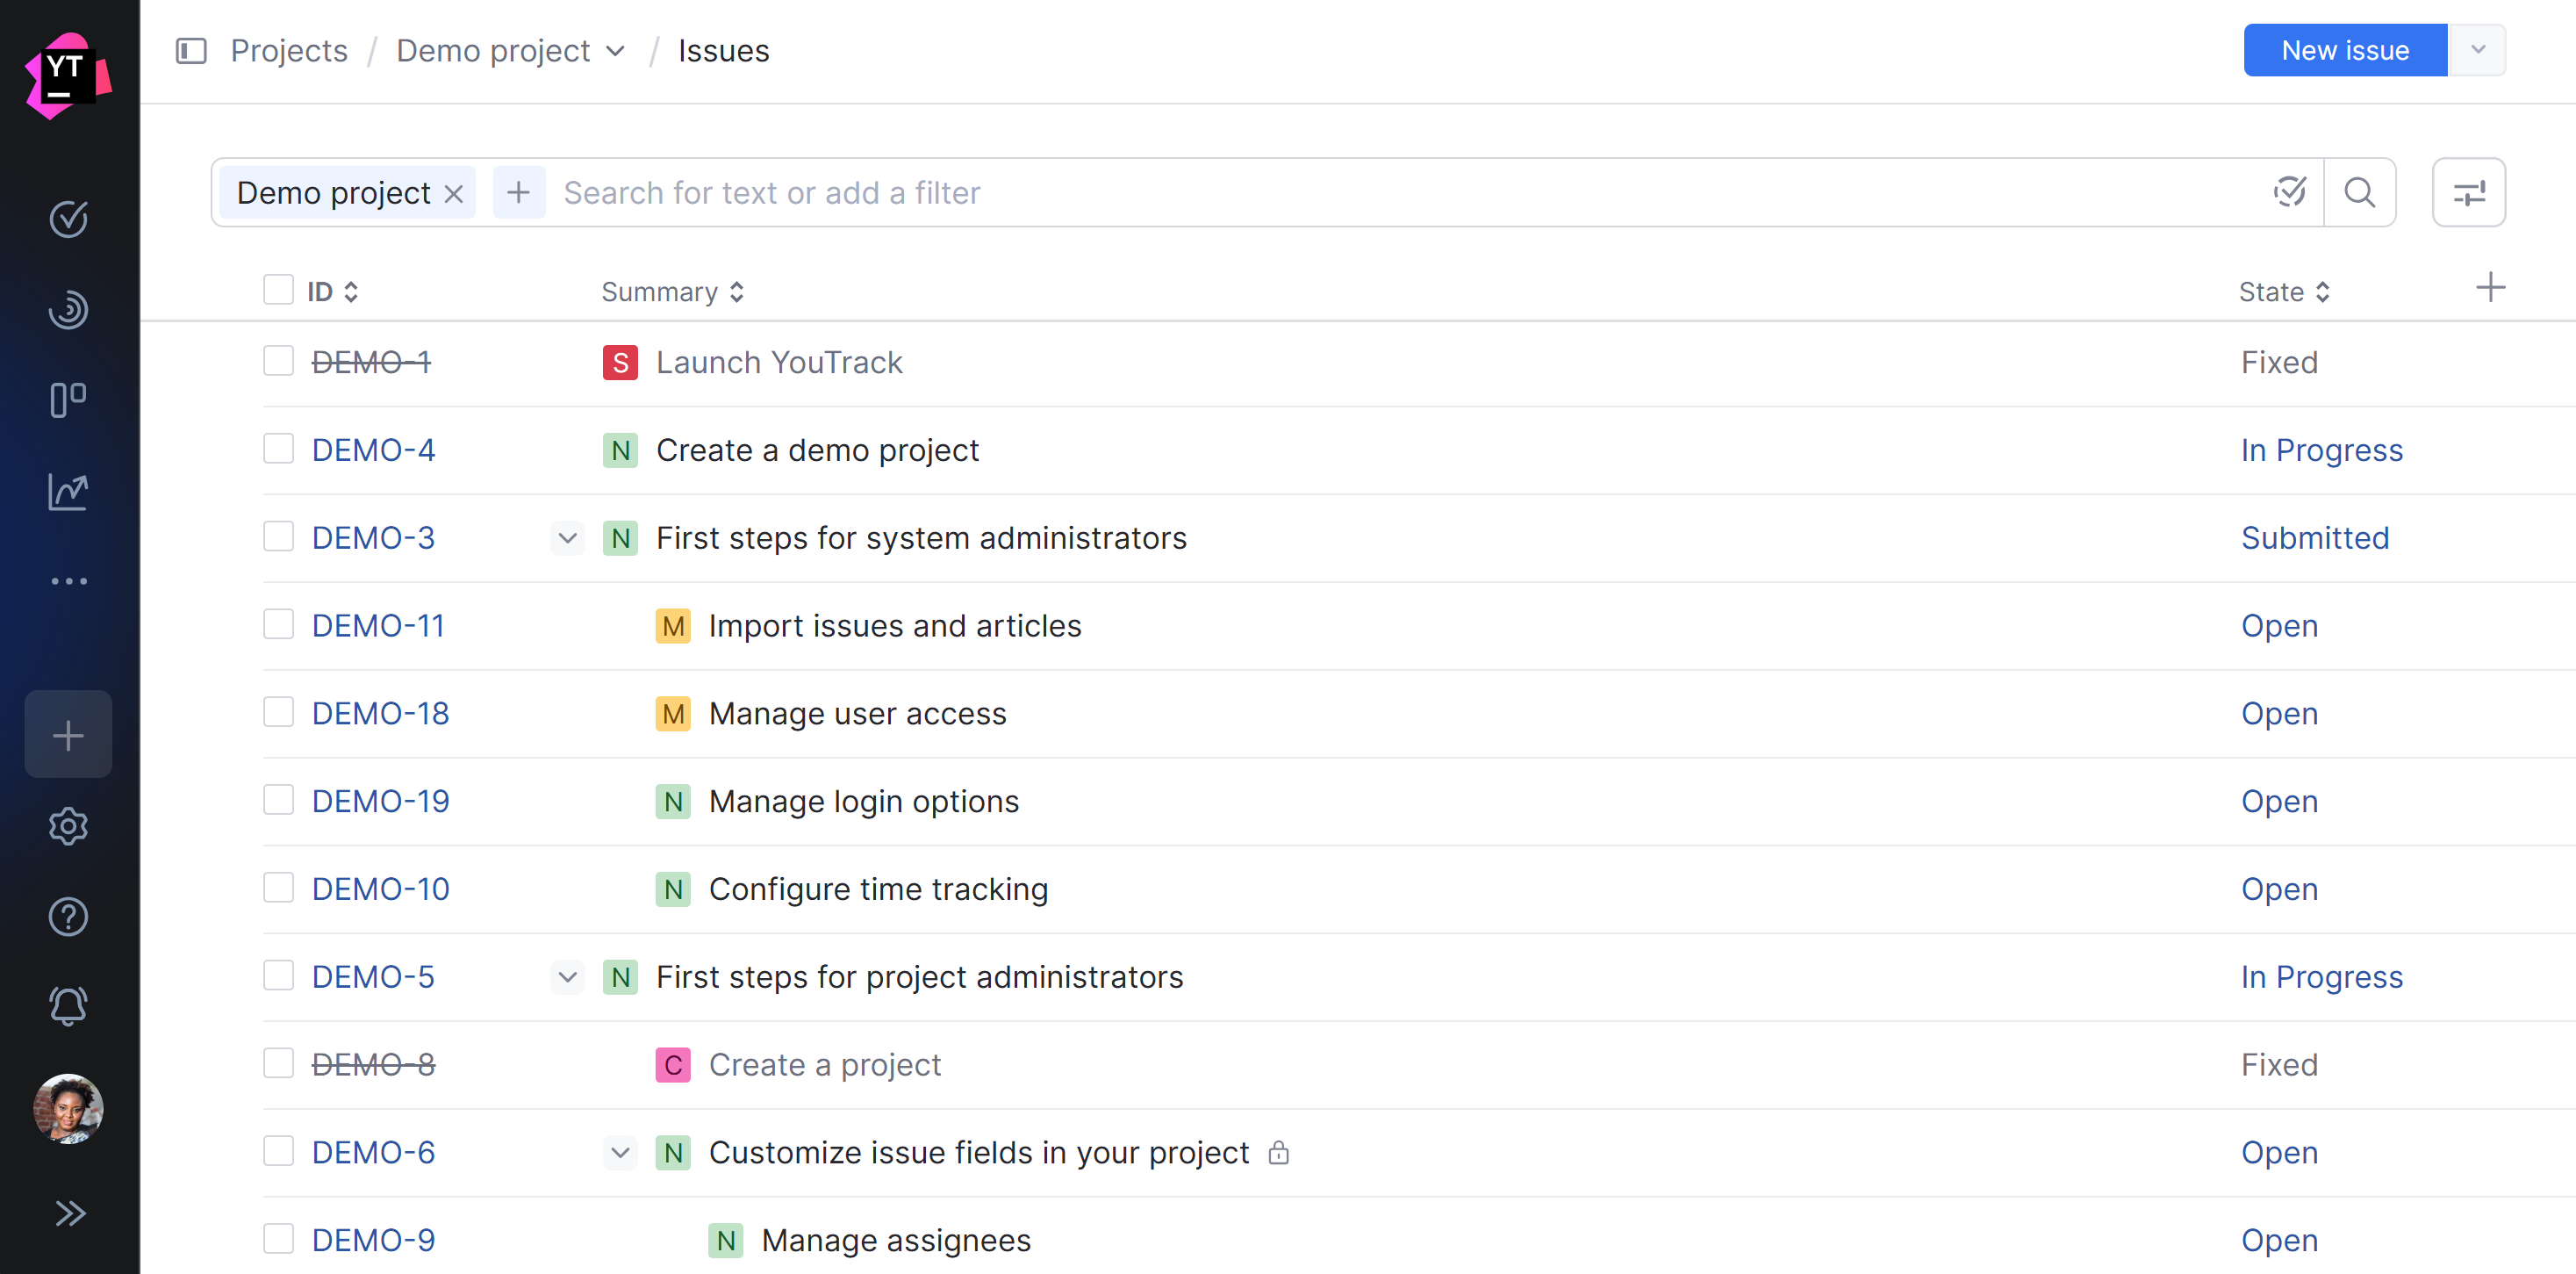
When you click the Issues link in the main menu, you can browse and view issues in your demo project.
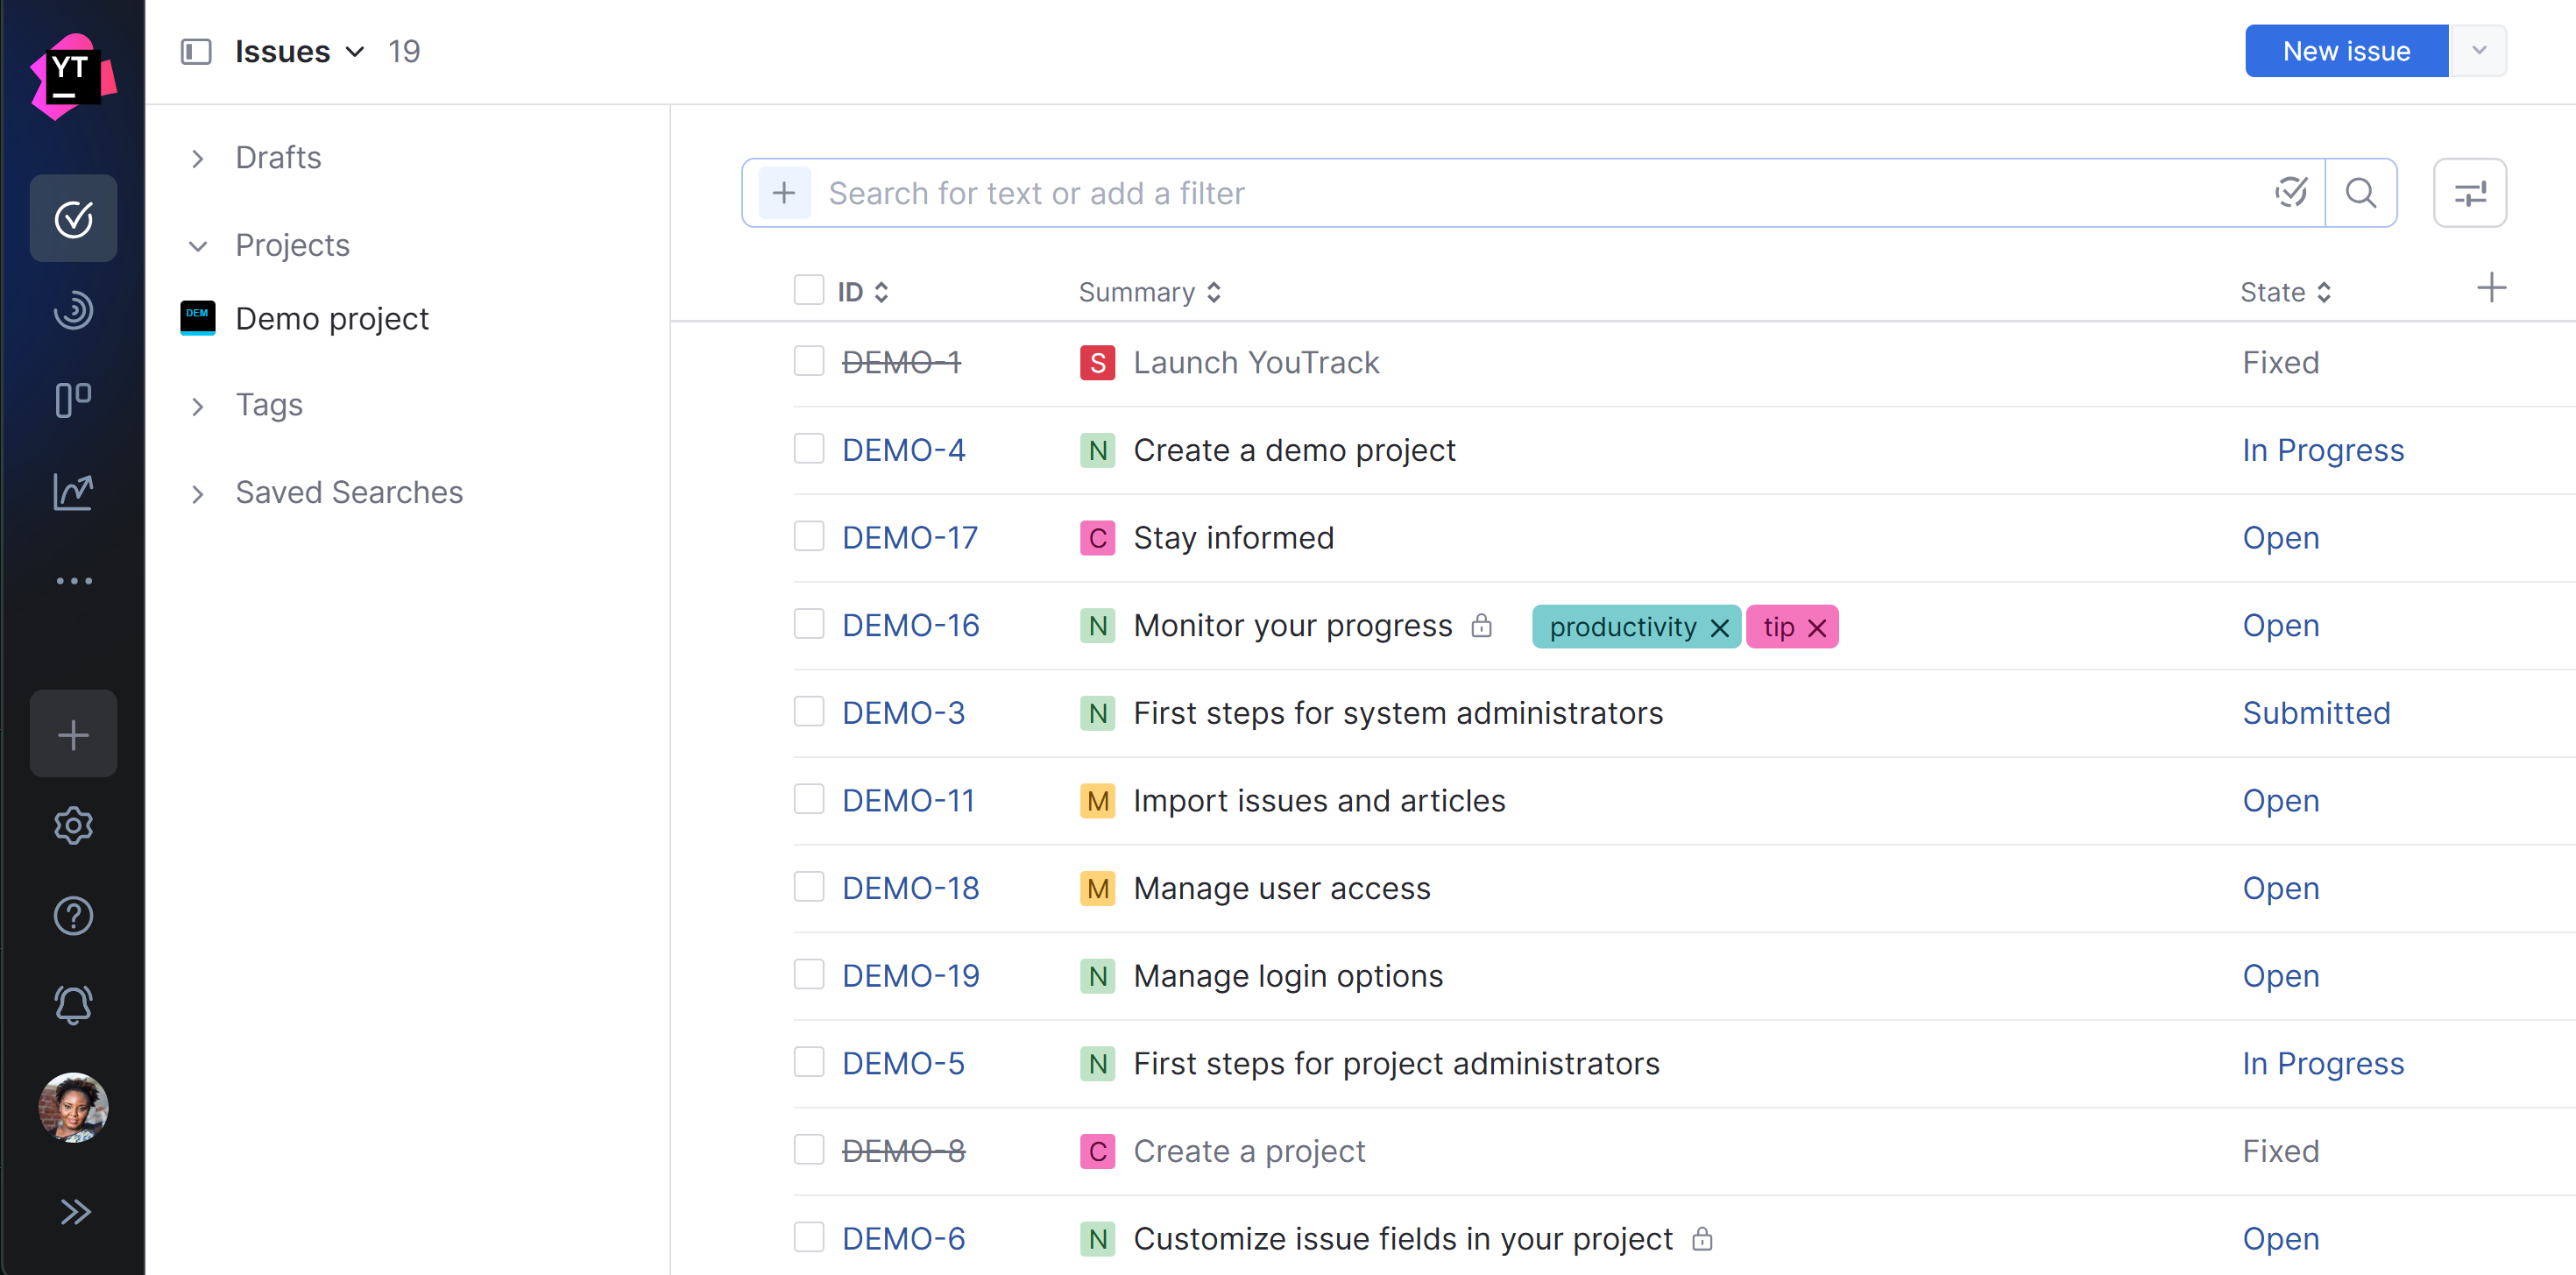
If you click the Issues link on the project overview page, you only see issues that belong to this project.
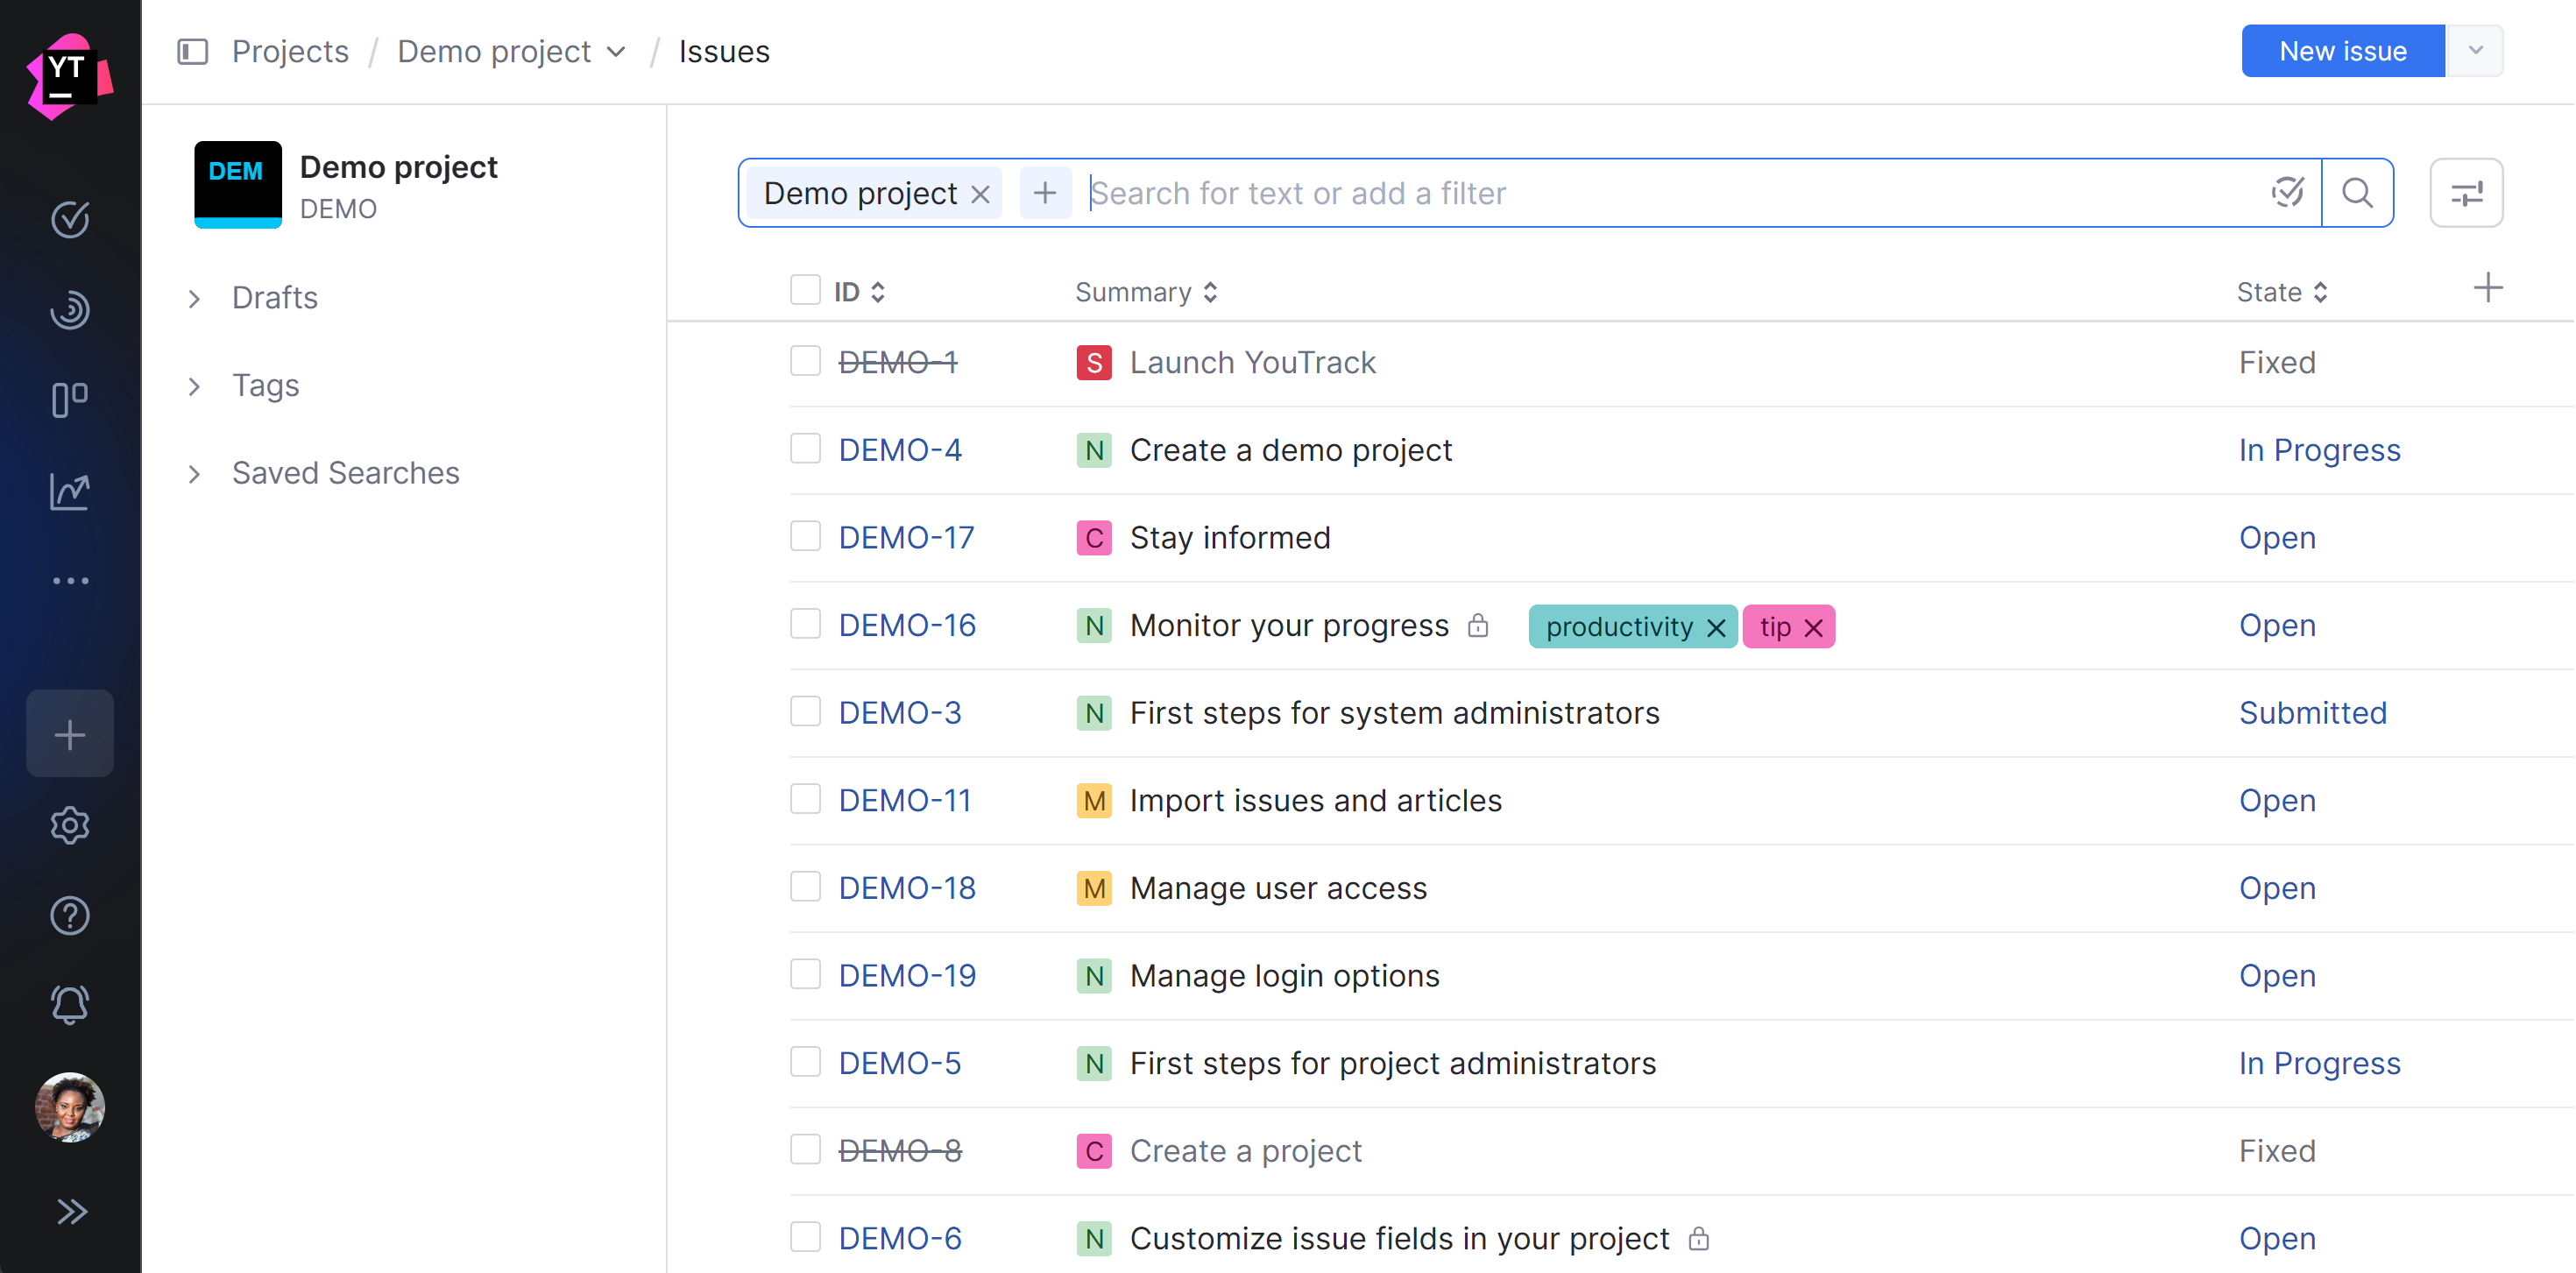
The issues have also been arranged into a predefined hierarchy. When the Structure setting for the page is set to Hierarchical (tree), each subtask is nested under its parent issue.
When you select an issue from the list, it opens in single issue view.
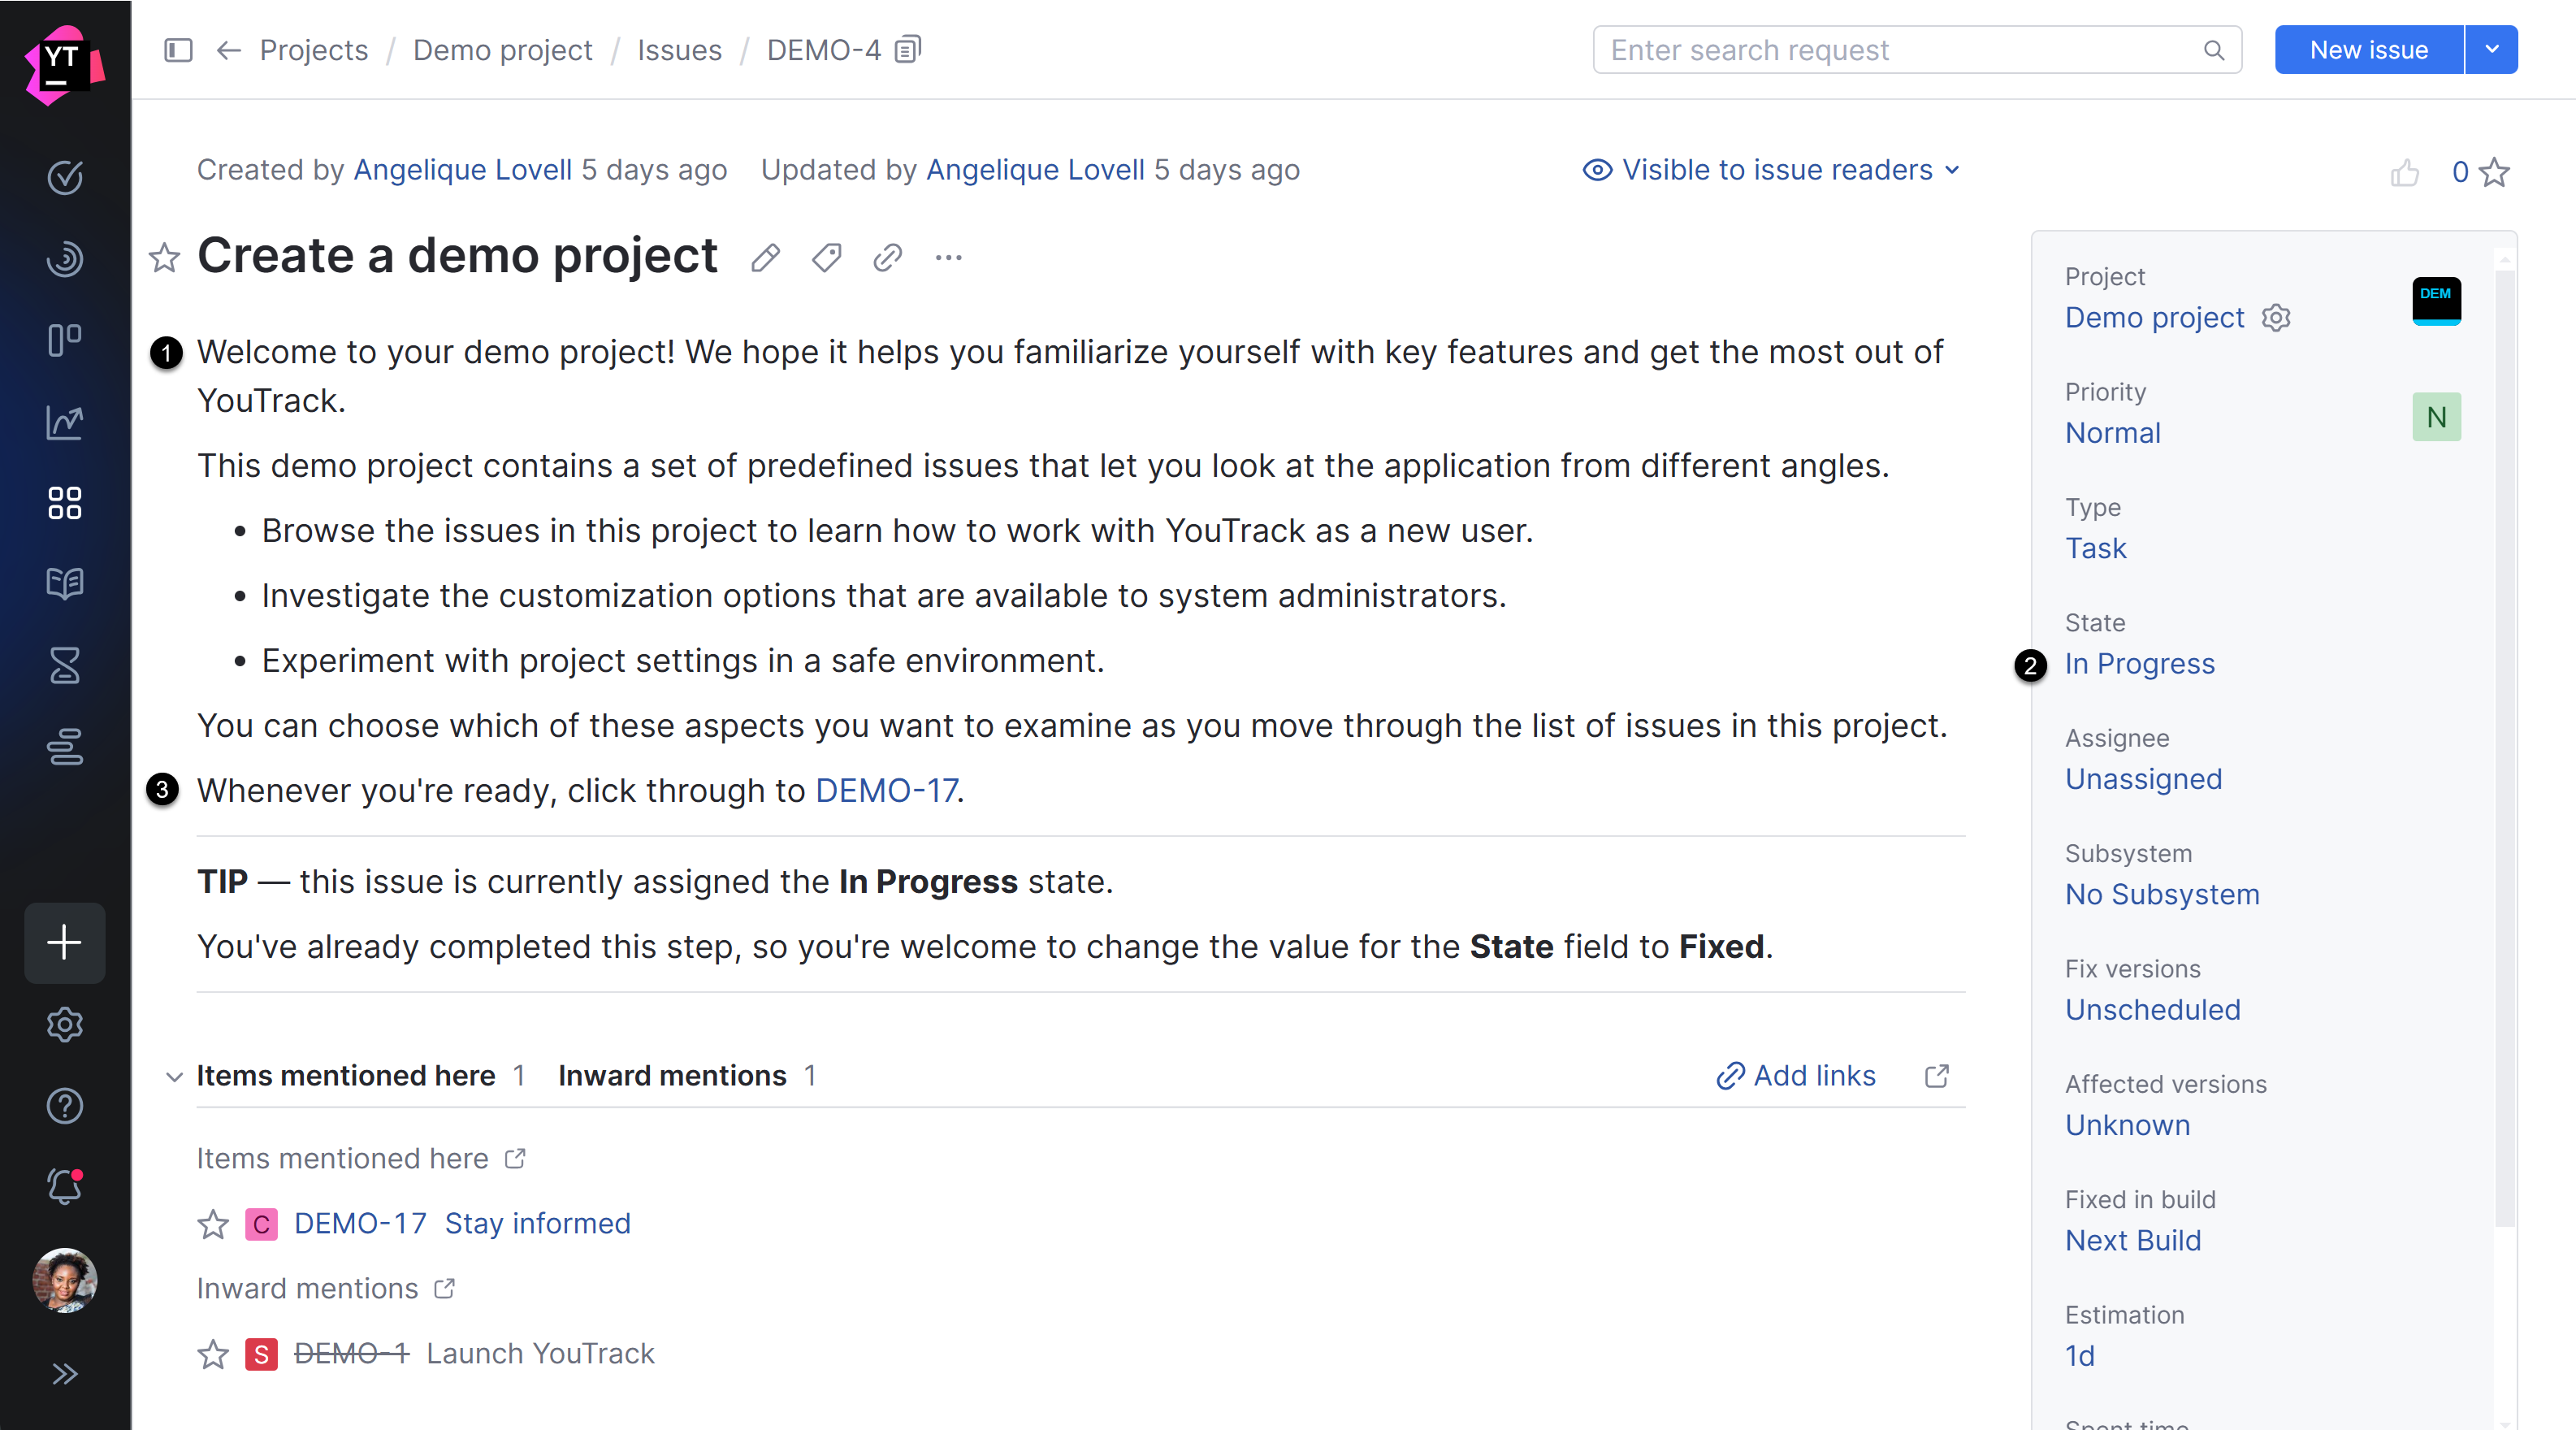
The descriptions for issues in the demo project are written to help you discover a specific feature, then move on to the next issue. Follow these steps for each issue in the demo project:
Read the issue description and follow the instructions provided.
Resolve the issue by changing the value for the State field to Fixed.
Continue with the next issue in the project.
You can work with issues in the demo project in any order. There's no right or wrong way. Keep going until you've resolved all the issues in the project or are confident enough to use the application without further assistance.
Dashboards
When the demo project is created, YouTrack generates a dashboard that displays information that is specific to the demo project. This dashboard is accessible from the list of dashboards as <demo project name> Dashboard.
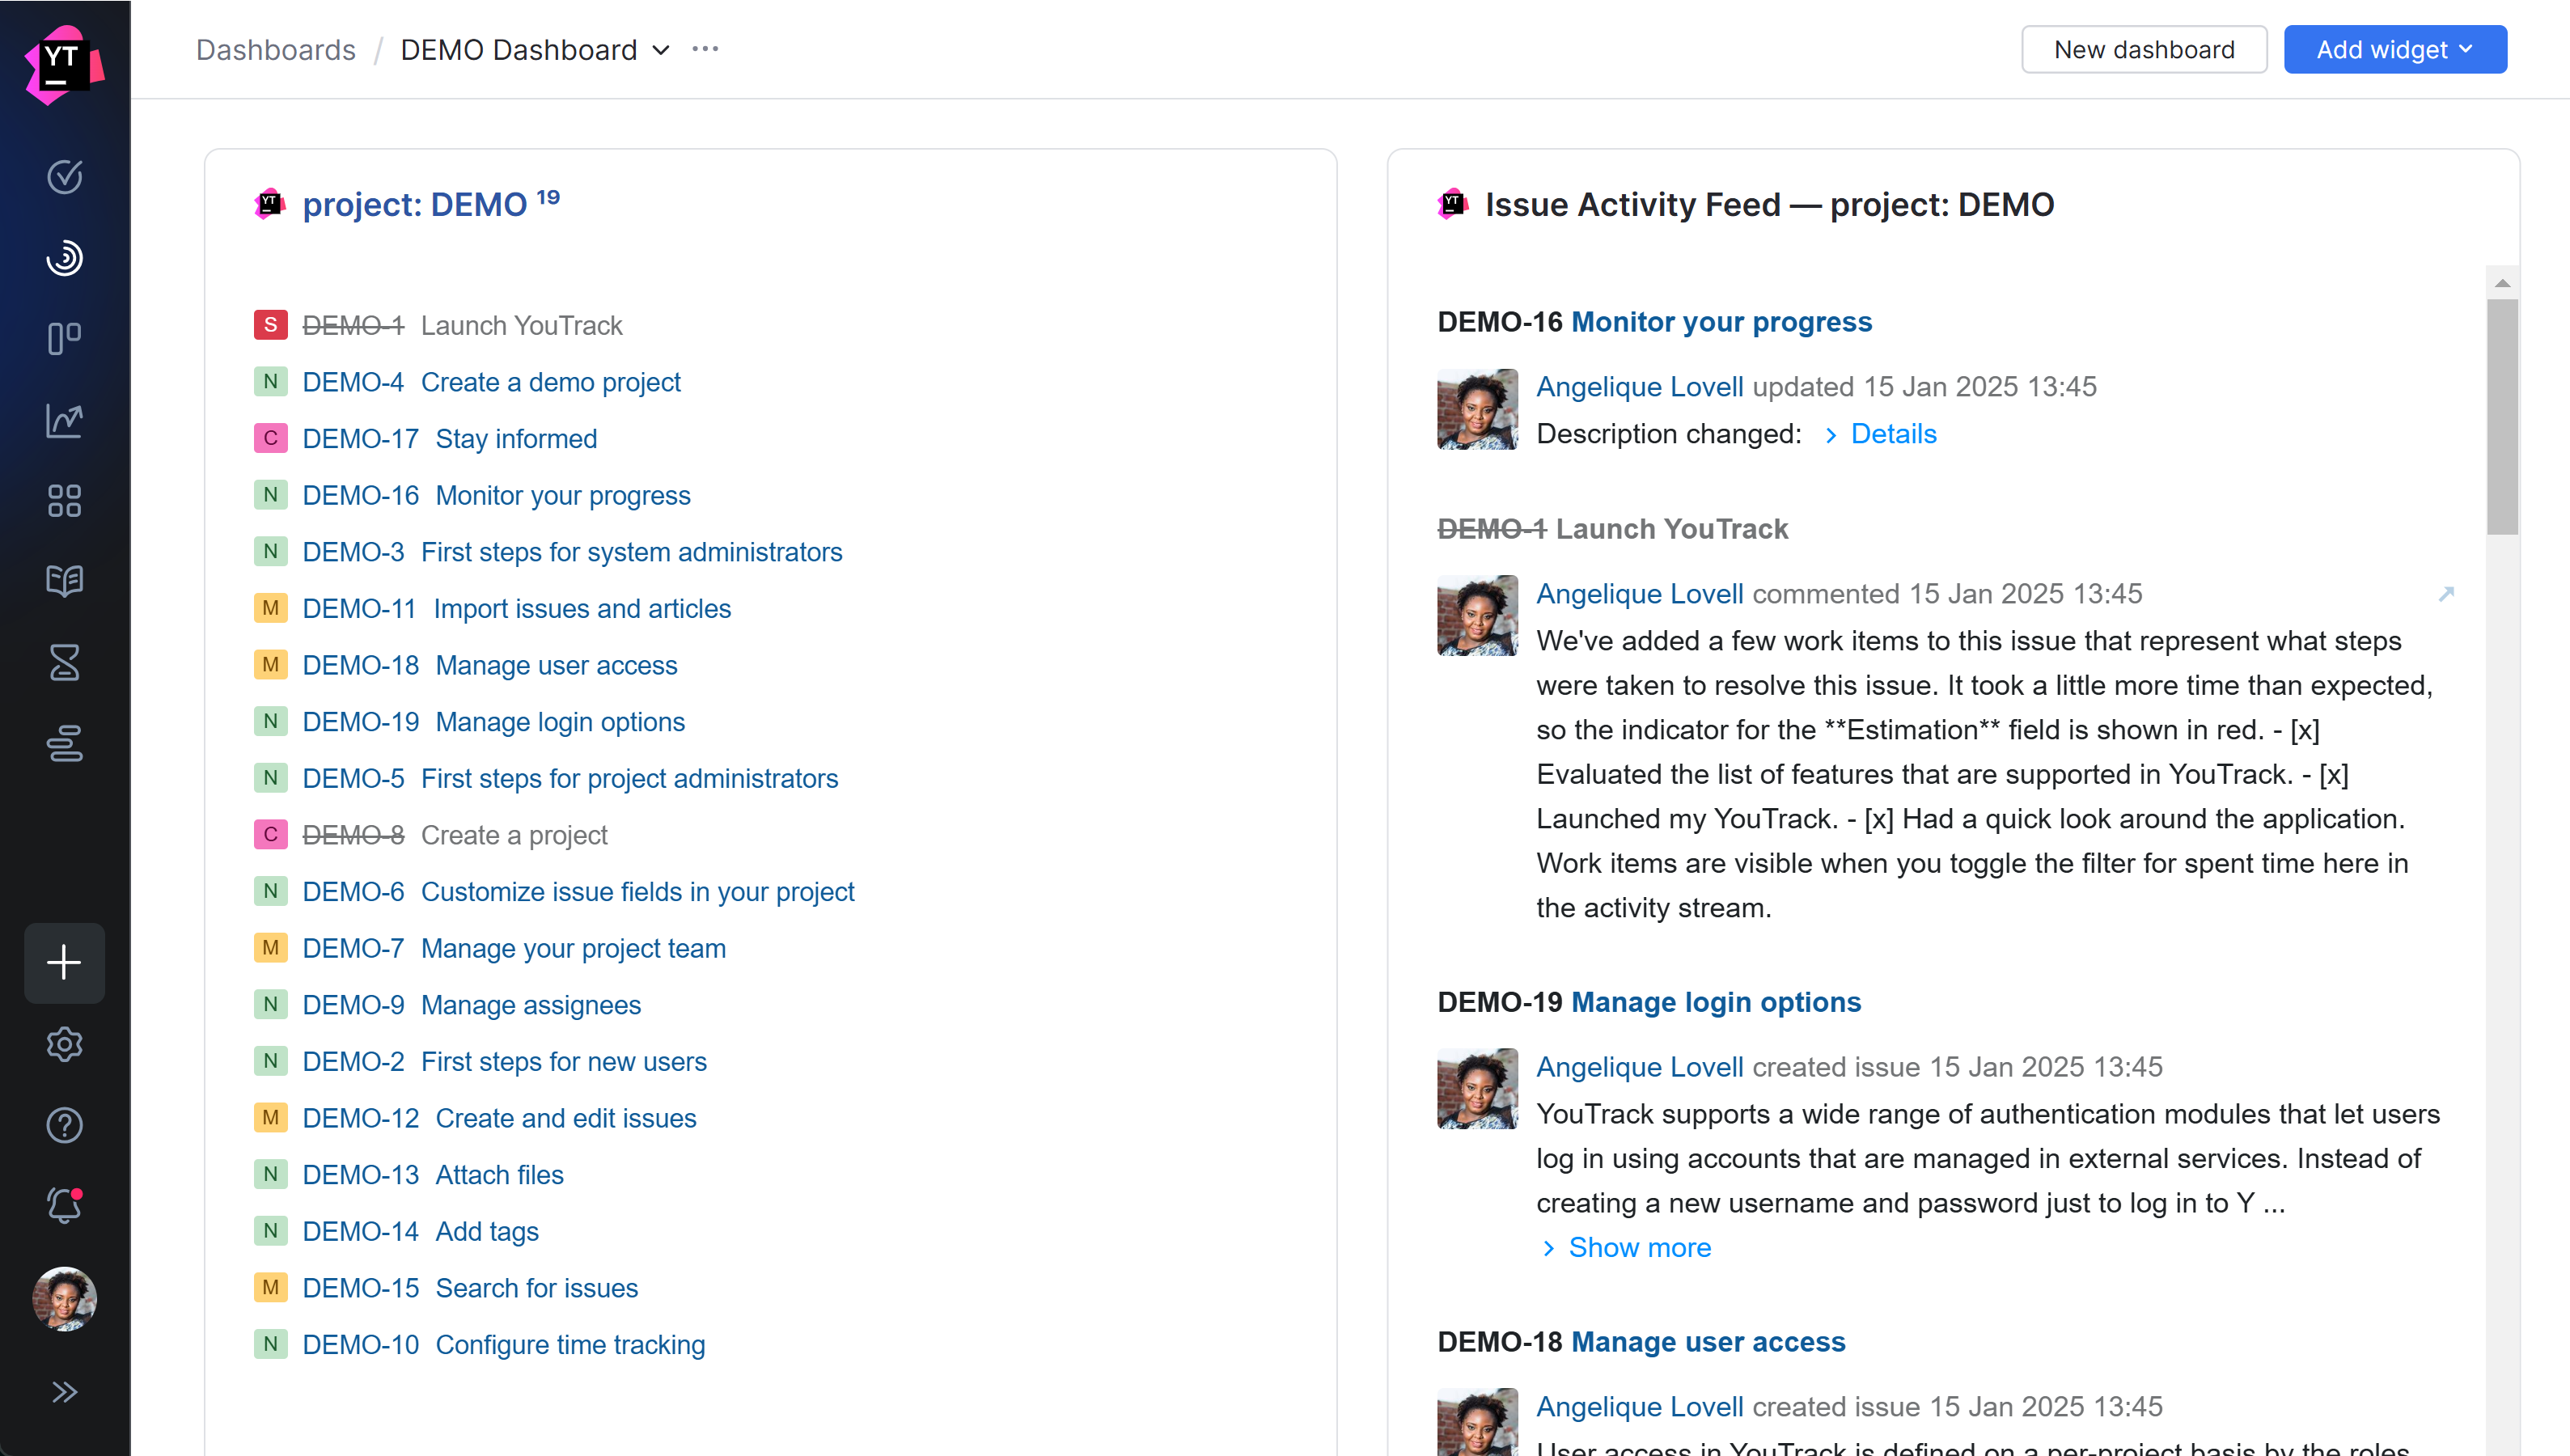
The dashboard is pre-populated with the following widgets:
Widget | Description |
|---|---|
Issue List Widget | This widget displays a simple list of all issues that belong to the demo project. You can customize the widget to show only issues that match specific search parameters. For example, if you add To learn more about this widget, see Issue List Widgets. |
Issue Activity Feed Widget | This widget shows you a timeline that represents all the issue-related activity that has taken place in your demo project. Even though these updates were generated automatically, the activity that is recorded in the demo project upon its creation is attributed to the user who created the project. As you apply changes to issues in the demo project, your activity will be reflected in this widget as well. To learn more about this widget, see Issue Activity Feed Widgets. |
Time Tracking Report Widget | This widget displays data that is calculated for and presented on a preconfigured Timesheet Report. This timesheet shows you who has allocated spent time by adding work items to issues in the demo project. The demo project includes predefined work items that help demonstrate this functionality. In each of these work items, the user who creates the demo project is assigned as the work author. To learn more about this widget, see Time Tracking Report Widgets. |
You can use the dashboard to track your progress as you resolve each issue in the demo project. You can also tune the dashboard any way you like.
Customize and resize the pre-populated widgets.
Add your own widgets.
To learn more about dashboards in YouTrack, see Dashboards.
Agile Boards
When you create a demo project, YouTrack creates a sample agile board. The board is designed to support a lightweight Kanban framework. With this model, cards are simply meant to flow from left to right, one column at a time, until all the tasks are marked as complete.
This board is automatically assigned the name <demo project name> Overview.
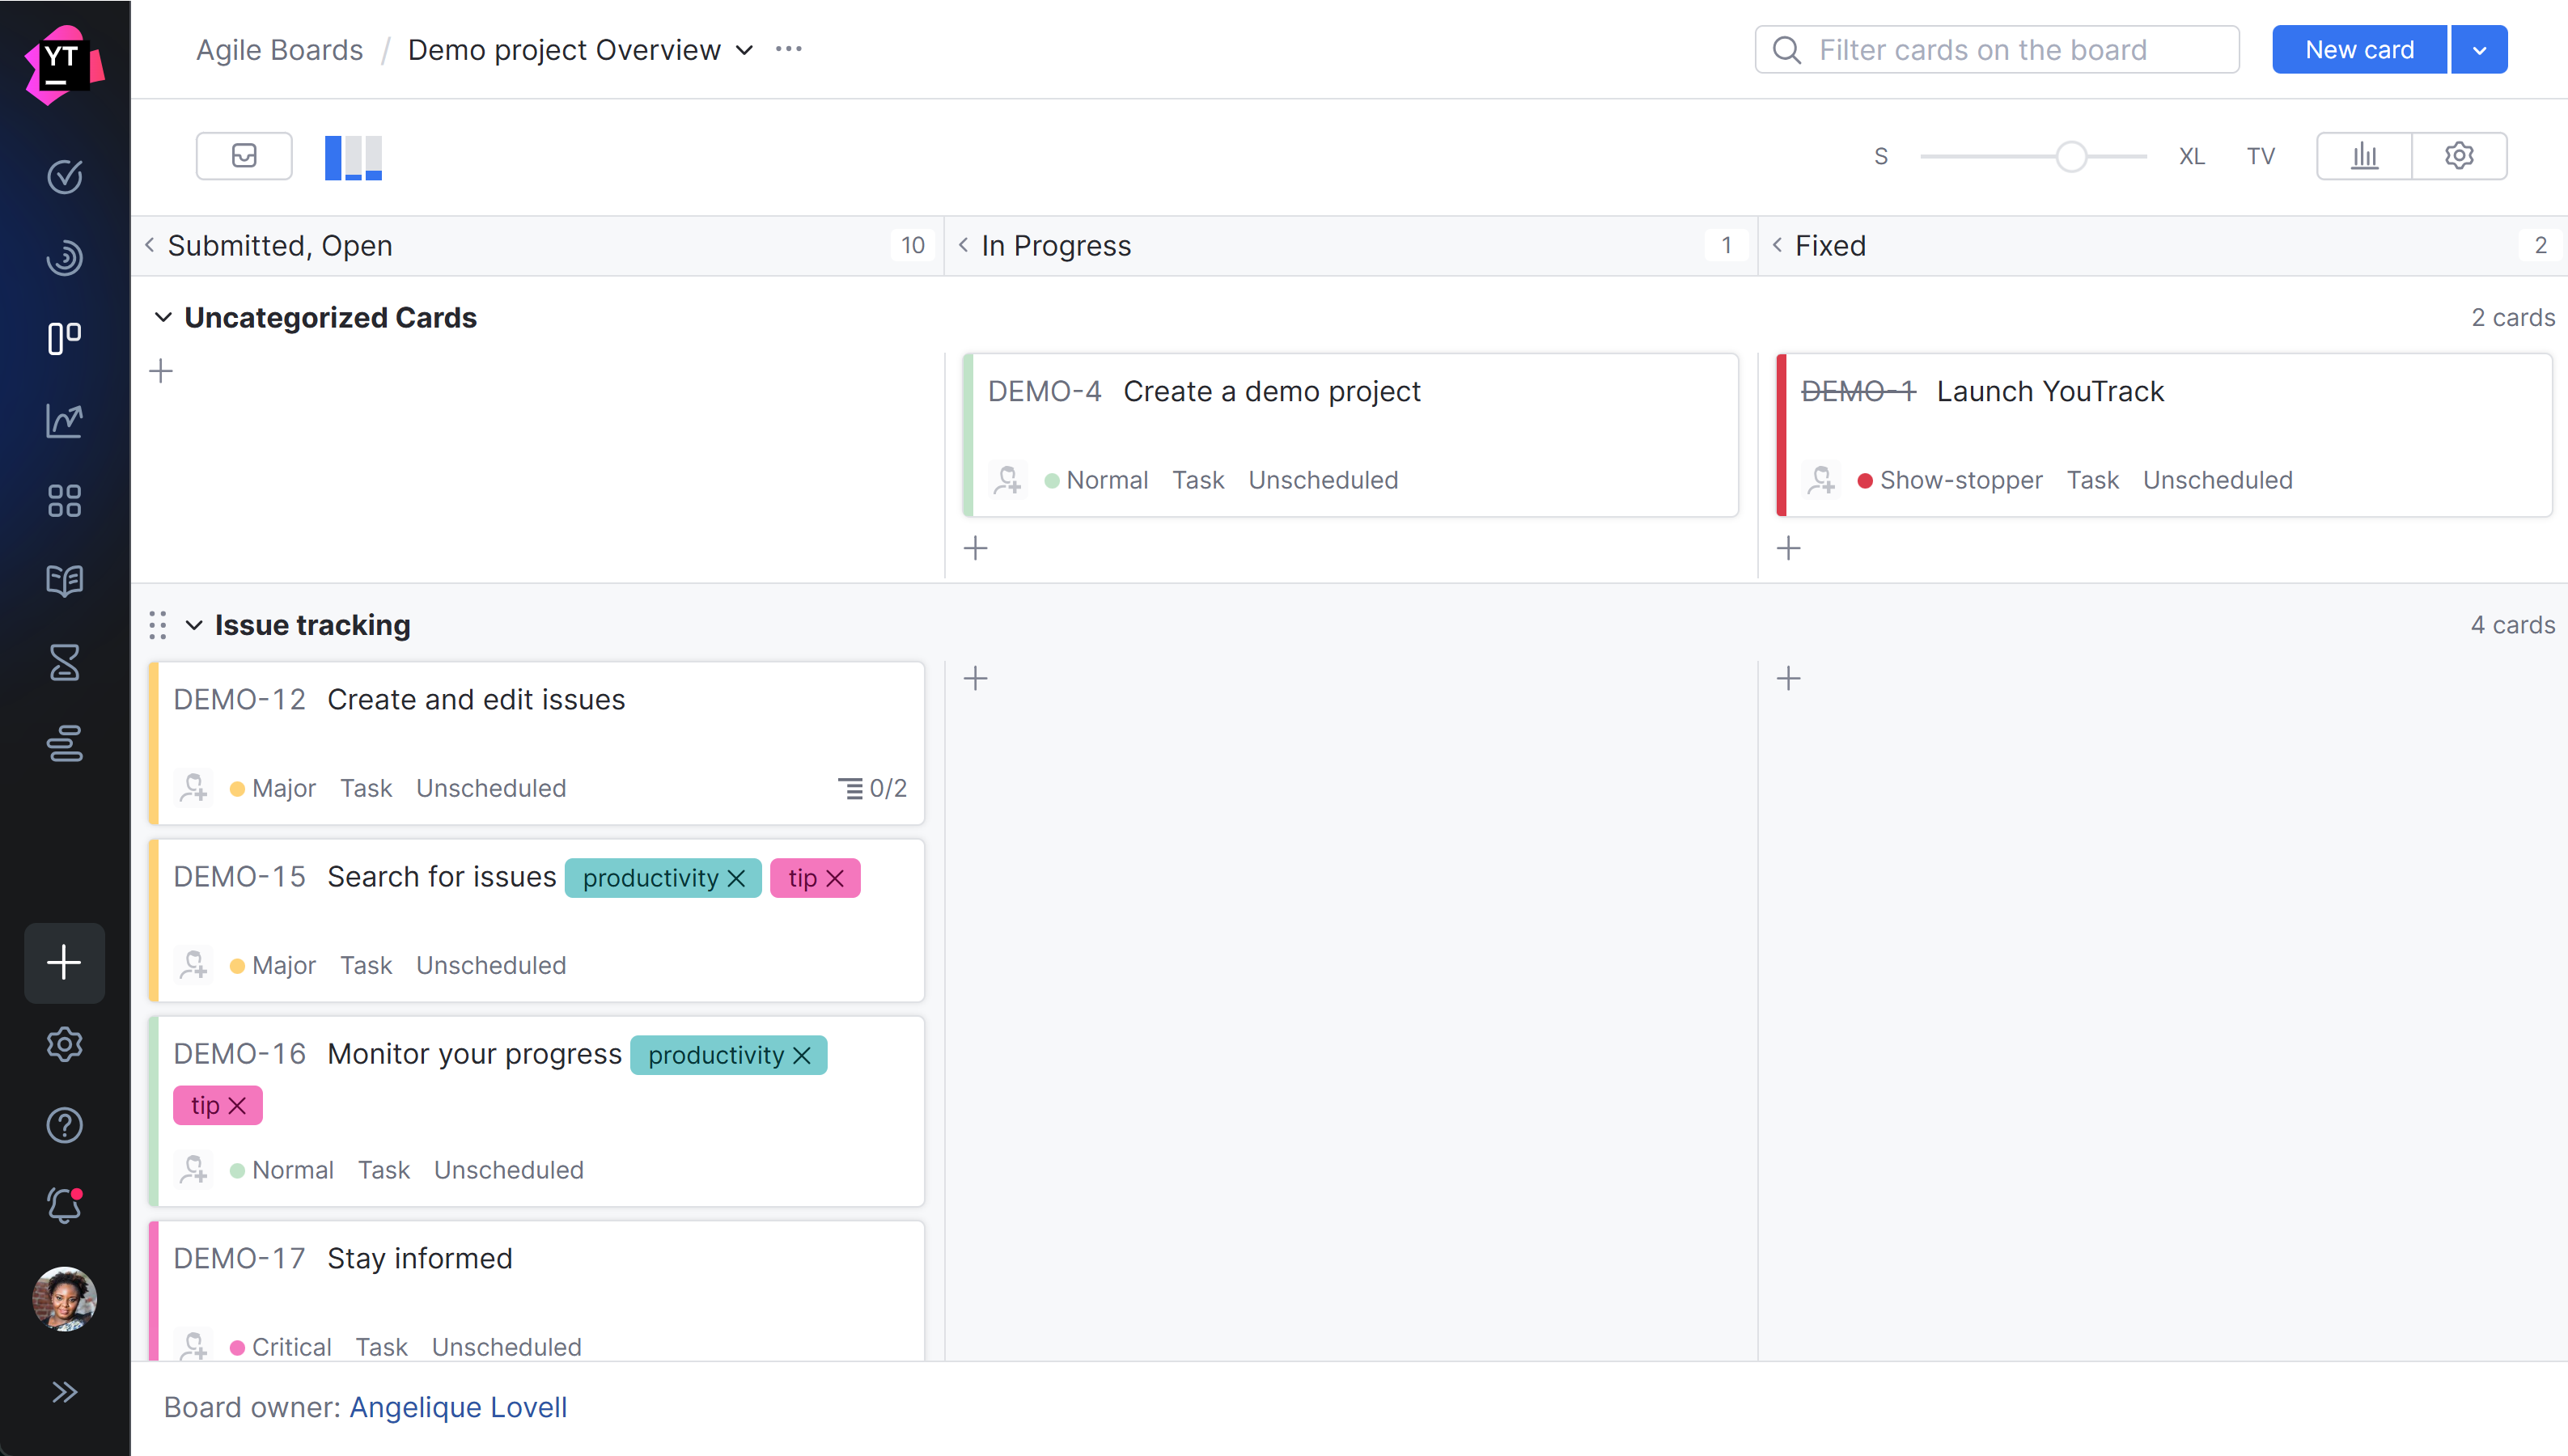
The kanban board has the following characteristics:
The board has three columns for issues in an Open or Submitted state on the left, issues In Progress in the middle, and issues that are Fixed on the right. The goal is to work on each open issue one by one and mark them as Fixed when you have finished reviewing the task.
The swimlanes are identified by values for the Subsystem field. This means that issues are grouped in predefined categories like Issue tracking, Project management, and Migration.
To learn more about agile boards in YouTrack, see Agile Boards.
Reports
Each demo project comes with three preconfigured reports. These are accessible from the Reports menu in the main navigation menu. These reports show you how to present and analyze issue data in your project.
The Issues per Subsystem Report
The first report shows you how many issues are assigned to each of the subsystems that are used in the demo project. This type of report helps teams decide which aspects of a particular project require the most attention at any given time.

To learn more about this type of report, see Issues per Arbitrary Field.
The Time Report
The second report shows how much time has been spent working on various issues in the demo project. This information is based on the amount of spent time that has been added to issues as work items.
This type of report is particularly helpful to teams that estimate the amount of time required to complete various tasks.

To learn more about this type of report, see Time Report.
The Timesheet Report
The last report shows the same information that is presented in the Time report, but from a different perspective. On the Timesheet report, the amount of time spent working on issues in the demo project is plotted on a timeline.
This type of report helps you track activity over a specific timeframe. People often use this information to calculate invoices and track the historical allocation of resources in a project.
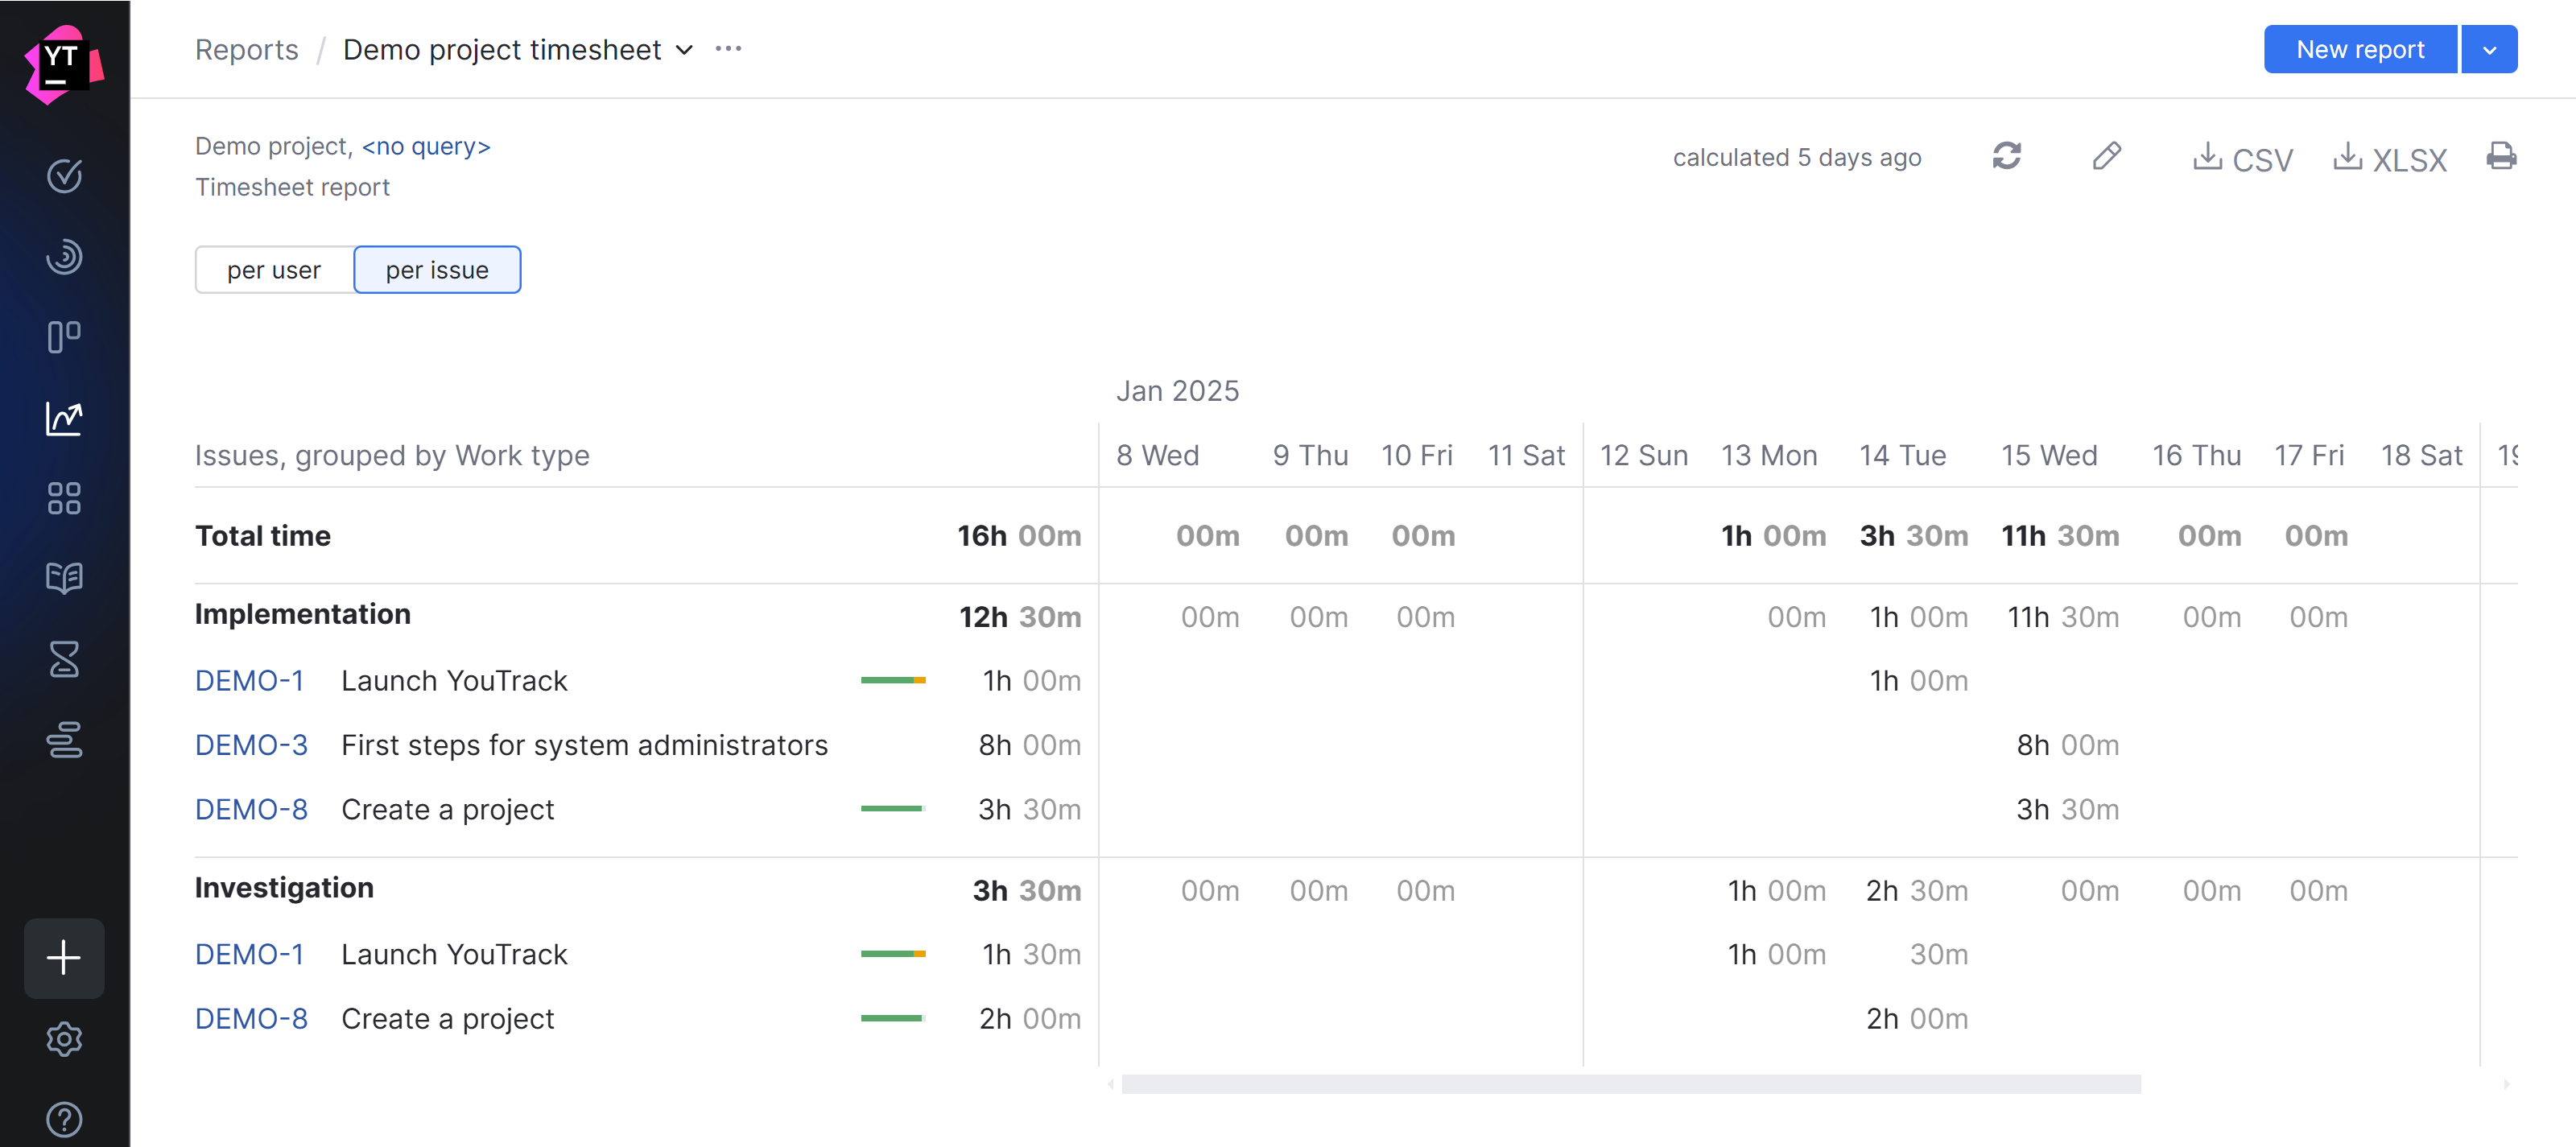
To learn more about this type of report, see Timesheet Report.
This is just a small sample of the various types of reports you can create in YouTrack. For a complete list, see Reports.
Projects
When you click the Projects link in the application header, YouTrack displays a list of projects that have been created in the system. Your demo project will be grouped with other favorite projects on the page.
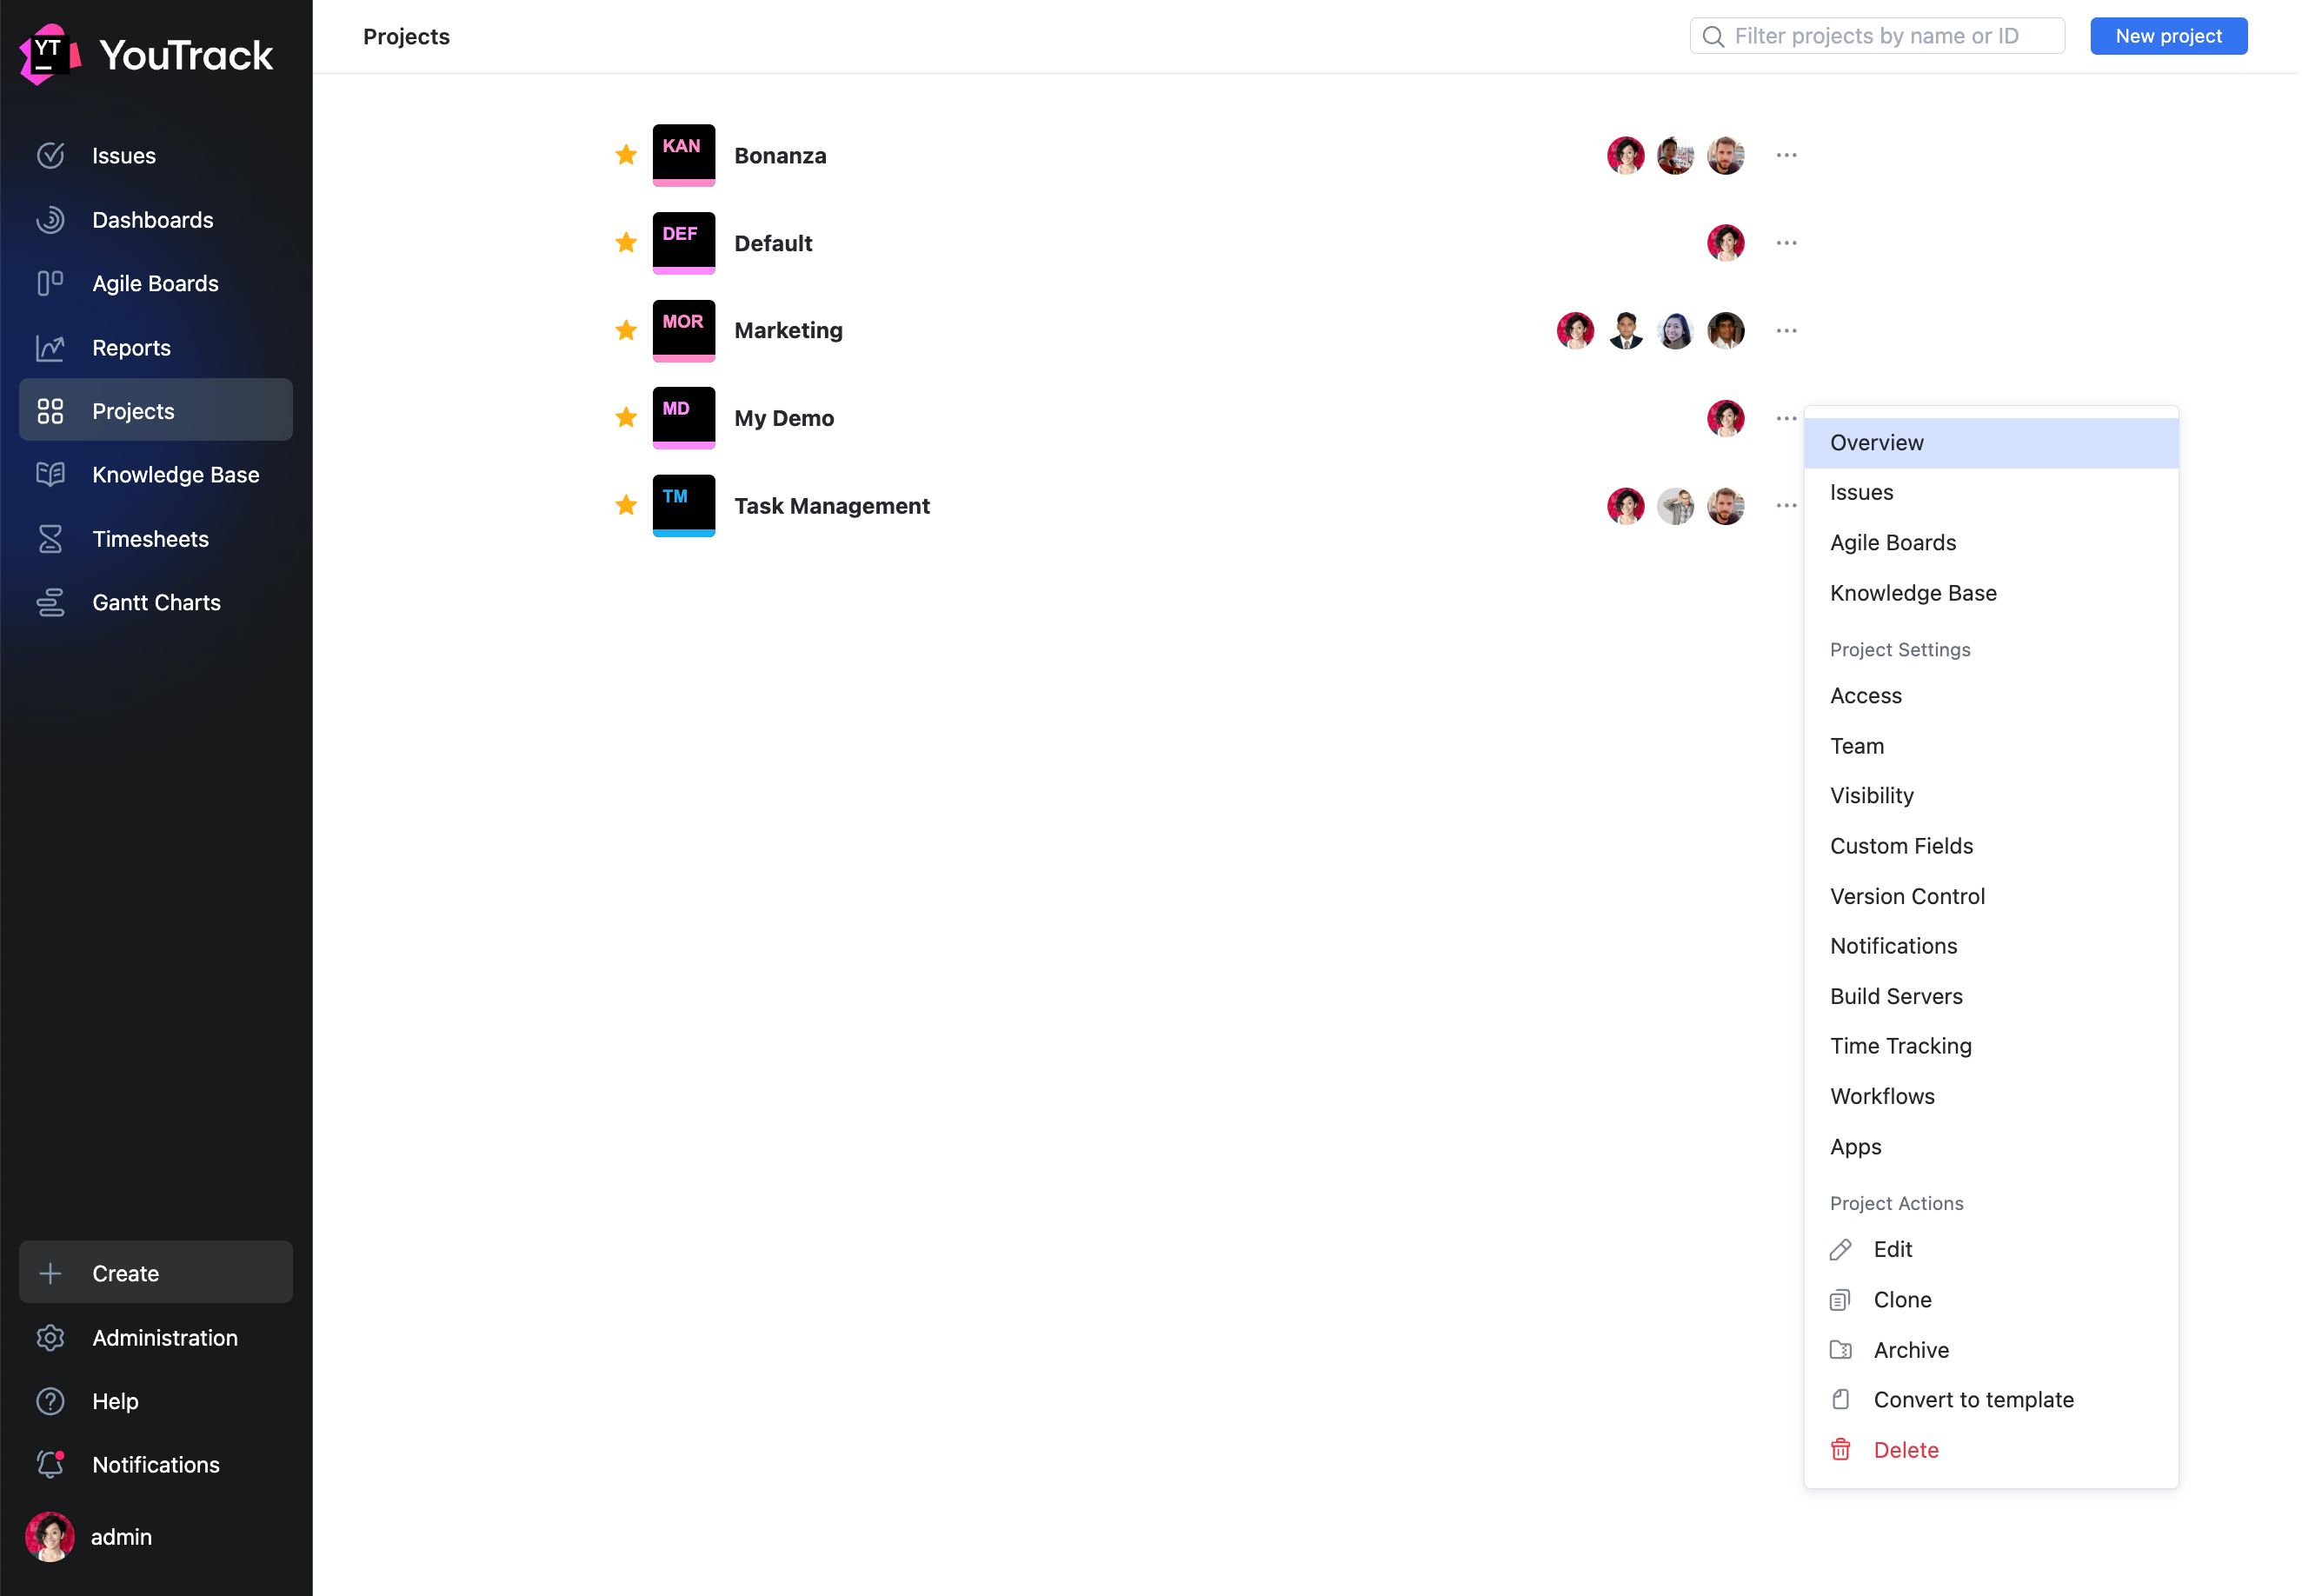
The more options icon for your demo project lets you navigate to issues and articles that belong to the project. Other links give you direct access to various project settings.
What to Do When Done with the Demo
Once you have resolved all the issues in your demo project, you should be familiar with the major features in YouTrack. This also probably means that you don't need the demo project anymore.
That doesn't mean you need to delete it right away. Here are a few ways you can get some extra mileage out of the demo project:
Use it as a sandbox — YouTrack lets you customize your projects in a million different ways. You can keep the demo project and use it to experiment with workflows, test integrations, and check different access profiles.
Manage a real project — the dashboard, agile boards, and reports that are generated when you create the demo project are set up just as they would be for a typical project team. You can add other users to the project team and use the demo project to track new activity. If the sample issues annoy you or your team in any way, just delete them.
Track your personal issues — many of the components that are generated when you create the demo can help you manage your personal list of to-do items. You can continue to report and track tasks that are related to your professional development or other efforts that don't involve other members of your project teams. You can also keep using the dashboard, agile boards, and reports without having to create them from scratch.
If none of the options appeal to you and you want to keep your YouTrack installation tidy, you can delete the demo project at any time. When you delete the demo project:
All the issues that belong to the project are deleted as well.
The dashboard, agile boards, and reports that were generated when the project was created are deleted from the system.
To learn more about deleting a project in YouTrack, see Delete a Project.