Module structure settings
Module settings apply only to one module and are stored in the .iml file. A module can have an SDK and a language level that are different from those configured for a project, and their own libraries. They can also carry a specific technology or a framework.
An SDK is a collection of tools that you need to develop an application for a specific software framework. To develop Java-based applications, you need a JDK (Java Development Kit).
You can compile a module with an SDK that differs from the project SDK.
In the main menu, go to File | Project Structure | Project Settings | Modules.
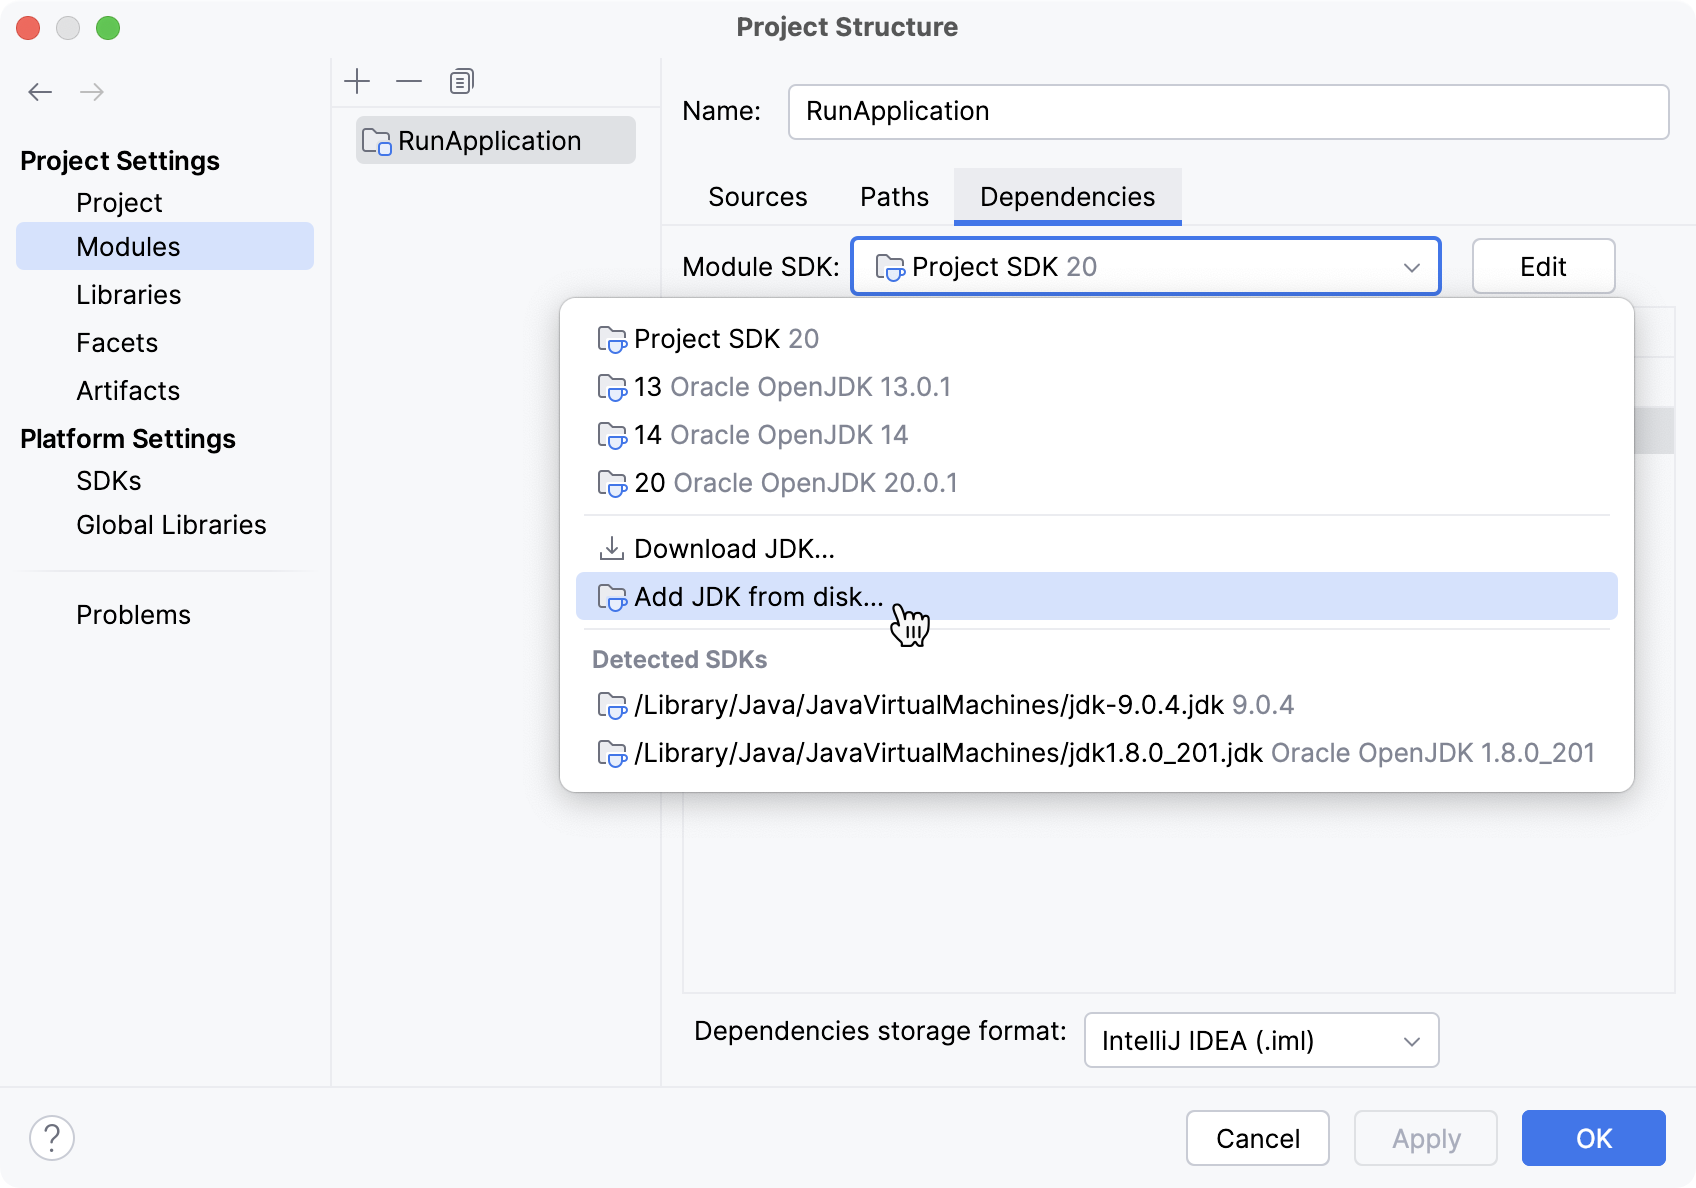
Select the module for which you want to set an SDK and click Dependencies.
If the necessary SDK is already defined in Aqua, select it from the Detected SDKs list.
Only for JDKs: if the IDE cannot find the necessary JDK on your computer automatically, click Add JDK from disk and specify its home directory in the dialog that opens.
If you don't have the necessary JDK on your computer, select Download JDK. In the next dialog, specify the JDK vendor, version, change the installation path if required, and click Download.
tip
If you want a module to inherit the project SDK, select the Project SDK option from the Module SDK list.

Aqua does the following to determine which JDK to use for compilation if you use different JDKs for modules in your project.
It checks all JDKs that are used in the project: the JDKs that are defined on both the project and module levels.
It calculates the latest of these JDKs. This is necessary to make sure all modules can be compiled.
If the version of the latest JDK configured is lower than 1.6, Aqua will pick the JDK version that is used for running the IDE. This limitation is related to the fact that the compiler API used by Aqua for building projects is supported starting from JDK 1.6.
Although a specific version of the compiler will be used (in accordance with the selected JDK version), each separate module will be compiled using the javac's cross-compilation feature against the libraries of the JDK defined for this particular module in the project settings.
This protects you from a situation when a module is compiled against newer libraries than those for which dependencies are set.
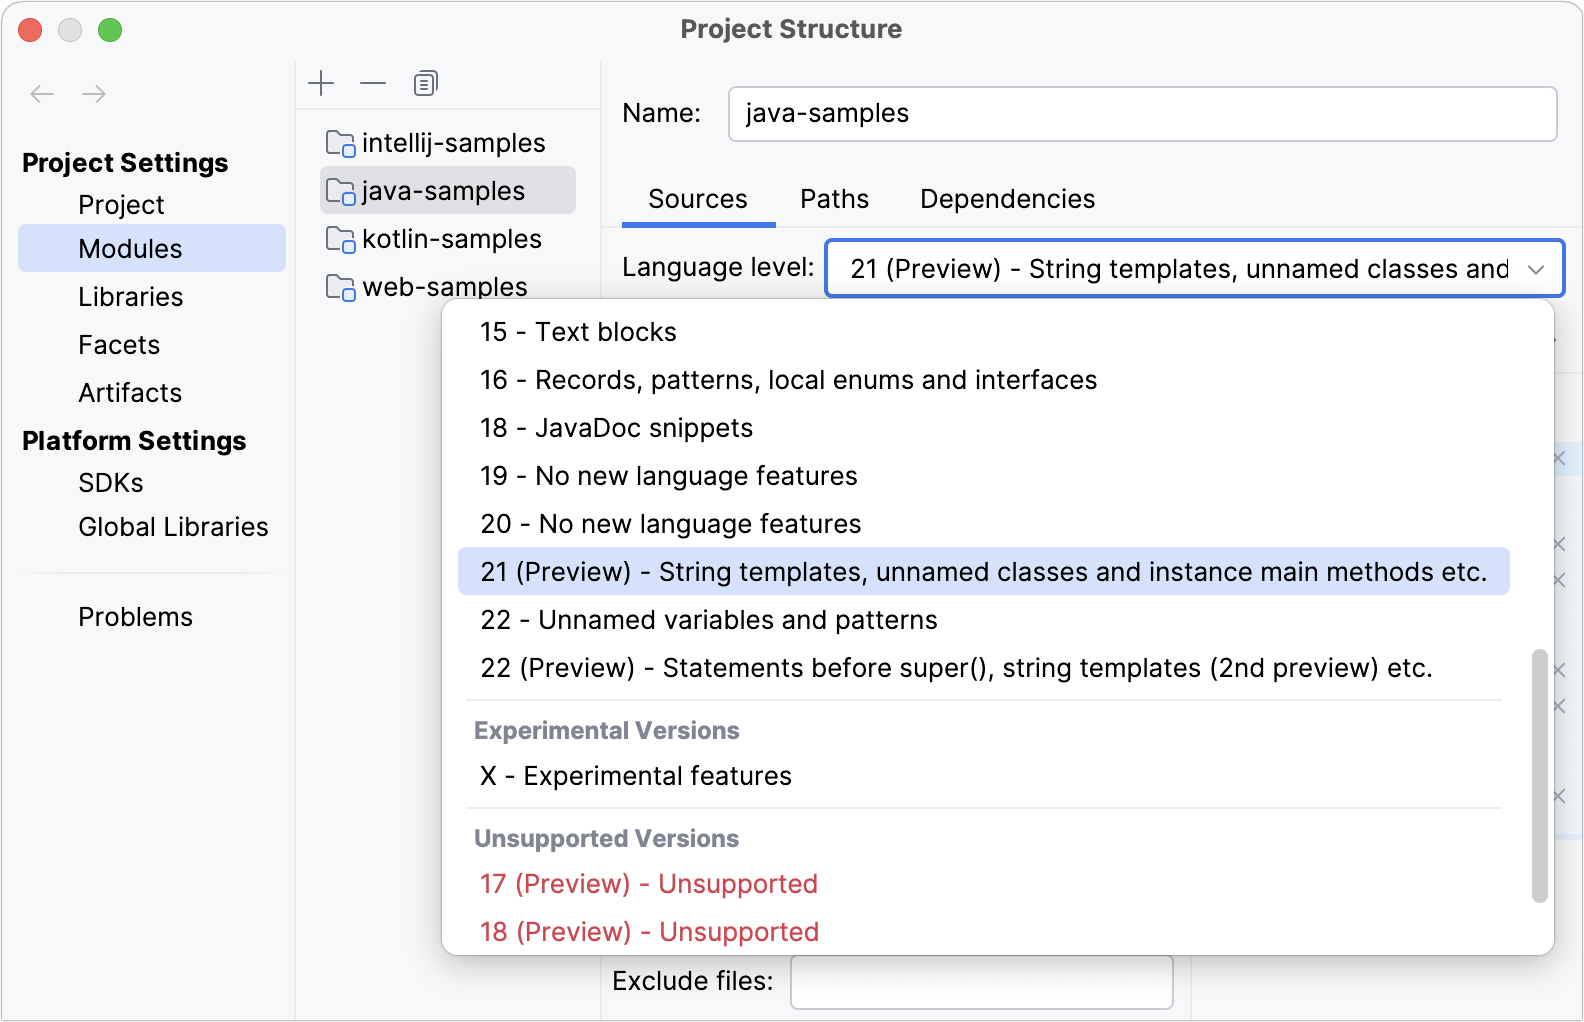
Language level defines coding assistance features that the editor provides. To configure a language level for a module:
In the main menu, go to File | Project Structure .
Under Project Settings, select Modules | Sources.
From the Language level list, select the necessary option.
To use the project language level, select Project default.

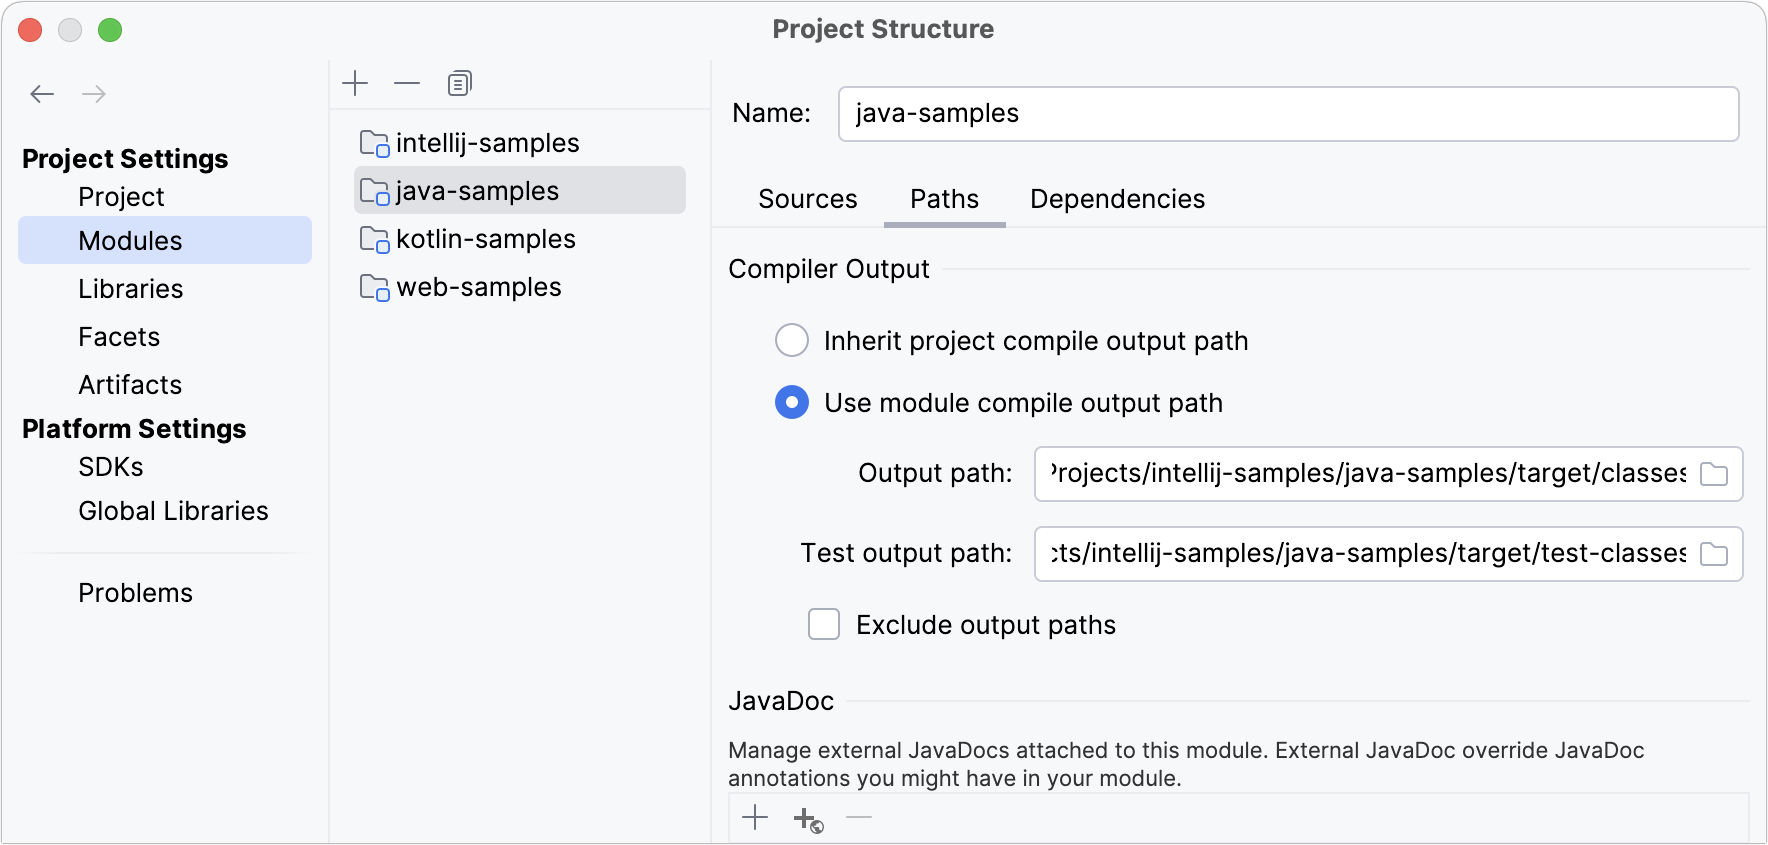
Compiler output path is the path to the directory in which Aqua stores the compilation results. In this directory, the IDE creates two sub-directories: output for production code and test output for test sources.
In the main menu, go to File | Project Structure .
Under Project Settings, select Modules | Paths.
Change the paths specified in the Output path and Test output path or select Inherit project compile output path to use the paths specified for the project.
Select the Exclude output path checkbox to exclude the output folders from code completion, navigation, and inspections. This helps increase overall IDE performance.

Libraries are a collection of compiled code that you can use when developing applications. You can add libraries on the module level. In this case, only one module can use the code from such libraries.
Global and project libraries are not available until you add them to module dependencies.
In the main menu, go to File | Project Structure | Project Settings | Modules.
Select the module for which you want to add a library and click Dependencies.
Click the
button and select Library.

In the dialog that opens, select a project or a global library that you want to add to the module.
Alternatively, click New Library and select the required option: you can add a Java and Kotlin libraries from files on your computer, or download a library from Maven.
