External tools
Configure third-party command-line applications as external tools to run them from CLion. For example, your workflow may require running a specific script, code generator, analyzer, preprocessor or postprocessor, some database utility, and so on. By configuring it as an external tool, CLion provides a dedicated action for it, which you can run from the main menu, from certain context menus, assign a shortcut to it, or run it when launching a specific run configuration.
You can use built-in IDE macros to pass context-dependent command-line arguments to the tool, such as the current file or your project source path. If necessary, CLion will print the tool's output to the console.
CLion supports the following types of external tools:
Local tools run locally on your computer.
Remote tools are executed on a remote server over SSH.
Press CtrlAlt0S to open the IDE settings and select Tools | External Tools.
Click
and specify the tool's settings.
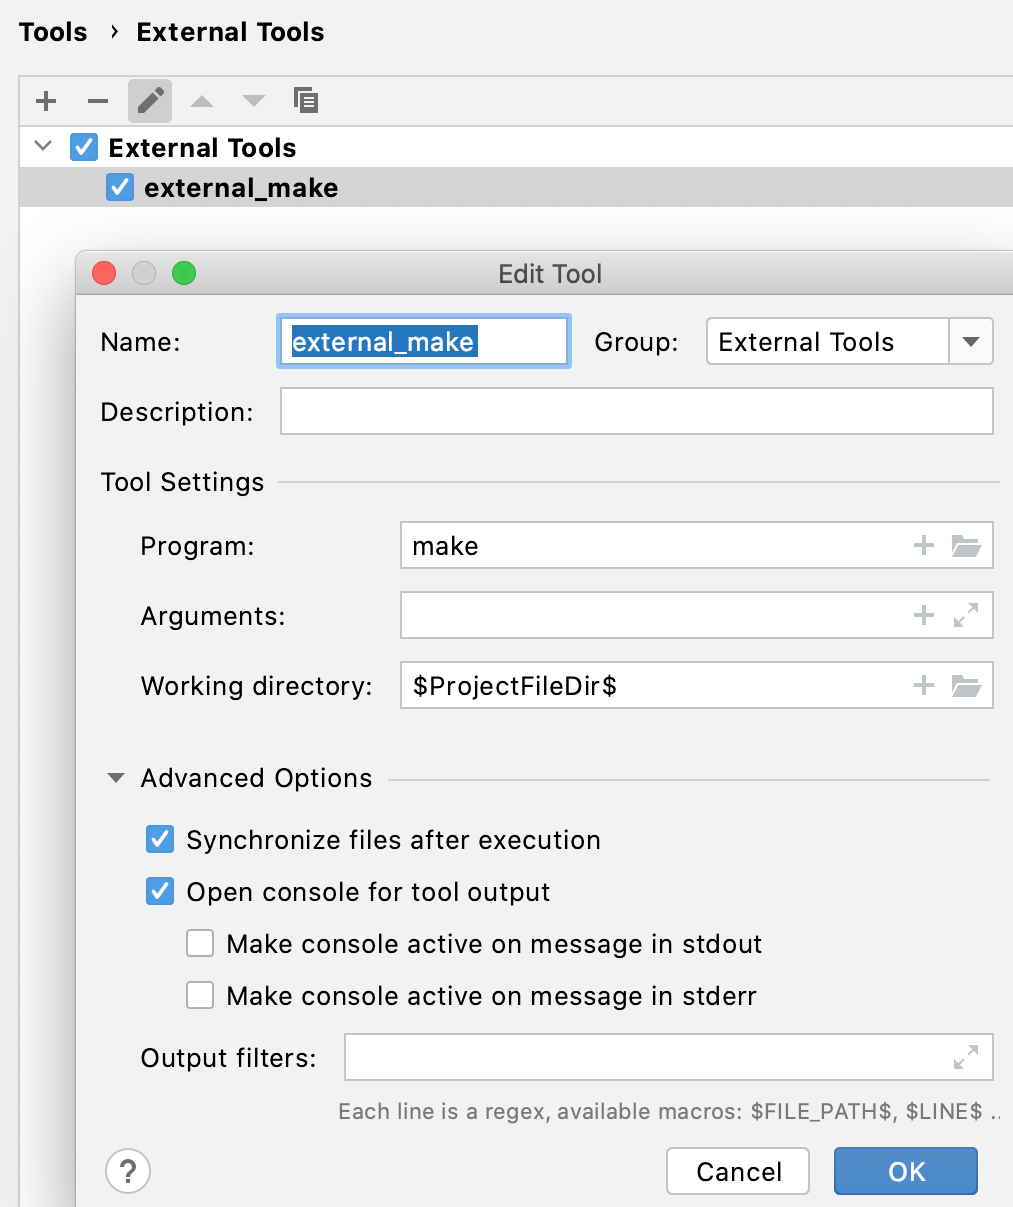
For more information, see External Tools.
tip
Click
to insert a built-in IDE macro with the name or path of the current file, path to the project source, and so on. This example uses
$FilePath$and$FileDir$.Click OK to add the tool and then apply the changes.
To run the added tool, do one of the following:
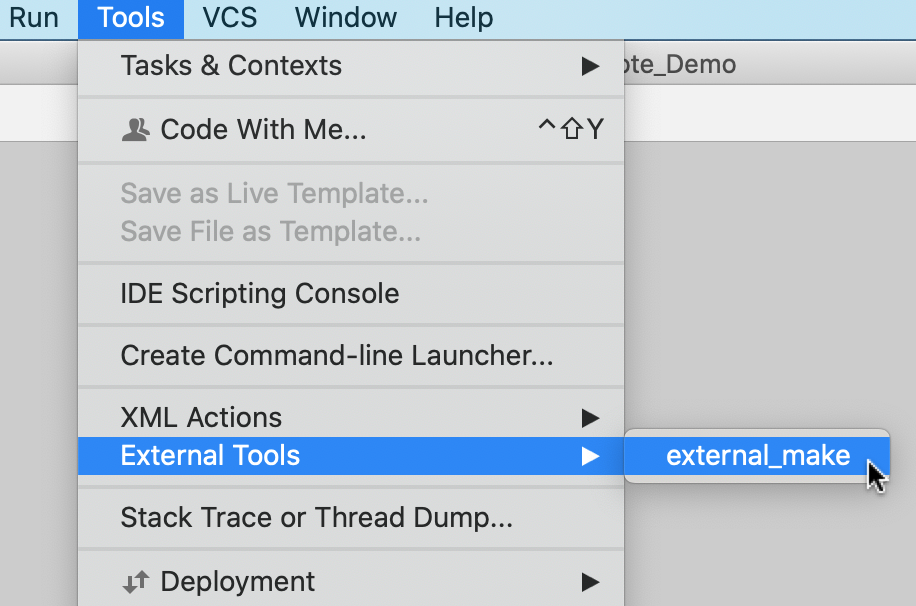
From the main menu, select Tools | External Tools and choose from the list of the available tools.
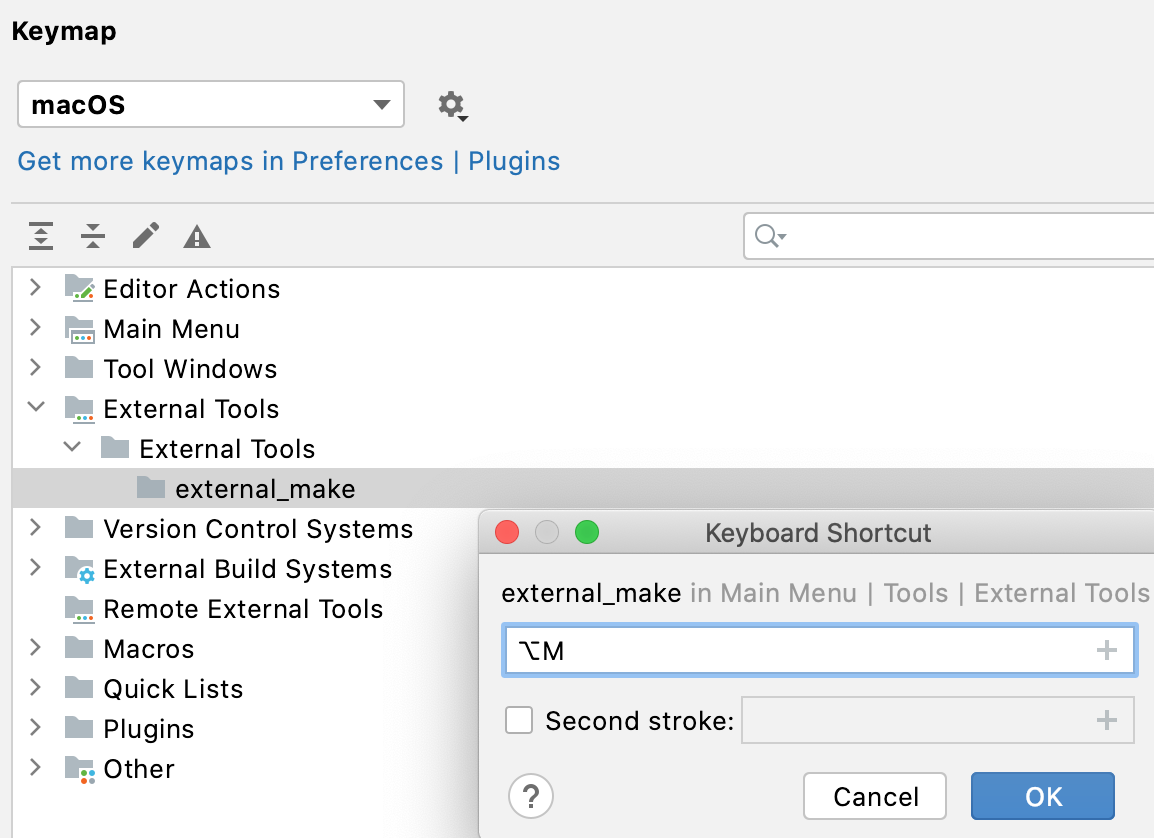
In the Settings dialog (CtrlAlt0S), select Keymap, find the tool under the External Tools node, right-click it and select Add Keyboard Shortcut. Assign a shortcut and use it to run the tool.
Set the tool as a Before launch step of a run/debug configuration: go to the Run | Edit Configurations, select the configuration, click
in the Before launch area, and select Run External Tool.
warning
Make sure the bundled FTP/SFTP/WebDAV Connectivity and HTTP Client plugins are enabled. You can check that in Settings | Plugins, the Installed tab.
Remote SSH external tools are configured similarly to local external tools, but also define the remote server on which they are executed and require credentials for connecting to it via SSH.
This example demonstrates how to add date as a remote SSH external tool that is executed on a remote server over SSH and returns the current date and time on it.
Press CtrlAlt0S to open the IDE settings and select Tools | Remote SSH External Tools.
Click
to open the Create Tool dialog.
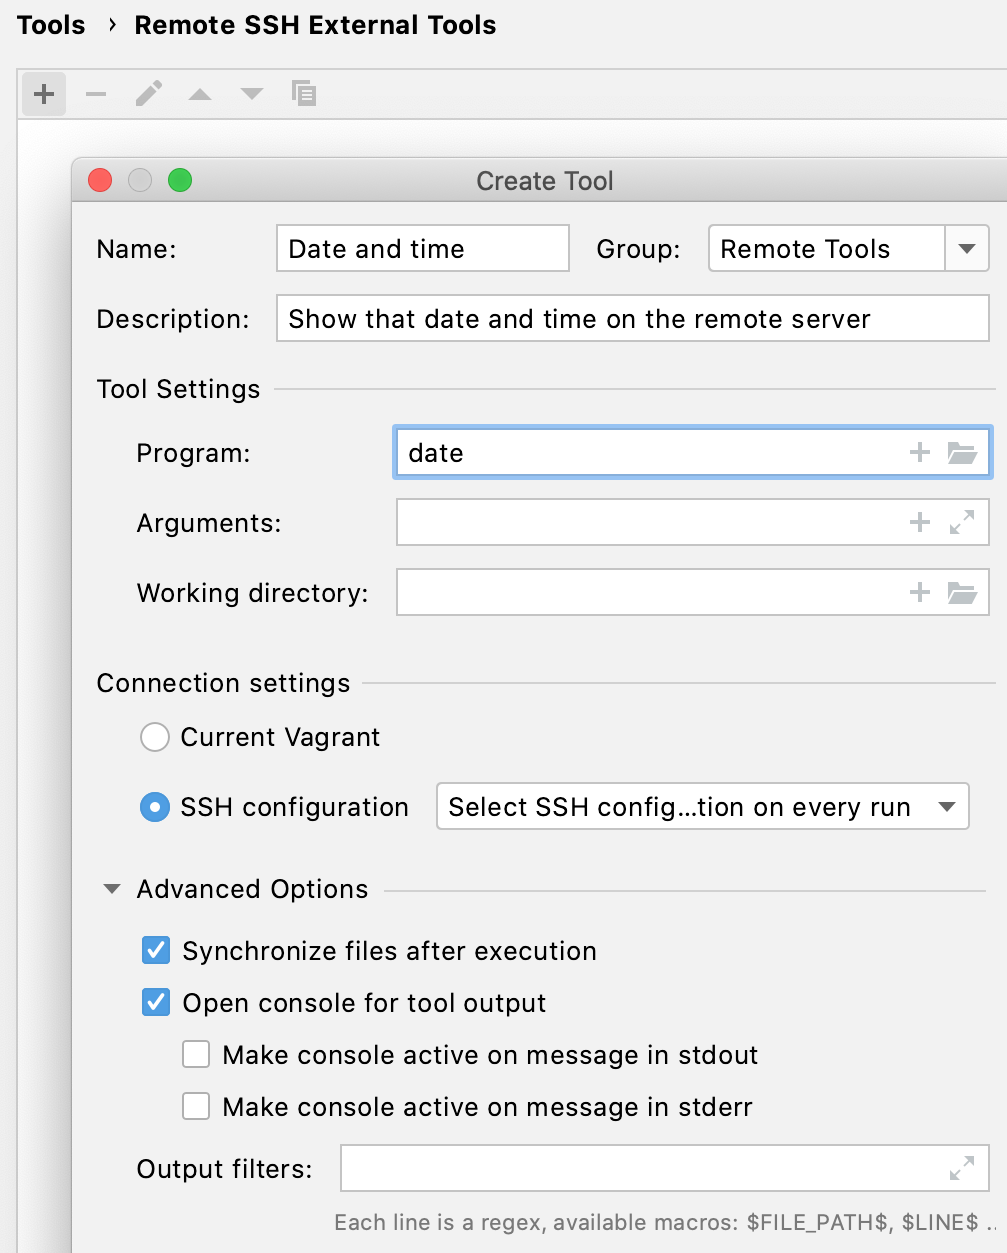
This dialog provides the same set of settings as when you add a local external tool, but also allows you to select a remote connection. If you don't specify the connection settings, CLion will ask you for the host, port, and relevant SSH credentials every time you run the tool on the server. For more information, see Remote SSH External Tools.
tip
You can use built-in IDE macros to specify the name of the current file, paths relative to the project root, and other contextual information for the tool.
Click OK to add the tool and then apply the changes.
Do one of the following:
From the main menu, select Tools | Remote Tools and the name of the added remote external tool.
Create a shortcut to run the tool.
Press CtrlAlt0S to open the IDE settings and select Keymap. Find the action with the name of your configured remote external tool, and assign a shortcut for it.
To export the External Tools settings, do the following:
Call File | Manage IDE Settings | Export Settings from the main menu.
In the dialog that opens, select the Tools checkbox:
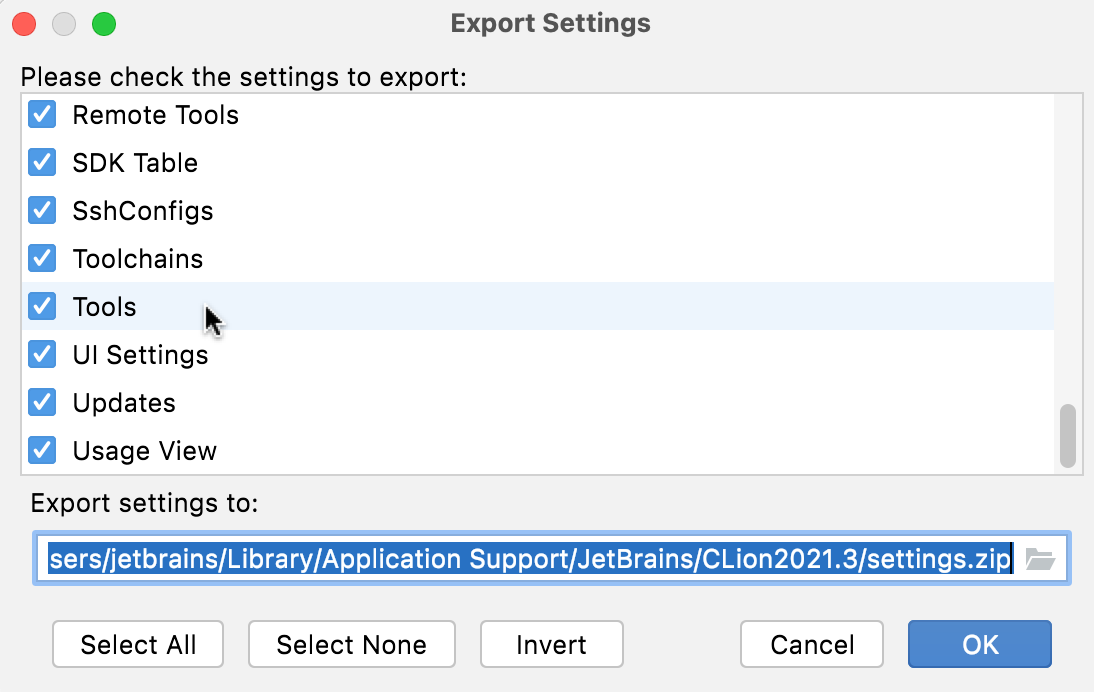
Specify the path to the target ZIP archive and click Ok.
To import the saved settings, use File | Manage IDE Settings | Import Settings.
Uncrustify is a popular code formatter that you can configure as an external tool to use in addition or as an alternative to the CLion's built-in formatter or the integrated ClangFormat.
Optionally, place the configuration file in the project directory (otherwise, you will need to provide the full path).
tip
See other ways of passing configuration files to Uncrustify.
Navigate to Settings | Tools | External Tools and click
.
In the dialog that opens, specify the following:
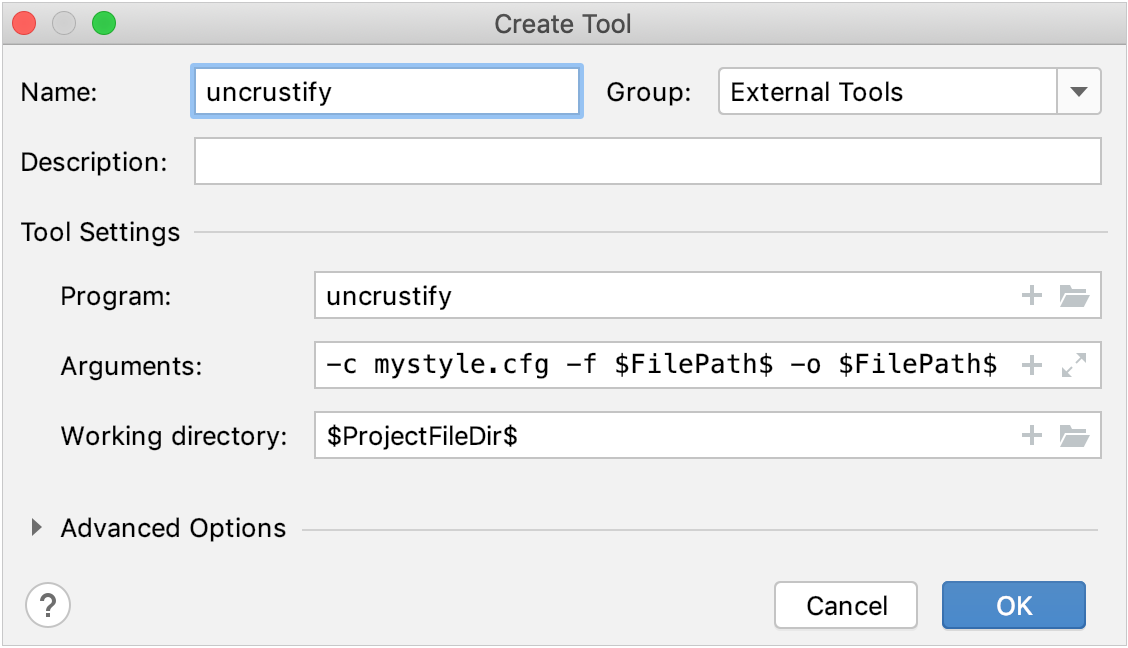
Name:
uncrustify- just for example, let's name the configuration similarly to the executable.Program:
uncrustify- provide the binary name (and include the full path if necessary).Arguments:
-c mystyle.cfg -f $FilePath$ -o $FilePath$Style settings stored in mypath.cfg will be applied to the file currently opened in the editor (click
to open the Macros dialog and insert the
$FileName$macro). The result will be written in-place: the-oflag redirects the Uncrustify output).Working directory:
$FileDir$- this macro corresponds the current file directory.
Click Ok to save the configuration.
Now you can go to Tools | External tools | uncrustify and run the tool with the above settings. The changes of code formatting will be introduced right away.
Go to Settings | Keymap and find uncrustify in the list of External Tools.
Click
and choose Add Keyboard Shortcut.
Press the keys to be used as shortcuts and click Ok.
Now the assigned shortcut is available, and you can see it next to the tool's name in the Tools | External Tools menu:

In the Run | Edit configurations dialog, choose the desired run/debug configuration.
Click
in the Before Launch section, and select Run External Tool:
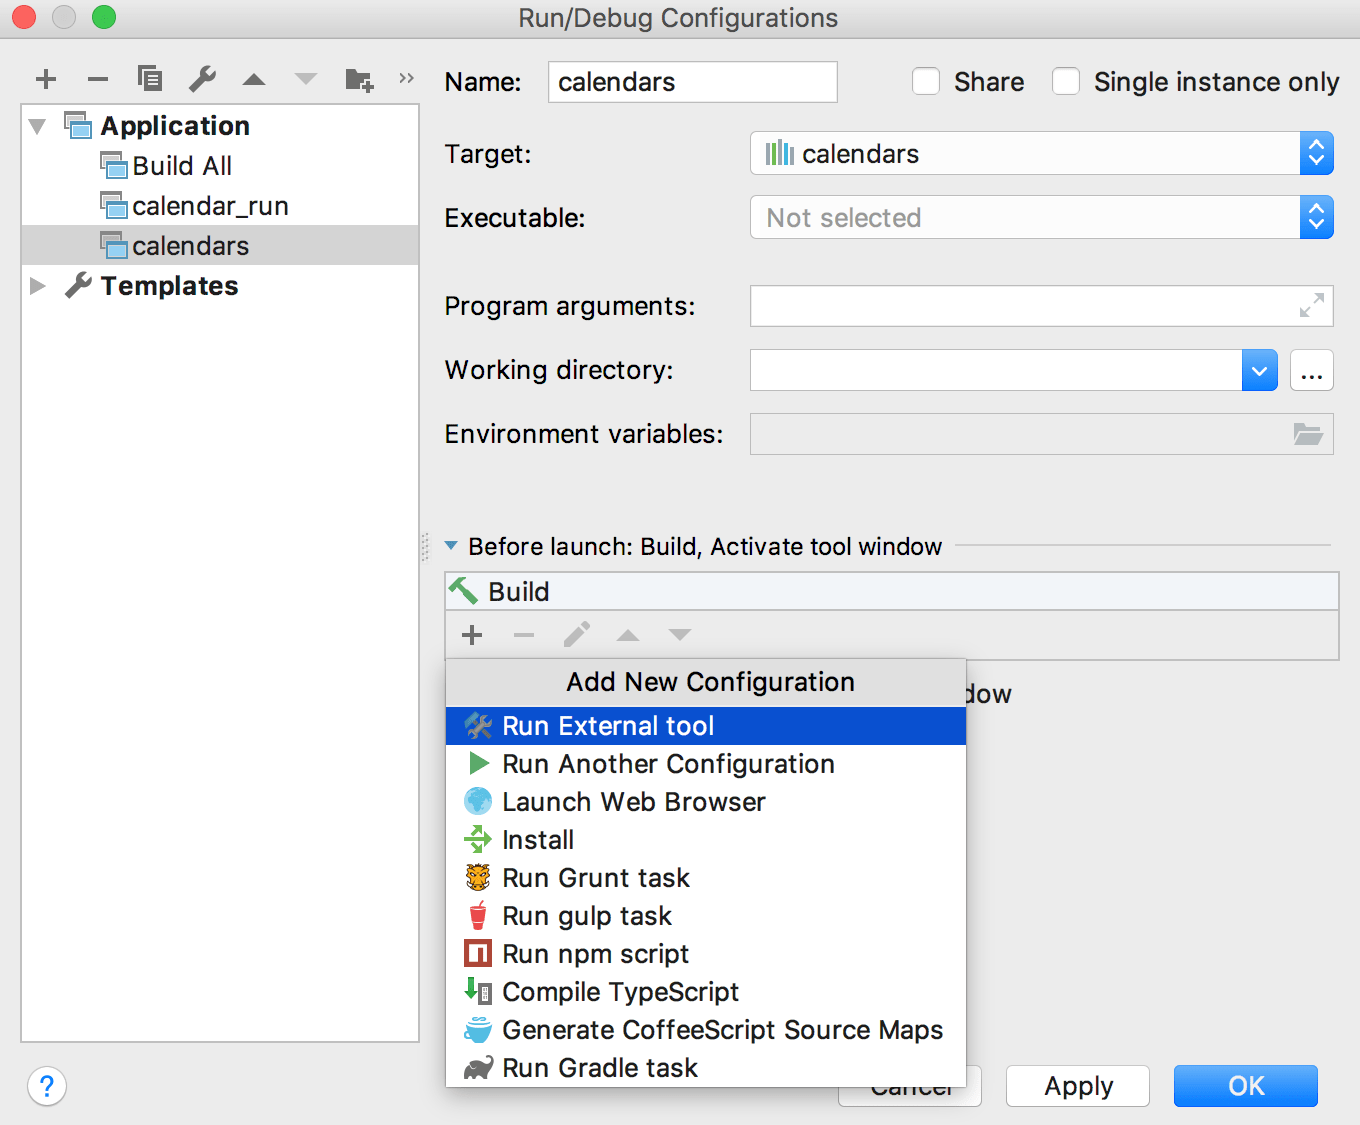
Choose uncrustify from the list of the available external tools.
As a result, the uncrustify external tool will be called every time you choose to run or debug the selected configuration.
You can use a web browser to open any file from your project. By default, it is used to preview the output of an HTML file or run and debug web applications.
To open a file that is intended to be rendered by a web browser (HTML, XML, JSP, and so on), do one of the following:
Press AltF2.
Right-click a file and select Open in Browser.
From the main menu, select View | Open in Browser.
Use the browser popup in the top right part of the editor window. Click the browser button to open the web server file URL, or ShiftClick it to open the local file URL.
The Open in Browser action is not available for other file types. However, you can still execute it using Find Action CtrlShift0A.
note
By default, CLion supports some of the most popular browsers, which are configured automatically, if available.
In the Settings dialog (CtrlAlt0S), select Tools | Web Browsers and Preview.

If a browser was installed using a standard procedure, the alias in the Path field should point to the right location. If it does not, specify the path to the corresponding executable file.
tip
To add a custom browser, click
and specify the browser name, family, and location of the executable file or macOS application.
You can configure custom profiles for Firefox and Chrome family browsers.
In the Settings dialog (CtrlAlt0S), select Tools | Web Browsers and Preview.
Select the browser in the list and click
.
For Firefox, specify the path to the profiles.ini file and choose the profile to use. For more information, see Firefox browser profile.
For Chrome, select Use custom user data directory and specify the location of the user data directory.
You can also specify additional command-line options to use when running Chrome from CLion. For more information, open
chrome://flagsin the Chrome address bar.
Thanks for your feedback!