Node.js with Docker
Required plugins:
Javascript and TypeScript, Node.js, Node.js Remote Interpreter, Docker - The plugins are bundled with CLion and enabled by default.
See Before you start below.
With Docker, you can quickly bootstrap your Node.js application to run, debug, and profile it from CLion. The IDE will take care of the initial configuration by automatically creating a new Dockerfile, building and running an image, syncing your source code, and installing npm dependencies in the container.
You can find some examples at Quick Tour of WebStorm and Docker.
Make sure the JavaScript and TypeScript, JavaScript Debugger, Node.js, Node.js Remote Interpreter, and Docker required plugins are enabled on the Settings | Plugins page, tab Installed. For more information, refer to Managing plugins.
Install the Node.js and Node.js Remote Interpreter plugins on the Settings | Plugins page, tab Marketplace, as described in Installing plugins from JetBrains Marketplace.
Download, install, and configure Docker as described in Docker plugin integration
Node.js interpreters in Docker are configured in the Configure Node.js Remote Interpreter dialog. You can open this dialog from the Node.js page of the Settings dialog or later, when you create or edit a Node.js run/debug configuration for running or debugging your application in Docker.
The recommended way is to configure a remote Node.js interpreter in the Settings dialog. In this case you can set the interpreter and the associated package manager as default for your project. As a result, you can not only run and debug your app with configured Node.js interpreter in Docker but also manage your project dependencies, run tests, and lint your code. See npm, pnpm, and yarn with Docker, Test your application, and ESLint with Docker below.
A remote Node.js interpreter that you configure right in the Node.js run/debug configuration can be used only with this run/debug configuration.
Open the Settings dialog (CtrlAlt0S) and go to Languages & Frameworks | Node.js.
Click
next to the Node interpreter field.

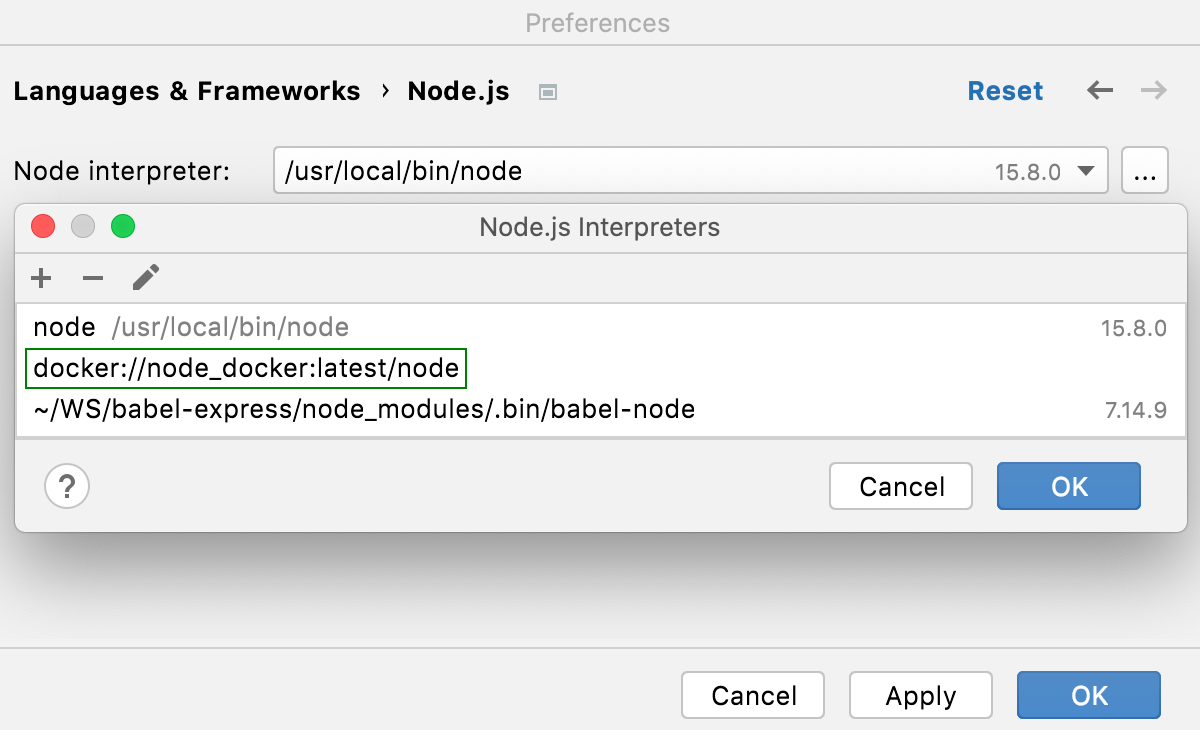
In the Node.js Interpreters dialog with a list of all the currently configured interpreters, click
on the toolbar and select Add Remote from the context menu.

In the Configure Node.js Remote Interpreter dialog that opens, select Docker.
From the Server list, select the Docker configuration to use.

Alternatively, click New next to the field and configure a Docker server as described in Enable Docker support.
From the Image name list, select the image to use.

The Node.js executable is detected automatically and is shown in the Node.js interpreter path field.
Click OK to return to the Node.js Interpreters dialog where the new interpreter is added to the list.

To set the newly configured interpreter as project default, select it in the list and click OK to return to the Node.js dialog.

CLion automatically uses this interpreter every time you select the
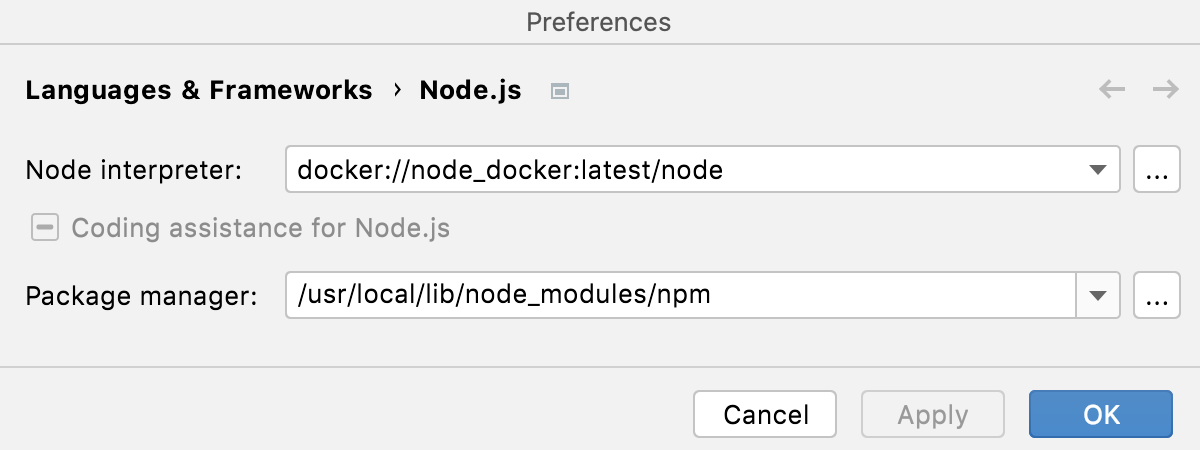
Projectalias from Node Interpreter lists, for example, when creating run/debug configurations.To use the package manager associated with the new interpreter for managing your project dependencies, set this package manager as default in your project. To do that, specify the location of the package manager in the Package manager field. Learn more from Specify the default project Node.js interpreter and package manager.
CLion automatically uses the default project interpreter every time you select the Project alias from Node Interpreter lists, for example, when creating run/debug configurations.
The default project package manager is used automatically for managing dependencies, for example, when you run <package manager> install from a package.json file or install third-party tools, such as ESLint, Prettier, and so on.
Open the Settings dialog (CtrlAlt0S) and go to Languages & Frameworks | Node.js.
From the Node interpreter list, select the configuration to use by default in the current project.
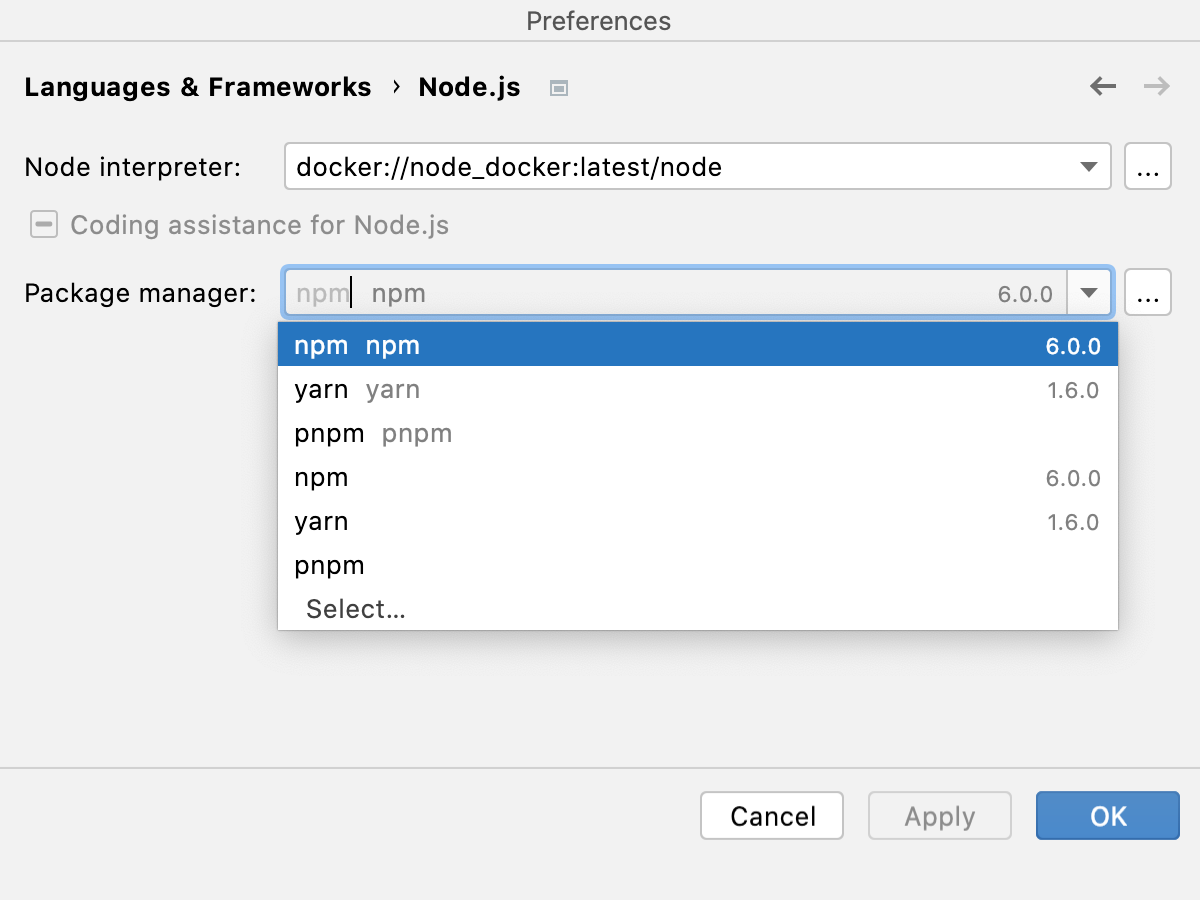
From the Package manager list, select the alias associated with the package manager to use. CLion detects its location automatically.

Alternatively, specify the location of the required package manager manually.
The default location for npm executable is
/usr/local/lib/node_modules/npm.The default location for pnpm depends on the installation method:
/usr for installation through npm./local /lib /node_modules /pnpm /usr for installation through curl (/local /pnpm-global /<version> /node_modules /pnpm curl -f https://get.pnpm.io/<version>.js | node - add --global pnpm).
Learn more from the pnpm official website.
The default location for yarn is
/opt , for example,/yarn-<version>5 /opt ./yarn-v1.22.5

With CLion, you can manage project dependencies and run scripts in a Docker container just in the same way as you do with local projects.
Make sure you have configured a remote Node.js interpreter in Docker.
Specify the default project Node.js interpreter and package manager
Manage your project dependencies.
Open your package.json file and proceed as with local development, for example, select Run '<package manager> install' from the context menu. The dependencies are installed using the default package manager inside the Docker container and the node_modules folder appears in your project.
Alternatively, open the embedded Terminal (AltF12) and install the packages you need manually, for example, run
npm install --save-dev eslint.
Learn more from Install and update packages and Edit package.json.
Go to Run | Edit Configurations. In the Edit Configuration dialog that opens, click
on the toolbar and select Node.js from the context menu. The Run/Debug Configuration: Node.js dialog opens.
In the File field, specify the path to the main file of the application that starts it (for example, bin/www for Express applications).

If necessary, specify some optional settings as described in Running and debugging Node.js applications.
From the Node interpreter list, select the relevant remote Node.js interpreter in a Docker environment.

Alternatively, Click
next to the Node interpreter field and configure a remote Node.js interpreter as described above.

Check the port and volume bindings values in the Docker container settings field.


Create a Node.js run/debug configuration as described above.
From the Select run/debug configuration list on the toolbar, select the newly created Node.js configuration.
Click
to the Select run/debug configuration list.
To make sure the application works as expected, you can run a HTTP request from the CLion built-in HTTP Client.

Create a HTTP Request file.
Write the following request:
GET http://<host IP>:<container port>/For example:
GET http://127.0.0.1:3010/Click
in the gutter and click
next to Run http://<host IP>:<container port>/.

The application output is shown in a separate tab of the Run tool window.


Set the breakpoints in the Node.js code as necessary.
Create a Node.js configuration as described above, select it from the Select run/debug configuration list on the toolbar, and click
next to the list.
Proceed as when starting the debugger together with a Node.js application locally.
With CLion, you can run Mocha and Jest tests inside a Docker container just in the same way as you do it locally. For more information, refer to Mocha and Jest.
Make sure a relevant remote Node.js interpreter in Docker is configured and selected as default for your project. Also make sure the package manager associated with this remote interpreter is set as project default. For more information, refer to Configure a Node.js interpreter in Docker and npm, pnpm, and yarn with Docker.
Open your package.json and make sure the required test framework is listed in the
devDependenciessection:{ "name": "node-express", "version": "0.0.0", "private": true, "dependencies": { "cookie-parser": "~1.4.4", "debug": "~2.6.9", "express": "~4.16.1", "http-errors": "~1.6.3", "morgan": "~1.9.1", "pug": "^3.0.2" }, "devDependencies": { "chai": "^4.3.4", "concurrently": "^6.3.0", "eslint": "^8.1.0", "http-server": "^14.0.0", "jest": "^27.3.1", "mocha": "^9.1.3", "nyc": "^15.1.0" } }Right-click anywhere in the editor and select Run '<package manager> install' from the context menu.
Create tests according to the instructions from the Mocha official website or Jest official website.
Run and debug single tests right from the editor or create a run/debug configuration to launch some or all of your tests as described in Running Mocha tests, Debugging Mocha tests, Running Jest tests, and Debugging Jest tests.
With CLion, you can run ESLint against your code inside a Docker container just in the same way as you do it locally. For more information, refer to JavaScript linters and ESLint.
Make sure a relevant remote Node.js interpreter in Docker is configured and selected as default for your project. Also make sure the package manager associated with this remote interpreter is set as project default. For more information, refer to Configure a Node.js interpreter in Docker and npm, pnpm, and yarn with Docker.
Open your package.json and make sure ESLint is listed in the
devDependenciessection:{ "name": "node-express", "version": "0.0.0", "private": true, "dependencies": { "cookie-parser": "~1.4.4", "debug": "~2.6.9", "express": "~4.16.1", "http-errors": "~1.6.3", "morgan": "~1.9.1", "pug": "^3.0.2" }, "devDependencies": { "eslint": "^8.1.0" } }Right-click anywhere in the editor and select Run '<package manager> install' from the context menu.
After that, ESLint works in the same way as when you work with your code locally. View descriptions of detected discrepancies right in the editor or in the Problems tool window and apply suggested quick-fixes. For more information, refer to JavaScript linters and ESLint.
