Connect GitLab Repository
Select Namespaces in the header navigation, then in the sidebar menu, select the namespace you need.
In the sidebar namespace menu, select Repositories.
Click New connection.
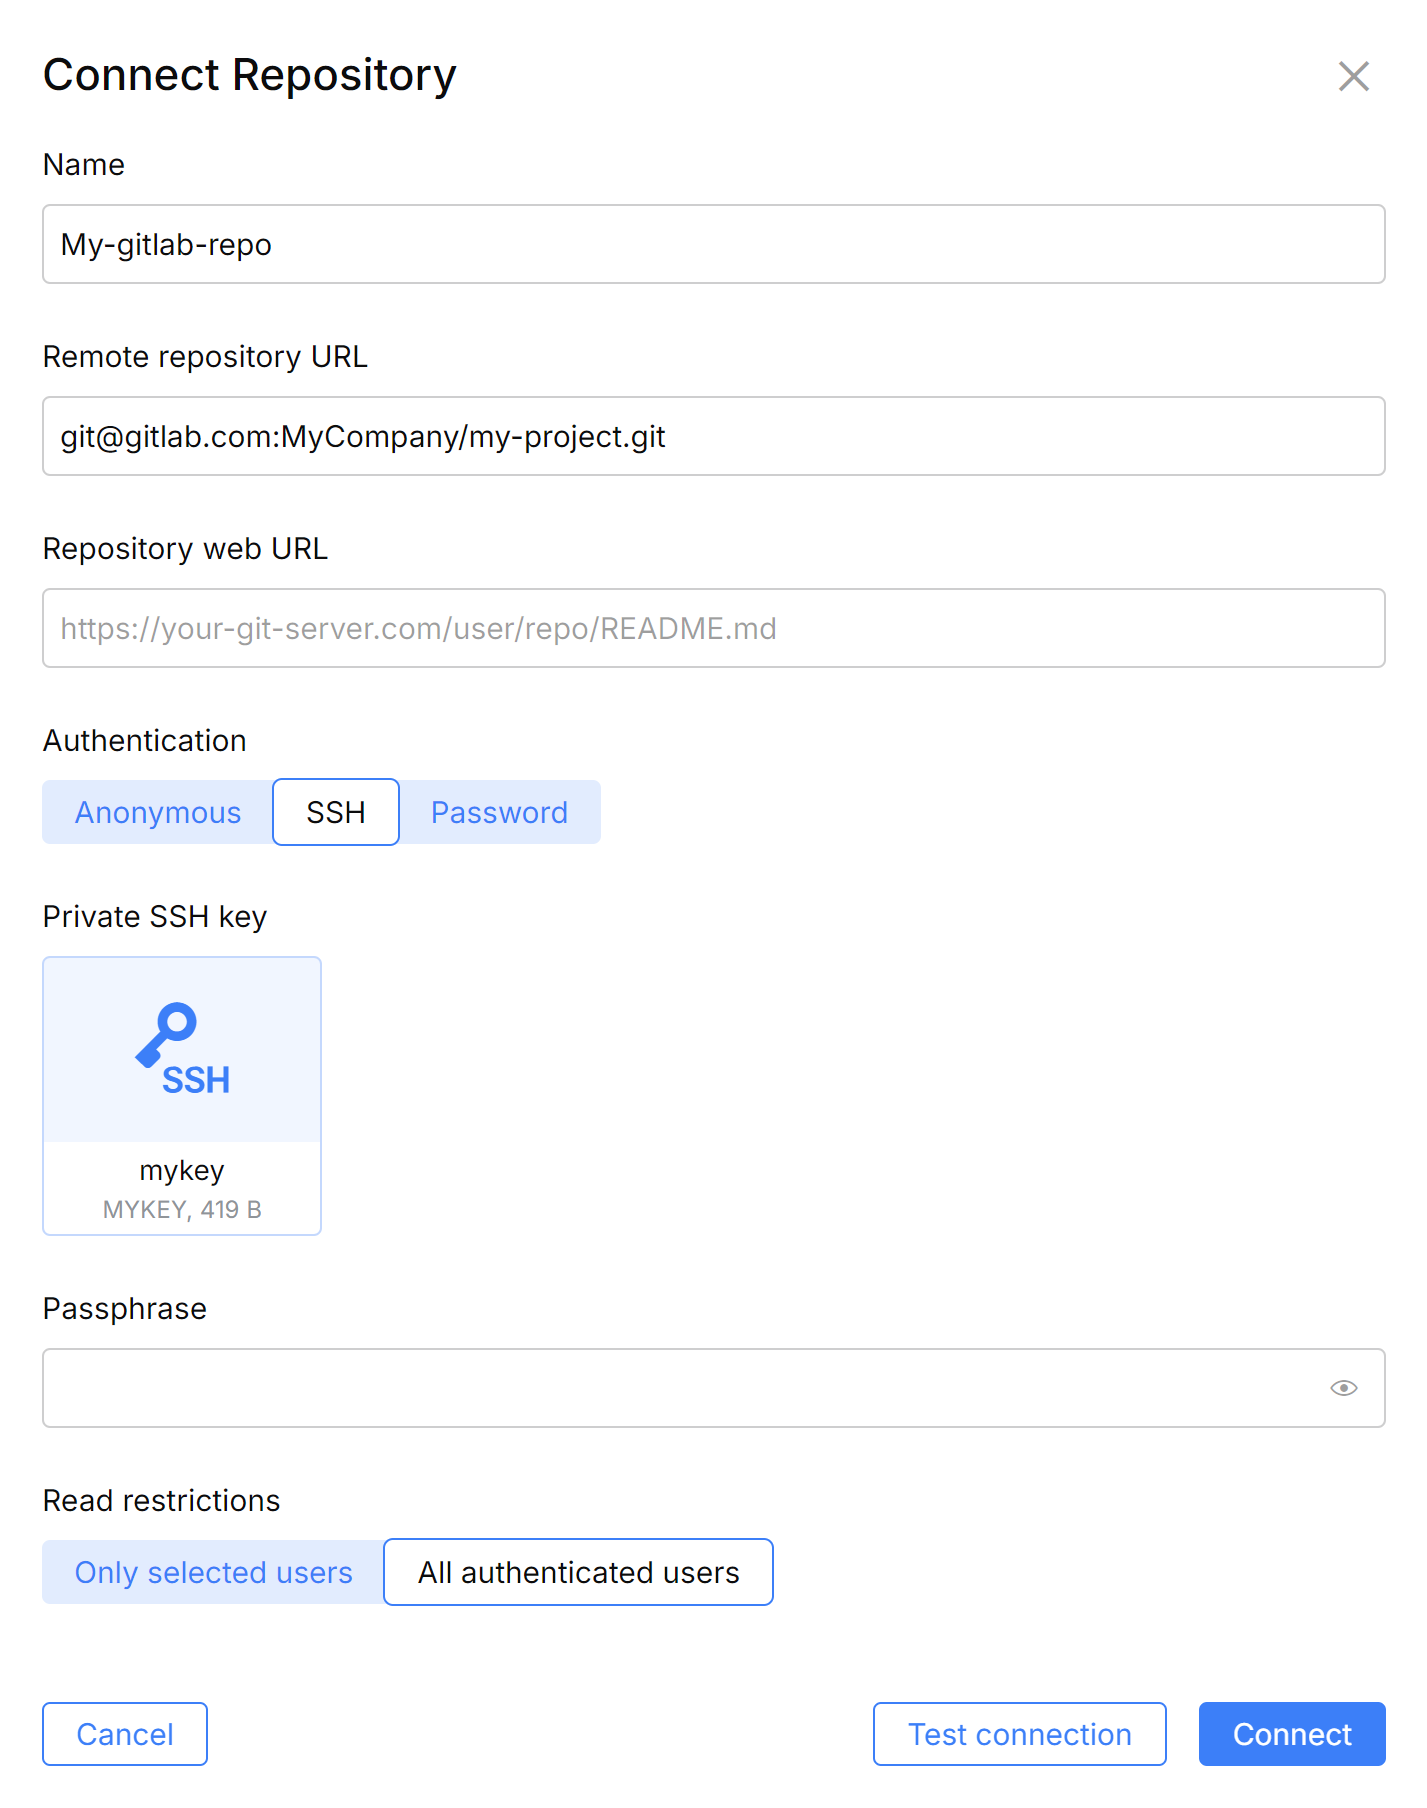
Provide a repository Name and other settings:
Remote repository URL – the SSH or HTTPS URL of the repository, e.g.,
git@gitlab.com:MyCompany/my-project.gitorhttps://gitlab.com/MyCompany/my-project.gitRepository web URL – the URL of the remote repository's web interface. CodeCanvas will show this link in the repository list. For example, this can be a link to the project's README file on GitLab.
Access control – specify who is allowed to view repository contents: Only selected users or All users.
In the case of Only selected users, you should synchronize this list with your Git hosting service. Learn more
If the repository doesn't require authentication, leave Anonymous in Authentication and click Connect. Otherwise, choose either SSH (for SSH authentication) or Password (for HTTPS authentication).
For SSH authentication, you need to provide an SSH key pair. CodeCanvas will use the private key only to clone the repository into dev environments. Users will be required to specify their own SSH key to pull from and push to the repository.
You can create a new SSH key pair manually or make CodeCanvas generate it for you.
In the Authentication field, select SSH and ensure Auto-generate SSH keys is turned on.
Click Connect and copy the generated public key.
On your GitLab server, go to the project | Settings | Repository | Deploy keys and click Add deploy key. Paste the public key into the Key field and click Add key.

In CodeCanvas, you can now Test connection or Close the dialog. The repository will appear in the Repositories list.
First, generate a new SSH key pair for CodeCanvas. On your local machine, run:
ssh-keygen -t ed25519During key pair generation, you can additionally protect the private key with a passphrase. Finally, your current directory will contain a pair of files, e.g.,
mykey(private key) andmykey.pub(public key).On your GitLab server, go to the project | Settings | Repository | Deploy keys and click Add deploy key. Paste the contents of the public key file (
mykey.pub) into the Key field and click Add key.
In CodeCanvas, in the Authentication field, select SSH and turn off Auto-generate SSH keys.
Provide the private key file (
mykey) and the passphrase (if you've specified it during key pair generation).
You can first Test connection, and if everything is OK, click Connect. After this, the repository will appear in the Repositories list.
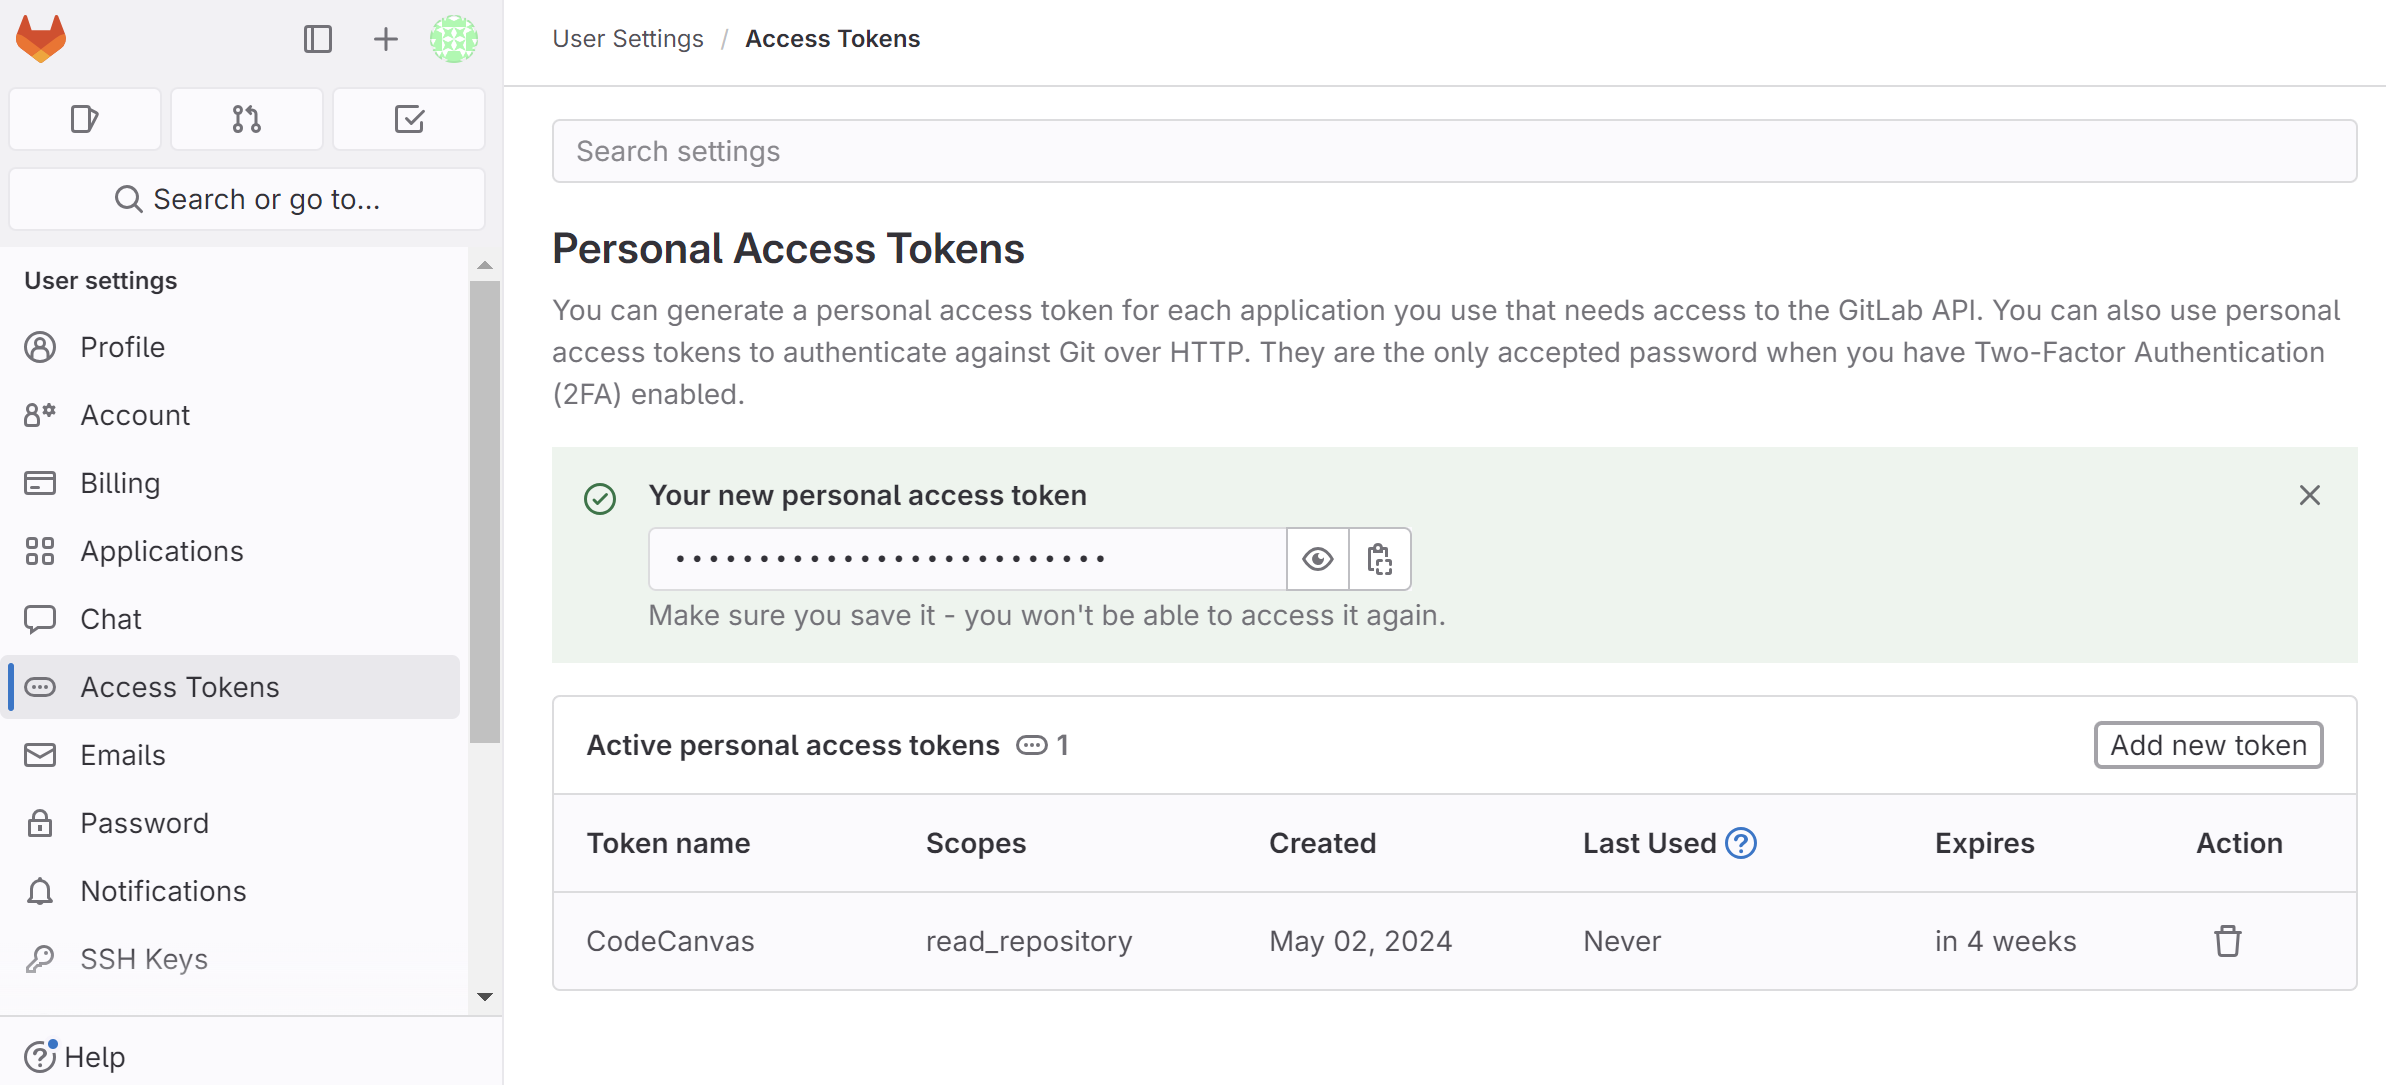
For GitLab, you can generate a personal access token and use it as the password. CodeCanvas will use this token only to clone the repository into dev environments. Users will be required to specify their own GitLab credentials to pull from and push to the repository.
In GitLab, go to your profile | Preferences | Access Tokens and under Personal access tokens, click Add new token.
Select the read_repository scope and click Create personal access token.

Copy the token and specify it in CodeCanvas as a repository Password and your GitLab username as Username.
You can first Test connection, and if everything is OK, click Connect. After this, the repository will appear in the Repositories list.
After you connect the repository, you can use it in dev environment templates. When a user creates a dev environment based on such a template, CodeCanvas will clone the repository to the dev environment.