Install Datalore Enterprise using Docker or Kubernetes (Helm)
The instructions in this article describe both installation methods: Docker and Kubernetes. We recommend that you choose the Docker-based installation if your primary goal is to get familiar with the product and its key features. This is the easier and quicker procedure of the two.
- Prerequisites
Before installation, make sure that you have the following:
Docker
Docker Compose V2
To check the requirements, execute
docker compose version.Expected result:
docker compose version Docker Compose version v2.2.3K8s cluster (tested with v1.22 version of Kubernetes)
Kubectl on your machine pointed to this cluster
Helm (tested with the v3.2.4 version)
- Hardware requirements
Datalore server machine: 4GB of RAM (the number of CPU is irrelevant if the load is not high)
For every additional computational machine (pod or container) per notebook: minimum 2GB of RAM required, 4GB of RAM recommended
Basic Datalore installation
Follow the instruction to install Datalore using the selected method.
Install Datalore
Depending on the installation type, do one of the following:
(For Docker) Clone or download the content of this repository.
(For Helm) Add the Datalore helm repository:
$ helm repo add datalore https://jetbrains.github.io/datalore-configs/charts
Do the following to set up your database:
Open docker-compose.yaml in the [repository_folder]/docker-compose folder in any text editor and replace the values of
DB_PASSWORDandPOSTGRES_PASSWORDproperties with any random string (both properties must have the same value). This string will be used as your database password. Make sure you keep it secret.Create a datalore.values.yaml file and add there your volume configuration and
dbRootPassword(to be used as your database password, random string advised).For example:
volumes: - name: storage emptyDir: { } - name: postgresql-data emptyDir: { } dbRootPassword: "super_secret_password"Run the following command and wait for Datalore to start up:
docker compose uphelm install -f datalore.values.yaml <release_name> datalore/datalore --version 0.2.4<release_name>can be anything, for example,datalore.Go to http://127.0.0.1:8080/ and create the first user. The first created user will automatically receive admin rights.
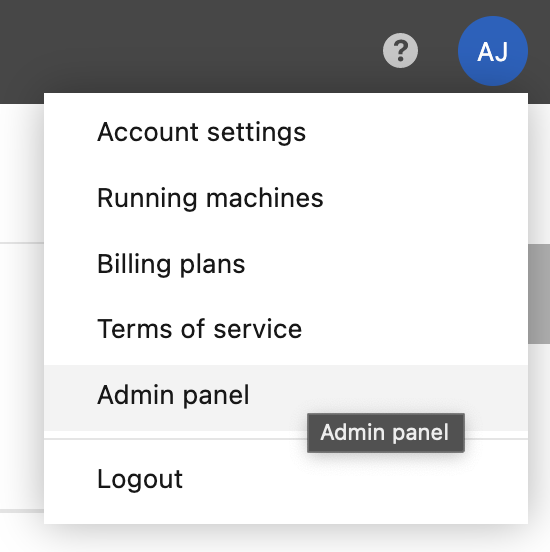
Click your avatar in the upper-right corner, select Admin panel and provide your license key.

Email, plan, and gift code options
This chapter explains how to configure email, plan, and gift code options for both types of installation.
- Enable emails
By default, emails are not enabled and email verification for users is disabled. To enable the email service, specify the following parameters in the docker-compose file (for Docker) or values under the
dataloreEnvkey in the datalore.values.yaml file (for Helm):MAIL_SENDER_EMAIL: sender's emailMAIL_SENDER_NAME: sender's nameMAIL_SENDER_USERNAME: username of SMTP userMAIL_SENDER_PASSWORDpassword of SMTP userMAIL_SMTP_SERVER: SMTP server hostMAIL_SMTP_PORT: SMTP server port
If you want to disable email verification while having enabled emails, you can explicitly set the
FORCE_EMAIL_VERIFICATIONproperty tofalse.Example (Docker)
services: datalore: ... environment: ... MAIL_SMTP_SERVER: "email-smtp.your_domain.com" MAIL_SMTP_PORT: "465" MAIL_SENDER_USERNAME: "email_user" MAIL_SENDER_PASSWORD: "pa$$w0rd" MAIL_SENDER_EMAIL: "no_reply.datalore@you_domain.com" MAIL_SENDER_NAME: "Datalore Team" FORCE_EMAIL_VERIFICATION: "false"- Enable plans
Use the plans feature to limit resources that are available for users. To enable the feature, do the following:
For Docker, mount the configuration file into the Datalore container and put the path to it into the
DATALORE_PLANS_CONFIGURATIONvariable.services: datalore: ... environment: ... DATALORE_PLANS_CONFIGURATION: "file:/opt/datalore/configs/plans.yaml"For Helm, specify plan parameters under the
plansConfigkey in values.yaml.
Parameters for plan configurations are the same for both installation types. Each plan has a unique planId. Make sure that one of them is marked as default. When adding or configuring a plan, specify the following parameters:
Option
Value example
Description
diskUsageLimit
10 Gb
Disk space in persistence storage allowed per user
numRunningInstancesLimit
10
Number of parallel running agents allowed per user
parallelInstancesQuota
PT100500H
Deprecated
instanceDurationQuotaMap
basic-agent: "PT100H"
large-agent: "PT10H"
Computation time per month available for each agent type; more than one agent type allowed, details in the tip below
Example (Docker):
- planId: "Student" default: true name: "Student plan" instanceDurationQuotaMap: docker-base: "PT100H" docker-swarm: "PT100H" teamcity-basic: "PT100500H" diskUsageLimit: "5.00 GB" numRunningInstancesLimit: 3 parallelInstancesQuota: "PT120H" - planId: "Teacher" name: "Teacher plan" instanceDurationQuotaMap: docker-base: "PT100H" docker-swarm: "PT50H" diskUsageLimit: "25.00 GB" numRunningInstancesLimit: 10- Enable gift codes
Turn on the option by setting
GIFT_CODES_ENABLEDtotruein the docker-compose file (for Docker) or values under thedataloreEnvkey in the datalore (for Helm).Example (Docker):
services: datalore: ... environment: ... GIFT_CODES_ENABLED: "true"Refer to Admin user actions to find information on how to use gift codes.