CPU and GPU machine options
With Datalore, you have access to cloud CPUs and GPUs so that you can explore gigabytes of data and train deep learning models. Below, you can find a brief overview of the available CPU and GPU resources for each Datalore plan.
Datalore Community | Datalore Professional | Datalore Enterprise | |
|---|---|---|---|
Monthly quota | 120 hours of CPU S | 750 hours of CPU S, 12 Datalore credits | Unlimited CPU and GPU hours, managed on the customer's side |
Available options | CPU S | 11 types of CPUs and GPUs, listed below | Any machine of your choice |
Users get a monthly total of 120 hours of a CPU S machine (2 vCPUs, 4 GB RAM). This is the only option available under the Community plan. To get access to the other machine options, upgrade to Professional.
Because different Datalore users have different needs, we offer a range of CPU and GPU machines to ensure a flexible choice of computation options to all Professional plan subscribers. Below is the full list of machines you can use for computations in Datalore.
Machine name | Type | RAM | nCPUs | nGPUs | Price per hour in Datalore Credits |
|---|---|---|---|---|---|
CPU S | CPU | 4 | 2 | - | 0.0226 |
CPU L | CPU | 16 | 2 | - | 0.0537 |
CPU XL | CPU | 32 | 16 | - | 0.3425 |
CPU XXL | CPU | 96 | 48 | - | 1.0287 |
GPU S | GPU | 16 | 4 | 1 | 0.2125 |
GPU M | GPU | 32 | 8 | 1 | 0.3028 |
GPU L | GPU | 64 | 16 | 1 | 0.4843 |
GPU XL | GPU | 128 | 32 | 1 | 0.8745 |
GPU XXL | GPU | 256 | 64 | 1 | 1.7482 |
Multi-GPU S | Multi-GPU | 192 | 48 | 4 | 1.5735 |
Multi-GPU l | Multi-GPU | 384 | 96 | 8 | 3.7015 |
By default, your notebook computations are run on the cheapest CPU S machine. As part of the Datalore Professional plan package, you get 750 hours of CPU S computations, a standalone category on your Datalore credit balance. After you run out of your CPU S time, you can start spending your Datalore credits to continue using CPU S.
Your other option is changing to a more powerful machine and use it within the limit of the hours available on your balance. Datalore calculates how long you can use any of the available machines according to your Datalore credit balance. Professional plan users get 12 Datalore credits monthly.
Datalore credits is the special currency unit in which you pay for the use of our powerful CPU and GPU machines. There are 3 types of Datalore credits:
Free Datalore credits: Pro plan users get 12 Free Datalore credits every month, the unused part of which expires at the end of the month.
Paid Datalore credits: Can be purchased via JetStore.
tip
Adding Datalore credits to your balance will be implemented in the next feature iteration.
Gift credits: Issued to a user as gift codes.
You can track and manage your balance in Account settings | Billing or Tools | Computation.
note
Important
The remaining balance is updated approximately every five minutes.
All the machines are only available with a prepaid Datalore credit balance. No overdraft is available.
For each new notebook computation, Datalore launches a new AWS EC2 machine. By default, this is a spot machine, a cheaper option, which ensures lower expenses on your side. This machine type costs lower because such machines are not always available and theoretically can be interrupted at any time of computation.
However, in the hours of higher load on the AWS side, spot machines may not be available, which prompts Datalore to launch on-demand machines. We will cover the extra costs (normally 3x) for launching on-demand machines in such cases.
In this chapter, you will learn how to change machine types, manage your credit balance, and download balance reports.
Access to all available machine options is provided to Professional plan users only. If you're on the Community plan, here are two ways to upgrade:
Open the Plans tab:
From Account settingsFrom Machines menuClick the avatar icon in the upper-right corner of the Home page or editor.
Select Billing plans from the list.
Open the Machine menu:
Go to Main menu | Run | Change machine and select More details from the list.
On the Computation tab, expand the list under Machine and select More details.
Click Upgrade plan in the upper-right corner of the menu.
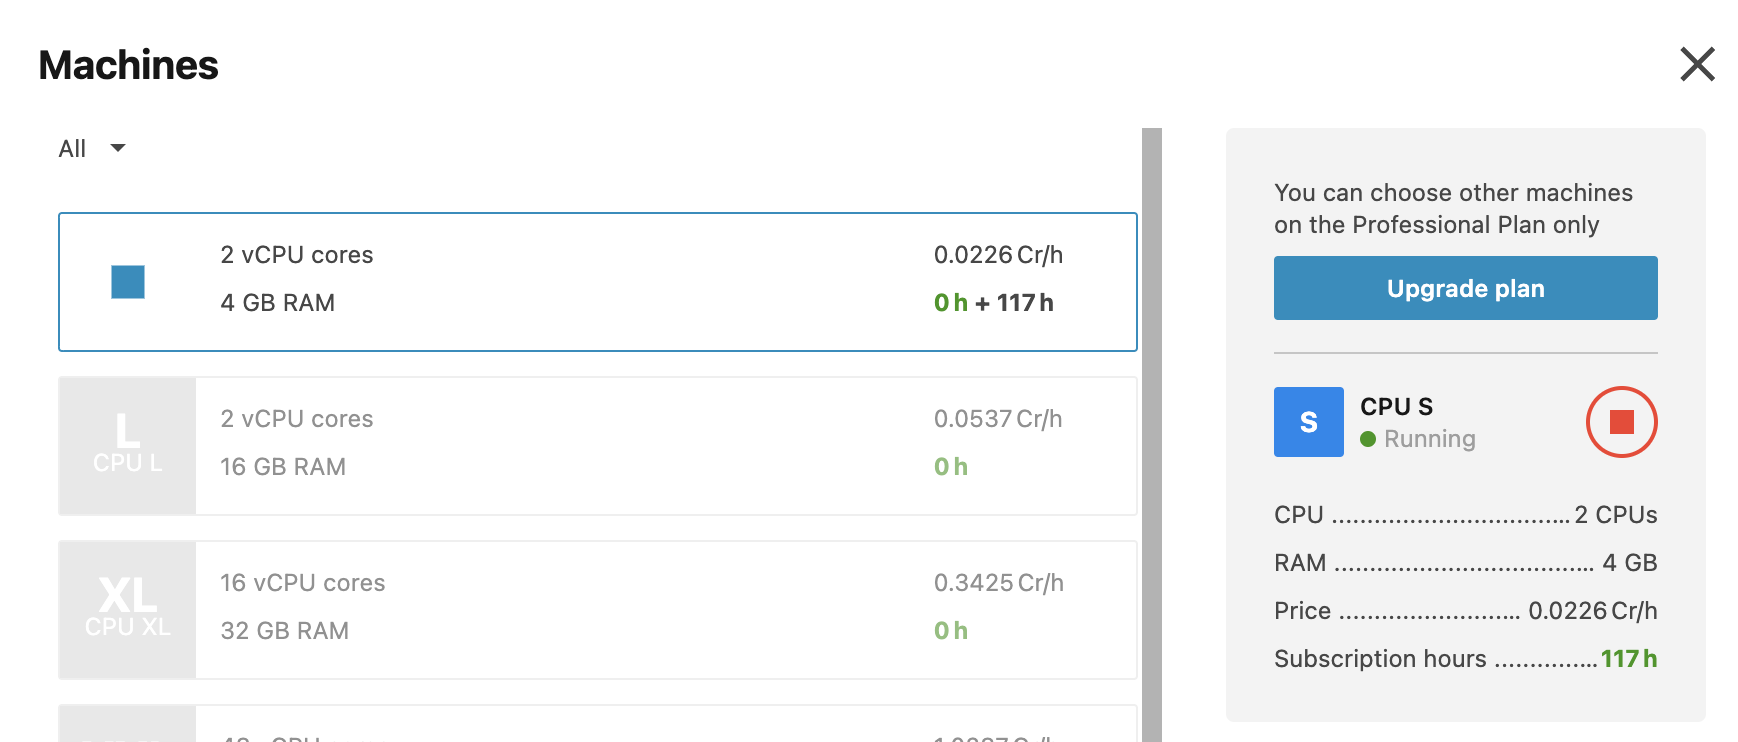
Now, you're on the Plans tab of the Account settings menu.
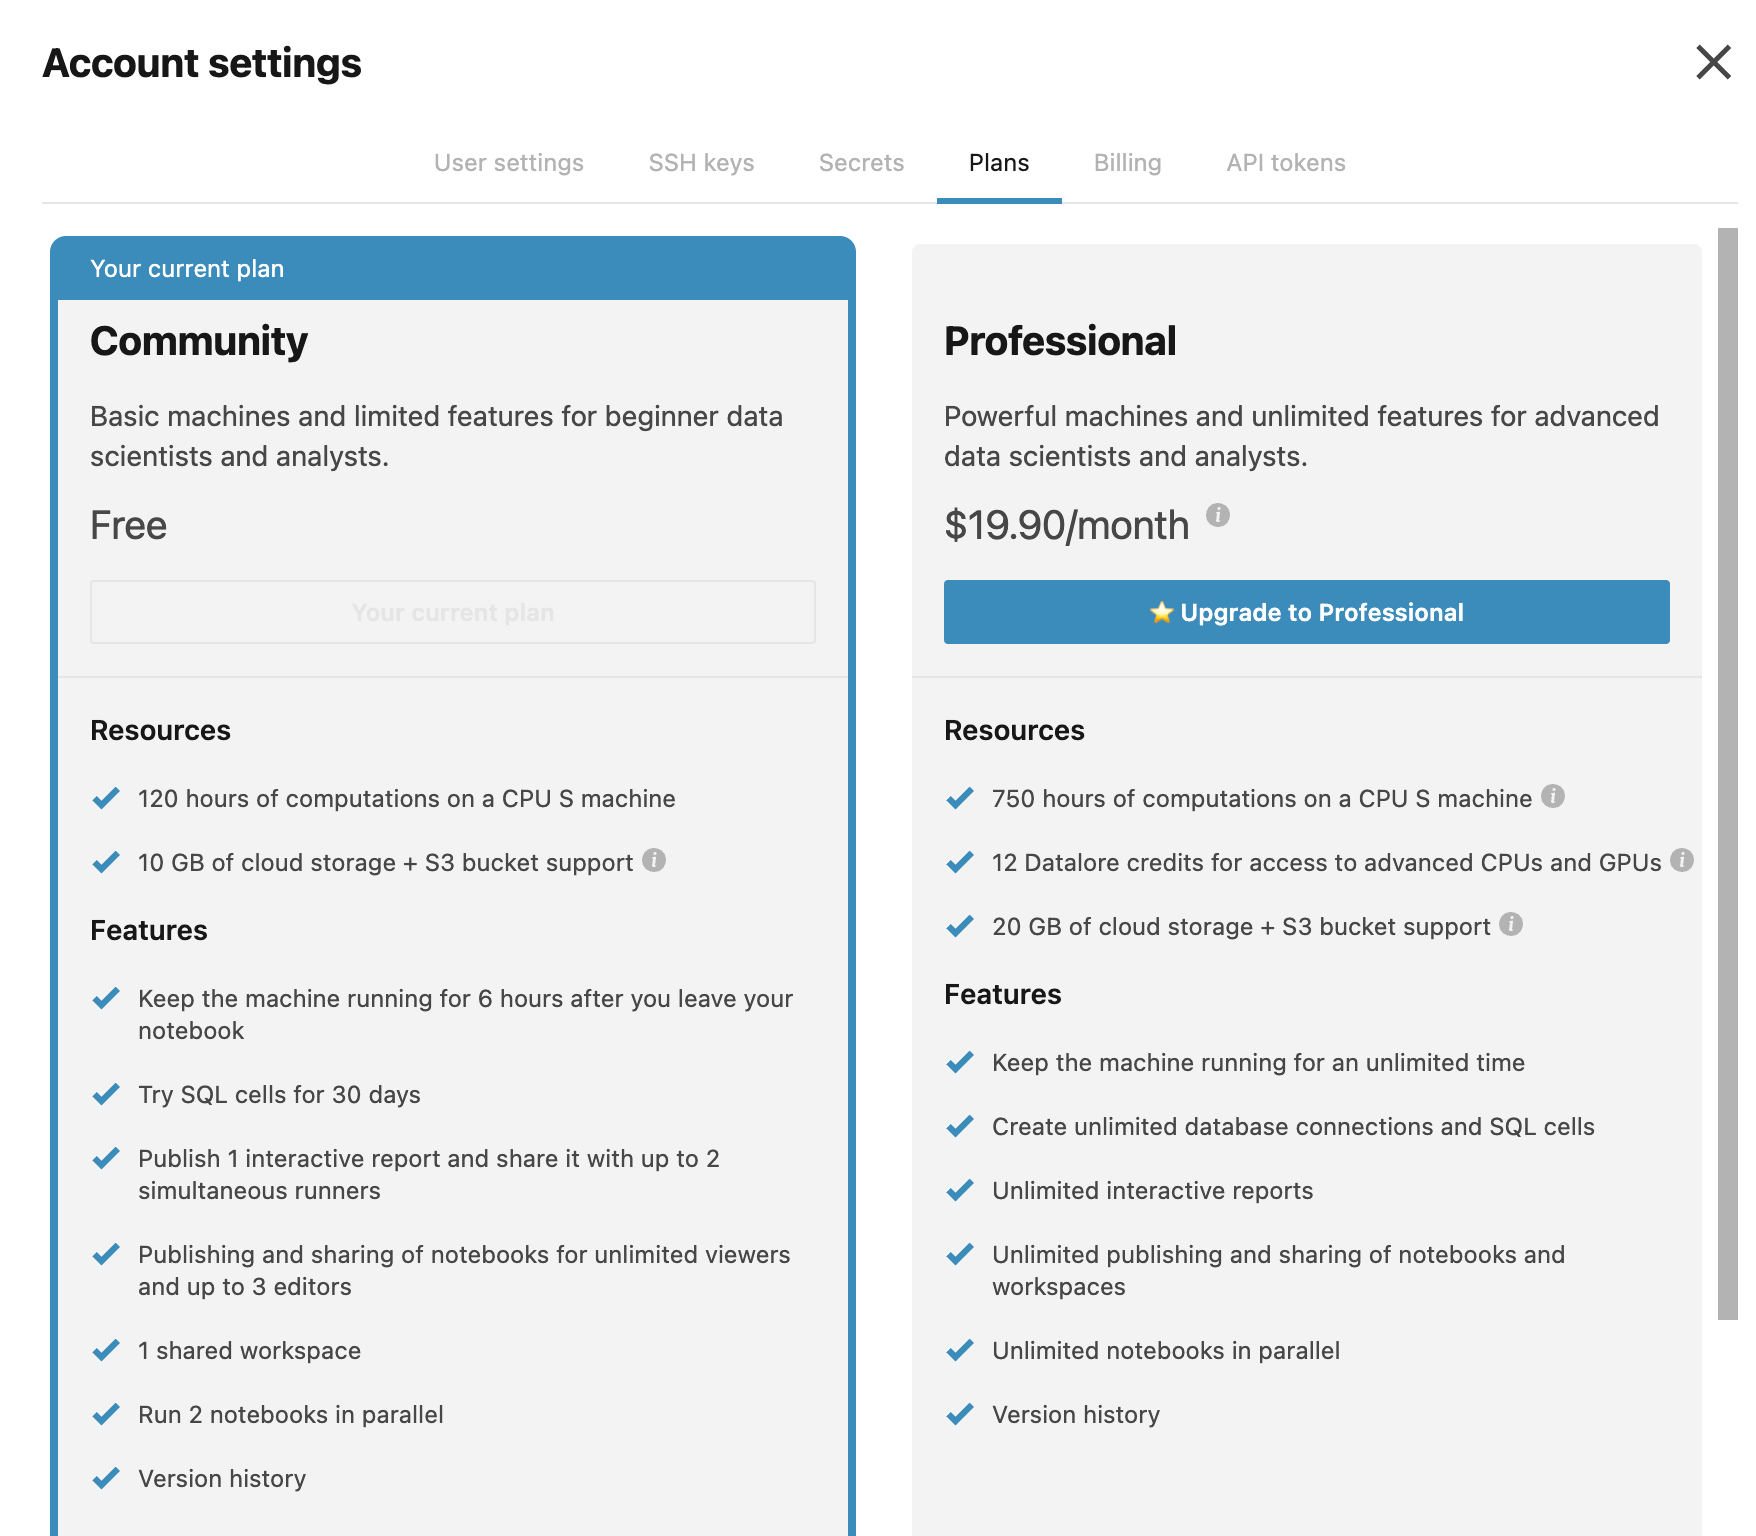
Click Upgrade to Professional. This will forward you to the JetBrains eStore.
Fill in the fields to provide your contact information and payment details and complete the order placement.
You can see the type of the currently used machine either in the bottom sidebar of the editor or on the Computation tab.
To change the machine, use one of the two interfaces.
Computation tab:
Click Computation on the left-hand sidebar of the editor.
On the Computation tab, expand the list under Machine.
Select the machine you want to use from the list.
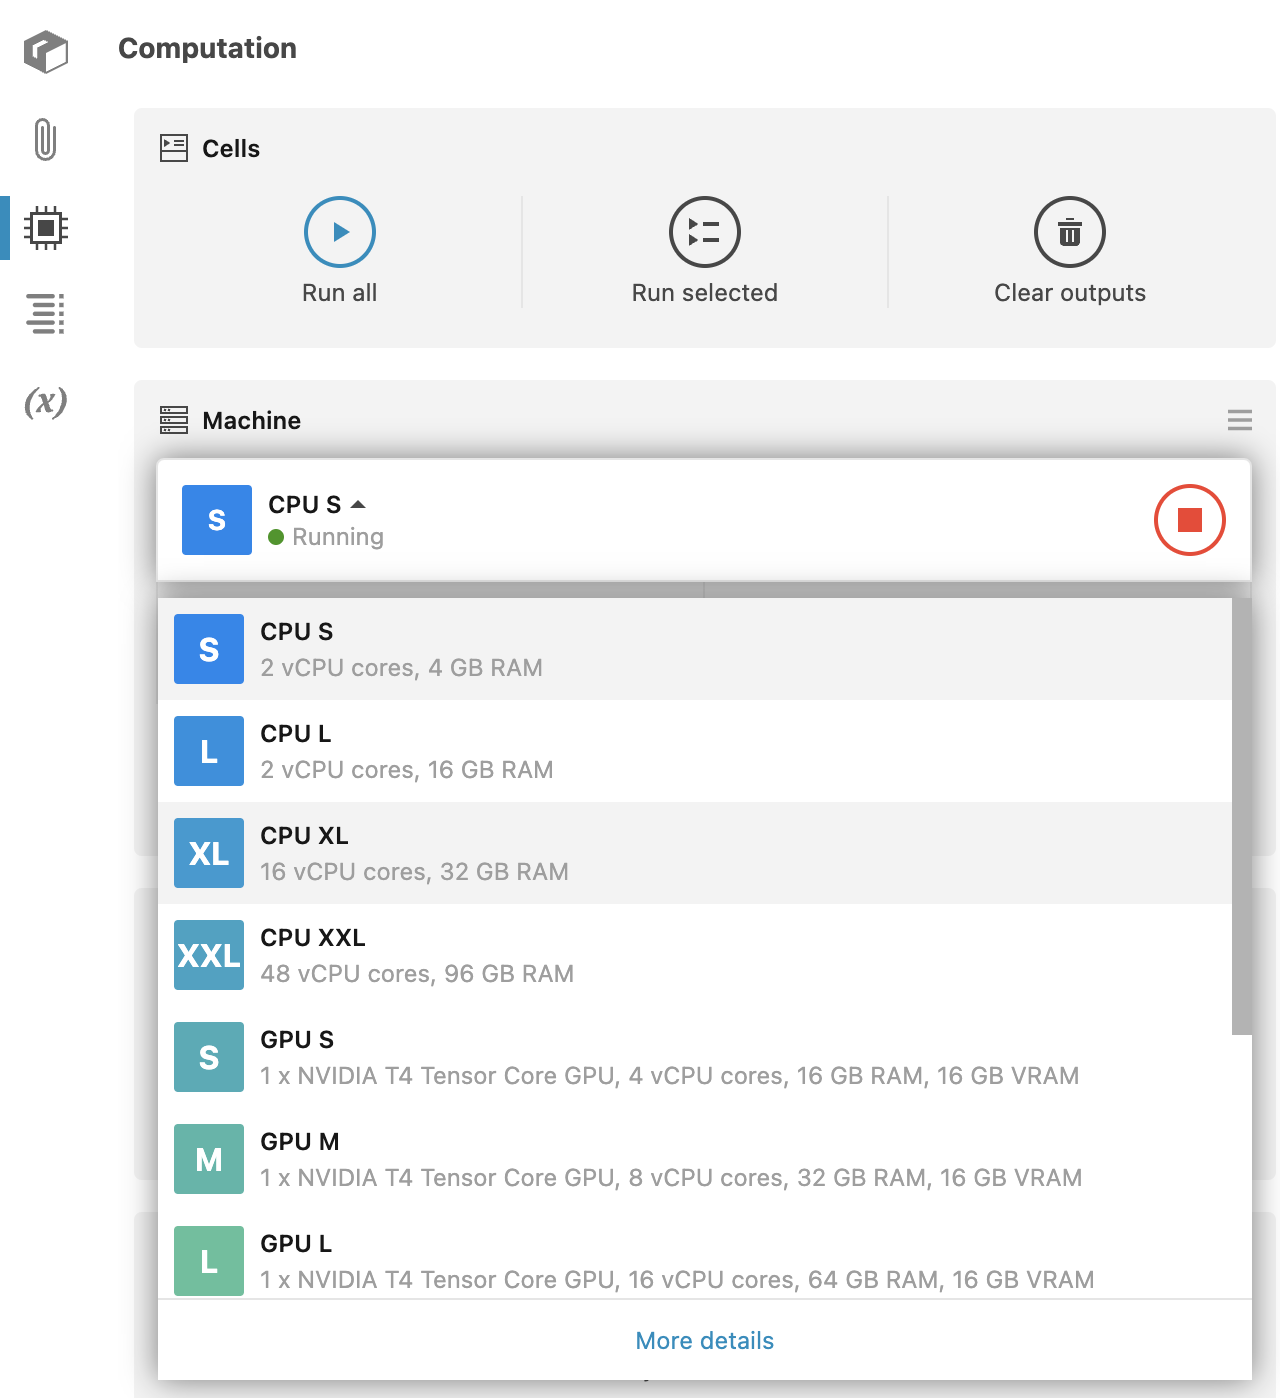
In the pop-up confirmation box, click OK to confirm your action and restart the machine.
(Optional) To open the Machines menu with the detailed machine list and your current balance, select More details from the bottom of the list. You can change your machine in the Machines menu too.
Main menu:
Go to Main menu | Run | Change machine to open the list of available machine options.
Select the machine you want to use from the list.
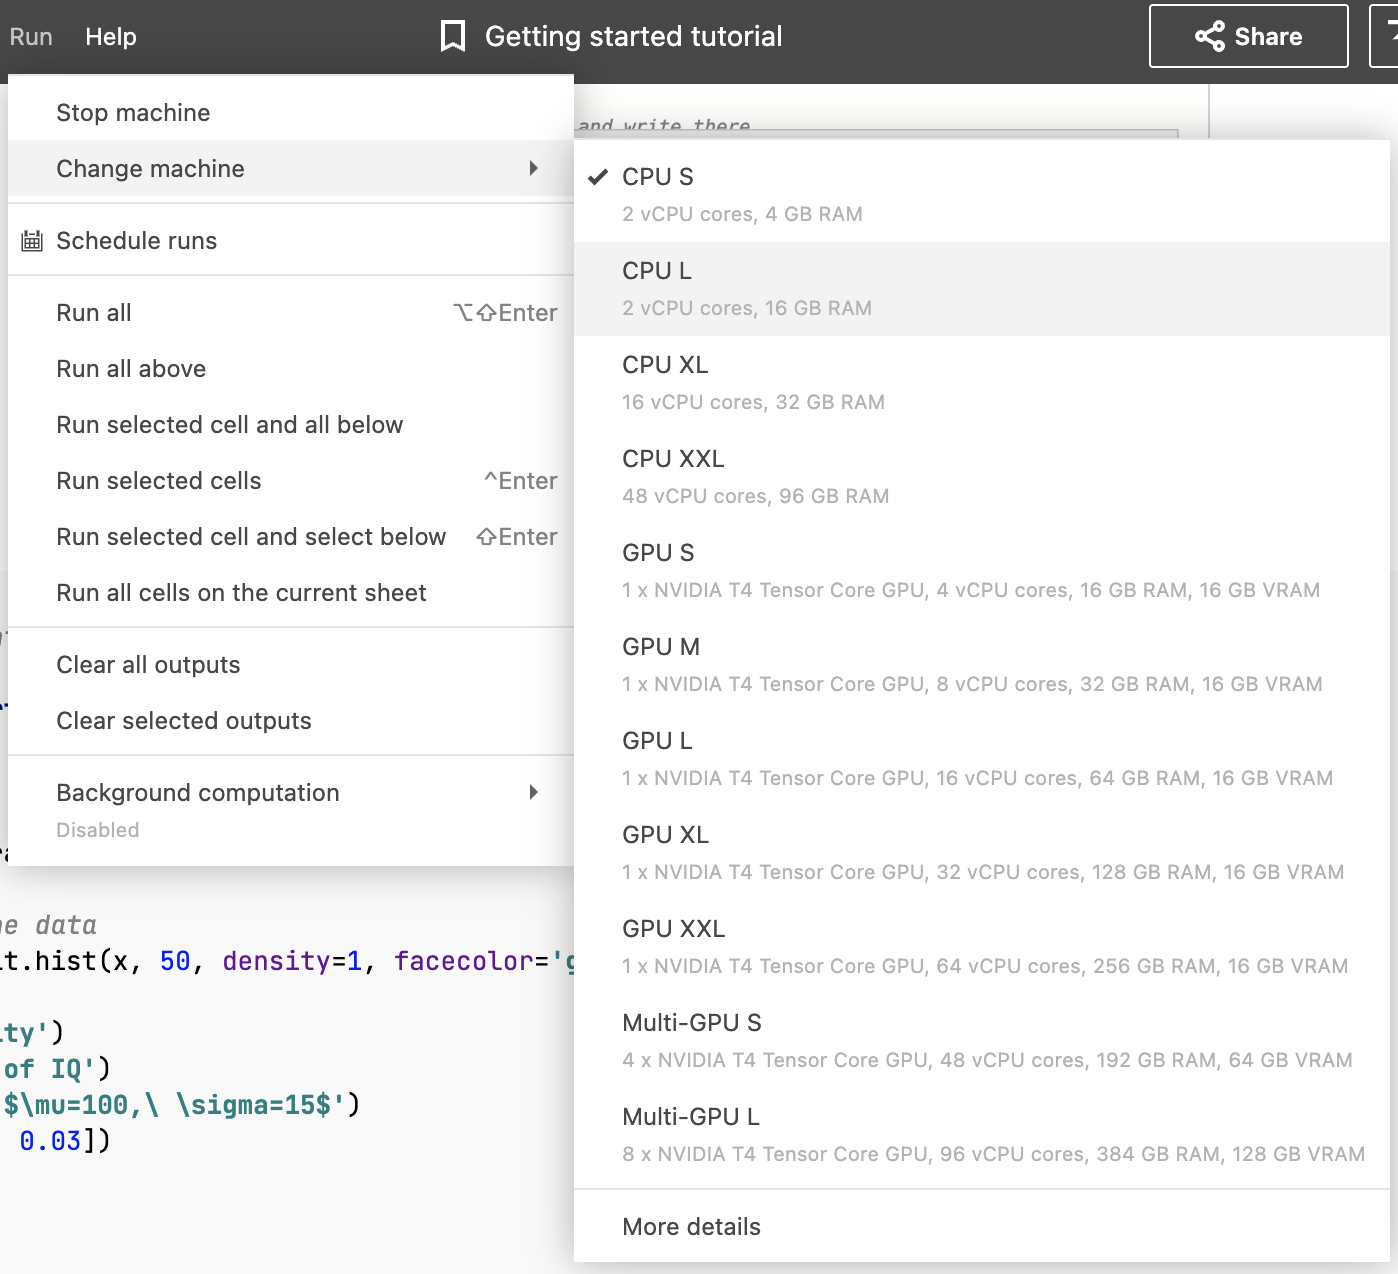
In the pop-up confirmation box, click OK to confirm your action and restart the machine.
(Optional) To open the Machines menu with the detailed machine list and your current balance, select More details from the bottom of the list. You can choose your machine in the Machines menu too.
In the first feature iteration, you can only view your current balance, the amount of available Datalore credits. In the second iteration, you will also be able to add Datalore credits.
Open the Machines menu in one of the following ways:
Go to Main menu | Run | Change machine and select More details from the list.
On the Computation tab, expand the list under Machine and select More details.
To view a breakdown on your Datalore credits, hover over the details icon next to the amount of credits (Cr). You will see how many paid credits and how many free credits you currently have.
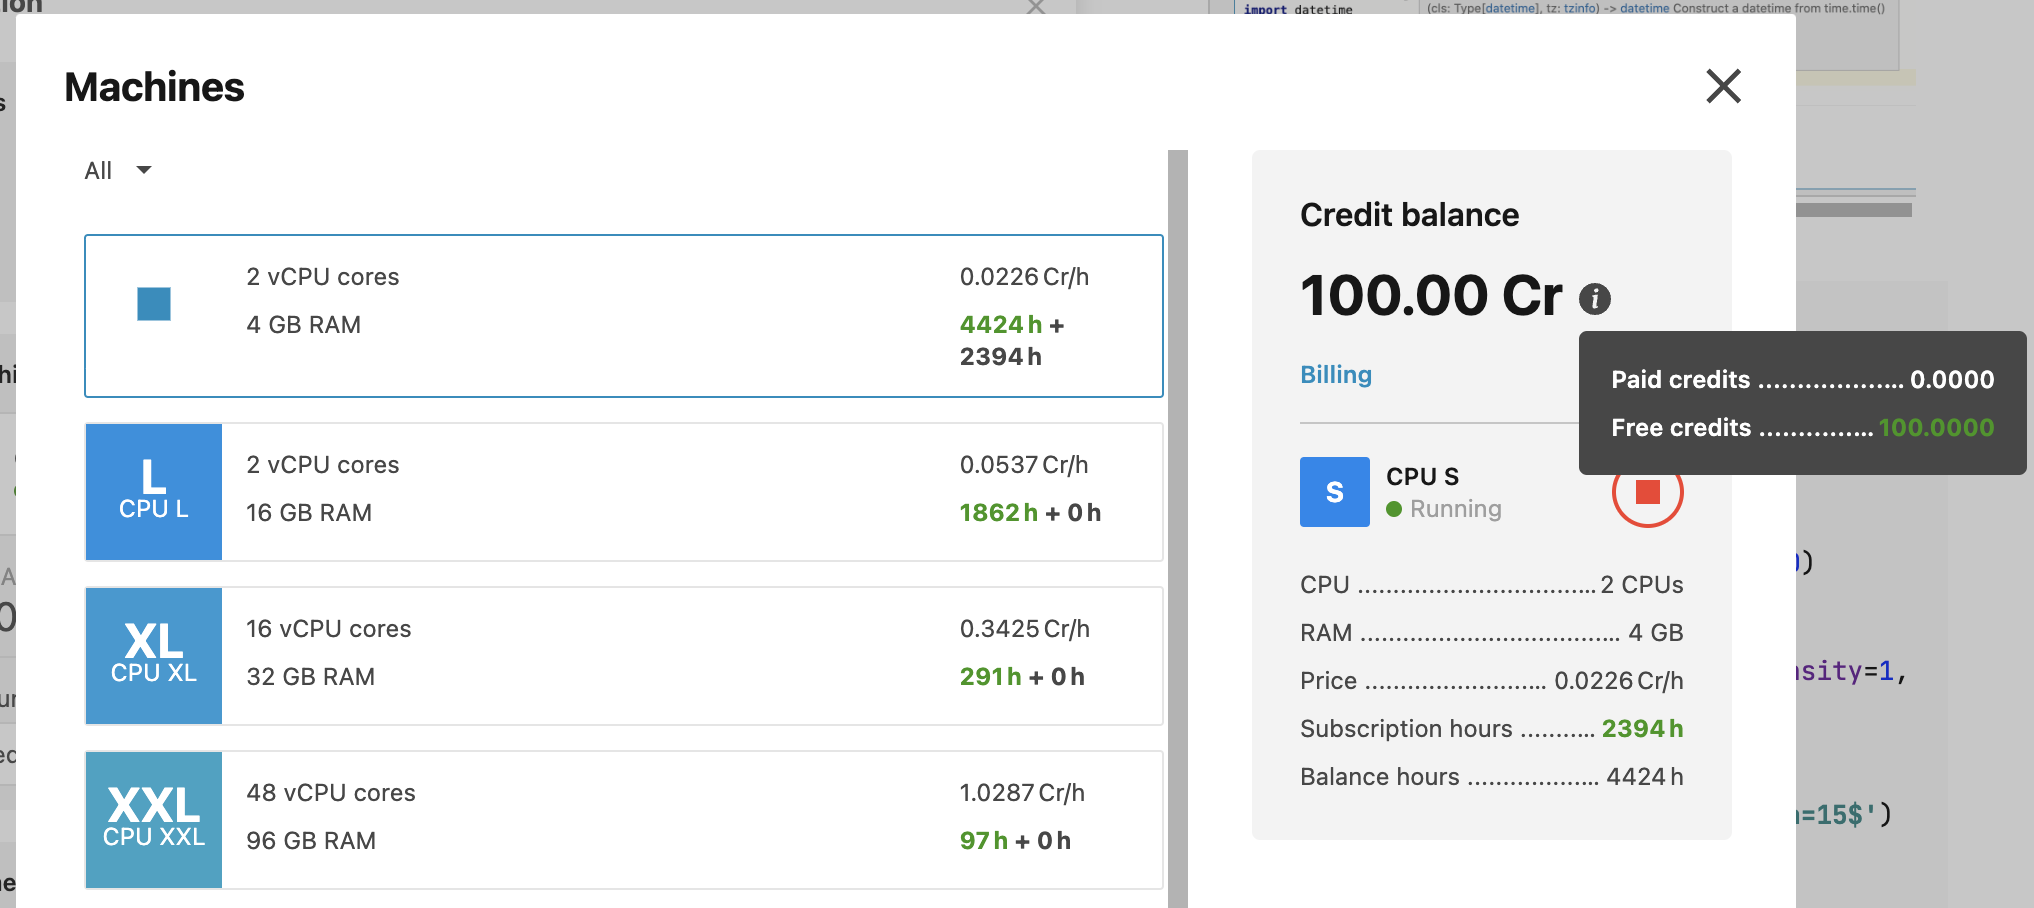
To view the changes in your balance, click Billing. This will forward you to the Billing tab of your Account settings.
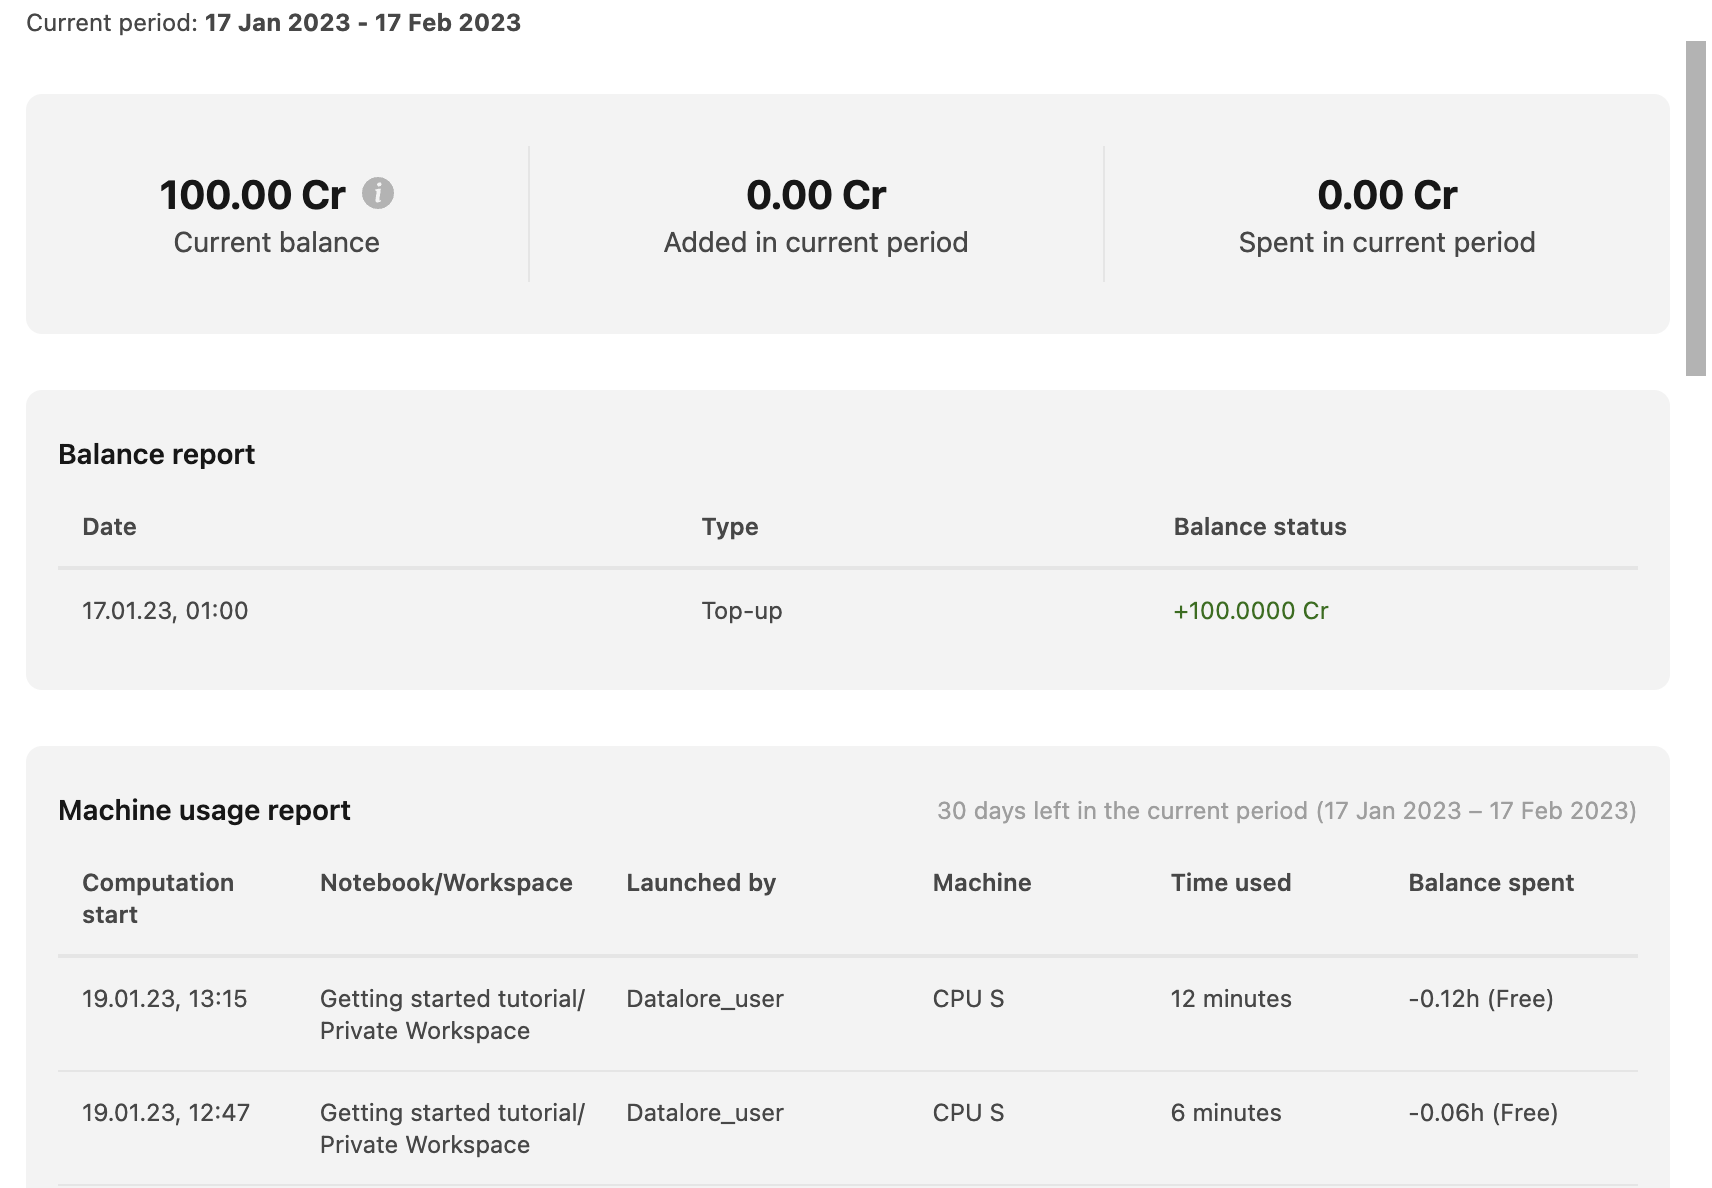
To download a detailed balance report, scroll the Billing tab down to the bottom and click the download icon to export the report as a .csv file.
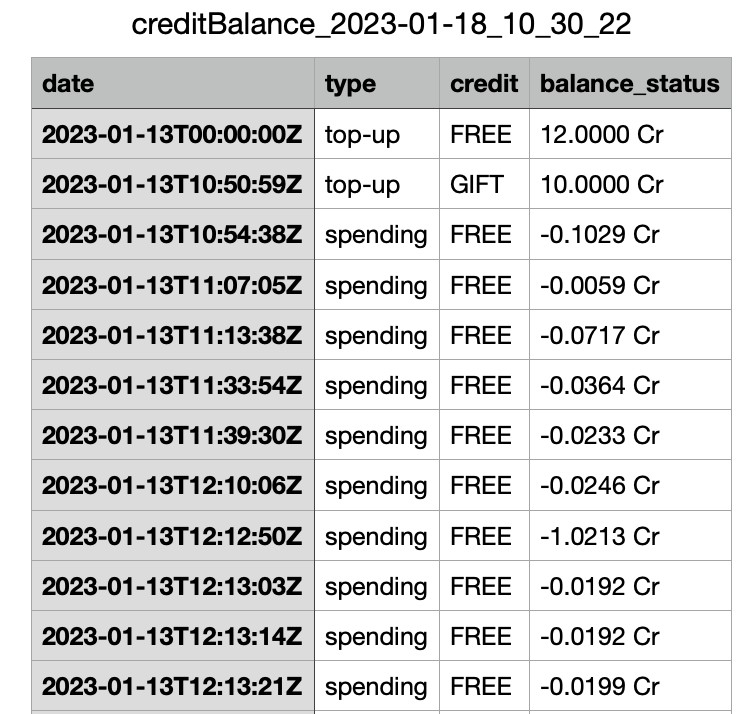
A downloaded balance report looks like this:
