Quick start tutorial
Use this guide to learn the basics of Datalore.
Overview
Datalore is a collaborative data science platform that streamlines insight delivery and helps data science and business teams become more productive together. You can use Datalore for data collection and exploration, machine learning, interactive visualization, and reporting.
Datalore brings together:
Powerful coding assistance for Python, SQL, R, Scala, and Kotlin in Jupyter notebooks
Data integrations for SQL databases and cloud storage systems
Modern business intelligence and interactive data apps
Real-time collaboration on code and in team workspaces
For a quick overview of Datalore, check out the Getting Started with Datalore video.
First steps
Start learning Datalore by creating and editing your first notebook.
Open a new notebook in the editor
On the Home page, click the New notebook. You are now redirected to the New notebook page.
(Optional) Enter your text in the Title field.
Press Enter to finish creating your notebook and open it in the editor.
At the moment, your notebook document contains only one cell. By default, it is an empty code cell.
Edit your notebook
In the first cell, enter the following code.
# Try it now import datetime now_moment = datetime.datetime.now() print('– What is the right time to start?') print('– Now!\n')To run the code of the currently active cell, press Alt+Shift+Enter.
Add a Markdown cell by hovering over the middle of the bottom border of the cell and clicking Add markdown cell.
Enter a text in your Markdown cell.
To run the code of your entire notebook, select from the main menu.
Work with your data
Follow the procedures below to attach a .csv file and perform basic analytics on its data.
Prepare your dataset
Download
libraries_by_python_version.csv. This dataset lists 20 popular Python libraries as imported by different Python versions.
Attach the downloaded dataset to your notebook by dragging it into the editor.
Click the Attached files icon on the left-hand sidebar to open the list of attached files and make sure your dataset is there.
View your data as a table
Use pandas, a popular library for Python, to view your dataset.
By convention, import pandas as pd:
import pandas as pdEnter the code below to access the content of your dataset and display it as a table.
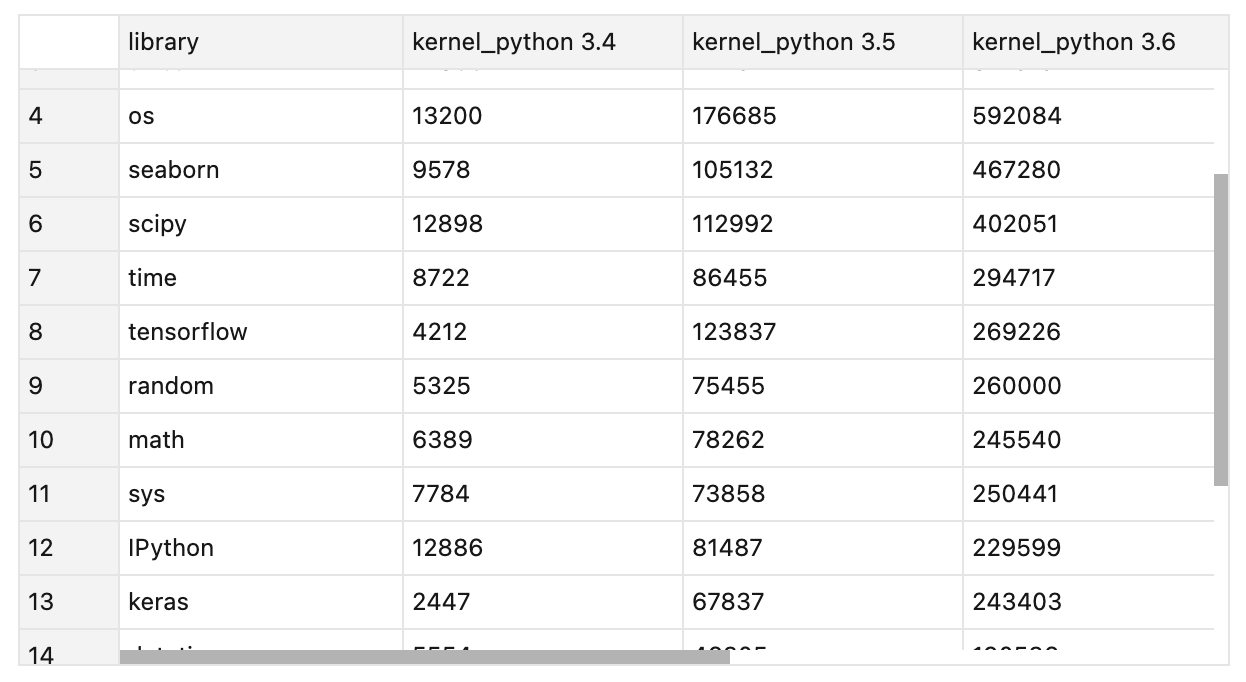
libraries = pd.read_csv('libraries_by_python_version.csv') libraries
After you run your code cell, you should have a scrollable table like this: 
Visualize your data set
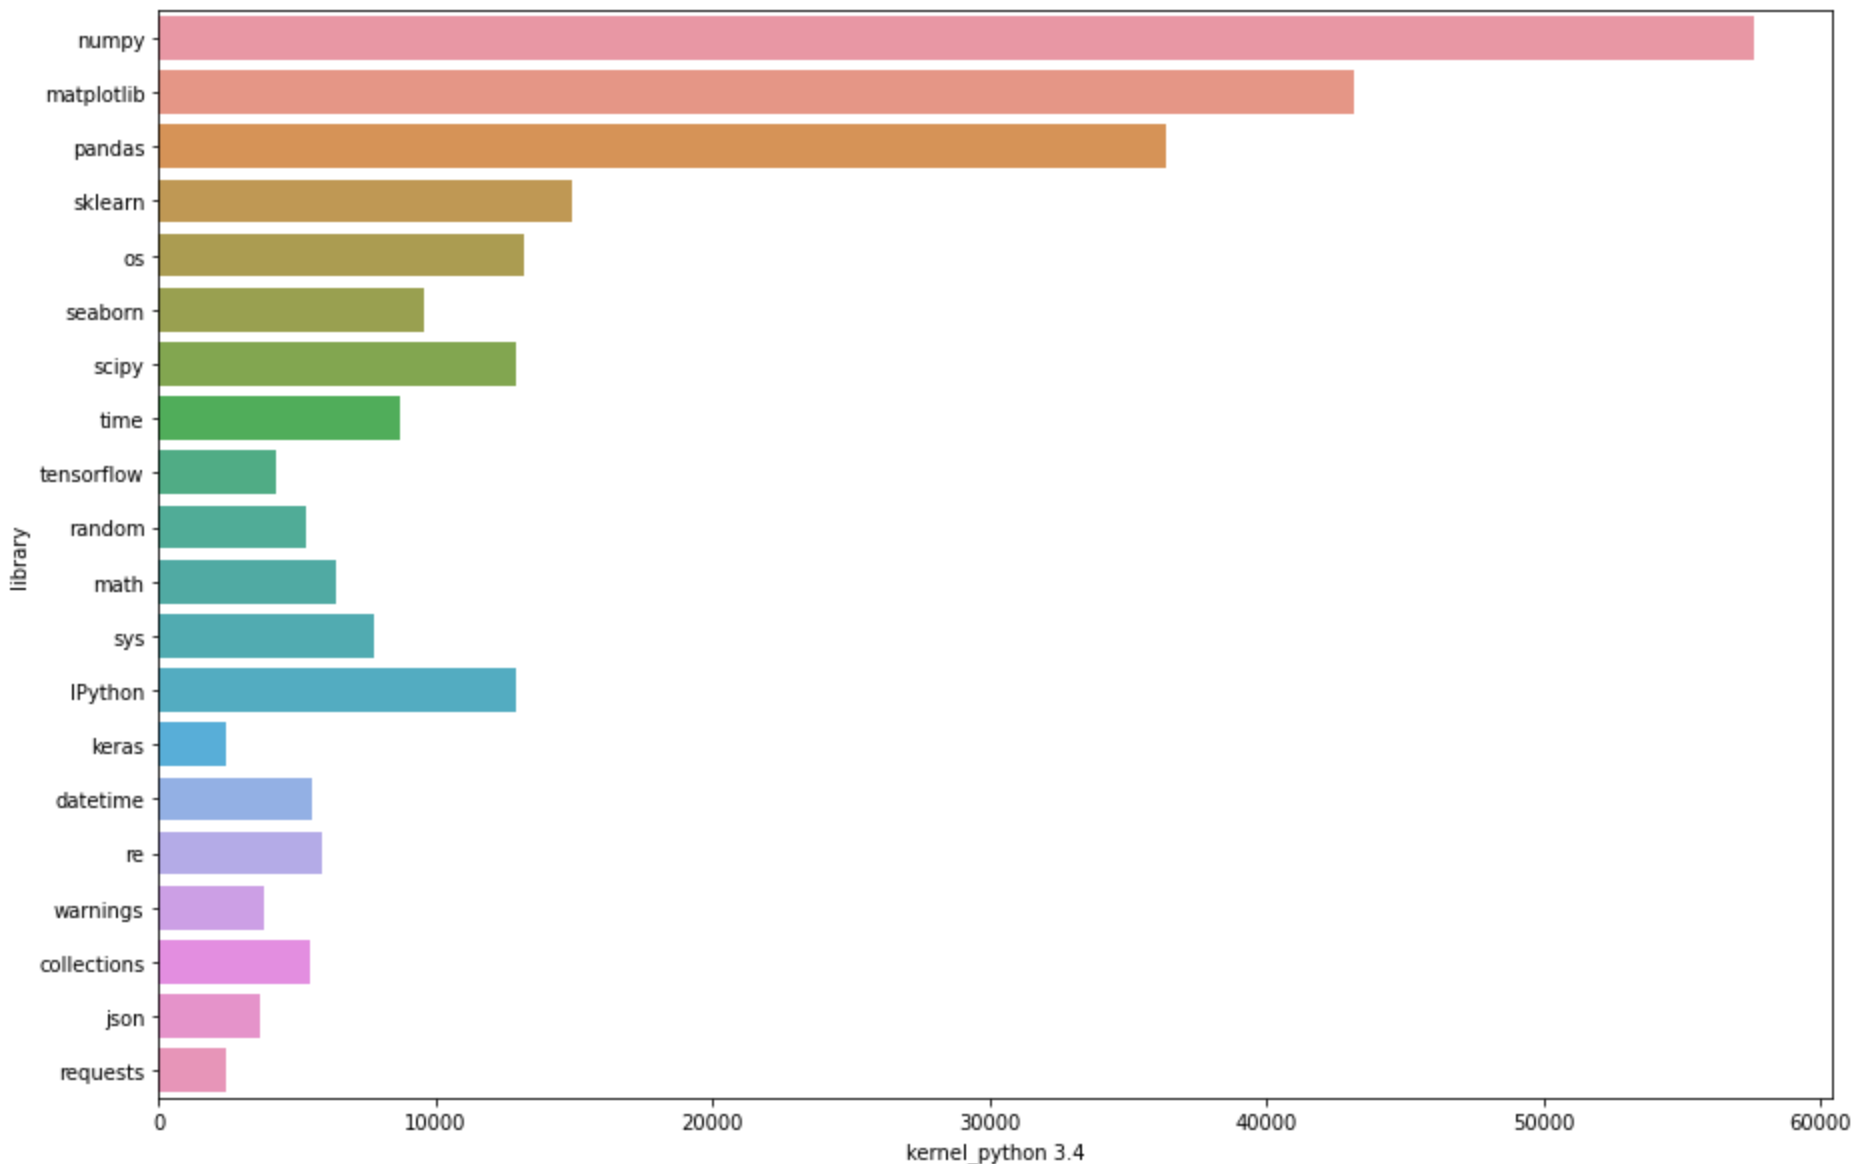
Build a horizontal bar chart to display imports of different libraries to Python 3.4.
Import the seaborn library.
import seaborn as snsEnter the code below.
sns.barplot(x="kernel_python 3.4", y="library", data=libraries) fig = sns.barplot
After you run your code cell, you should have a chart as shown below.

Share your work
Invite other people to view or edit your notebook:
Click the Share icon in the upper right corner of the editor.
In the Share [Notebook_name] with others dialog, specify the other user's email address.
Select whether the specified user can view or edit the shared notebook.
Click Send invitation.