Share a notebook
You can share notebooks from your default Home workspace to work on them together with other users. Users with edit access can work directly on the shared version of the notebook. Users with view access can view the shared version of the notebook but must clone it to their file system to edit its content.
note
When users work on a shared notebook, it is the owner's computation time and memory that are consumed.
To access the shared notebooks, select Shared with you on the left-side menu of the Home page.
The table below shows how viewers and editors can work on a shared notebook.
Action | View access | Edit access |
|---|---|---|
Share the notebook | No | Yes. When running the notebook, the owner's resources are consumed. |
Clone and copy the notebooks | Yes | Yes |
Download the shared notebook | Yes | Yes |
Rename the shared notebook | No | Yes |
View the notebook in the editor | Yes | Yes |
Run or edit the notebook | The notebook must be cloned to the viewer's file system.
| Yes |
Download the notebooks | Yes | Yes |
View the notebook attachments | Yes | Yes |
Create and execute SQL cells for the notebook's connected databases | No | Yes |
There are two ways you can share your notebooks:
Using the notebook link
Using email invitations
Follow this procedure to grant view or edit access to a notebook using its link.
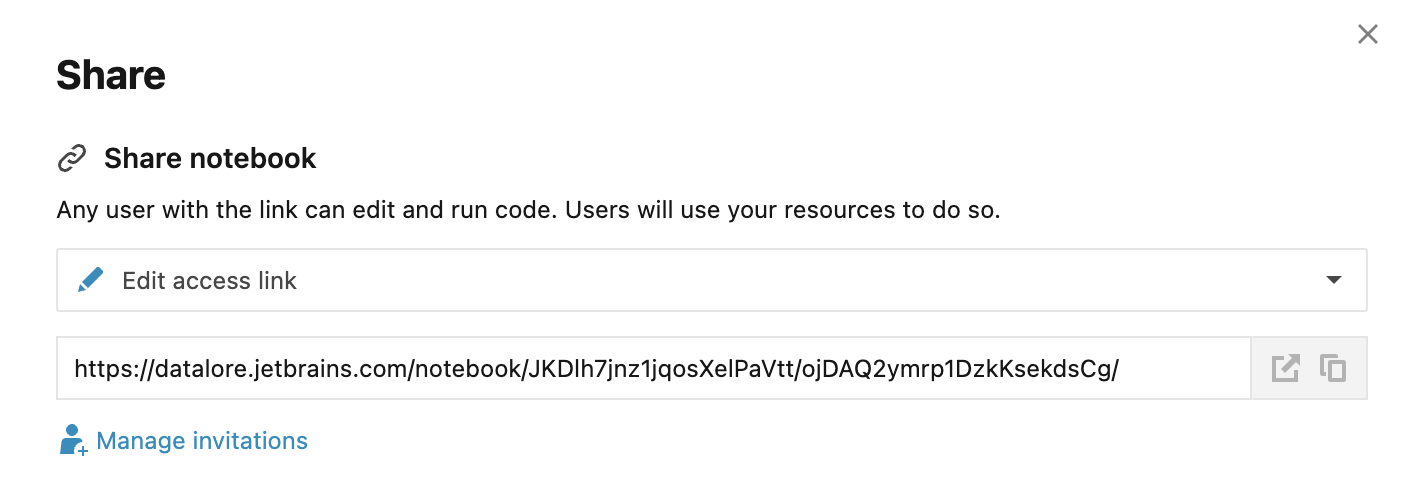
On the editor page, click the Share button in the upper right corner of the editor to open the popup shown in the picture below.

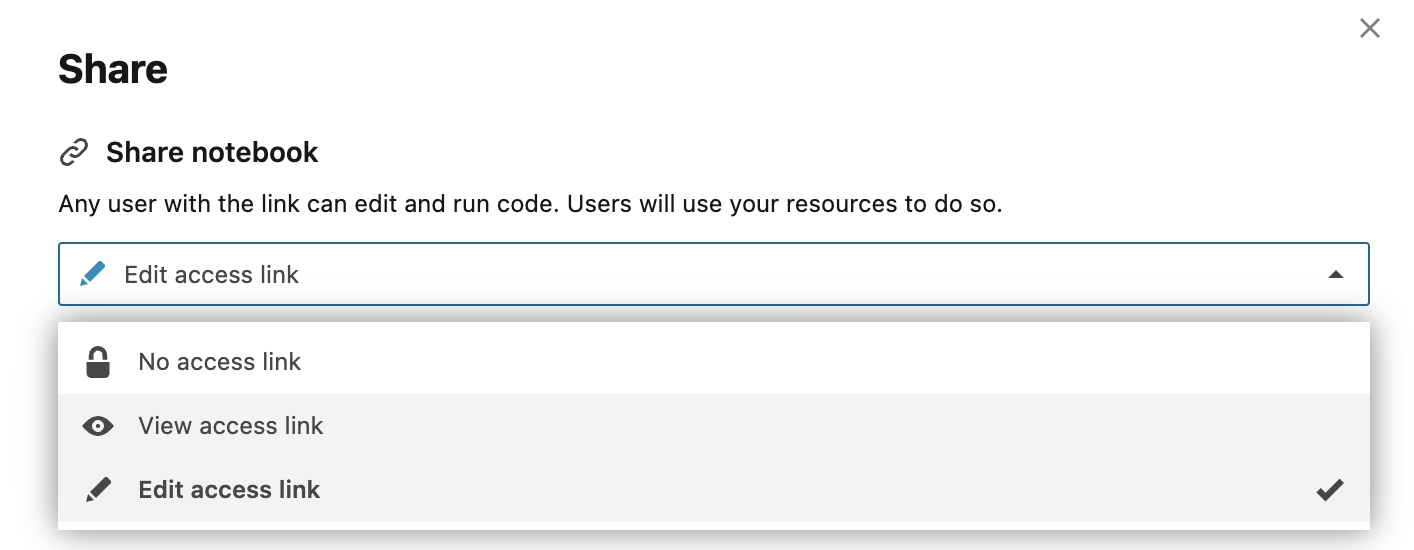
Under Share notebook, expand the list and select the access type you want to grant using the link.

Click the icons next to the notebook link to open it in a new browser tab or copy the link.
(Optional) To disable the link, repeat steps 1 and 2, and select No access link.
note
If you select Edit access link, all users who previously used the link to access notebook as viewers will have edit access.
Follow this procedure to share notebooks by sending email invitations with selected access types.
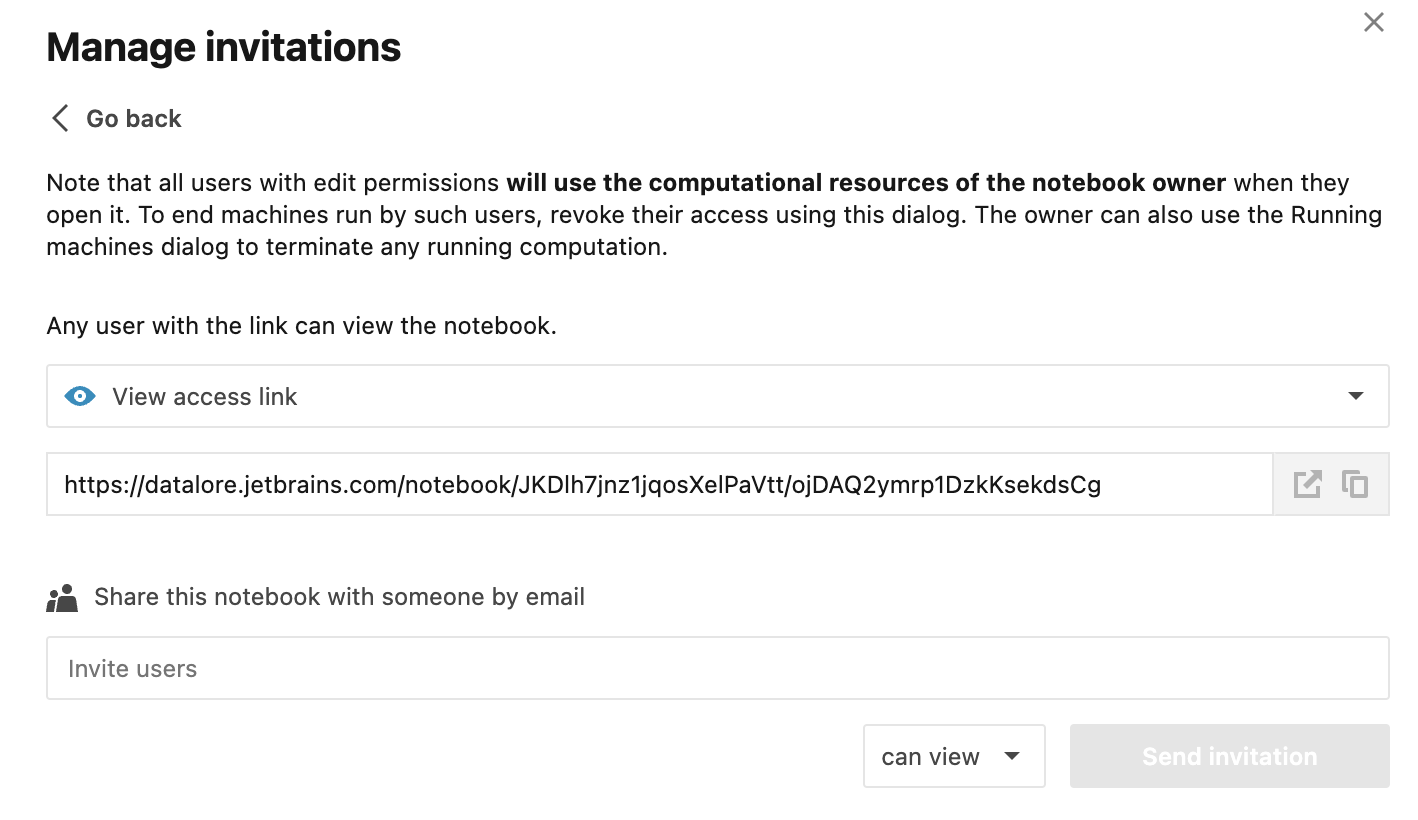
On the editor page, click the Share button in the upper right corner of the editor and click the Manage invitations button in the popup.
In the field under Share this notebook with someone by email, enter the email addresses of the users you want to invite.
Select the access type you want to grant to the invited users.
Click the Send invitation button.

tip
Use the same interface to change the access type for the listed users or delete addresses:
To change the access type, enter the user's address, select the new access type and send the new invitation.
To revoke an invitation, click the x icon next to the respective email address.
note
Sharing from an own workspaceSharing notebooks from own workspaces is restricted: they can only be available to workspace members (people the workspace is shared with). Therefore, after clicking the Share button, you can only add more workspace members and share the link to the notebook with them.
You cannot share individual notebooks from your own workspaces. Therefore, if the share option is disabled for your notebook, make sure you are working from your Home workspace.
tip
You can perform all the procedures described above if you open the Share [notebook_name] dialog:
On the Home page, right-click the notebook that you want to share and select Share.
In the editor, select File | Share from the main menu.
When working on a shared notebook at the same time, you can see the avatars of the other collaborators in the upper-right corner of the editor. To track another collaborator's work in real time, double-click the respective avatar. This will allow you to follow this particular collaborator as they make their changes.
To stop tracking a collaborator, double-click the respective avatar.
