Worksheets
By default, every notebook is presented on one worksheet. This means you can see all your work on one scrollable page. If your notebook is big enough and has a large amount of data, you may want to organize its content into multiple worksheets.
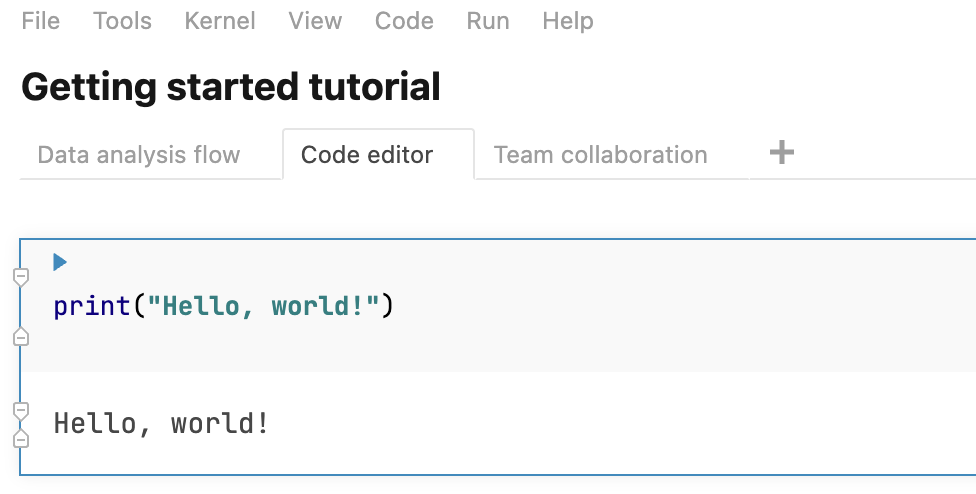
All worksheets in a notebook share the same files, and newly created worksheets inherit the environment of those created earlier. For example, the notebook shown below consists of three worksheets: Code editor, Data analysis flow, and Team collaboration.

To create a worksheet, click the + icon in the lower left corner of the editor.
For further options, right-click the worksheet you want to manage. This will open a popup menu.

Use the popup menu for the following options:
Rename worksheet: select the option, provide a new name in the Rename dialog, and click OK.
Duplicate worksheet: select the option to add a worksheet with the same content to the notebook.
Delete worksheet: select the option to delete the worksheet from the notebook. Click OK in the Confirmation dialog to confirm the action.
note
You cannot delete a worksheet if there are no other worksheets in this notebook.