Manage team workspaces
This topic explains how to manage workspaces as a team admin.
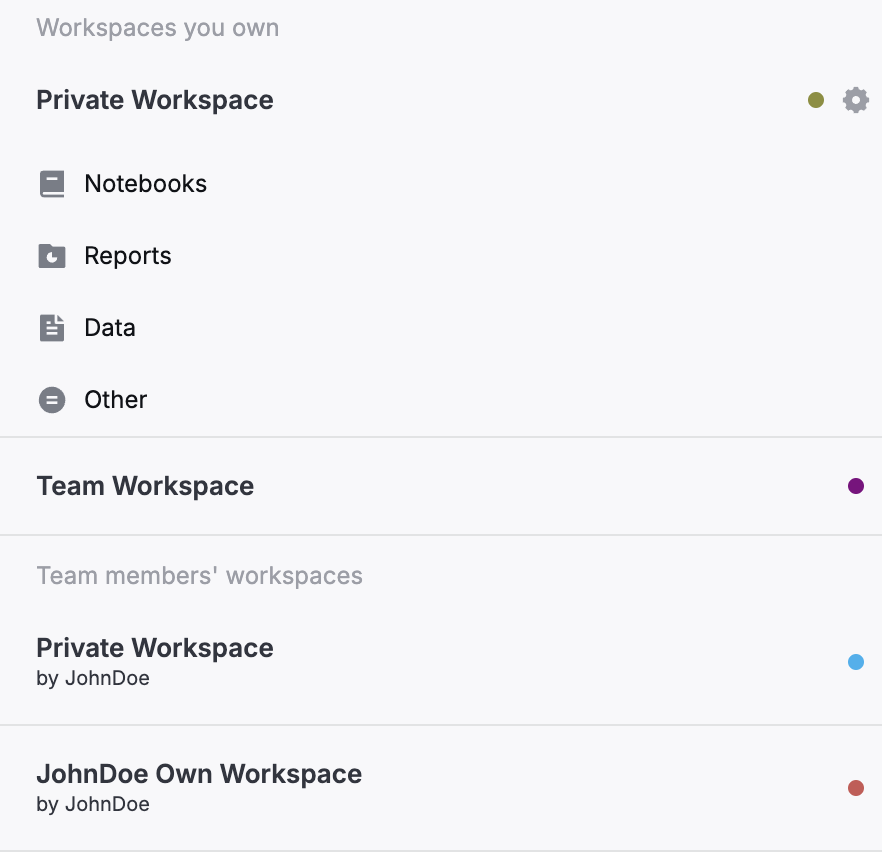
- Team admin's Private workspace
Created automatically for the team admin.
- Team workspace
Created automatically and shared with the team's current and future members, who all have edit rights to it.
- Team member's Private workspace
Created automatically for each added member of the team. The workspace can also be accessed and managed by the team admin.
- Member's own workspace
Created by a team's member, such a workspace can also be accessed and managed by the team admin.
Manage team workspaces
As a team admin, you can access and manage any workspace created for or by any member of your team.
On the Home page, click the arrow next to the workspace name.
Select a workspace. In the image below, the team admin can see their own Private workspace and two workspaces associated with the team's only other member (JohnDoe).

In the selected workspace:
Manage the notebooks as described in this article.
Manage the workspace as described in this article.
Create a new Team workspace
Technically, the default Team workspace is like any other workspace shared with all members of your team by granting them edit rights. If your default Team workspace was deleted, create another one by sharing one of your workspaces as instructed below.
On the Home page, Create a workspace or select one of the workspaces you already have.
(Optional) we recommend naming the workspace Team workspace for convenience.
Hover over this workspace and click the share icon.
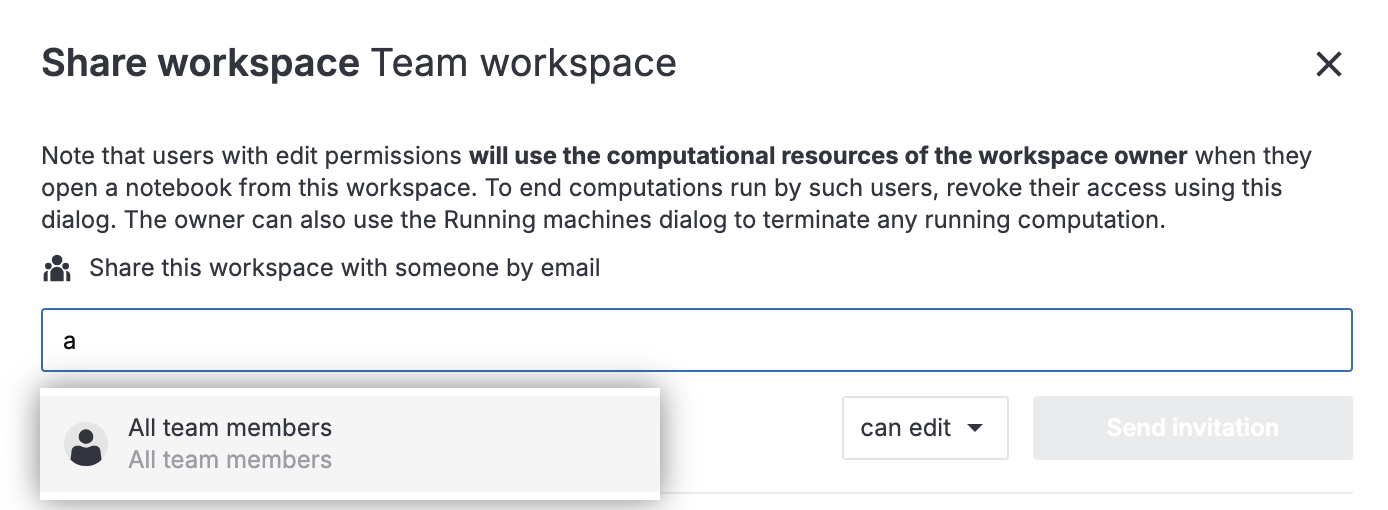
In the Share [workspace_name] dialog, start typing 'All team members' and click the popped-up suggestion to invite every user from your team.
Expand the access type list and select can edit.
Click the Send invitation button.

Now, the shared workspace can be accessed by all of your team members and viewed as the new Team workspace.