Manage your team
This topic explains how you can manage your team using the Team Management Panel:
Add more users to the team (buy more seats for your Cloud plan)
Invite and remove users from your team
Restrict access to machine options for selected team members
Allocate Datalore credits and storage space for selected team members
Manage running machines launched across your entire team
View the basics
Click the avatar in the upper right corner and select Team admin page. This will take to the Team Management Panel.
From the panel, select Dashboard.
On the Dashboard, you can view the status of key parameters for your further actions as a team admin:
Current Datalore credit balance
Number of team members and available invitations
Currently running machines
Manage team members
Add members to your team
You add team members by inviting a person to become a Datalore user as part of your team.
Click the avatar in the upper right corner of the screen and select Team admin page. This will take you to the Team Management Panel.
From the panel, select Team management. If you have not added members yet, you can only see your user (labeled as Owner) on the list of team members.
In the image below, you can see a team that has three seats, including one appointed to the admin ('TeamAdmin' user). Both other seats were used to invite users 'Gary' and 'Alex', meaning there are no empty seats left.

Click the Add new member button.
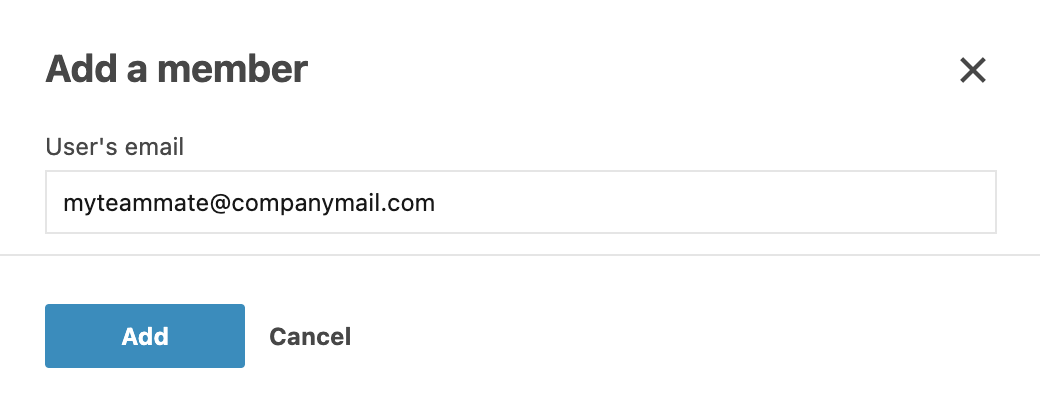
In the Add a member dialog, provide the email of the user you want to invite and click the Add button.

After you complete these steps, the user receives an invitation email sent at the provided email address. Once this user follows the instructions in the email and gets signed in to Datalore, you can see the respective username added to the team member list on Team.
Add more users to your team
Suppose your team needs more seats than the number of licenses you originally bought under your Cloud plan. For example, you want to invite more people to the team, but all seats are already taken and deleting any of the current team members is not an option. The solution is to upgrade your subscription and buy more seats.
Click the avatar in the upper right corner of the screen.
From the menu, select Plans.
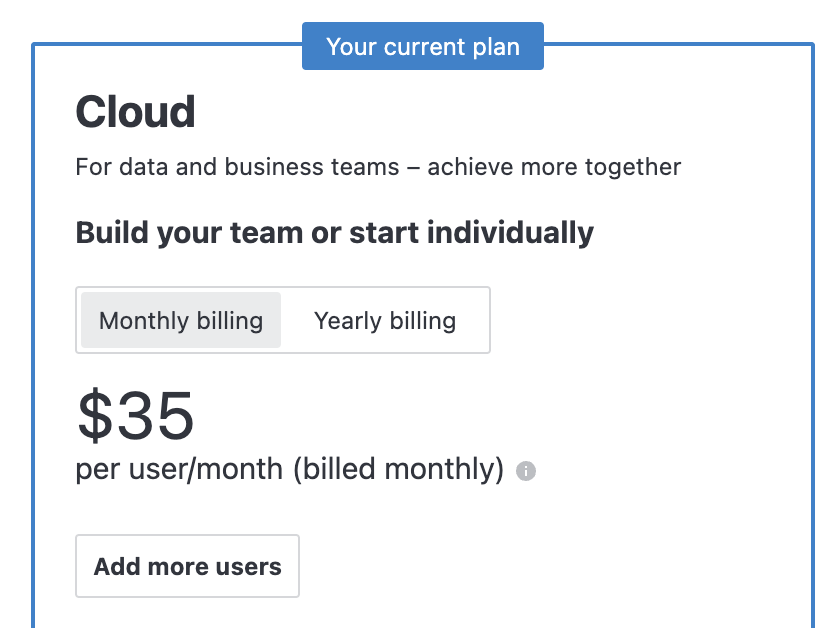
On the Cloud tab of the Plans menu:
(Optional) To change to yearly billing, select the Yearly billing option.
click the Add more users.

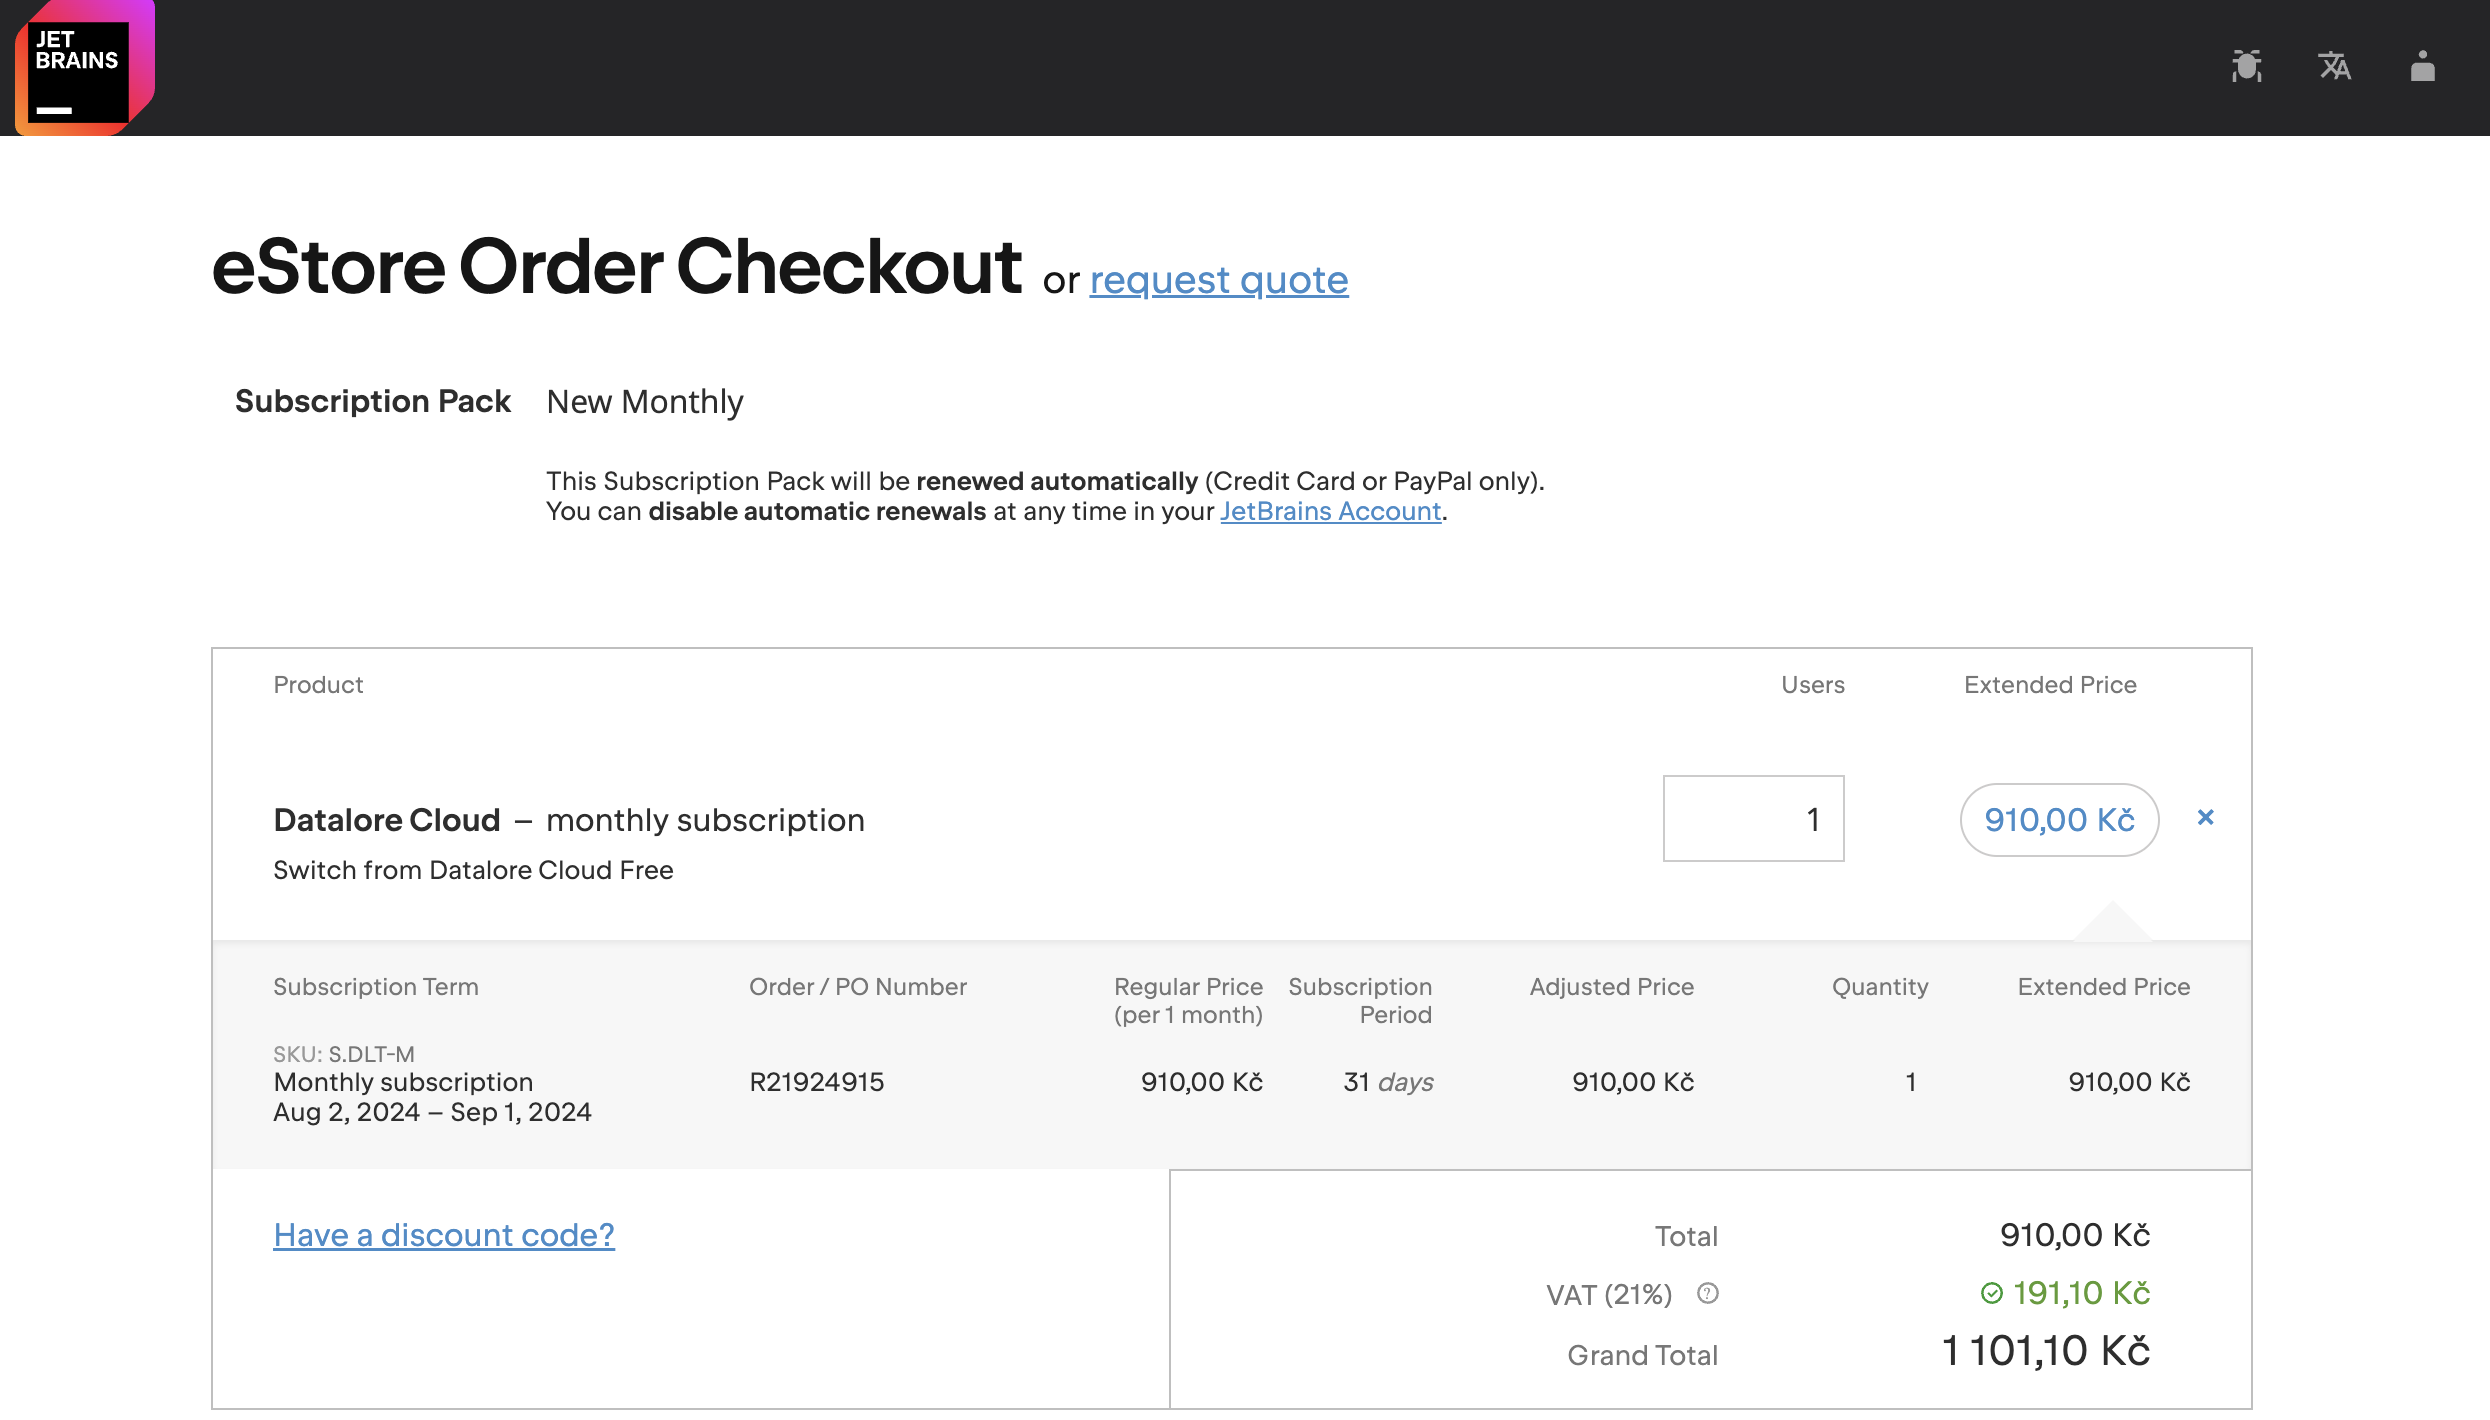
This will take you to the plan purchase form.
On the plan purchase form page, specify the new number of users in the Users field and complete the remaining steps to purchase the upgraded plan as described in this procedure.

After completing this procedure, you will use Datalore with the new number of users available for your team.
Delete a team member
Delete a team member to remove a Datalore users from your team and free up a seat that you can then use to invite a different user.
Click the avatar in the upper right corner of the screen and select Team admin page. This will take to the Team Management Panel.
From the panel, select Team management.
On the team member list, click the ellipsis icon for the user you want to delete and select Delete.
In the confirmation dialog:
Select whether you want to delete all data associated with this user (default option). Clear the checkbox if you want to continue accessing and using their workspaces.
Click the Delete button to complete the procedure.
![Delete [user_name] confirmation dialog Delete [user_name] confirmation dialog](https://resources.jetbrains.com/help/img/datalore/2025.6/delete_confirm.png)
Restrict machine options for team members
Use computation profiles to restrict access to machines for different members of your team. By assigning a profile to a team member, you allow that user to use only those machines available under the selected profile.
Create a computation profile
This procedure explains how to create a computation profile. Optionally, you can select members of your team for this profile while creating it.
Click the avatar in the upper right corner of the screen and select Team admin page. This will take to the Team Management Panel.
From the panel, select Computation profiles.

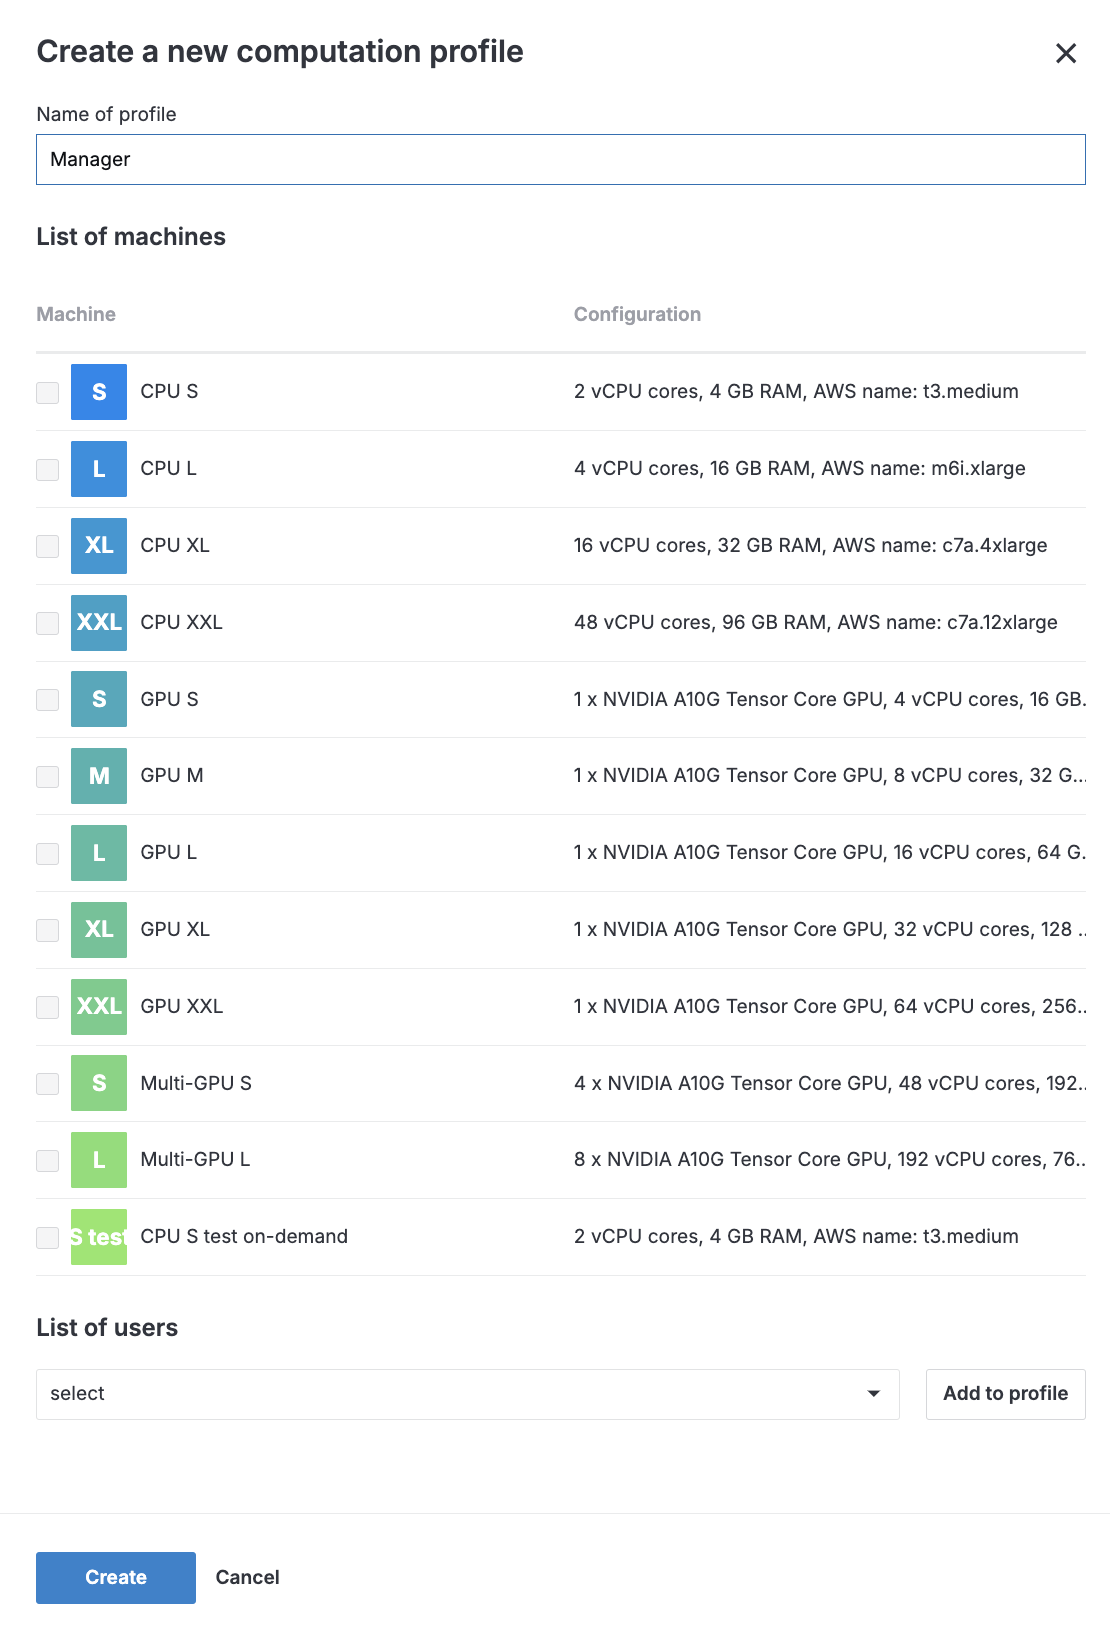
In the upper right corner of the Computation profiles menu, click the Add new profile button. This will open the Create a new computation profile dialog.

In the Name of profile field, provide a name for the new profile.
Under List of machines, select the machines that your team members with this profile can use.
(Optional) Assign the profile to selected members of your team.
Under List of members, expand the list of team members.
Click the users you want to select.
Click the Add to profile button to save the selection.
Click the Create to save the new profile.
You can now assign this profile to members of your team.
Edit or delete a computation profile
This procedure explains how to edit a computation profile you created for your team.
Click the avatar in the upper right corner of the screen and select Team admin page. This will take to the Team Management Panel.
From the panel, select Computation profiles.
On the list of the computation profiles, click the ellipsis for the profile you want to edit or delete and select the required option:
Edit: opens the Edit [profile_name] dialog. Make the required changes (provide a new name, select and deselect machines, or choose team members for this profile), and click the Save button.
Delete: deletes the profile.

In the Name of profile field, provide a name for the new profile.
Under List of machines, select the machines that your team members with this profile can use.
(Optional) Assign the profile to selected members of your team.
Under List of members, expand the list of team members.
Click the users you want to select.
Click the Add to profile button to save the selection.
Click the Create to save the new profile.
You can now assign this profile to members of your team.
Assign computation profiles to team members
This procedure explains how to assign computation profiles to your team members. It is assumed that you have already created at least one such profile (see the procedure above).
Click the avatar in the upper right corner of the screen and select Team admin page. This will take to the Team Management Panel.
From the panel, select Team management.
On the list of team members, expand the list in the Profile column for the user you want to assign a profile.
From the expanded list, select the required profile.

Allocate resources for team members
You can limit the use of Datalore credits and storage space for selected team members.
Procedure
Click the avatar in the upper right corner of the screen and select Team admin page. This will take to the Team Management Panel.
From the panel, select Resource allocation.
In the Resource allocation menu, you can view the list of all team members set resource limits for each of them:
Limit the amount of available Datalore credits:
Expand the list in the Credit limit column for the required team member.
Select one of the options.
Limit the storage space:
Expand the list in the Storage limit column for the required team member.
Select one of the options.

Manage running machines
As the admin of your team, you can monitor and manage all running machines launched by the members of your team.
Procedure
Click the avatar in the upper right corner of the screen and select Team admin page. This will take to the Team Management Panel.
From the panel, select
Running machines.
To sort the list, click the header of the respective column.
To stop a machine, click the Stop button for the respective list item. After that, the stopped machine is removed from the list.

Related topics
Learn how to monitor and manage the usage of computational resources and associated transactions.
Learn how to purchase, use, and monitor the balance of Datalore credits, the currency used to buy paid machine hours.