Set up a working environment
To execute notebooks or Python code in JetBrains DataSpell, you need to configure at least one virtual environment based on a Python interpreter. You can configure Conda, Virtualenv or Pipenv.
When you attach a directory to the workspace or open a project, the IDE creates a virtual environment for you. In most cases, it is a Conda environment based on your Anaconda installation. You can select any other Python environment on your machine or create a new one.
To preview a configured Python environment, modify its settings, and update packages, press Ctrl+Alt+S and go to .
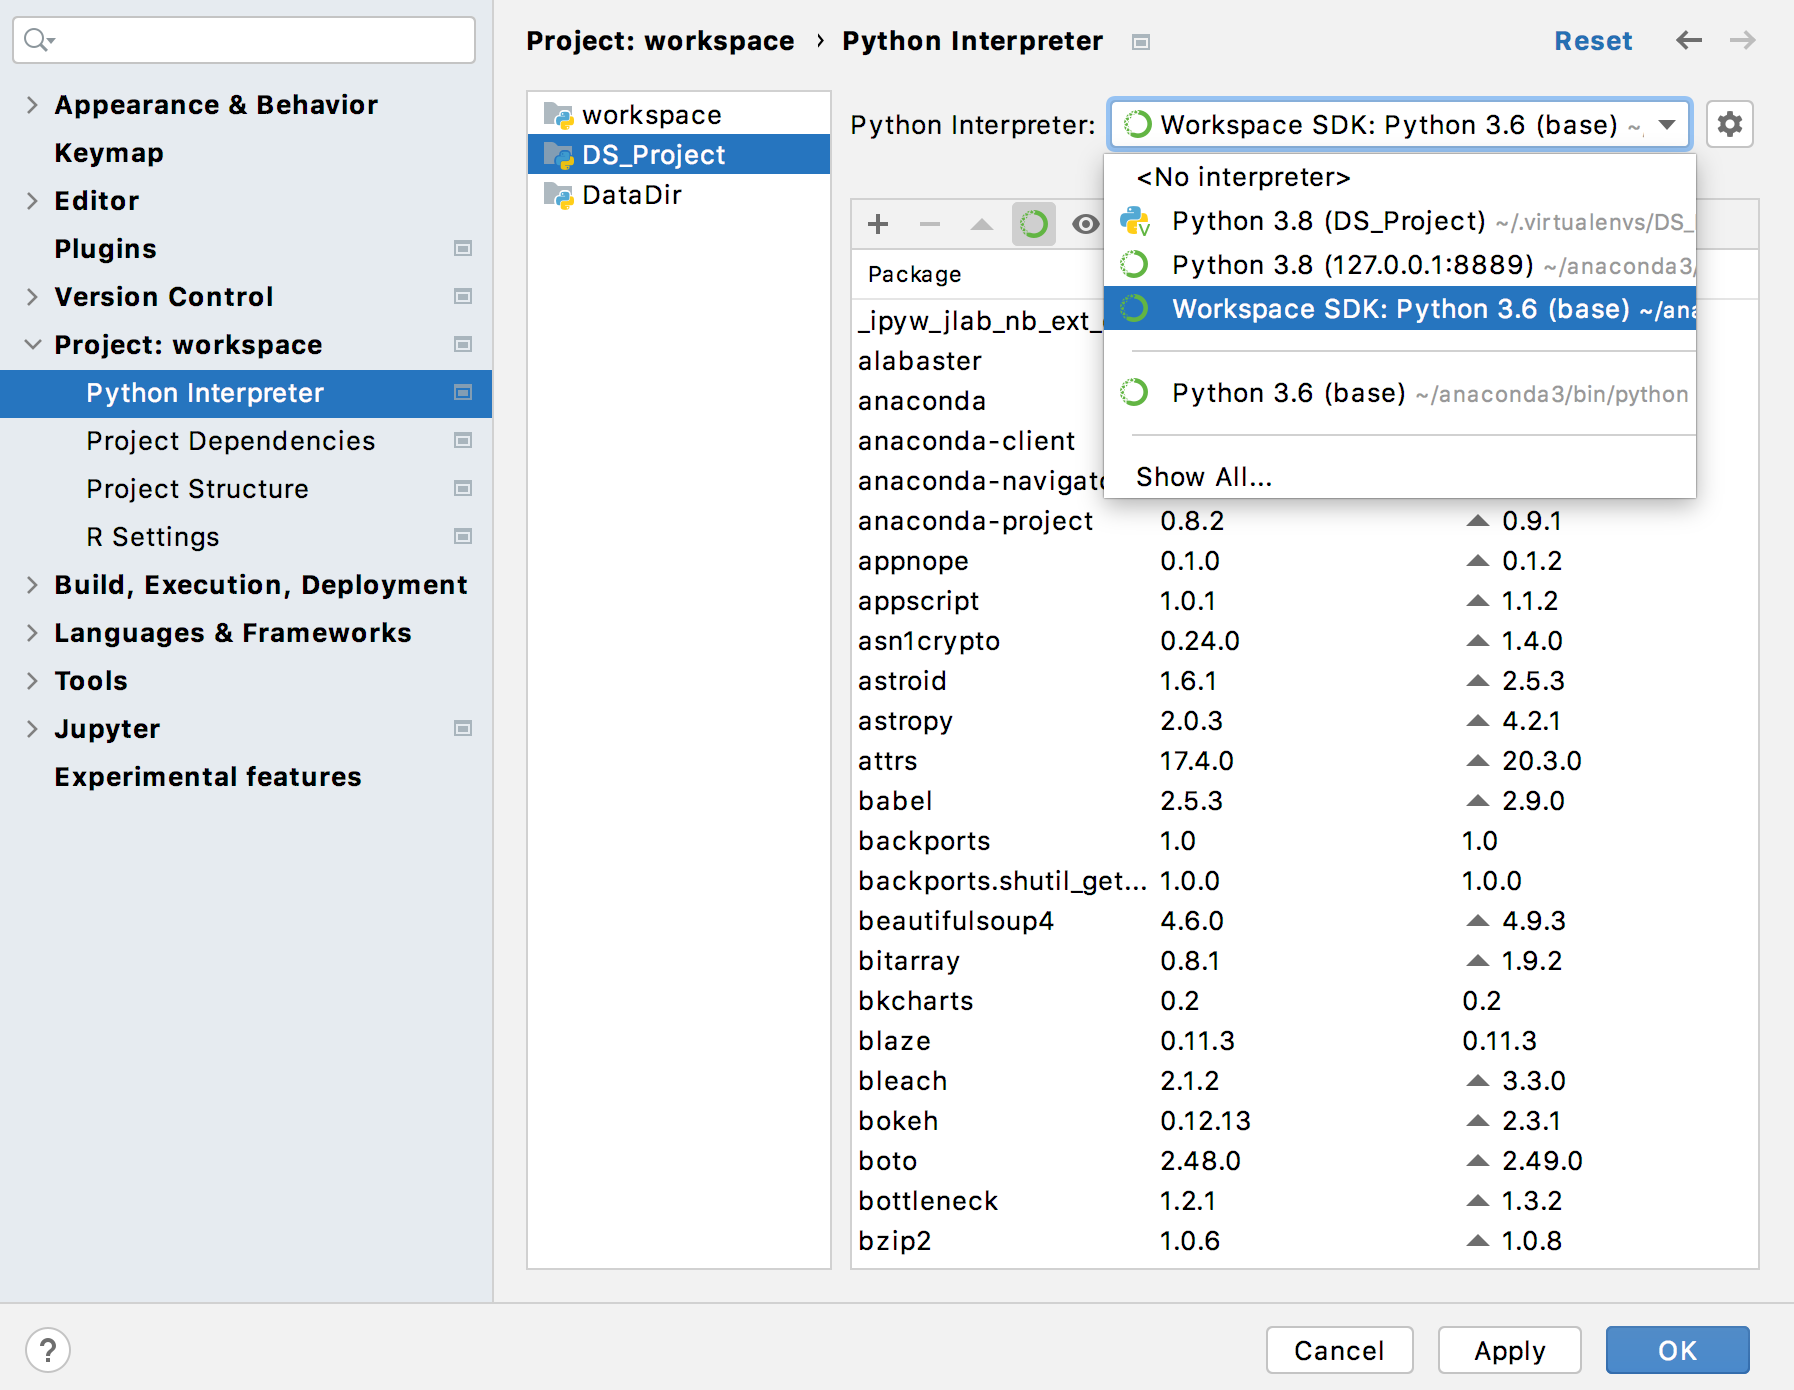
Note that the Workspace SDK: prefix indicates the workspace-specific environment. By default, this environment is configured for a newly attached directory. So, when the environment of the workspace changes, it changes for all directories that use it.
Change your virtual environment
There are two basic ways to change your environment in JetBrains DataSpell: using commands in the Terminal window and the Python interpreter selector in the IDE UI.Change Conda with Anaconda CLI
In the Terminal window, run the ls command in the <Conda Home>/envs directory (for example, /Users/jetbrains/.conda/envs) and select the target environment.
Navigate to the bin directory of your anaconda installation (for example, anaconda3/bin ).
Execute the
conda activate <env name>command (for example,conda activate my-conda-env).
Change the environment with the Python interpreter selector
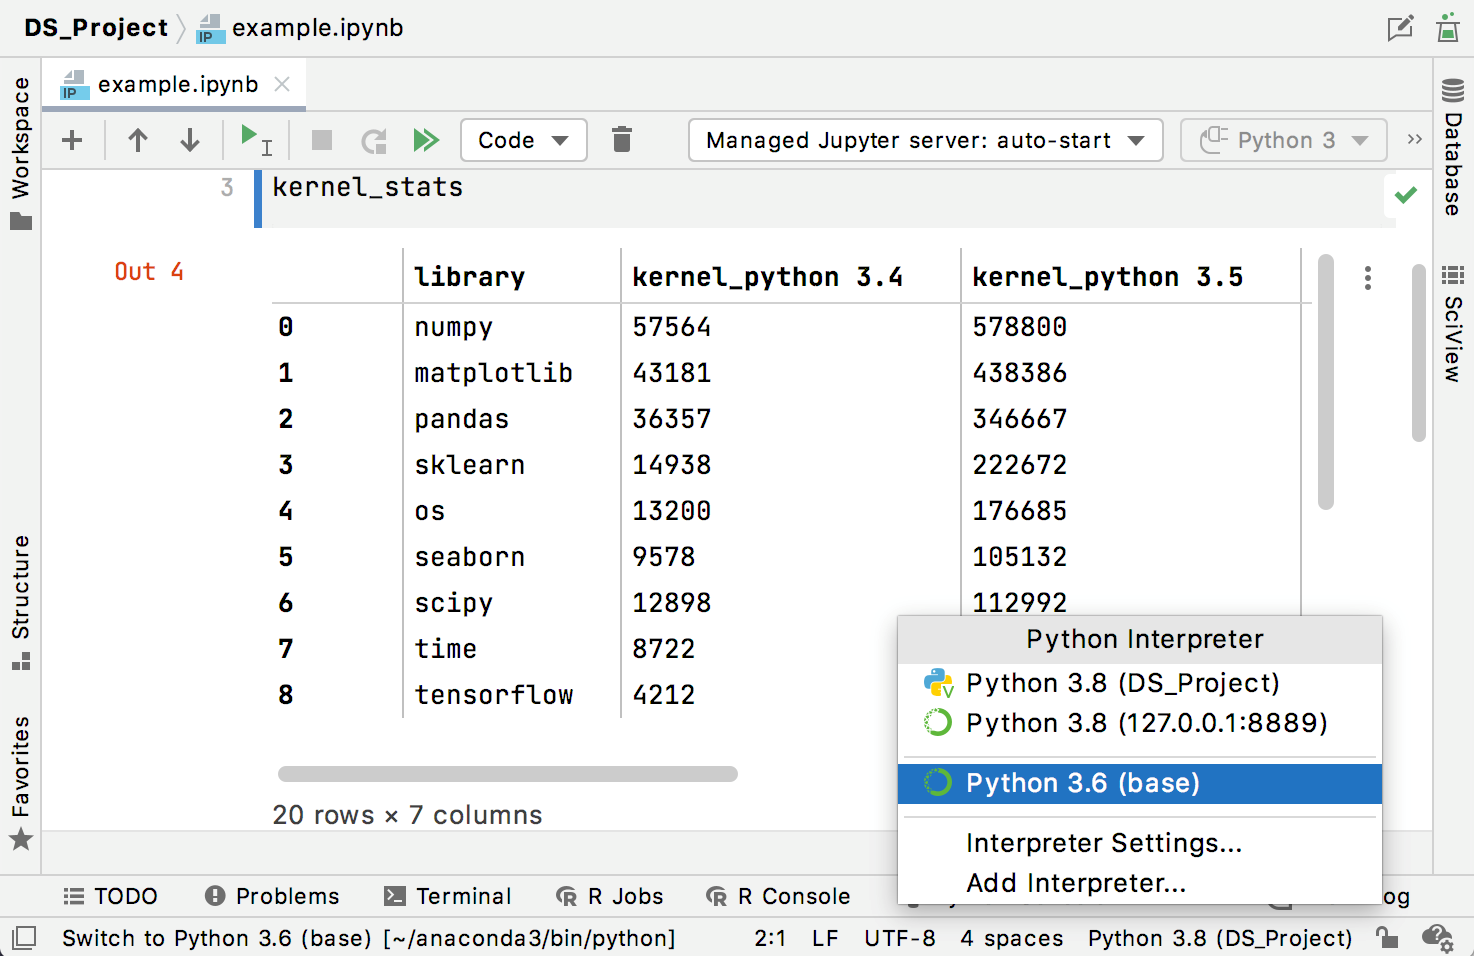
The environment selector is located in the lower-right corner of the JetBrains DataSpell UI. Click it and select the target environment from the list.
Create a new environment
With the Python interpreter selector, you can quickly create a new environment for your project.Select Add interpreter in the Python interpreter selector.
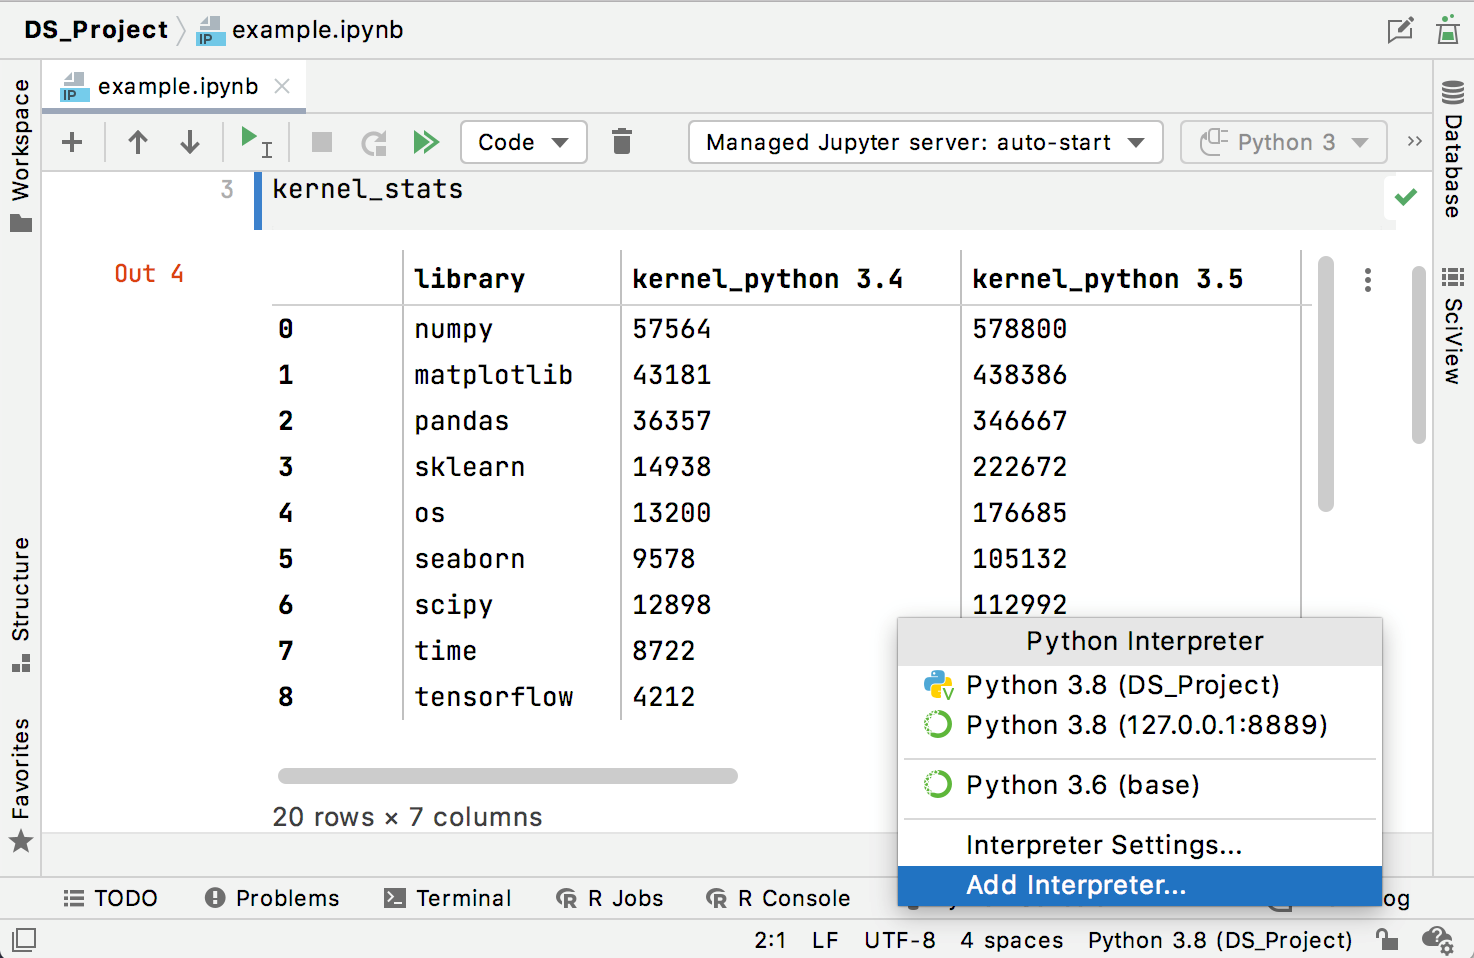
In the Add Python Interpreter dialog, enter the name of the new environment and select the type of environment:
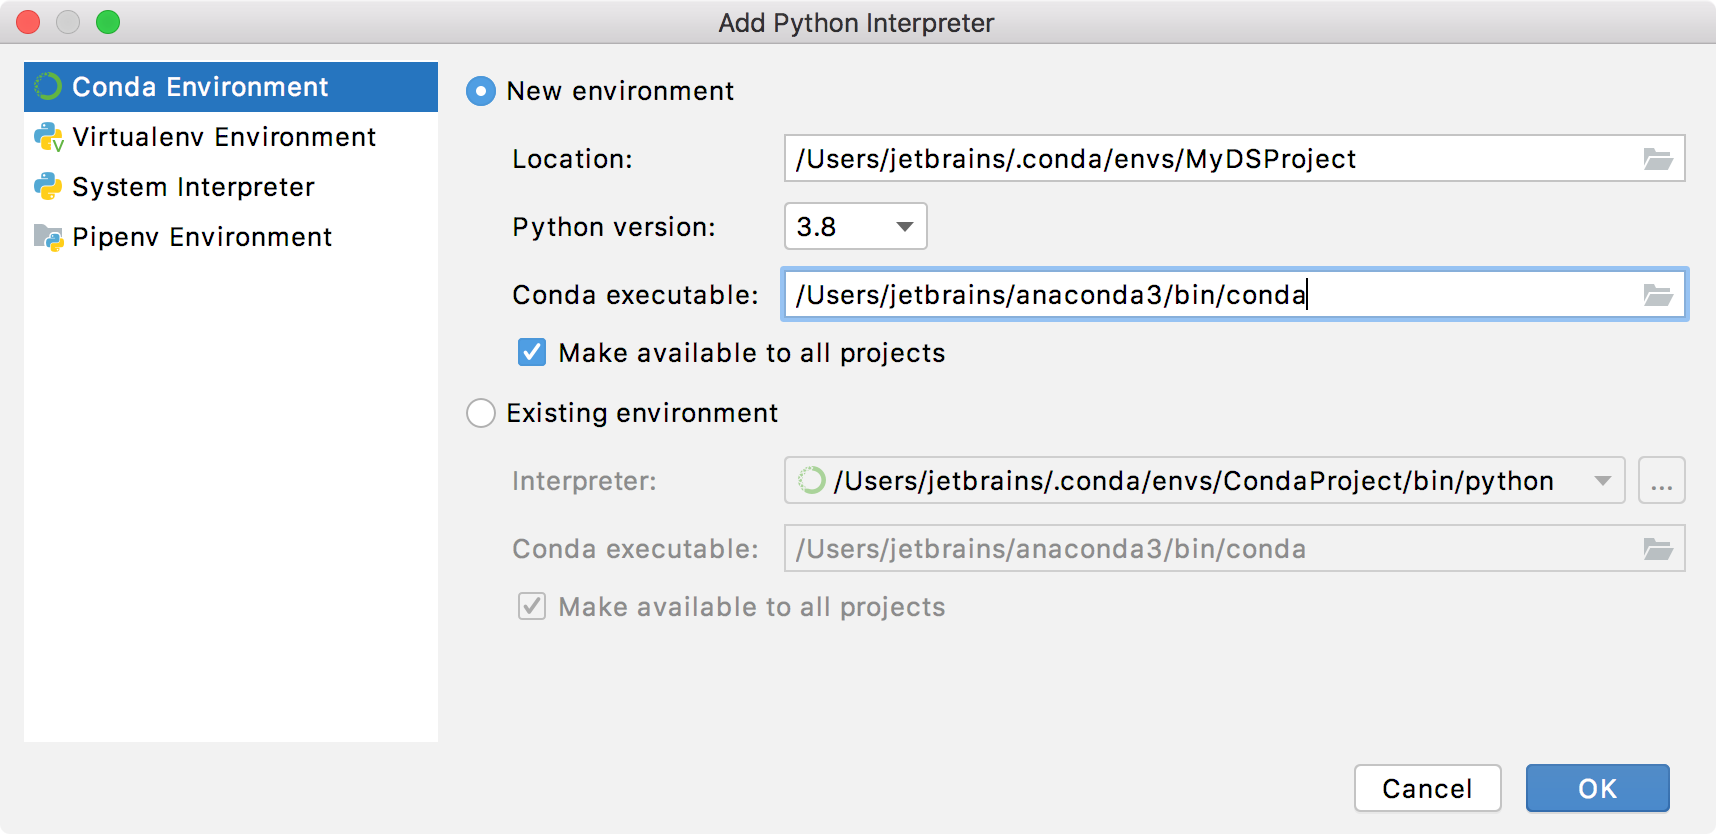
If New environment is selected:
Specify the location of the new Conda environment in the text field, or click
 and find location in your file system. Note that the directory where the new Conda environment should be located, must be empty!
Select the Python version from the list.
Specify the location of the Conda executable file in the text field, or click
 and find location in the Conda installation directory. You're basically looking for a path that you've used when installing Conda on your machine.
Select the Make available to all projects checkbox, if needed.
If Existing environment is selected:
Expand the Interpreter list and select any of the existing interpreters. Alternatively, click
 and specify a path to the Conda executable in your file system, for example, C:\Users\jetbrains\Anaconda3\python.exe.
Select the checkbox Make available to all projects, if needed.
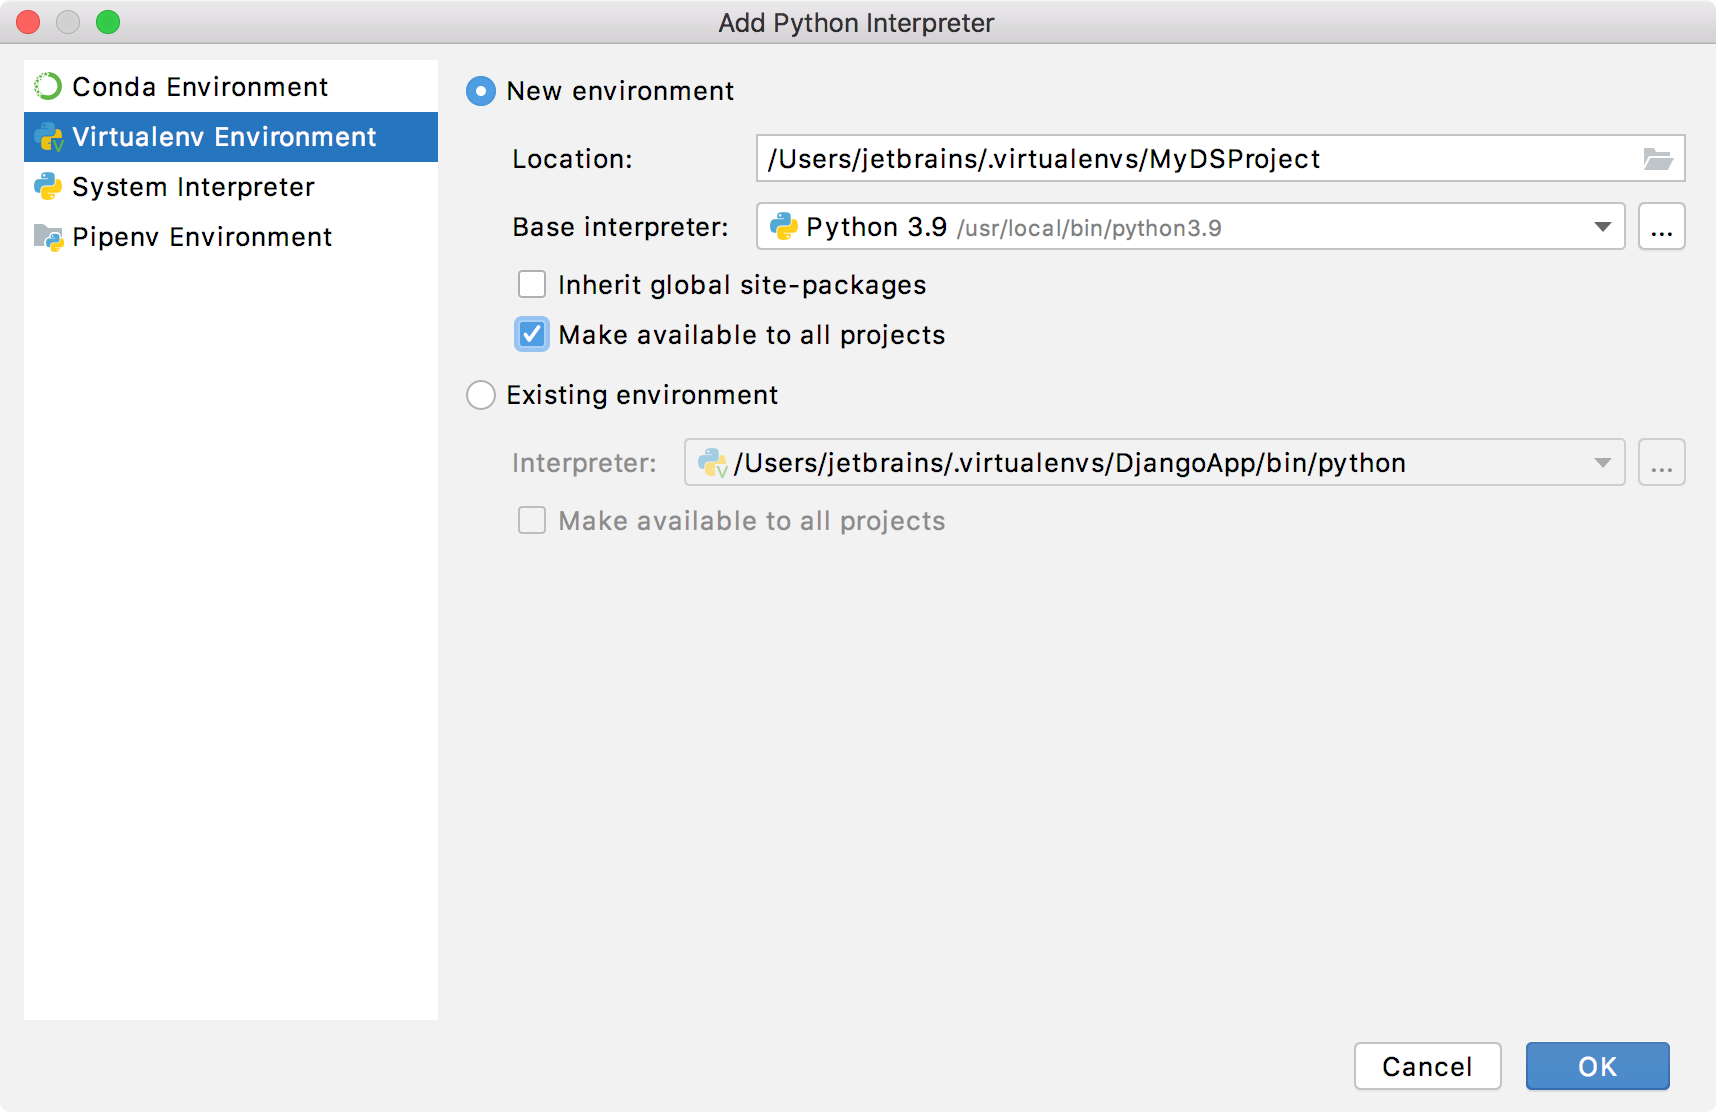
If New environment is selected:
Specify the location of the new virtual environment in the text field, or click
 and find location in your file system. Note that the directory where the new virtual environment should be located, must be empty!
Choose the base interpreter from the list, or click
 and find a Python executable in the your file system.
If JetBrains DataSpell detects no Python on your machine, it provides two options: to download the latest Python versions from python.org or to specify a path to the Python executable (in case of non-standard installation).

Select the Inherit global site-packages checkbox if you want to inherit your global site-packages directory. This checkbox corresponds to the
--system-site-packagesoption of the virtualenv tool.Select the Make available to all projects checkbox, if needed.
If Existing environment is selected:
Expand the Interpreter list and select any of the existing interpreters. Alternatively, click
 and specify a path to the Python executable in your file system, for example, C:\Python36\python.exe.
Select the checkbox Make available to all projects, if needed.
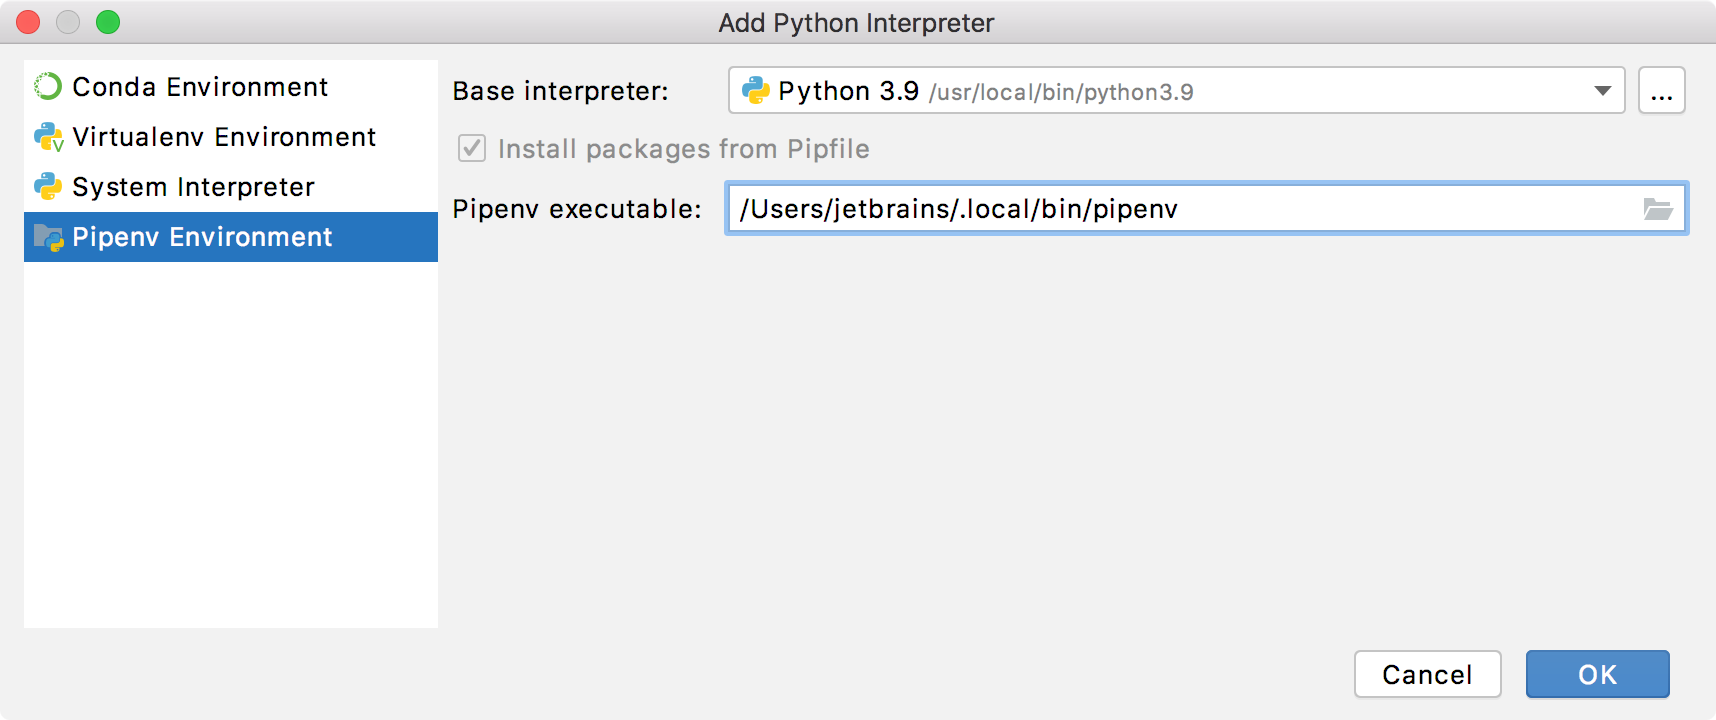
If you have added the user base’s binary directory to your
PATHenvironmental variable, you don't need to set any additional options: the path to the pipenv executable will be autodetected.If you see the Pipenv executable is not found error message, follow the pipenv installation procedure to discover the executable path and add it to the Pipenv executable field.
Manage packages
The reason for creating various Conda environments based on the same Anaconda installation is obvious - you can install specific packages for each environment and use them for specific tasks and projects.
You can install packages for an environment using pip and the Conda package manager. You can do it using the IDE UI in the environment settings or in the Terminal window.
Install packages using the environment settings
In the Python interpreter selector, select Interpreter Settings.
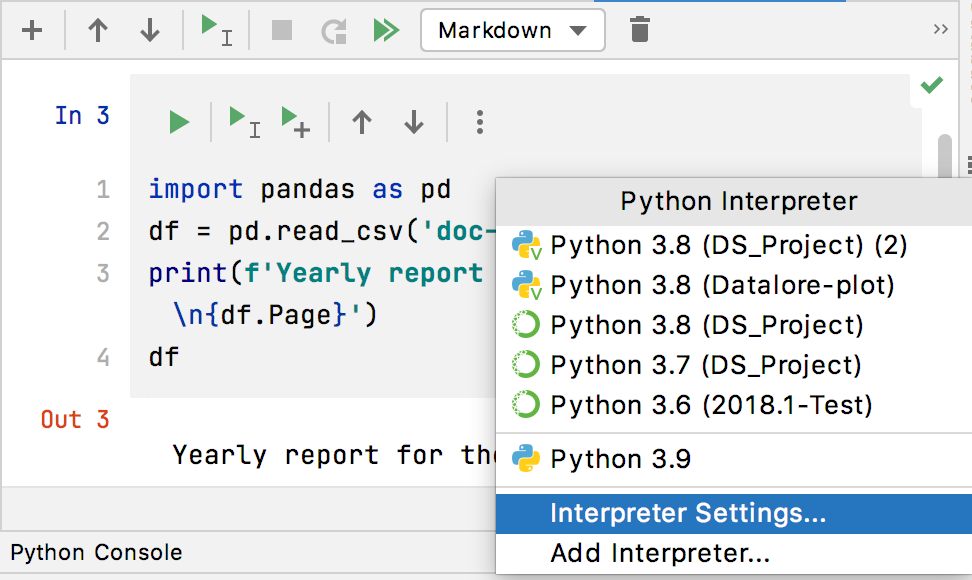
Select the target environment from the Python Interpreter list.
Click + to add a new package. Click the Conda package manager button (
) to manage packages from the Conda repository. Otherwise, JetBrains DataSpell will be using pip.
Type a package name in the search field and locate the target package. If needed, specify a package version. Then press Install
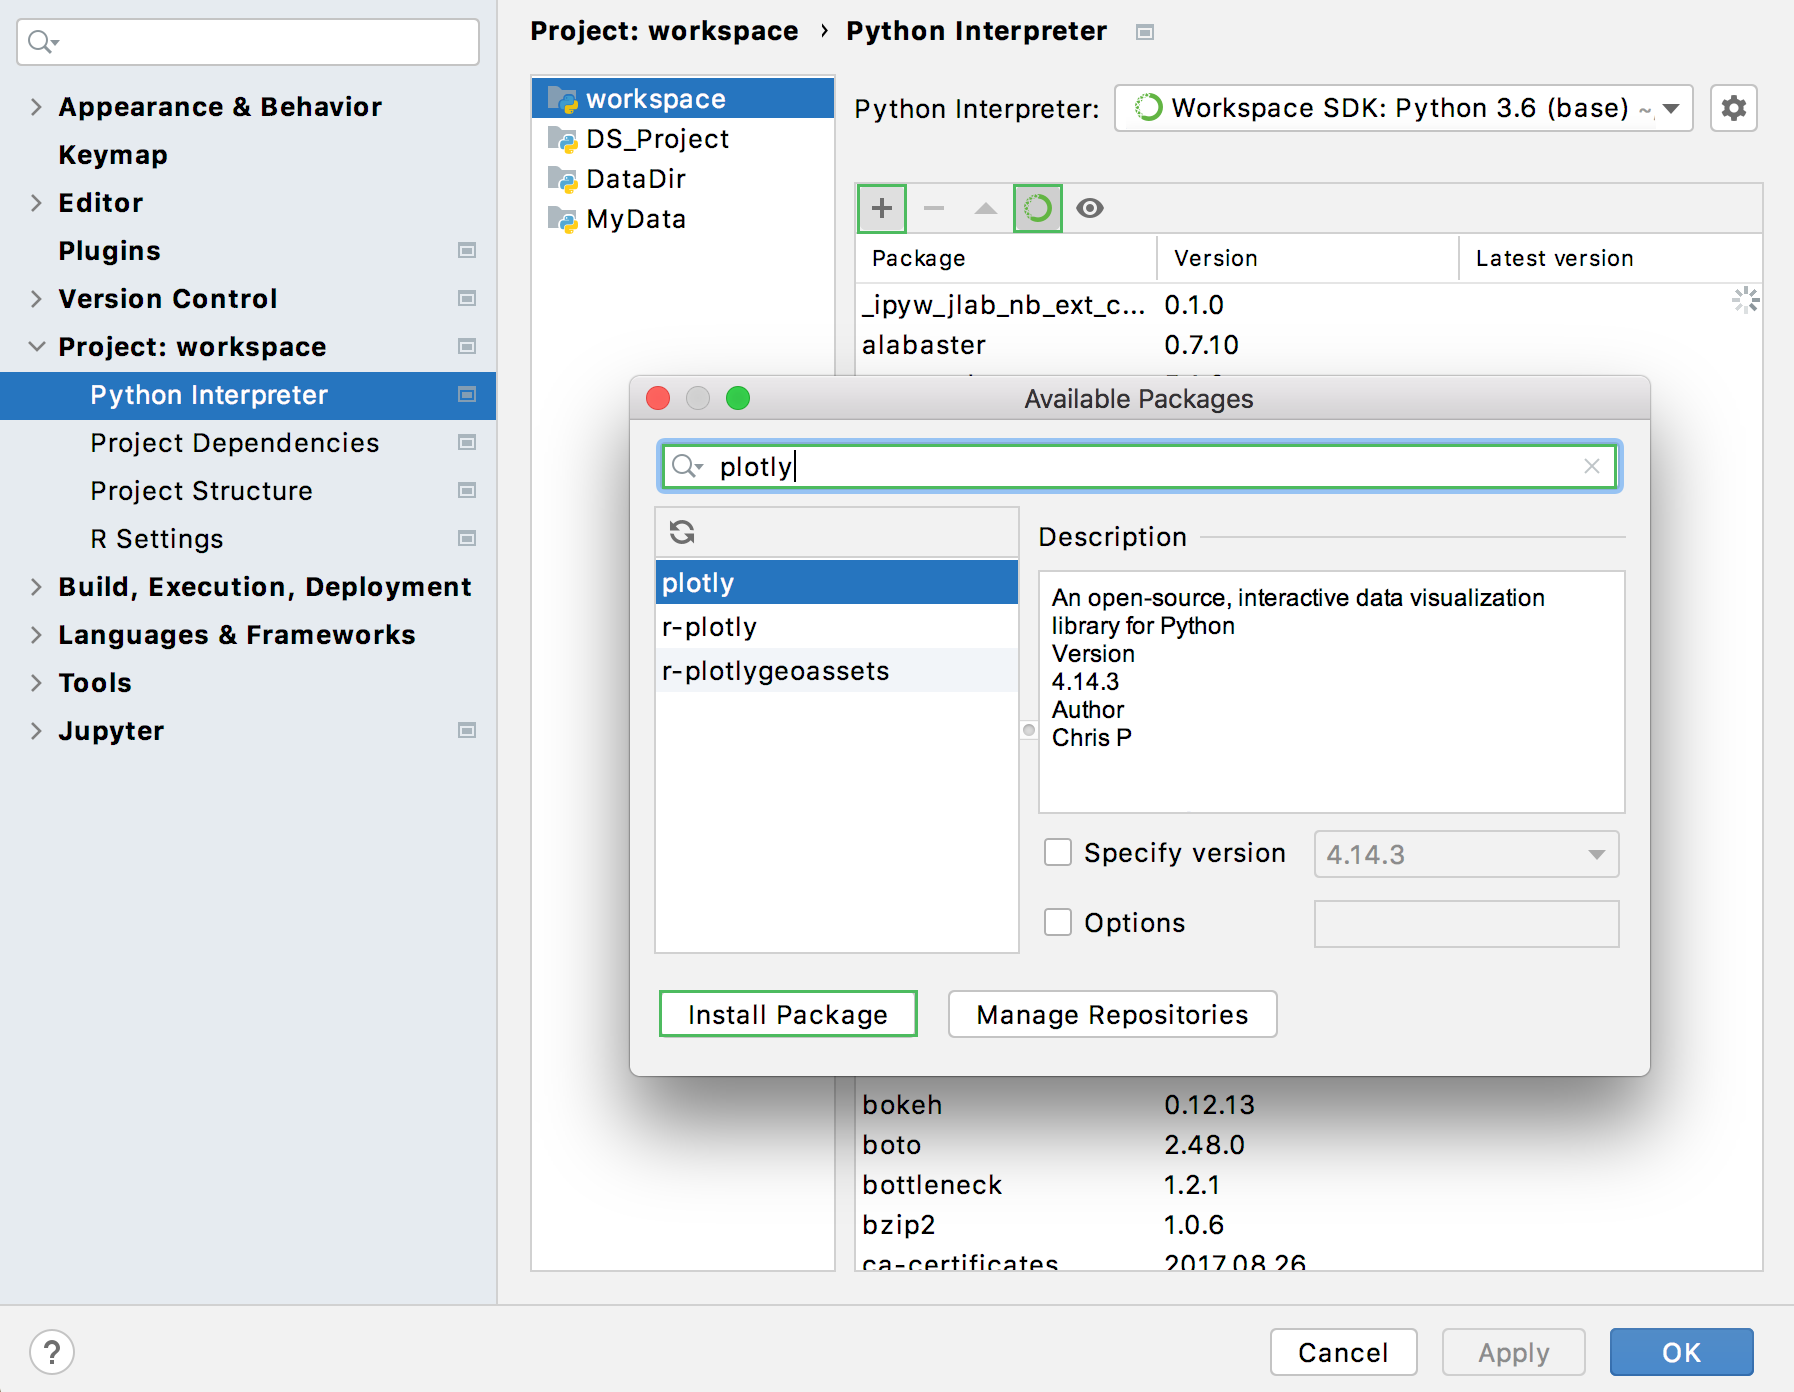
Close the window on the task completion. If needed, press the Manage Repositories button and add a custom repository from which you install packages.
Install packages in the Terminal window
Open the Terminal window.
To install a package from pip, execute:
pip install <package name>(for example,pip install plotly).To install packages from the Conda repository:
Navigate to the bin directory of your anaconda installation (for example, anaconda3/bin)
Execute the following command:
conda install <package name>(for example,conda install tensorflow).
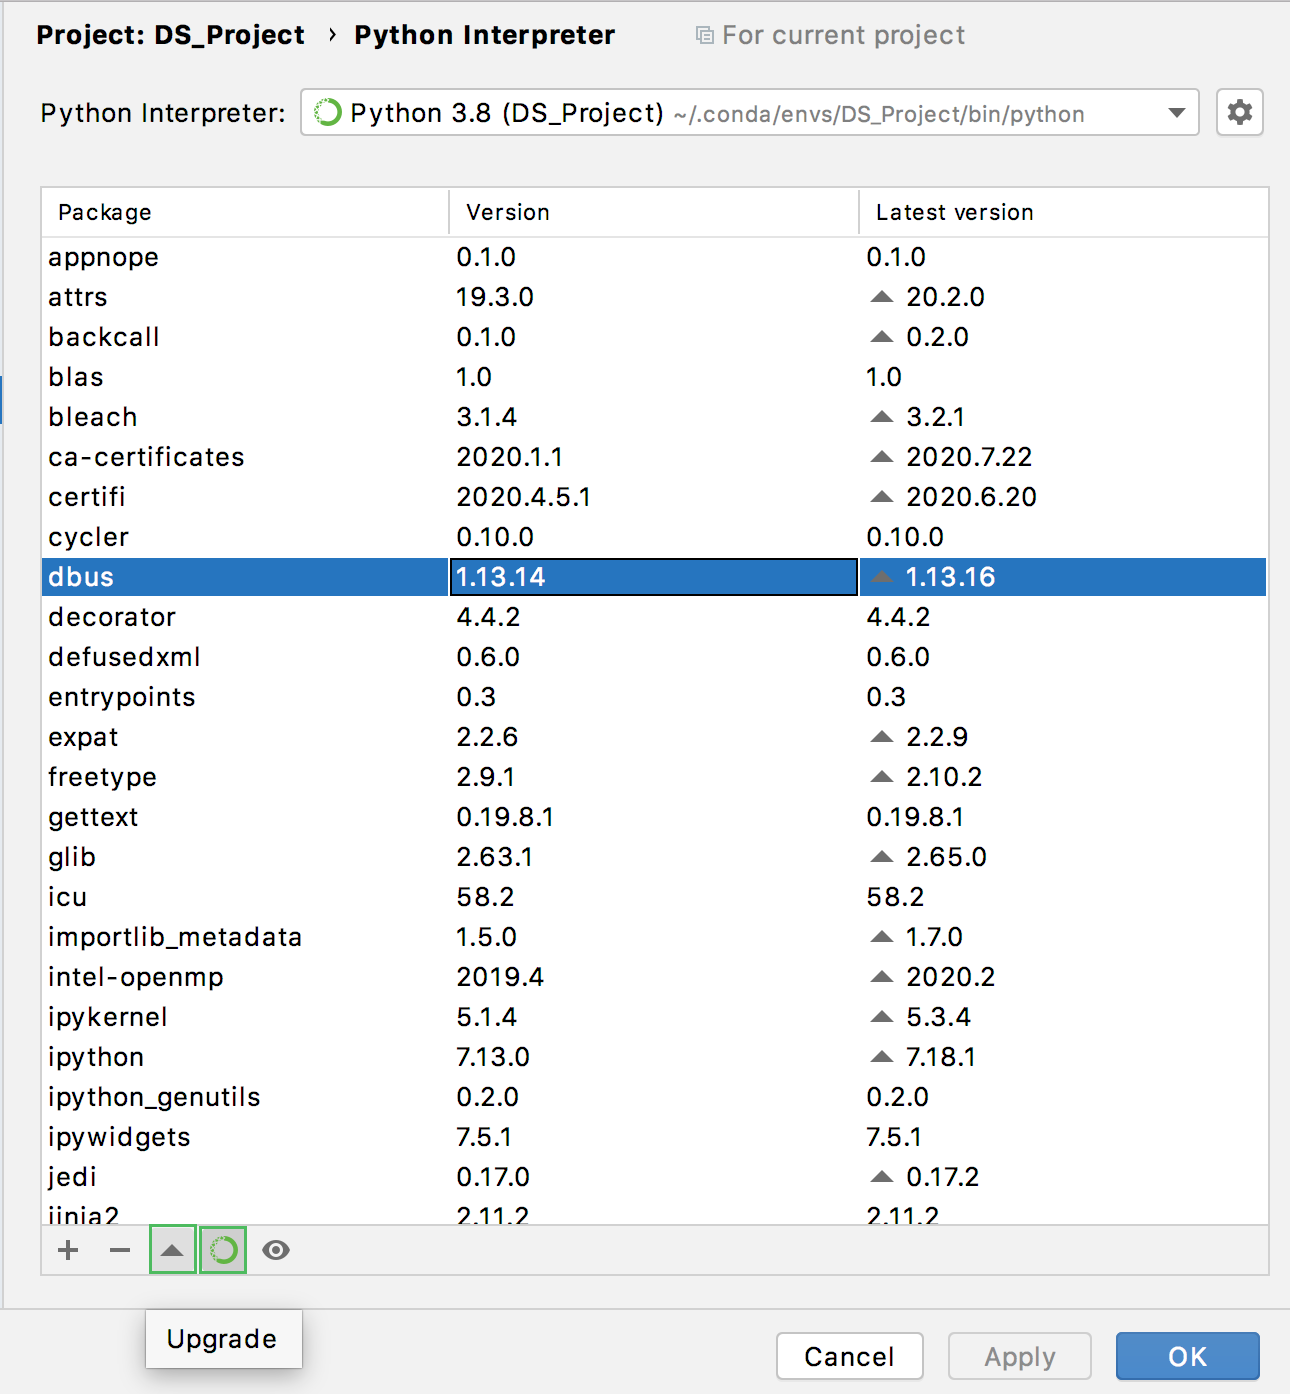
Sometimes, you want to upgrade packages in your environment. The quickest way is to use the environment settings.
Upgrade packages
In the Python interpreter selector, select Interpreter Settings.

Mind the
in the Latest version column. Select the corresponding package and click the Upgrade button (
).
