Hierarchy window
Windows | Hierarchies
Inspect | Hierarchies
The Hierarchy window can display several types of hierarchical structures of your code:
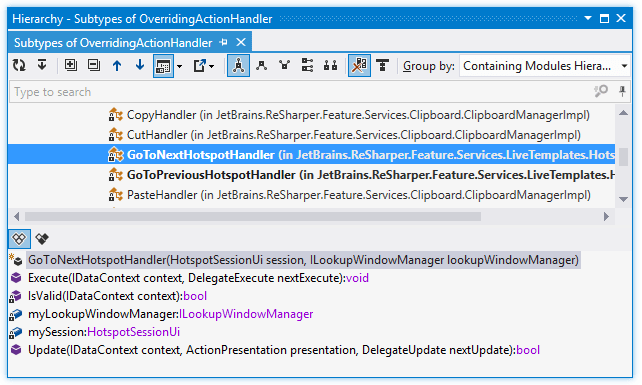
This view displays the hierarchy of types that includes members and the list of all subtypes and supertypes of a particular type. You can analyze the hierarchy and navigate to the declaration of any type by double-clicking it.

Control | Name | Description |
|---|---|---|
| Refresh | Updates window content to reflect any changes made in the code or externally. |
| Base on This | A selected type becomes the root of the hierarchy tree and the tree is rebuilt accordingly. The new base type is highlighted with bold. |
| Expand All/Collapse All | Expands/collapses all nodes in the current tab. |
| Previous/Next Shift+F8/F8 | Navigate to the previous/next item and scrolls through the source code accordingly. |
| Show Members | Hides or shows the preview pane in the position specified using the list (at the bottom or in the right part of the window). |
| Export | Click this button to export the data currently displayed in the window in text format , or use the drop-down selector to export the data in an XML or HTML format. The Export Data dialog that appears will help you save the data to a file or copy it to the clipboard . |
| Class Hierarchy | This tree shows all subtypes and supertypes of the center type. The center type can be located anywhere in the tree, not necessarily at the root. You can select a different center type using the Base on This button |
| Subtypes Hierarchy | This tree shows all subtypes of the center type. The center type is positioned at the root of the tree. |
| Supertypes Hierarchy | This tree shows all supertypes of the center type in ascending order (each child node is the supertype of its parent). The center type is positioned at the root of the tree. |
| Implementation Hierarchy | This tree shows all descendants of the center type. |
| Interface Leaves | In this mode, the hierarchy only shows derived interfaces that have classes as inheritors, and hides all intermediate interfaces that have other interfaces as inheritors. |
| Show Elements From This Solution | Hides symbols from external libraries. |
| Show on Diagram | Click this button to display all the types shown in the window in the type dependencies diagram view. |
| Referenced Projects | Click this button to display all project and assemblies referenced by the current project. |
| Referencing Projects | Click this button to display all project that reference the current project. The hierarchy is shown in ascending order (each child node is the project that reference its parent). The current project is positioned at the root of the tree. |
Group by | Allows grouping items in the window by different categories. | |
| All Instance Members (preview pane) | Displays all instance members in the preview pane. |
| Only Polymorphic Members (preview pane) | Restricts the preview pane to displaying only polymorphic members of the selected hierarchy node. |
The type dependency diagram view allows you to visually study dependencies between types in your solutions. You can add any number of types from different projects or compiled assemblies and visualize different kinds of dependencies between them. For more information, refer to Explore type dependency diagram.

Control | Name | Description |
|---|---|---|
| Refresh | Updates window content to reflect any changes made in the code or externally. |
| Undo | Click this button to revert the changes in the view (adding and removing items) step by step. |
| Redo | Click this button to revert the last Undo operation. |
| Export to PNG | Click this button to save the visible part of the diagram as a PNG image file. |
| Filter Dependencies | With this drop-list, you can select what kinds of dependencies should be displayed between types on the diagram. |
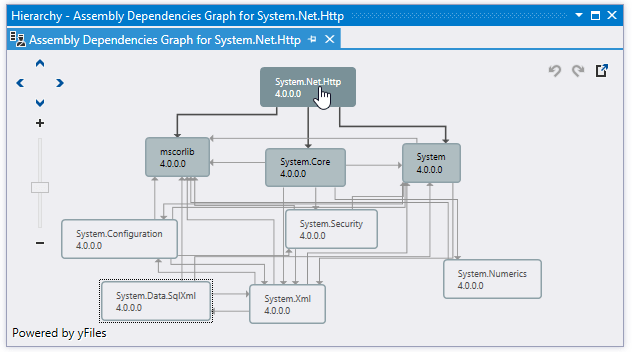
The assembly dependency diagram helps you visually explore dependencies between compiled assemblies. For more information, refer to Explore assembly dependency diagram.

Control | Name | Description |
|---|---|---|
| Undo | Click this button to revert the changes in the view (adding and removing items) step by step. |
| Redo | Click this button to revert the last Undo operation. |
| Export to PNG | Click this button to save the visible part of the diagram as a PNG image file. |
This view helps you explore hierarchy of references for any assembly and track down all assembly dependencies. Recursive dependencies are detected and marked with a glyph to the right of a reference entry. For more information, refer to Explore hierarchy of references.

When type or style hierarchies, or type dependency graphs open in the window, they are displayed in new tabs, which show up on the left. The previously open tabs move to the right if the width of the window allows, otherwise they unload themselves saving memory - but you can always restore them by clicking the arrow that appears to the right of the tabs and clicking the required tab:

To prevent a tab from unloading, click the pin icon ![]() next to the tab title.
next to the tab title.