Access rules
To restrict and fine-tune access to licenses within your organization, configure access rules and priorities.
How access rules work
In this section, you'll learn how licenses are distributed before any rules are created and how rules change user access.
Default license distribution policy
By default, before any rules are created, all authorized users have access to all licenses.
Rules help you restrict and fine-tune user access. Here's how it works:
- If you create a rule for a specific user or profile:
These users and profiles only have access to the licenses specified in the rule.
- If there are no rules for a specific user or profile:
These users and profiles have access to any available licenses. To restrict their access, you need to create a rule.
License distribution example
For example, let's say you have a single rule that grants User A access to PyCharm licenses. Here's how this rule is applied:
If
User Arequests aPyCharmlicense, they successfully obtain one.If
User Arequests aCLionlicense, their request is denied because, according to your rule set, they are only allowed to usePyCharm.If
User Brequests aCLionorPyCharmlicense, they successfully obtain one because there aren't any rules that restrict their access.
Enforcing a stricter distribution policy
You can enforce a stricter license distribution policy so that access is only granted to the users and profiles that are explicitly mentioned in your access rules.
If you do this, the semantics of your rules will change from restricting access to granting it.
- If you create a rule for a specific user or profile:
These users and profiles only have access to the licenses specified in the rule. (No change here.)
- If there are no rules for a specific user or profile:
These users and profiles don't have access to any licenses. To grant them access, you need to create a rule.
License distribution example
Going back to the example with a single rule that grants User A access to PyCharm, here's what will change:
If
User Arequests aPyCharmlicense, they'll still successfully obtain one.If
User Arequests aCLionlicense, their request will still be denied.But if
User Brequests aCLionorPyCharmlicense, their request will now also be denied because there are no rules that grant this user access to licenses.
To restrict global access
In the top menu, select Licenses.
In the menu on the left, select Rules.
At the top of the page, clear the Allow users that are not mentioned in the rules to get licenses checkbox.

Confirm your action in the dialog that pops up.
Adding access rules
This section walks you through the process of creating an access rule. Before you begin, make sure that you have configured user authentication.
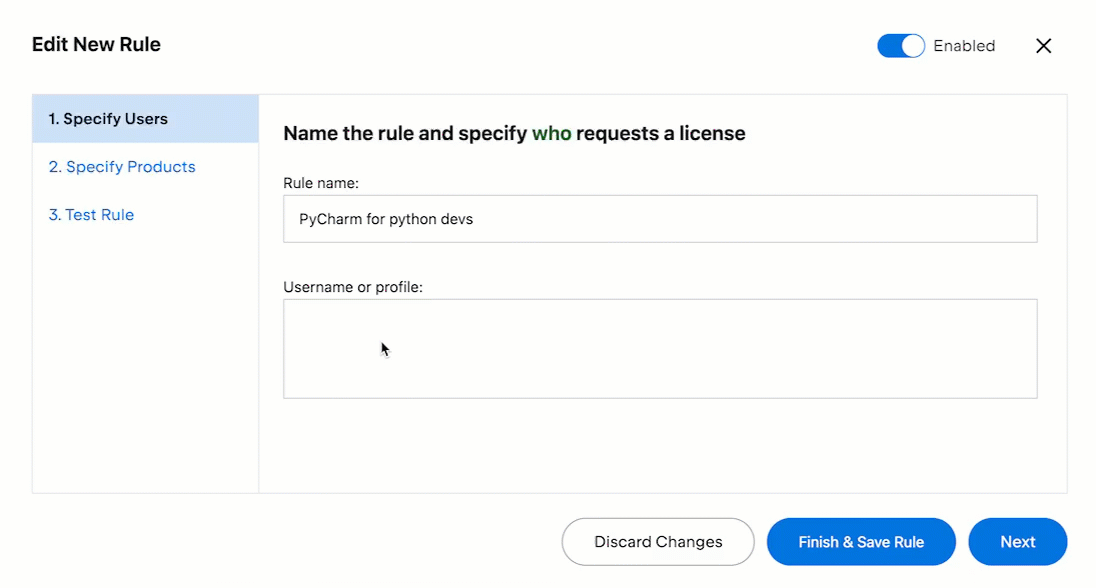
To add an access rule
In the top menu, select Licenses.
In the menu on the left, select Rules.
In the top-right corner, click Add rule.
In the dialog that pops up, enter the name of your rule.

In the same window, under Username or profile, enter the name of the user or profile to which this rule will apply.
Simply start typing to see all available user and profile names on the suggestion list. If the name you're looking for is not on the list, check the existing users and profiles to make sure that you're typing the name correctly.
Click Next. This will take you to the Specify products tab of the rule settings.
From the dropdown list, select the products you want these users to have access to.
You can select multiple products. The list will only display products for which you have at least one license in your Toolbox Enterprise.

Click Next. This will take you to the Test rule tab of the rule settings.
In this step, you can check the effective permissions that will be granted to users based on your current set of rules, including the one that you're creating.
To do so, select the user or profile and a product from their respective dropdown lists and click Check effective permissions.
On the Result tab, you'll see whether the user or profile you selected is allowed to use this product.

On the Related Rules tab, you'll see which rules affect their current permissions.

If your rule has the effect you're aiming for, click Finish & Save Rule to save it.
How multiple rules interact
Sometimes, more than one rule can apply to the same user. This can happen if:
You intentionally create multiple rules that include the same user by username.
The user belongs to multiple profiles, and separate rules exist for each group.
The user is included by username in one of the rules, but other rules apply to them based on their profile membership.
In such case, the user is allowed to obtain licenses for any of the products specified in the rules that apply to them.
For example, let's say you created a rule that allows User A to use PyCharm and then a second one that allows them to use CLion. In this case, User A will be able to obtain licenses both for PyCharm and CLion.
You can always check the effective permissions granted to any user or profile based on your current set of rules.
To check effective permissions
In the top menu, select Licenses.
In the menu on the left, select Rules.
In the top-right corner, click Test rules.
Select a user or profile and a product from their respective dropdown lists and click Check effective permissions.
On the Result tab, you'll see whether the user or profile you selected is allowed to use this product.
On the Related Rules tab, you'll see which rules affect their current permissions.
Managing rules
As a Toolbox Enterprise administrator, you can edit, disable, and remove rules.
To disable a rule
In the top menu, select Licenses.
In the menu on the left, select Rules.
In the rule list, locate the rule you want to disable.
Click on the toggle next to that rule, situated in the column.

The rule will remain on the list, but it will no longer affect the users' effective permissions. You can always re-enable it by clicking on the toggle again.
To remove a rule
In the top menu, select Licenses.
In the menu on the left, select Rules.
In the rule list, locate the rule you want to remove.
Click the menu icon with three dots next to the rule.
In the menu, select Remove.
To edit a rule
In the top menu, select Licenses.
In the menu on the left, select Rules.
In the rule list, locate the rule you want to edit.
Click the menu icon with three dots next to the rule.
In the menu, select Edit.
To edit the rule, follow the same steps you followed when adding it.
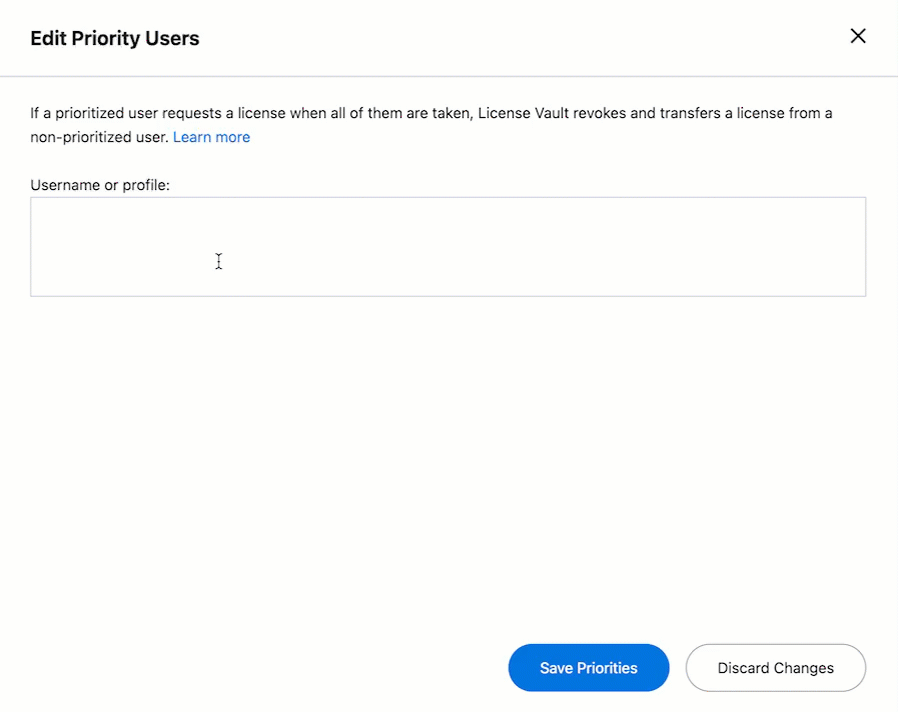
Adding prioritized users
Add users or profiles to the priority list to ensure they can get licenses even if your team reaches the maximum license capacity.
How distribution priority works
As long as Toolbox Enterprise has enough licenses for everyone, prioritized users are treated the same as everyone else.
Priority settings start working when all of the licenses are taken. In this case, Toolbox Enterprise denies requests from non-prioritized users. However, if a prioritized user requests a license, Toolbox Enterprise revokes one from a non-prioritized user and transfers it to the prioritized user.
Whose license will Toolbox Enterprise revoke?
Toolbox Enterprise picks a non-prioritized user at random to revoke their license.
Can Toolbox Enterprise deny a license request from a prioritized user?
A prioritized user's request can only be denied in one of the following cases:
Toolbox Enterprise has no licenses that match the user's request. For example, if the Toolbox Enterprise administrator only added
PyCharmlicenses, and the user requests a license forCLion.All of the licenses that match the user's request are already taken by other prioritized users.
Rules prohibit that this user obtains the requested licence. Priority does not override rule restrictions.
To add or remove a prioritized user
In the top menu, select Licenses.
In the menu on the left, select Rules.
At the top of the page, select the Priorities tab.
In the top-right corner, click Edit Priorities.
Edit the list of prioritized users and profiles.
To add a new prioritized user or profile, enter their name into the corresponding field.
Simply start typing to see all available user and profile names on the suggestion list. If the name you're looking for is not on the list, check the existing users and profiles to make sure that you're typing the name correctly.
To remove a prioritized user or profile, click on the x button next to their name.
Click Save Priorities to save your changes.