SpringUltimate
Required plugin: Spring (bundled)
Spring is an application framework for the Java platform. It helps you build modern web applications with support for microservice architectures, cloud systems, reactive processing, and serverless workloads.
IntelliJ IDEA provides extensive coding assistance for Spring, including a dedicated project wizard, code highlighting, intelligent context actions, embedded documentation, navigation, and highly customizable run configurations.
If you are new to Spring, start with Tutorial: Create your first Spring application.
To use Spring in your project, you need the Spring facet that comprises libraries and UI elements for configuring settings specific to Spring. IntelliJ IDEA automatically detects Spring configuration files in your code. The IDE will inform you if the project requires any adjustements and suggest the necessary actions. So normally, manual configuration is not required.
However, if IntelliJ IDEA does not detect configuration files automatically, you can add the facet manually:
Manually add Spring support to existing modules
From the main menu, select File | Project Structure or press Ctrl+Alt+Shift+S to open the Project Structure dialog.
From the left-hand list, select Modules.
Select the necessary module and click
in the middle section.
Select Spring from the list.
Select the necessary library.
If you already have a Spring library, select Use library and specify the library that you want to use.
If you have the corresponding JAR files, click Create and select the files to arrange into a new library.
If you do not have a library, select Download.
Whatever option you choose, you can click Configure to edit the selected library settings and contents.
When you are done, click OK to add the facet to the module.
If the Spring facet is configured correctly, you will see Spring gutter icons marking each component, bean, and so on. To configure gutter icons, open Settings/Preferences Ctrl+Alt+S and go to Editor | General | Gutter Icons.
Create an application context
The Spring application context is a way of grouping configuration files in IntelliJ IDEA. When you create a context, you let IntelliJ IDEA understand the relationship between configuration files included into this context.
You can create as many application contexts as you need and add any configuration file in more than one context.
From the main menu, select File | Project Structure or press Ctrl+Alt+Shift+S to open the Project Structure dialog.
From the left-hand list, select Facets.
Select the Spring facet from the list in the middle and click
in the right-hand section.
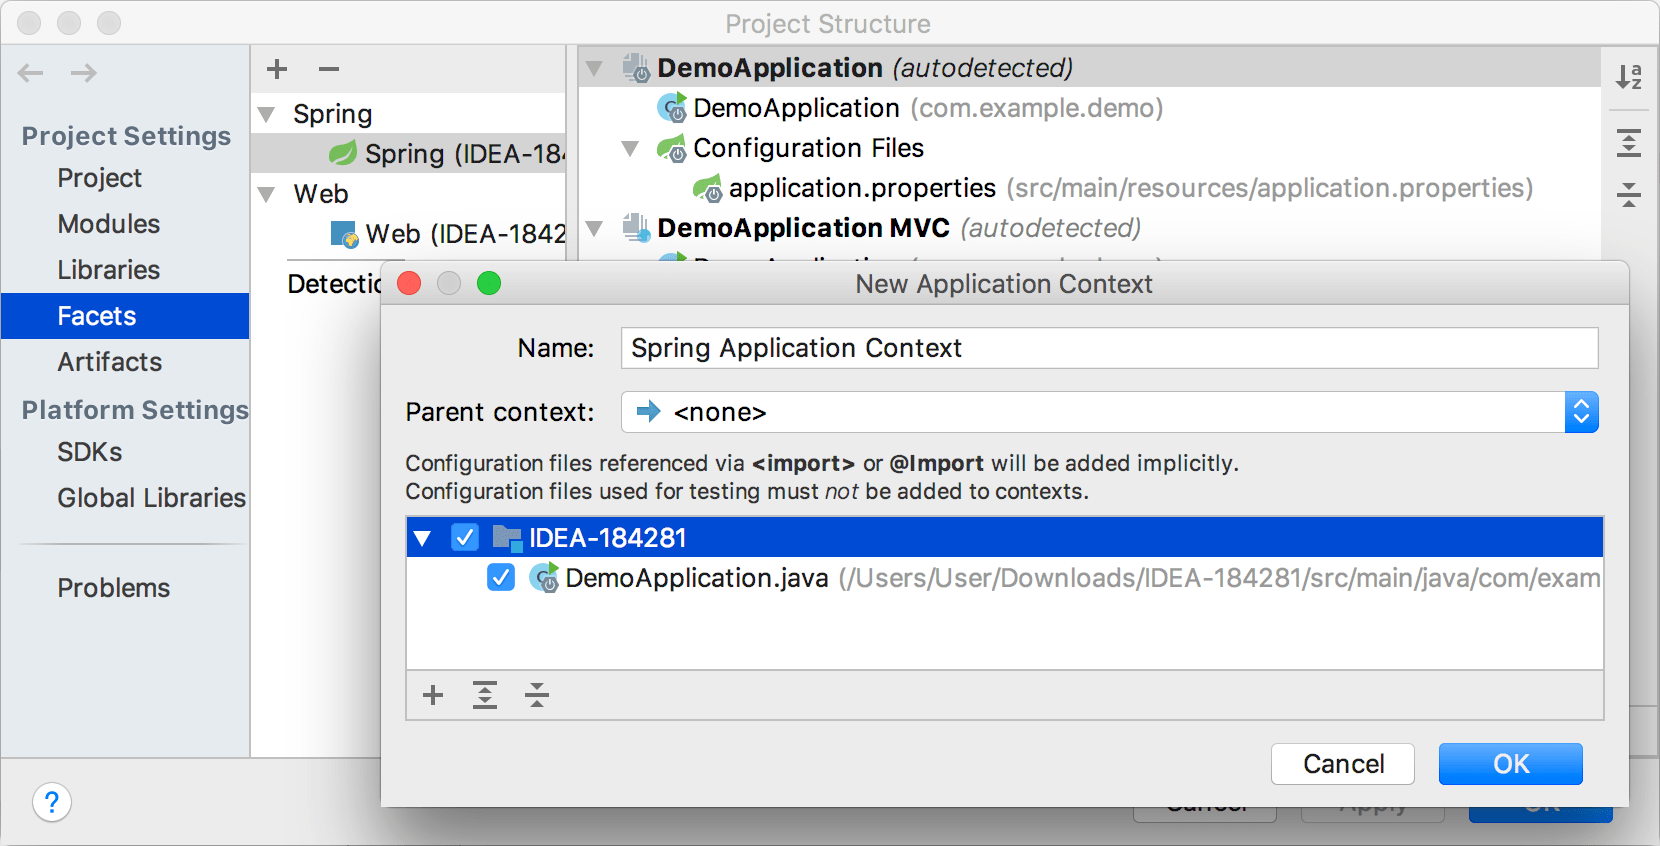
In the New Application Context dialog, specify the name for context, and select the files you want to include in the context.

note
In some cases, adding an application context is not required. For example, Spring MVC web applications have strict rules about their configuration. Spring support in IntelliJ IDEA can deduce them and create an autodetected application context for you, as well as set up the Web facet.
Configure a parent context
IntelliJ IDEA allows you to configure a parent-child relationship between contexts. Beans from a parent context are visible to beans in child contexts, but not vice versa. Therefore, beans from child contexts can use configuration from the parent context.
For example, Spring MVC applications usually have two contexts: one for the web layer beans and the other for services and repositories. The web layer context will be a child context in this case, as you need to inject services into controllers, not the other way around.
To configure a parent context, use the New Application Context dialog, as described in Create an application context.
The Multiple Context panel shows up on top of the editor for files included into two or more application contexts. You can use this panel to select the active context, for example, if you want to run your application with a specific configuration, and change highlighting. To disable the panel, click and clear the Show Multiple Context panel checkbox.
note
IntelliJ IDEA can configure the parent context automatically. For example, if the IDE detects the Spring Cloud context, it will make it a parent application context for Spring Boot.
Change active profiles
Spring allows you to map specific contexts or beans to different profiles, for example, test or production. This way, you can activate different profiles in different environments.
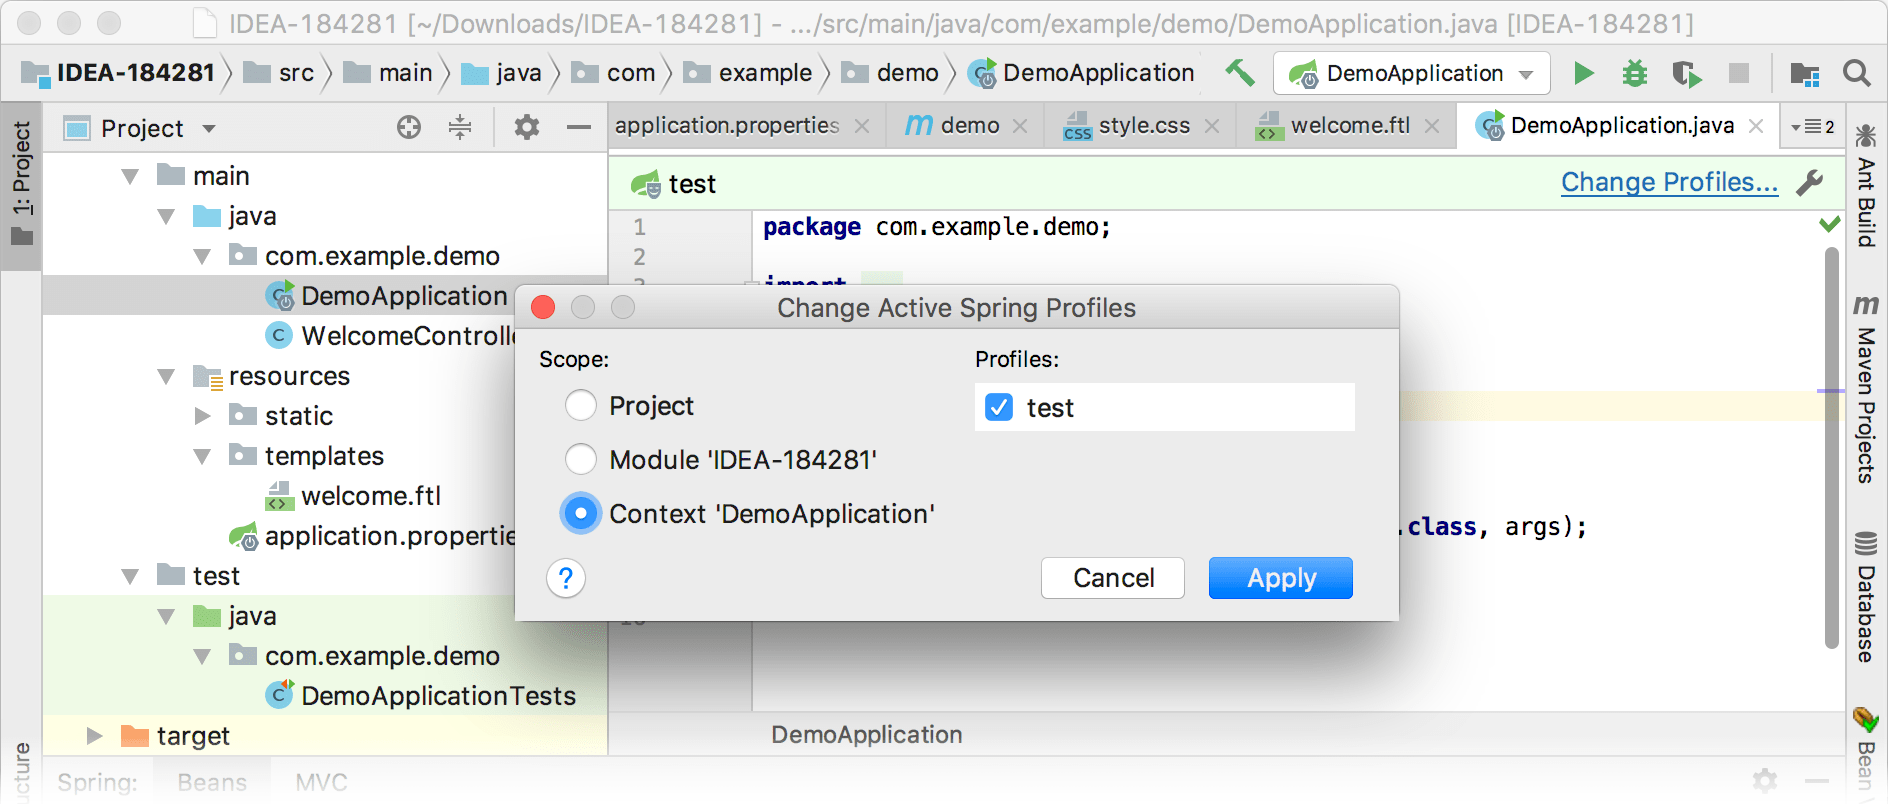
If you have defined at least one profile in your project, IntelliJ IDEA will show a special panel on top of the editor. You can use this panel to view the current profile name and change active profiles.
tip
You can also change active profiles in the Spring tool window. Right-click a component and select Change Active Spring Profiles.
Click Change Profiles on the panel.
Select the component to which you want to map the profile. This can be either the entire project, the current module, or the current context.
Select the profile to which you want to map this component.

If you want to hide the panel, click and clear the Show Profiles Panel checkbox.