Jakarta Persistence (JPA)
Last modified: 11 February 2024Required plugin: Jakarta EE: Persistence (JPA) (bundled)
Jakarta Persistence (JPA), formerly known as Java Persistence API, is a Java specification for managing relational data in Java Enterprise applications.
Enable the Jakarta EE: Persistence (JPA) plugin
This functionality relies on the Jakarta EE: Persistence (JPA) plugin, which is bundled and enabled in IntelliJ IDEA by default. If the relevant features aren't available, make sure that you didn't disable the plugin.
note
The Jakarta EE: Persistence (JPA) plugin is available only in IntelliJ IDEA Ultimate.
Press to open the IDE settings and then select Plugins.
Open the Installed tab, find the Jakarta EE: Persistence (JPA) plugin, and select the checkbox next to the plugin name.
IntelliJ IDEA provides the following:
Coding assistance specific to JPA.
A dedicated facet for managing the JPA configuration persistence.xml and object-relational mapping orm.xml files.
The Persistence tool window for managing your JPA project items, creating configuration files and persistent classes, navigating to related source code in the editor, opening diagrams and consoles, and more.
Entity-relationship (ER) diagrams that you can access from the Persistence tool window.
An ability to generate managed entity classes and object-relational mappings for them by importing a database schema or an EJB deployment descriptor file ejb-jar.xml.
The JPA console for writing and running JPQL queries, and analyzing the query results.
Create a new Java Enterprise project with JPA
Since JPA is part of Jakarta EE (formerly known as Java EE), you can add support for it to any Java Enterprise application.
Click New Project on the Welcome screen or select File | New | Project.
From the Generators list, select Jakarta EE.
Name the new project, select a build tool, a language you want to use, and select the Web application project template.
From the JDK list, select the JDK that you want to use in your project.
If the JDK is installed on your computer, but not defined in the IDE, select Add JDK and specify the path to the JDK home directory.
If you don't have the necessary JDK on your computer, select Download JDK.

On the next step of the wizard, select the Java Enterprise version to be supported.
From the Dependencies list, select Persistence (JPA).
If you are not going to implement all the interfaces of the JPA specification yourself, you also need to include a persistence framework. By default, IntelliJ IDEA provides support for the following persistence frameworks:
EclipseLink is the reference implementation. Select it if you are just trying things out.
Hibernate is the most popular implementation. For more information, refer to Hibernate.

Click Create.
For more information about creating a Java Enterprise project, refer to Tutorial: Your first Java EE application.
Enable JPA support for an existing project
Open the build file in the editor (pom.xml or build.gradle depending on the build tool that you use in your project).
Add the following dependency, but make sure to change the version according to your project's requirements:
MavenGradlePress to import the changes.
Once the dependency has been added, Jakarta Persistence features, such as the Persistence tool window, become available right away.
For more information about working with build tools, refer to Maven or Gradle.
Share facet settings
You can change and share settings by creating custom facets and adding a module file with the .iml extension to the version control system.
For example, to share a selected data source for JPA within your team, you can create a JPA facet and commit its settings.
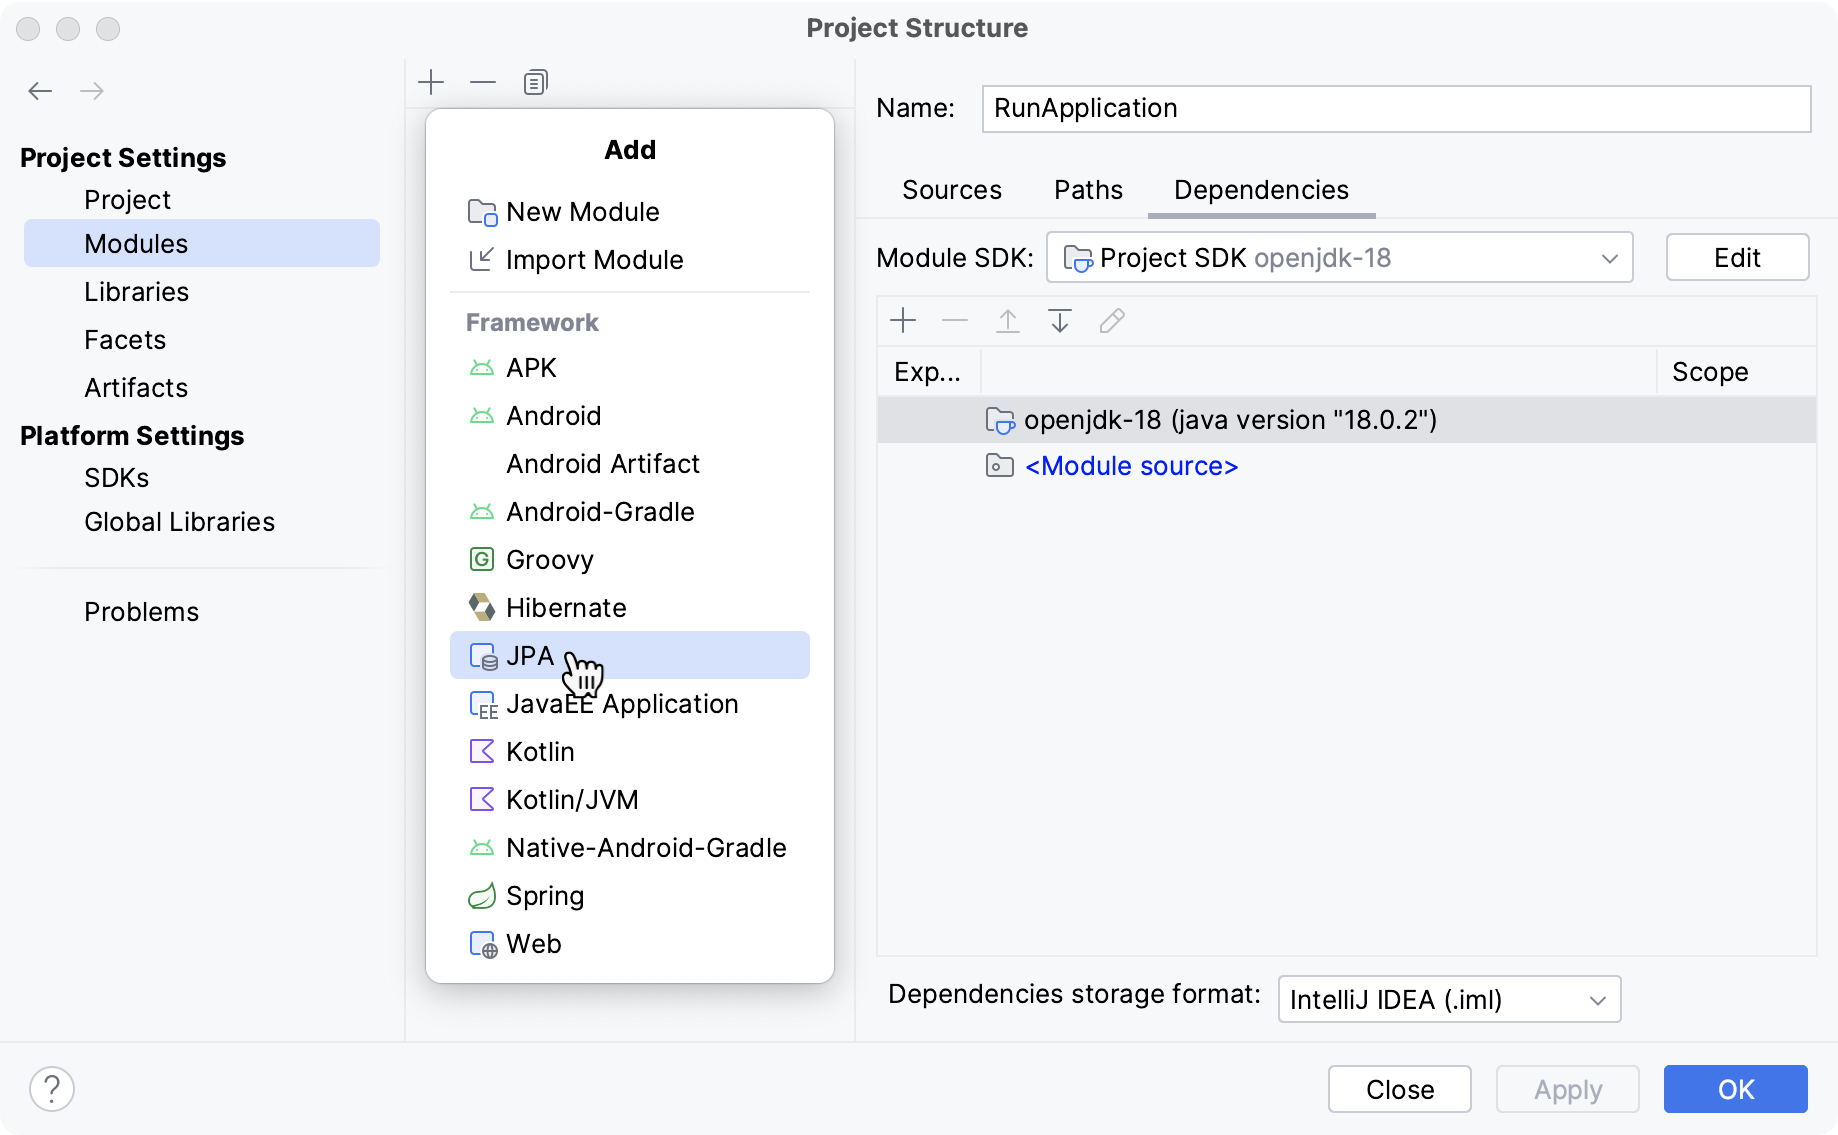
In the main menu, go to File | Project Structure or press . Then select Modules.
Make sure the module to which you want to add a facet is selected and click
above the list of modules. From the list of available facets, select JPA.

The Descriptors section becomes available on the right.
In the Descriptors section, click
and select a descriptor type. Create a new file or specify the path to an existing one.
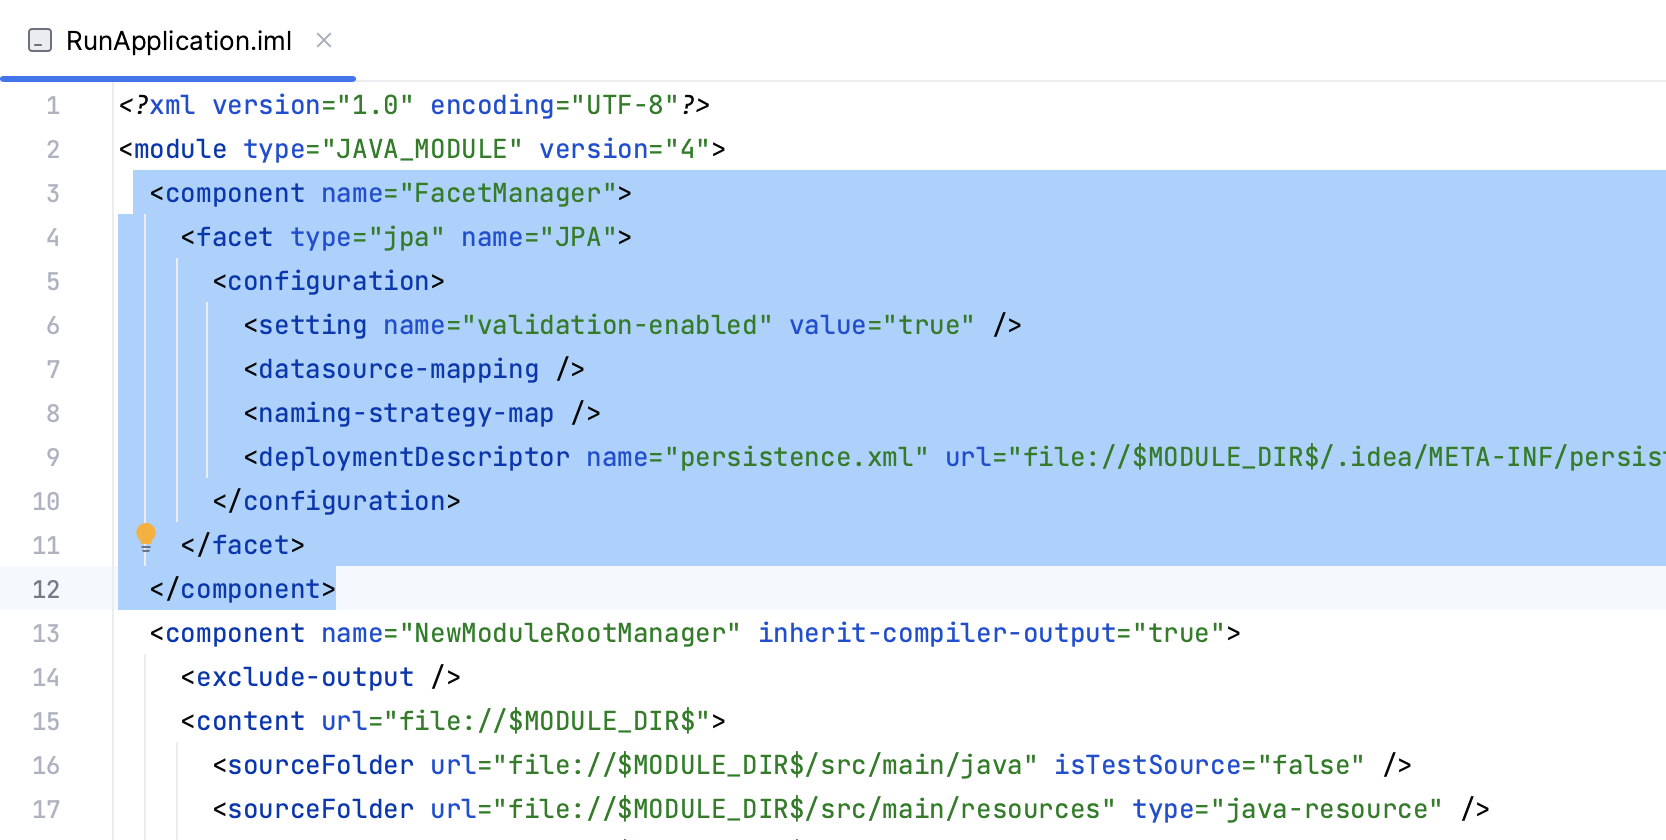
Reopen the project. After that, the changes will appear in the .iml file of the module to which you have added the facet.

Add the .iml file to your version control system.