Add Spring support to existing project
IntelliJ IDEA automatically detects Spring in your project based on the XML configuration or @Configuration annotations. Normally, a Spring project does not require manual configuration, and most of the features are available without adding the Spring facet.
However, if you have multiple Spring application contexts, you have to map existing configuration files to application contexts so that IntelliJ IDEA provides correct coding assistance and enables gutter icons in bean definitions. The IDE will inform you if the project requires additional configuration, and a warning will be displayed on top of a configuration file if it is not mapped to any application context. You can also check the Spring configuration using the dedicated action. To map you configuration files to application contexts, you have to do the following:
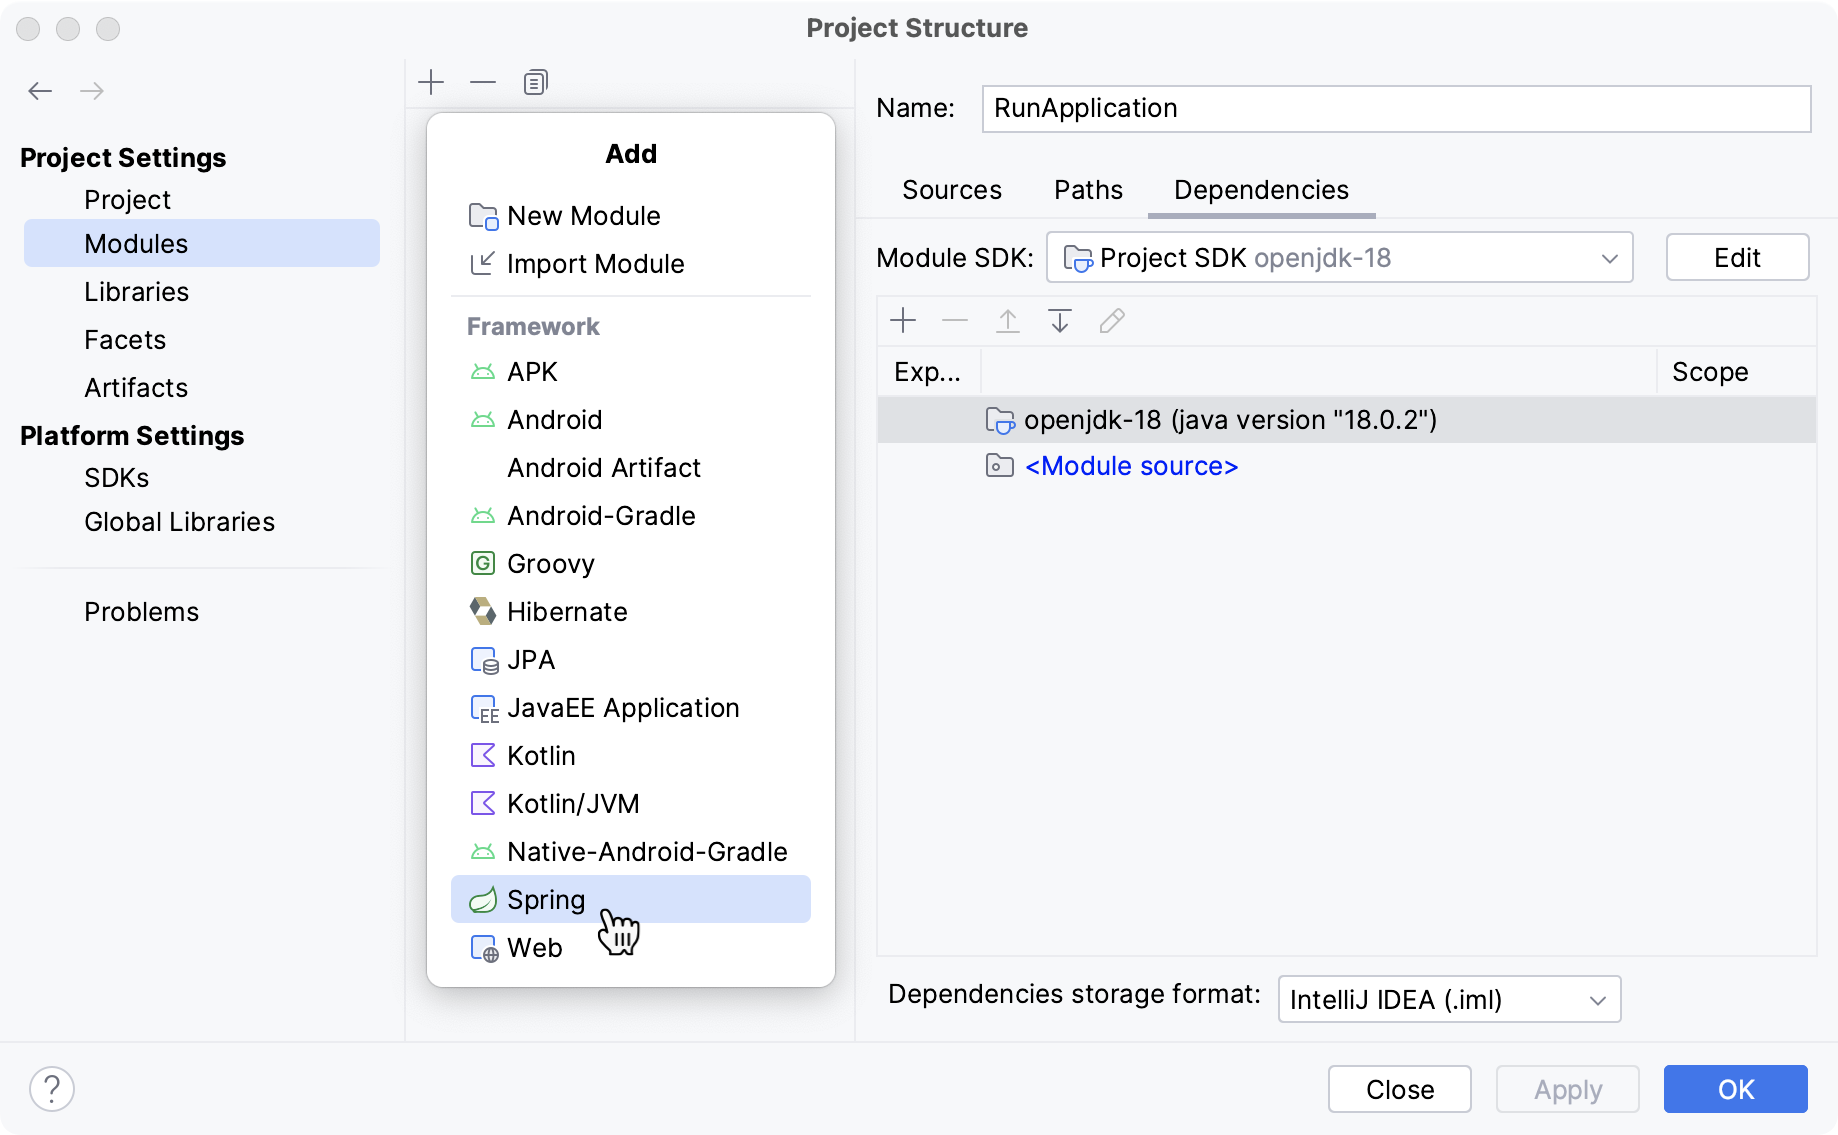
In the project settings, add the Spring facet.
Add Spring facet
In the main menu, go to or press Ctrl+Alt+Shift+S to open the Project Structure dialog.
From the left-hand list, select Modules.
Select the necessary module and click
in the middle section.
Select Spring from the list.
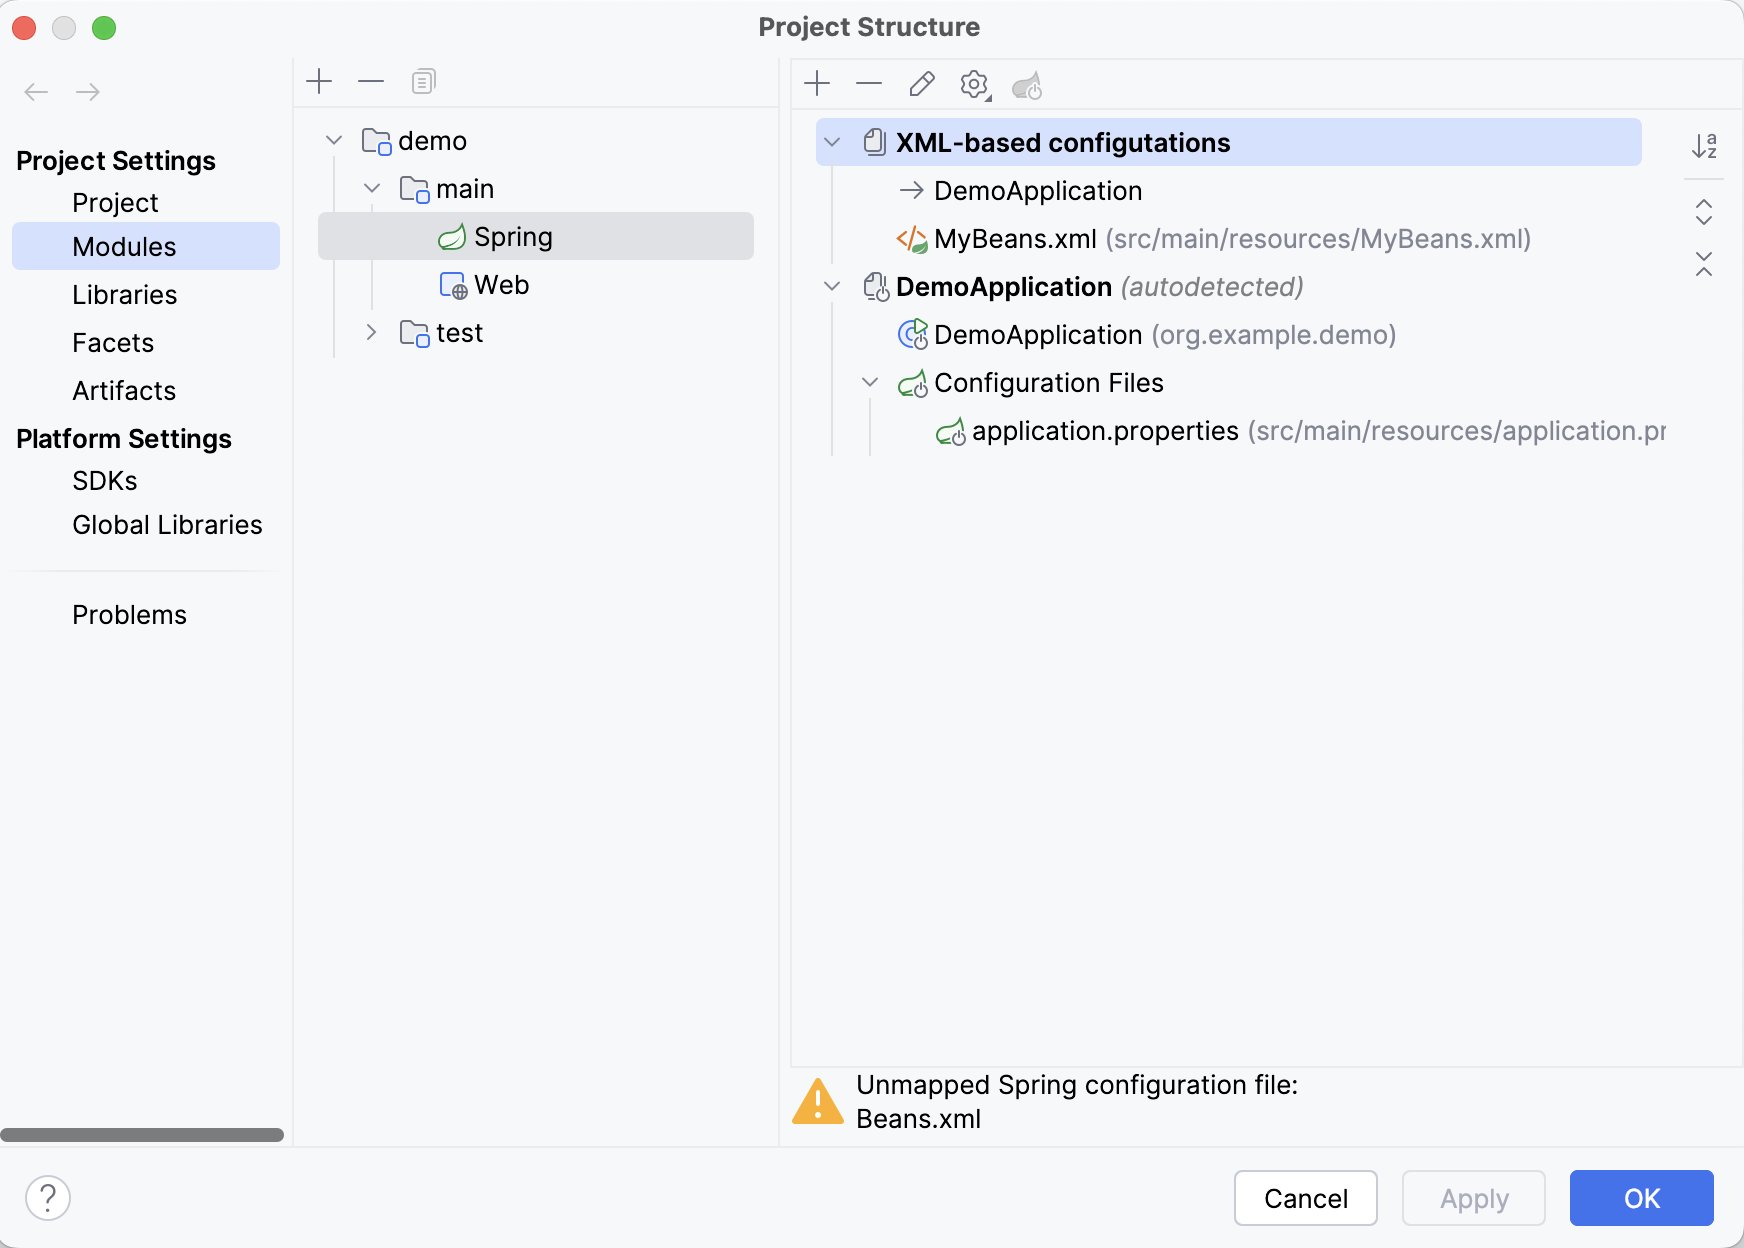
At this point, you may already see autodetected contexts and configuration files as well as unmapped files.
Create application contexts
In the project structure (Ctrl+Alt+Shift+S), under , select the added Spring facet.
Click
to create a new context.
In the New Application Context dialog, specify the name for context and select the configuration files that should be used in the context (either XML files or source code files annotated with
@Configuration).
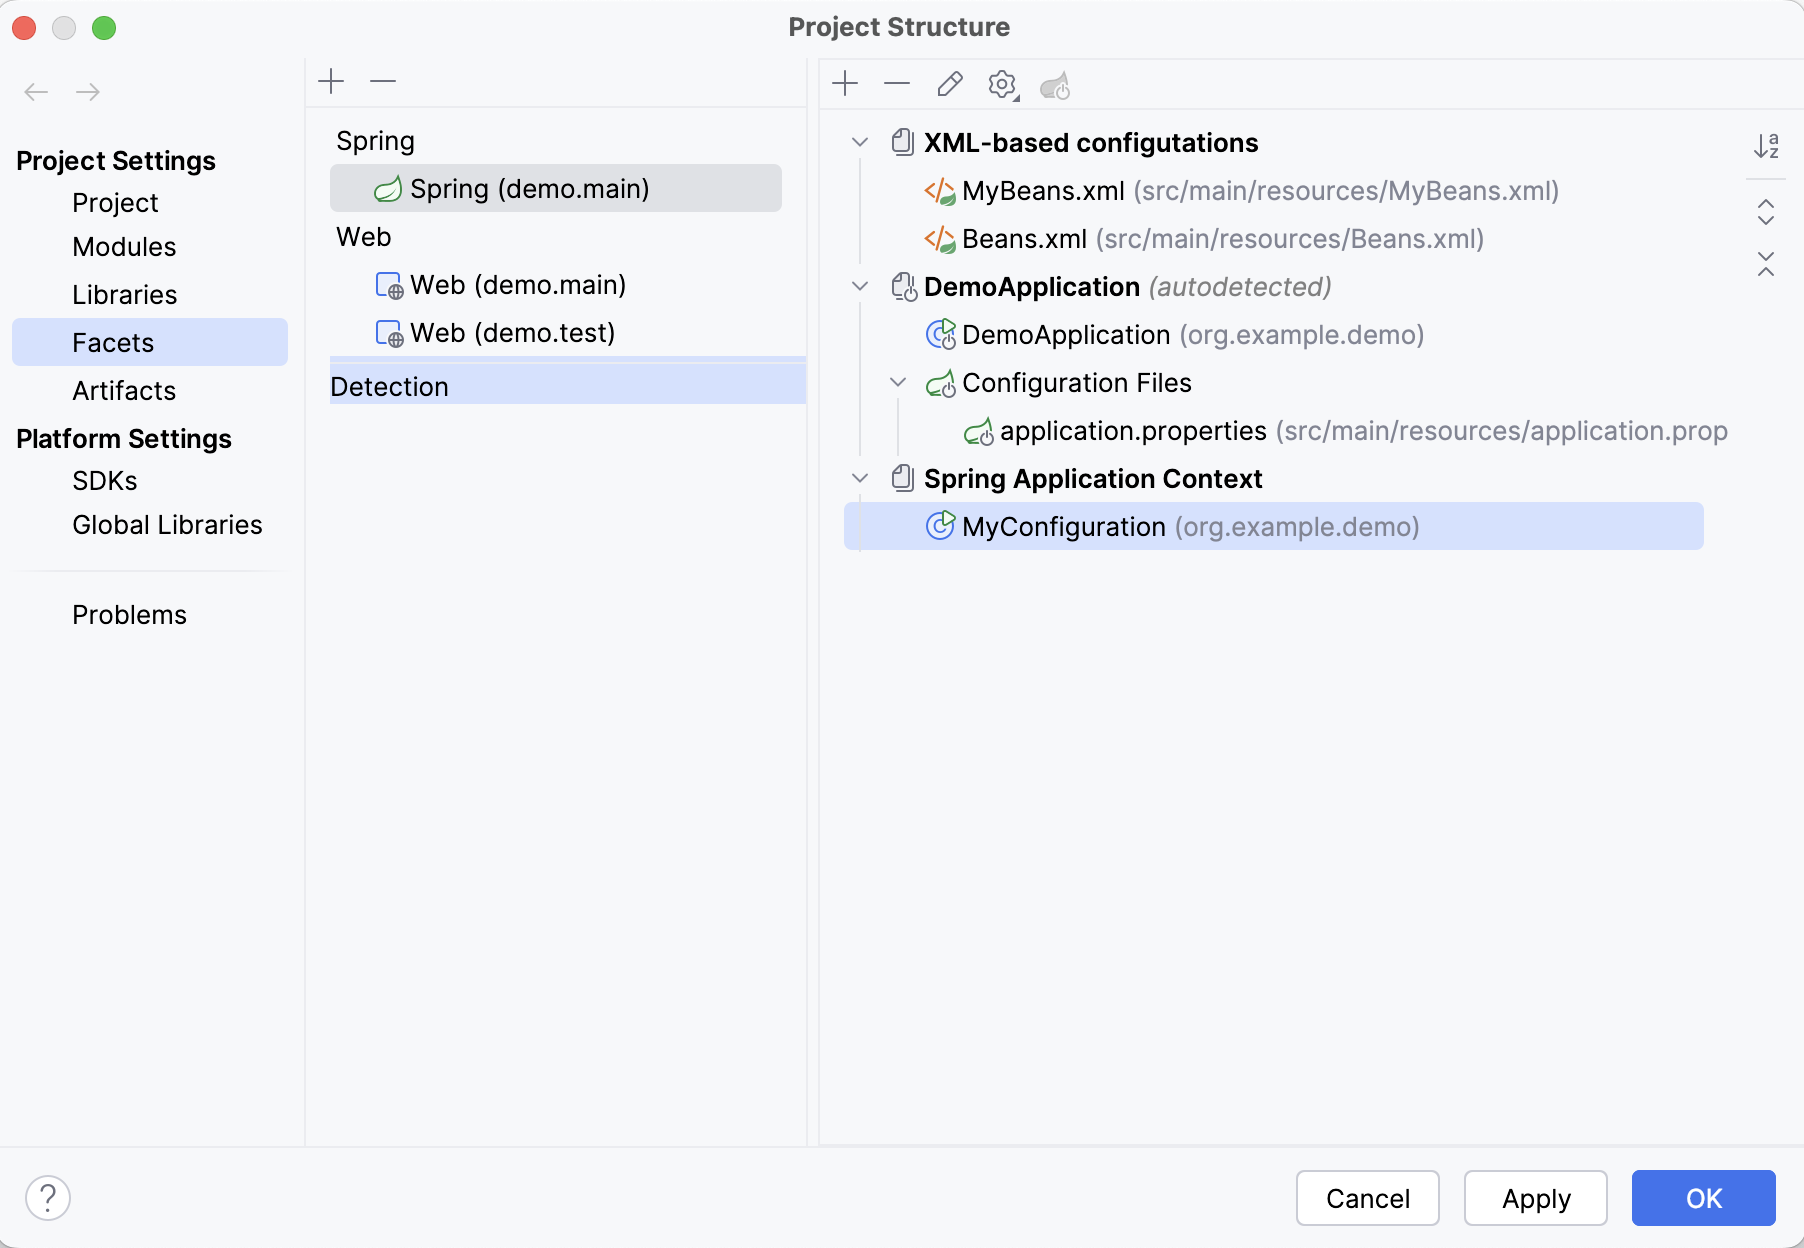
If your project is correctly configured, you will see Spring gutter icons marking each component, bean, and so on. To configure gutter icons, open the IDE settings with Ctrl+Alt+S and go to .
Check Spring Configuration
If you have unmapped configuration files, the corresponding warning will be displayed in and on top of the configuration file when opened in the editor. If in doubt, you can check the Spring configuration using the dedicated action.
Press Shift twice to open the search window and go to the Actions tab or just press Ctrl+Shift+A.
In the search field, type Check Spring Configuration and select the corresponding action. If your project has unmapped configuration files, a notification will be displayed.
Click the link with the number of unmapped files (for example, 2 files) and select one of the files. This will open the file in the editor where you can either select one of the available contexts or create a new one.
Configure a parent context
IntelliJ IDEA allows you to configure a parent-child relationship between contexts. Beans from a parent context are visible to beans in child contexts, but not vice versa. Therefore, beans from child contexts can use configuration from the parent context.
For example, Spring MVC applications usually have two contexts: one for the web layer beans and the other for services and repositories. The web layer context will be a child context in this case, as you need to inject services into controllers, not the other way around.
To configure a parent context, use the New Application Context dialog, as described in Create application contexts.
The Multiple Contexts panel shows up on top of the editor for files included in two or more application contexts. You can use this panel to select the active context, for example, if you want to run your application with a specific configuration, and change highlighting. To disable the panel, click and clear the Show Multiple Contexts panel checkbox.
Change active profiles
Spring allows you to map specific contexts or beans to different profiles, for example, test or production. This way, you can activate different profiles in different environments.
If you have defined at least one profile in your project, IntelliJ IDEA will show a special panel on top of the editor in configuration bean files. You can use this panel to view the current profile name and change active profiles.
Change active profiles
Click Change Profiles on the panel.
Select the component to which you want to map the profile. This can be either the entire project, the current module, or the current context.
Select the profile to which you want to map this component.
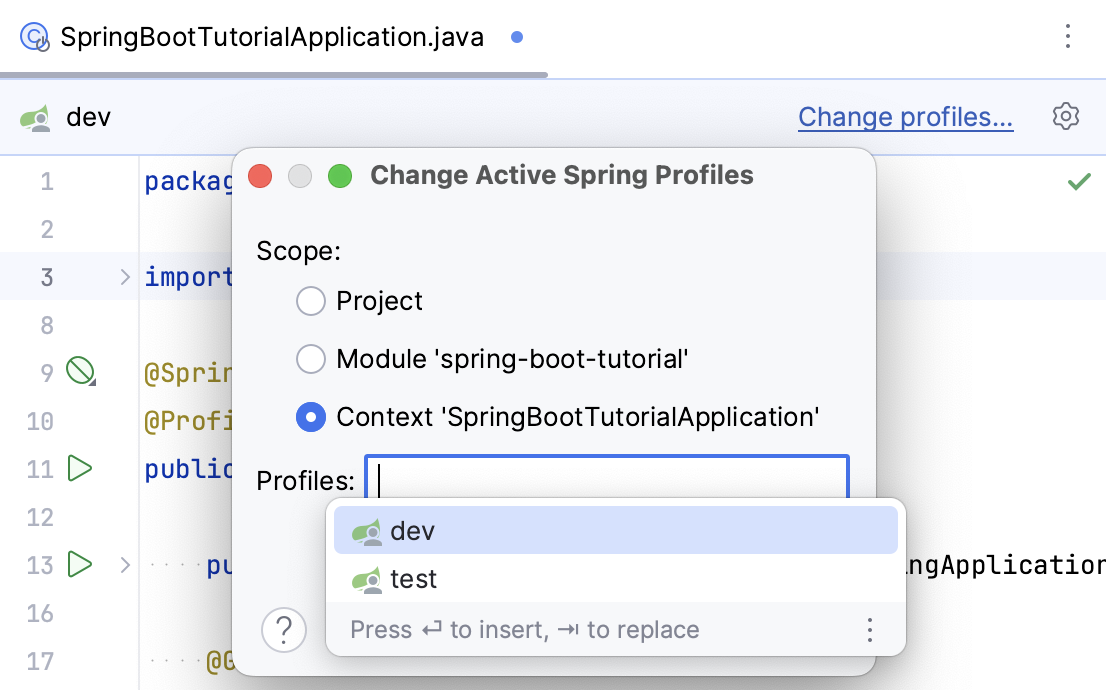
If you want to hide the panel, click and clear the Show Profiles Panel checkbox.
Share facet settings
You can change and share settings by creating custom facets and adding a module file with the .iml extension to the version control system.
For example, to share an application context within your team, you can create a Spring facet and commit its settings.
In the main menu, go to or press Ctrl+Alt+Shift+S. Then select Modules.
Make sure the module to which you want to add a facet is selected and click
above the list of modules. From the list of available facets, select Spring.
In the right section, click
to add a new application context.
Name the context, click
, select a context type, and then select the file on your computer.
Reopen the project. After that, the changes will appear in the .iml file of the module to which you have added the facet.
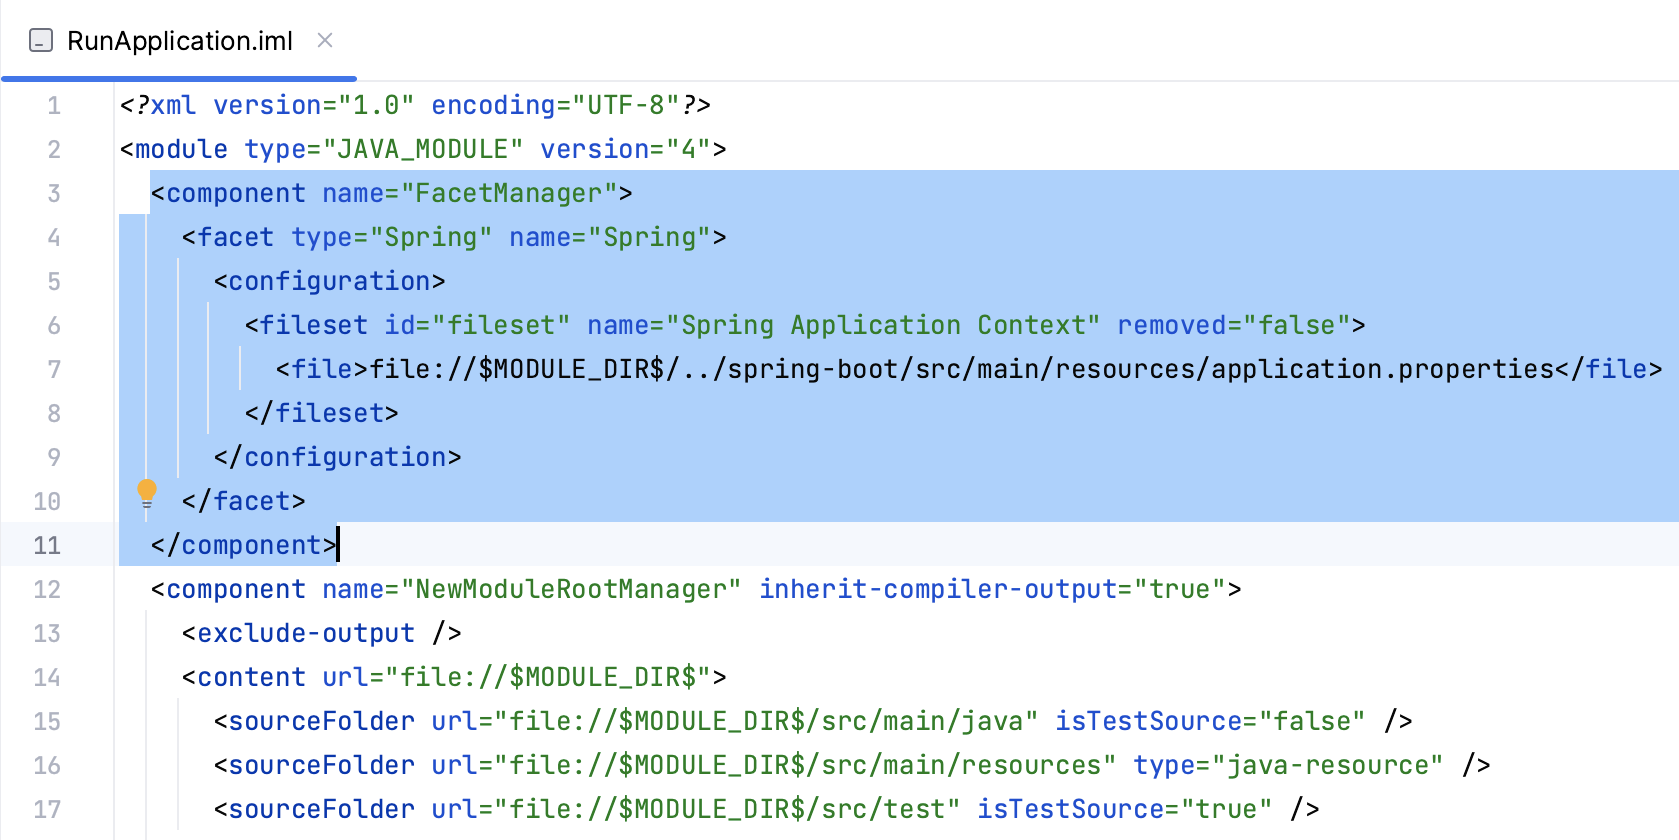
Add the .iml file to your version control system.