Work with Snapshots
While you profile an application, dotTrace collects profiling data and writes it either to a *.dtp file (sampling, tracing, line-by-line snapshots) or to a *.dtt file (timeline snapshots). Also, dotTrace supports *.nettrace NetTrace files collected with dotnet-trace collect.
Temporary snapshot storage
By default, dotTrace saves all collected snapshots to the temporary snapshot storage (a directory on the disk). The default storage location is %HOMEPATH%/dotTraceSnapshots. You can change it in .
If you may need a particular snapshot in the future, we recommend that you don't store it in the temporary storage but save it in another location.
To disable auto-saving snapshots to the temporary storage
Open the Settings tab.
Clear the Auto-save all collected snapshots in temporary storage checkbox.
To check the size of the temporary snapshot storage and clean it up
Open the Snapshots tab.
The size is shown at the top of the page.

To clean up the storage, click the Clean up link. This will permanently delete all snapshots from the storage.
To configure auto-cleanup of the temporary snapshot storage
Open the Settings tab.
Under Temporary snapshot storage, configure two cleanup rules:
In Auto-delete snapshots that were not opened in last [ ] days, specify how many days snapshots must not be opened to qualify for auto-deletion. The value
0means "delete all snapshots after closing dotTrace".In Auto-delete the oldest snapshots so that the storage size never exceeds [ ] GB, specify the maximum allowed size of the storage. When new snapshots are saved into the storage, dotTrace tracks its current size. If this size is exceeded, dotTrace will delete the oldest snapshot(s) in the storage so that the storage size doesn't exceed the limit. The value
0means "delete all snapshots after closing dotTrace".
Opening snapshots
To open a snapshot from temporary storage or a previously opened snapshot
Open the Snapshots tab.
Double-click the required snapshot.
To open a snapshot or NetTrace file from disk
In the left panel of dotTrace Home, click Open Snapshot....
Choose the snapshot of NetTrace file and click Open.
Saving snapshots
By default, snapshots are stored in the temporary storage. If you need a particular snapshot for future use or want to share the snapshot with other people, you should save it to the disk.
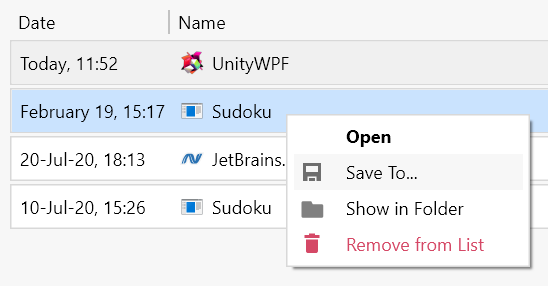
Open the Snapshots tab.
Right-click the required snapshot.
In the context menu, select Save To....

Specify a new location and click Save.
After this, the snapshot will remain in the Snapshots list, but it will change its status from 'saved in the temporary storage' to 'saved on the disk'. The initial snapshot in the temporary storage will be deleted.
Editing snapshot name
Open the Snapshots tab.
Right-click the required snapshot.
In the context menu, select Edit Name.