Configuring Project Structure
In PyCharm, content is a collection of files with which you are currently working, possibly organized in a hierarchy of subfolders. The top-level folder of a project is its content root.
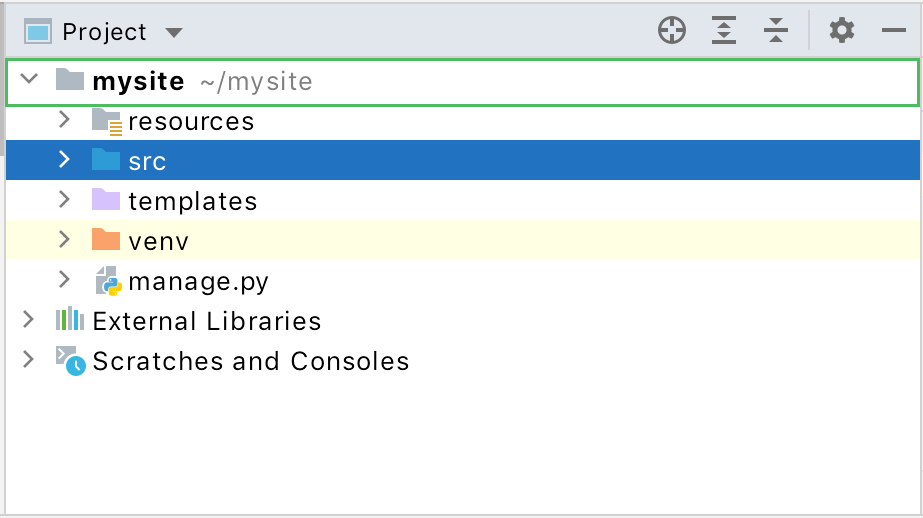
Within a content root, PyCharm can distinguish between the folders that contain source code, and the ones to be ignored while searching, parsing, watching and so on. To distinguish different types of folders, mark any folder below a content root as a source folder or as excluded.
Source roots
contain the actual source files and resources. PyCharm uses the source roots as the starting point for resolving imports
Resource roots
(PyCharm Professional only) are intended for resource files in your application (images, Style Sheets, and so on). By assigning a folder to this category, you tell PyCharm that files in it and in its subfolders can be referenced relative to this folder instead of specifying full paths to them.
Template roots
(PyCharm Professional only) contain templates for the various web projects.
Excluded roots
contain files and folders ignored by PyCharm when indexing, searching, parsing, watching, and so on.
To access project structure, open Settings / Preferences dialog by pressing Ctrl+Alt+S or by choosing for Windows and Linux or for macOS, then expand the Project node, and select Project Structure.
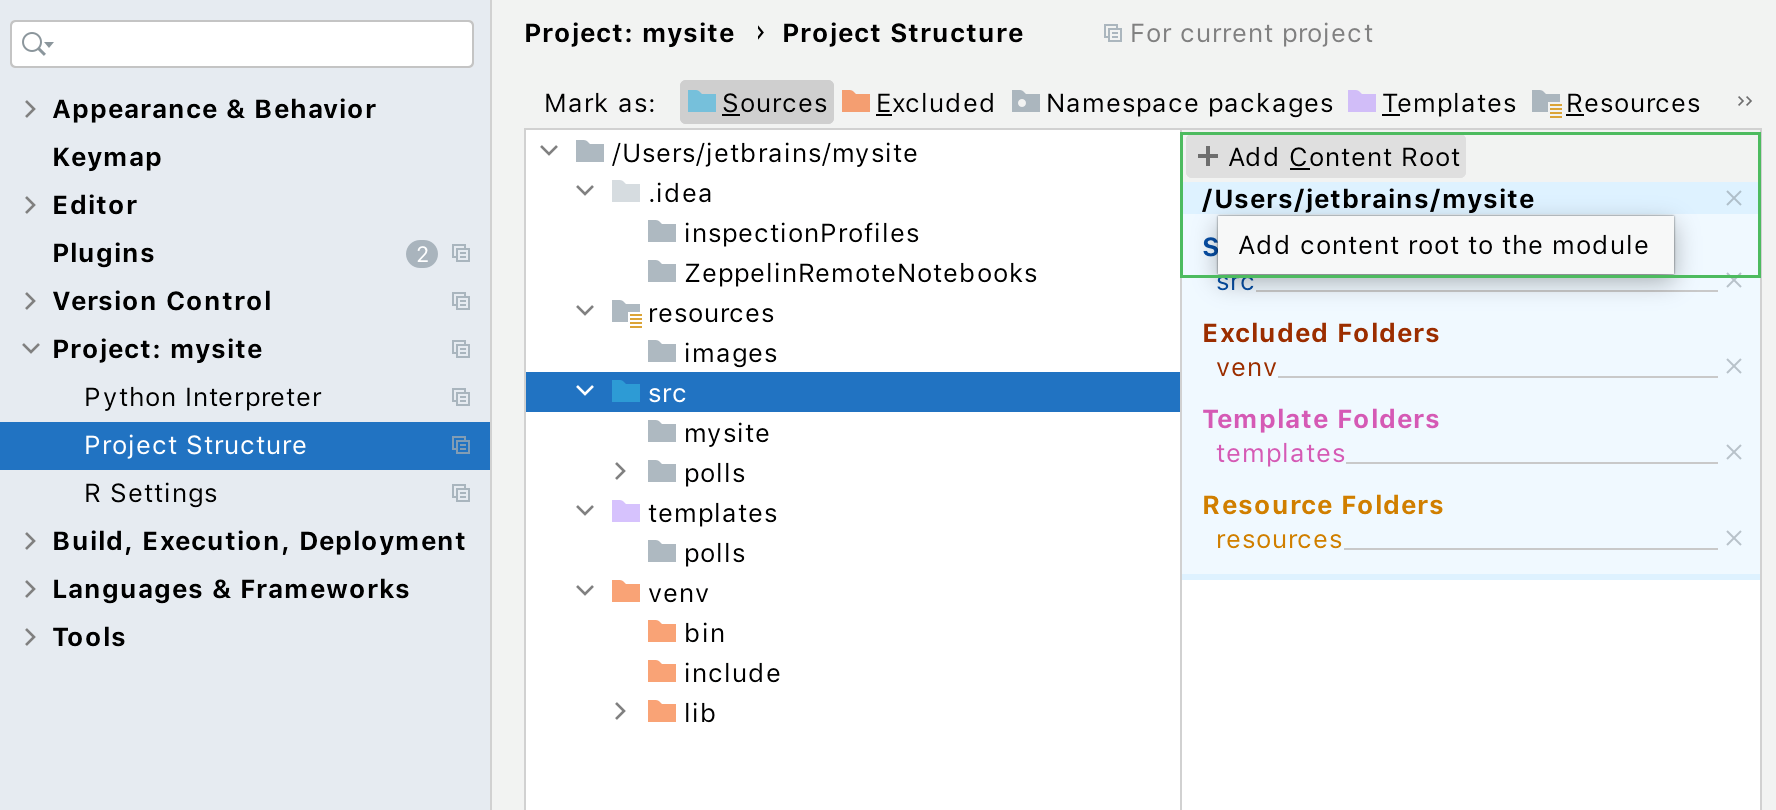
Create a content root
Open the Project Structure settings.
In the Projects pane of the Project Structure page, click the project you want to configure content roots for.
In the Content roots of the Project Structure page, click the Add Content Root button
.
In the dialog that opens, locate the desired directory and click OK.
Remove a content root
Open the Project Structure settings.
In the Projects pane of the Project Structure page, click the project you want to configure content roots for.
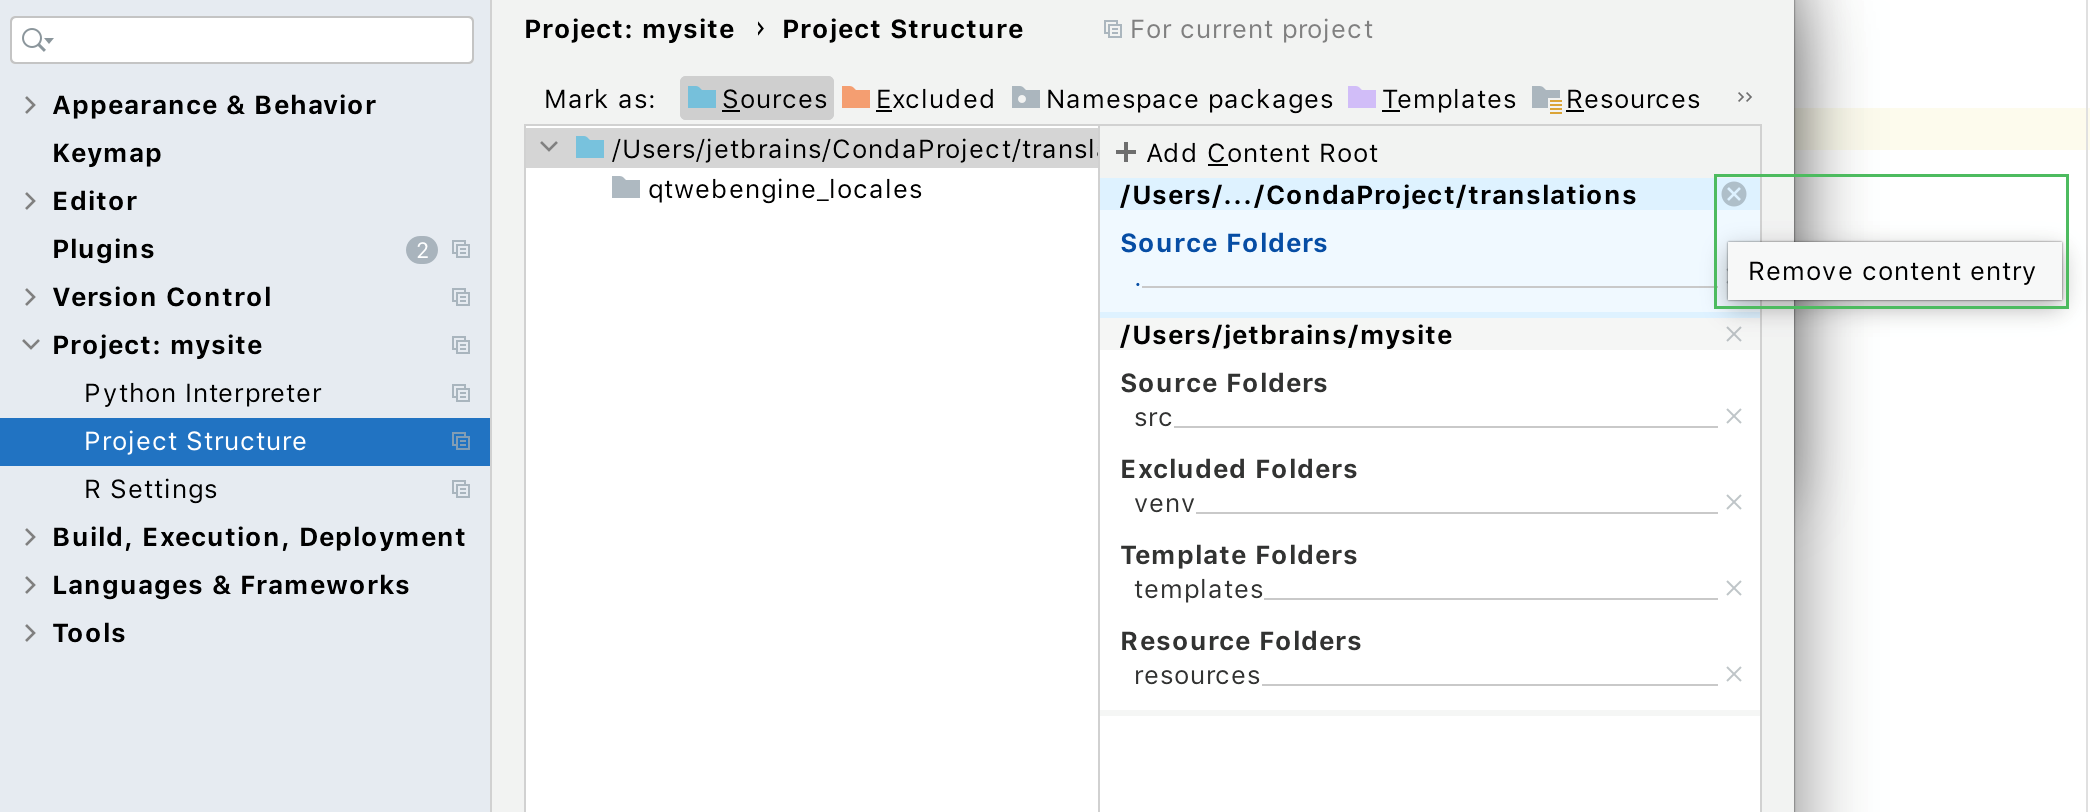
In the Content roots pane of the Project Structure page, select the content root that you want to delete.
Click the Remove button
 and confirm removal.
You can assign a folder to a different category. This can be done both in the Project tool window and on the Project Structure page of the Settings/Preferences dialog.
Assign a category to a folder in the Project tool window
Open the Project tool window (for example ).
Select the folder that you want to assign to a certain category.
Right-click it and select the desired category from Mark Directory As menu.
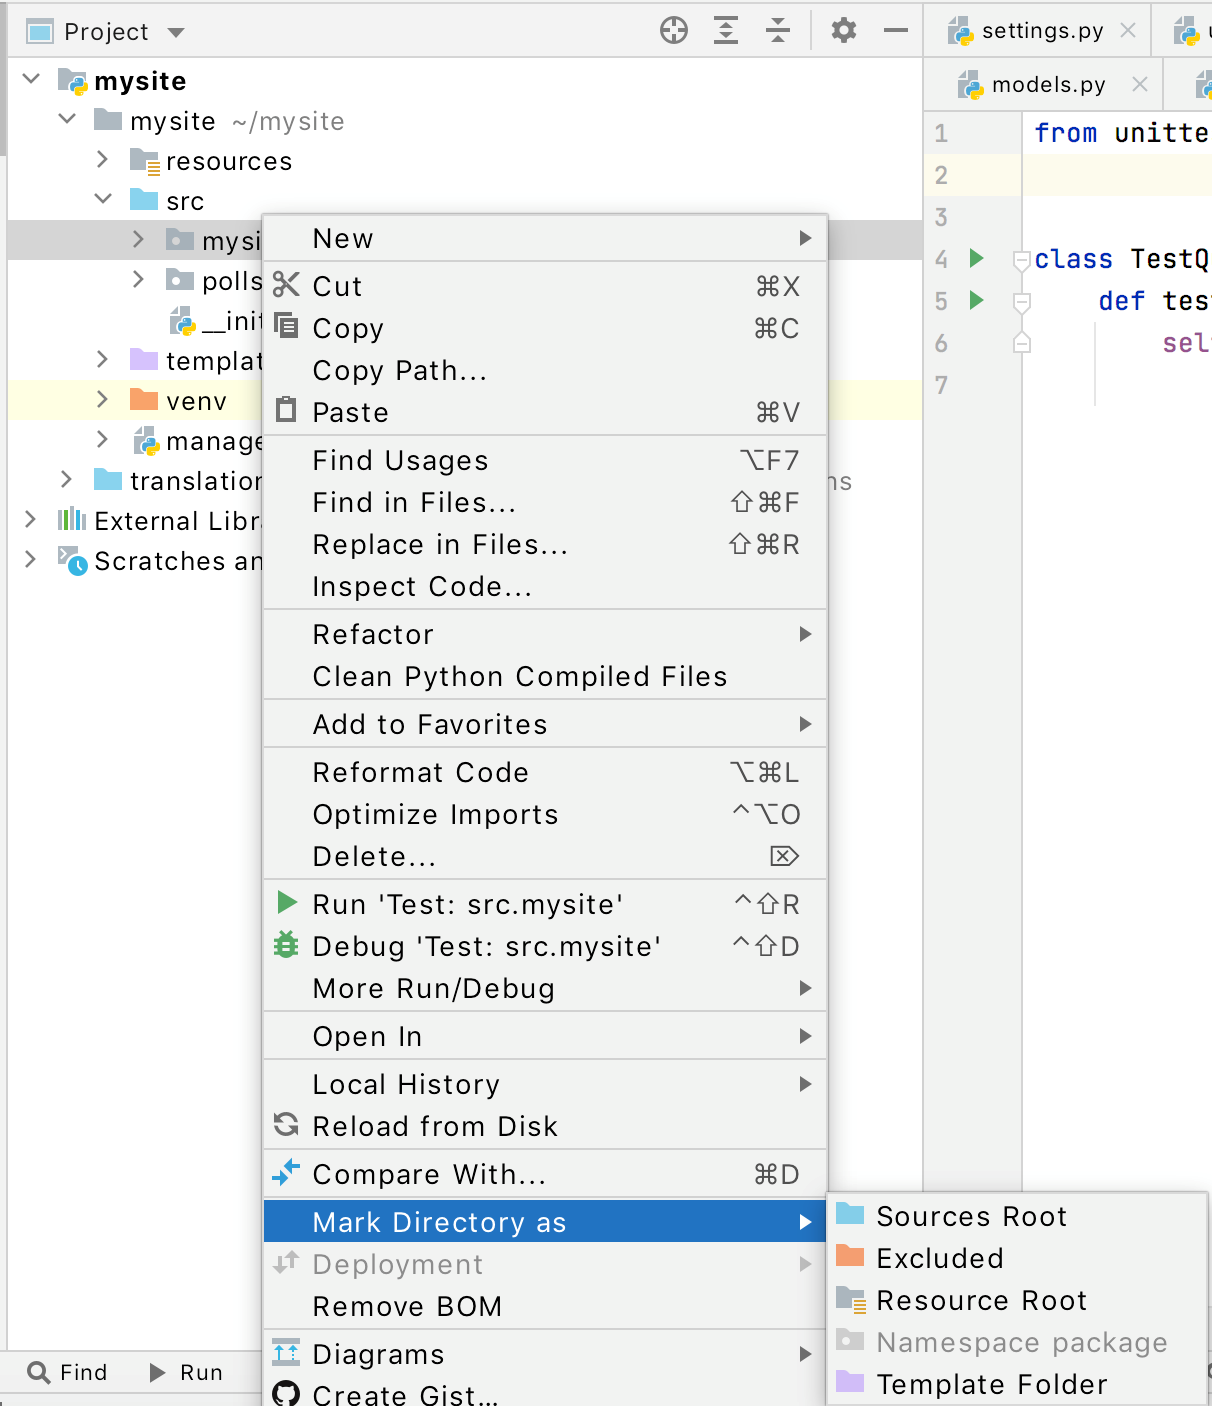
In a similar way you can change the folder category at a later time. (Just select a different category from the context menu.)
To cancel the folder association with its current category (that is to make a folder an "ordinary" folder ![]() ), select Unmark as <current_category> Root. (for example Unmark as Resource Root).
), select Unmark as <current_category> Root. (for example Unmark as Resource Root).
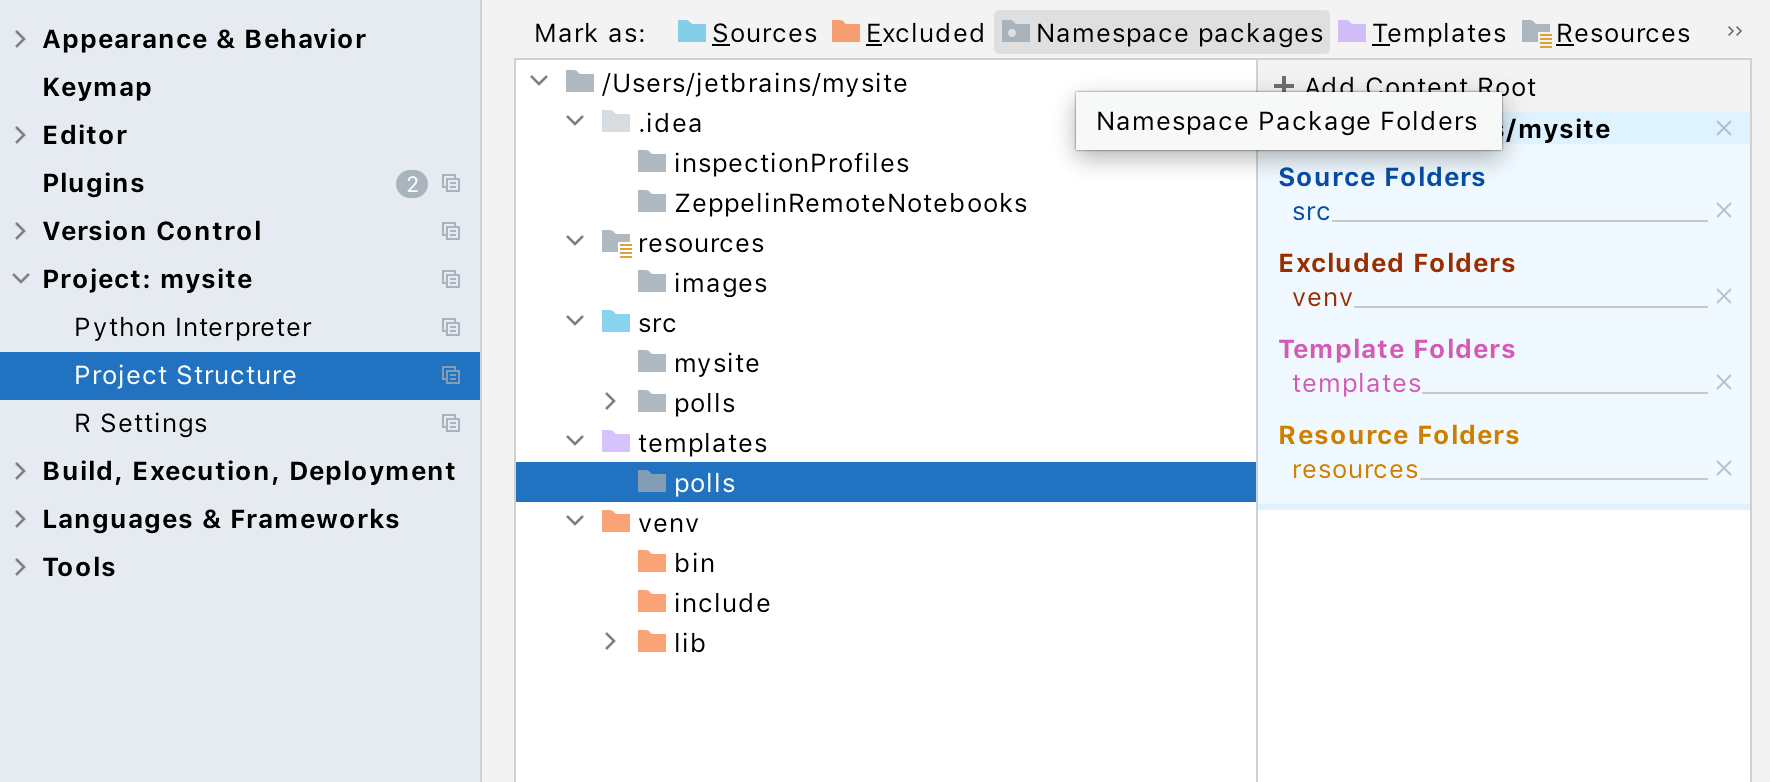
Assign a category to a folder in the project settings
Open Project Structure page of the Settings/Preferences dialog (Ctrl+Alt+S).
Select the folder you want to assign a category to.
Click the category button, for example,
 .
. 
You can make files and folders excluded by specifying the name patterns. Use the Exclude files field to specify the patterns.
The files and folders whose names match at least one of the specified patterns are made excluded. Folders are excluded along with all their contents.