You are viewing the documentation for an earlier version of PyCharm.
Auto import
Last modified: 30 June 2021
When you reference a class that has not been imported, PyCharm helps you locate this file and add it to the list of imports. You can import a single class or an entire package, depending on your settings.
The import statement is added to the imports section, but the caret does not move from the current position, and your current editing session does not suspend. This feature is known as the Import Assistant.
tip
To configure auto-import, in the Settings/Preferences dialog Ctrl+Alt+S, go to Editor | General | Auto Import, and use the corresponding XML, Python, and TypeScript/JavaScript options.
warning
Using Import Assistant is the preferred way to handle imports in PyCharm because import optimizations are not supported via command line.
The same possibility applies to XML files. When you type a tag with an unbound namespace, the import assistant suggests to create a namespace and offers a list of appropriate choices.
Creating imports on the fly
Import packages on-the-fly
Start typing a name in the editor. If the name references a class that has not been imported, the following prompt appears:
The unresolved references will be underlined, and you will have to invoke intention actionAdd import explicitly.
Press Alt+Enter. If there are multiple choices, select the desired import from the list.
You can define your preferred import style for Python code by using the following options available on the Auto Import page of the project settings (Settings/Preferences | Editor | General | Auto Import):
from <module> import <name>
import <module>.<name>
tip
PyCharm provides a quick-fix that automatically installs the package you’re trying to import: if, after the keyword import, you type a name of a package that is not currently available on your machine, a quick-fix suggests to either ignore the unresolved reference, or download and install the missing package:
Optimizing imports
Sooner or later, some of the imported classes or packages become redundant to the code. PyCharm provides the Optimize Imports feature, which enables you, whenever it is convenient, to remove unused imports from your current file, or from all files in the current directory at once. This helps you avoid unused, excessive and duplicating imports in your project. One can remove unused import statements in the entire project or in the current file only.
Besides cleaning the code from the unused imports, PyCharm formats the existing import statements according to the Style Guide for Python Code. In doing so, PyCharm splits import statements into separate lines, and sorts them into groups (refer to the Imports section for details).
Also, imports are sorted alphabetically and case-sensitively within the respective groups:
You can modify the sorting policy in the Import tab of the Python code style settings (Settings/Preferences | Editor | Code Style | Python). See Python Code Style Settings for more information.
Optimize imports in the entire project
Switch the focus to the Project tool window and do one of the following:
From the main menu, choose Code | Optimize Imports.
Press Ctrl+Alt+O.
The Optimize Imports dialog opens.
If your project is under version control, the option Only VCS changed files is enabled. Select or clear this option as required.
Click Run.
One way of dealing with unused import is to use the quick-fix that appears when you set the caret at the highlighted unused import. However, you can optimize imports in a larger scope as described below.
Optimize imports in the current file
From the main menu, choose Code | Optimize Imports.
Press Ctrl+Alt+O.
Place the caret at the import statements, click , and choose Remove unused import.
Open the Reformat File dialogCtrl+Alt+Shift+L and select the Optimize imports checkbox.
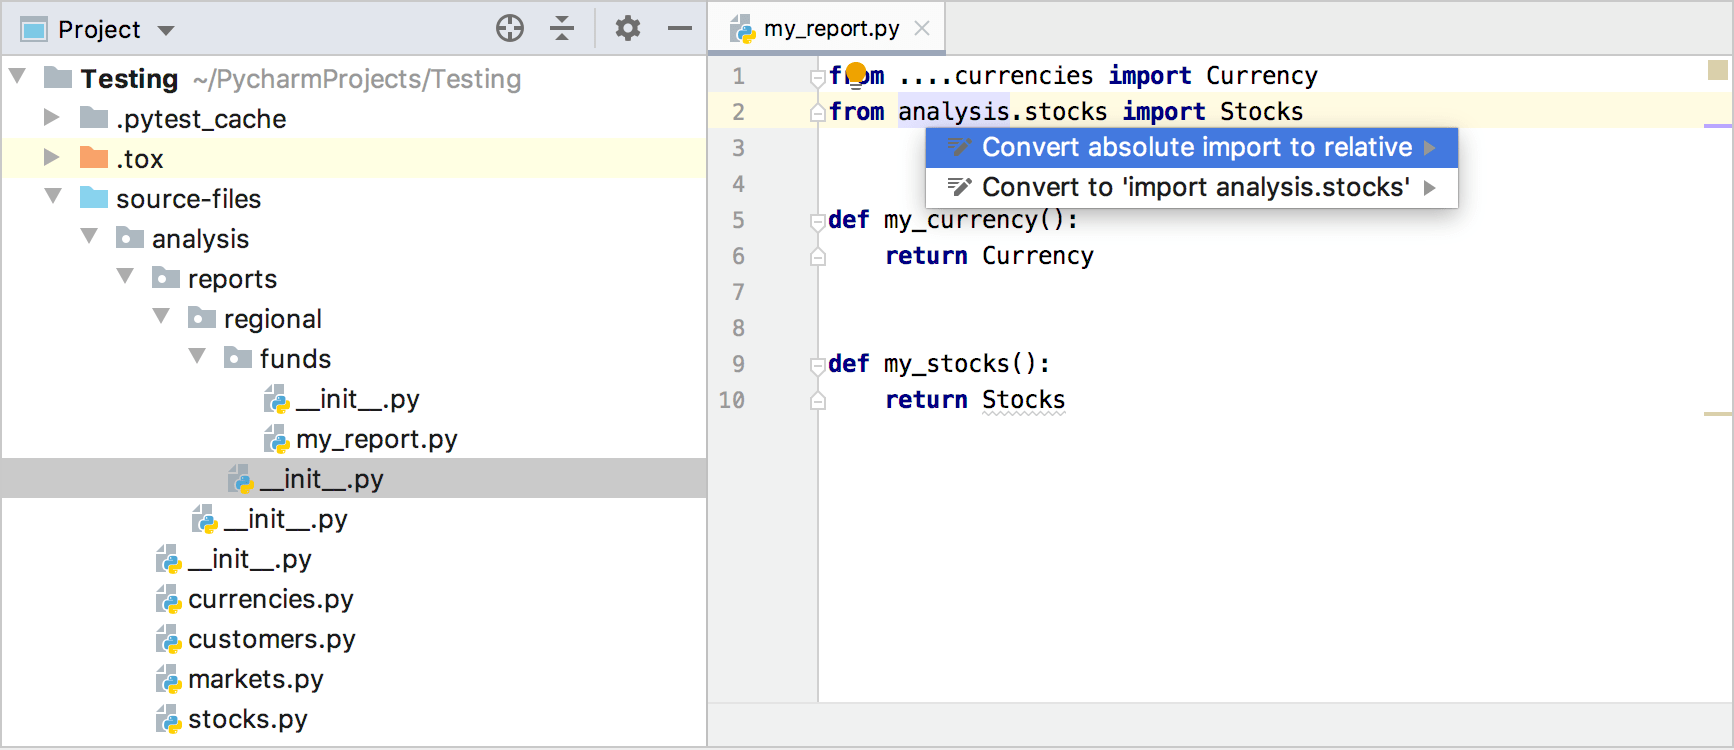
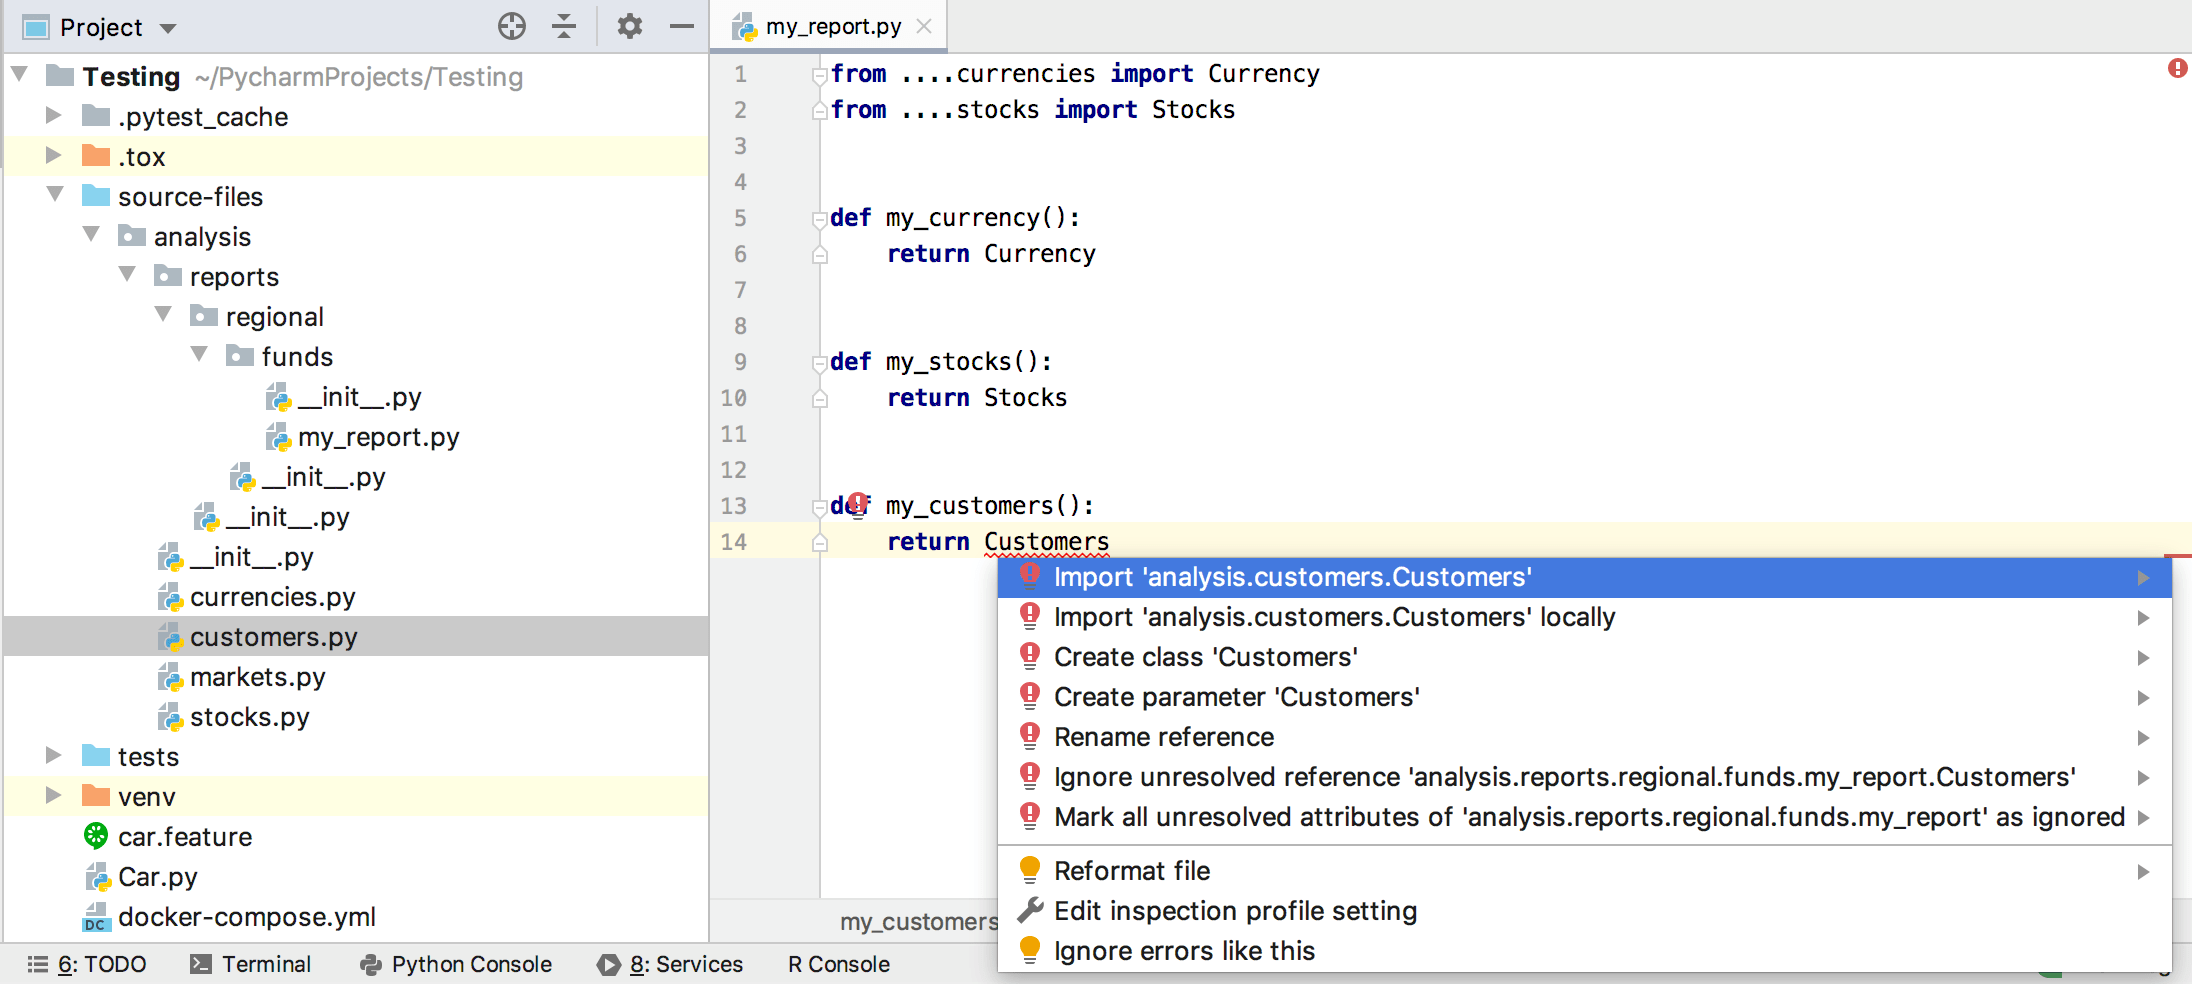
Toggling relative and absolute imports
PyCharm helps you organize relative and absolute imports within a source root. With the specific intention, you can convert absolute imports into relative and relative imports into absolute.
Gif
If your code contains any relative import statement, PyCharm will add relative imports when fixing the missing imports.
Gif
Note that relative imports work only within the current source root: you cannot relatively import a package from another source root.
The intentions prompting you to convert imports are enabled by default. To disable them, open project Settings/Preferences(Ctrl+Alt+S), select Editor | Intentions, and deselect the Convert absolute import to relative and Convert relative import to absolute.
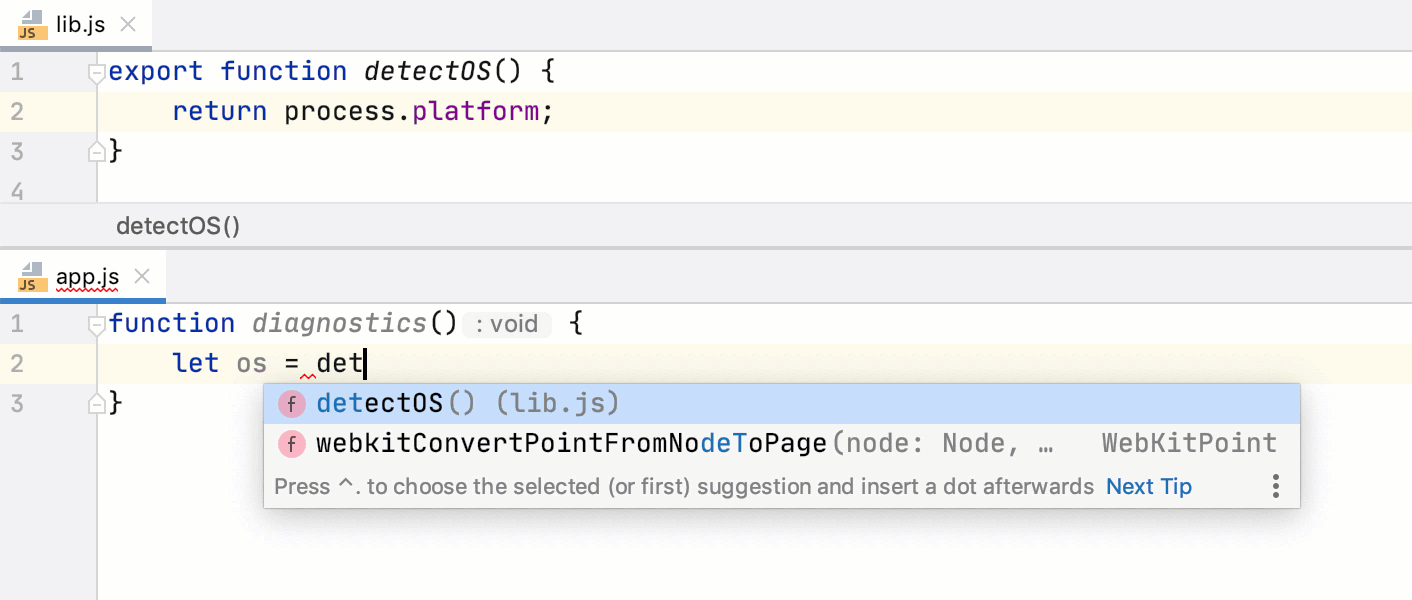
Adding import statements on code completion
PyCharm automatically adds an import statement when you refer any module member or package in the Python code and invoke code completion. Auto-import on code completion is also applied to some popular package name aliases, such as np for numpy or pd for pandas.
Gif
PyCharm also adds import statements when you complete exported JavaScript or TypeScript symbols.
Gif
Configure auto-import on completion
You can disable auto-import on completion and use quick-fixes instead:
Gif
In the Settings/Preferences dialog Ctrl+Alt+S, go to Editor | General | Auto Import.
On the Auto Import page that opens, use the checkboxes in the TypeScript/JavaScript area to enable or disable import generation on code completion.
Ignoring missing import statements
If you use a module in your code that doesn't have any corresponding stub, PyCharm might show a missing statement error. To suppress this error message, use the # type: ignore comment:


 , and choose Remove unused import.