Creating Pyramid Project
Pyramid project scaffolds are intended for productive development of Pyramid applications. PyCharm takes care of creating the specific directory structure and settings.
Create a Pyramid project
In the main menu, go to , or click the New Project button in the Welcome screen.
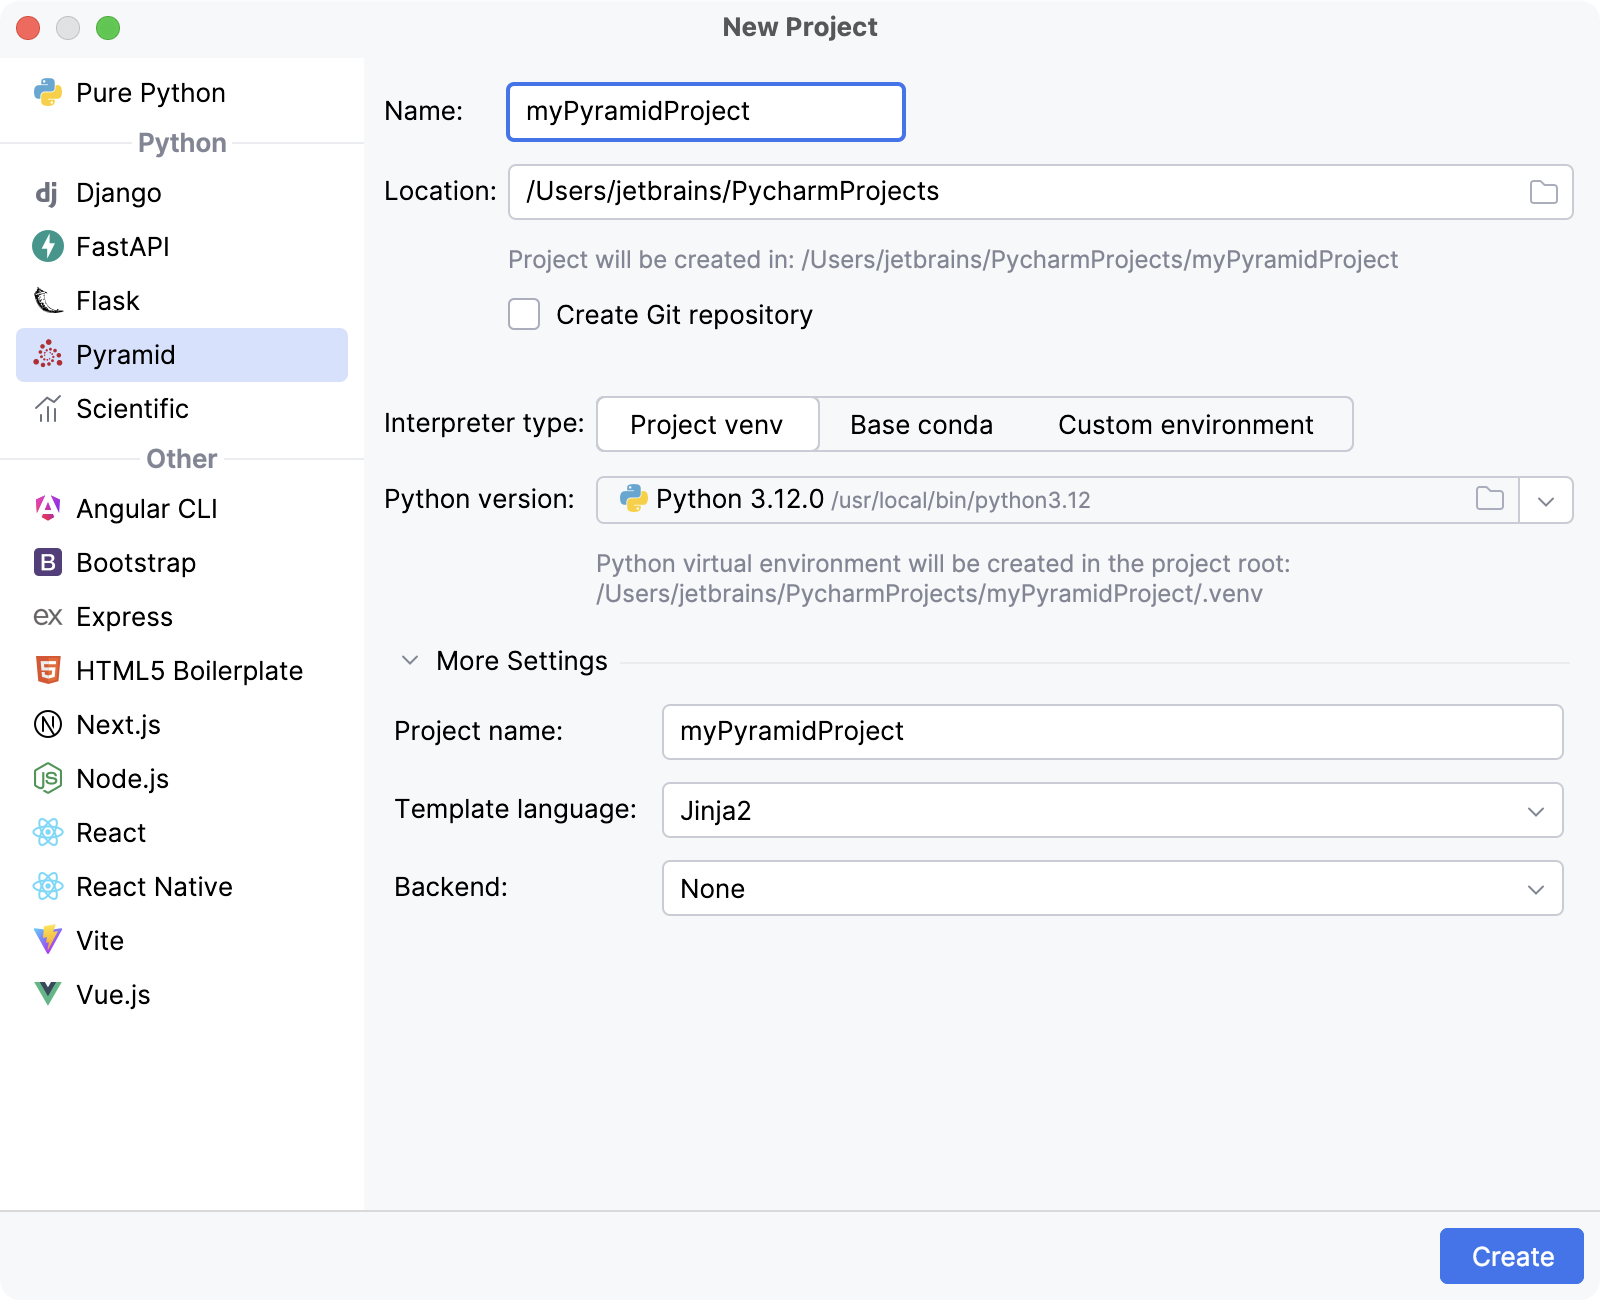
In the New Project dialog, do the following:
Select Pyramid as the project type.
Specify the project location.
Select Create Git repository to put the project under Git version control.
If you want to proceed with the Project venv or Base conda interpreter, select the corresponding option and click Create.
- Project venv
PyCharm creates a virtualenv environment based on the system Python in the project folder.
- Base conda
PyCharm configures conda base environment as the project interpreter.
To configure an interpreter of other type or to use an existing environment, select Custom environment.
The following steps depend on your choice:
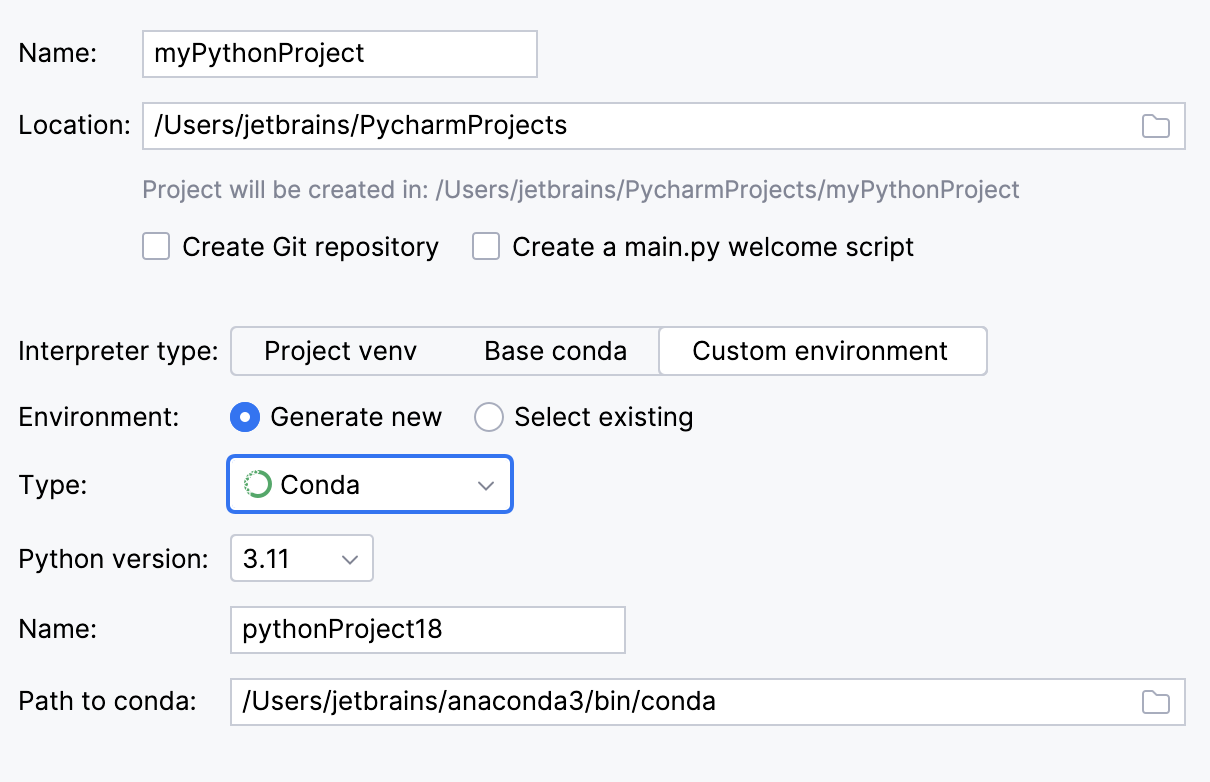
Select the Python version from the list.
Normally, PyCharm will detect conda installation.
Otherwise, specify the location of the conda executable, or click
to browse for it.
Specify the environment name.
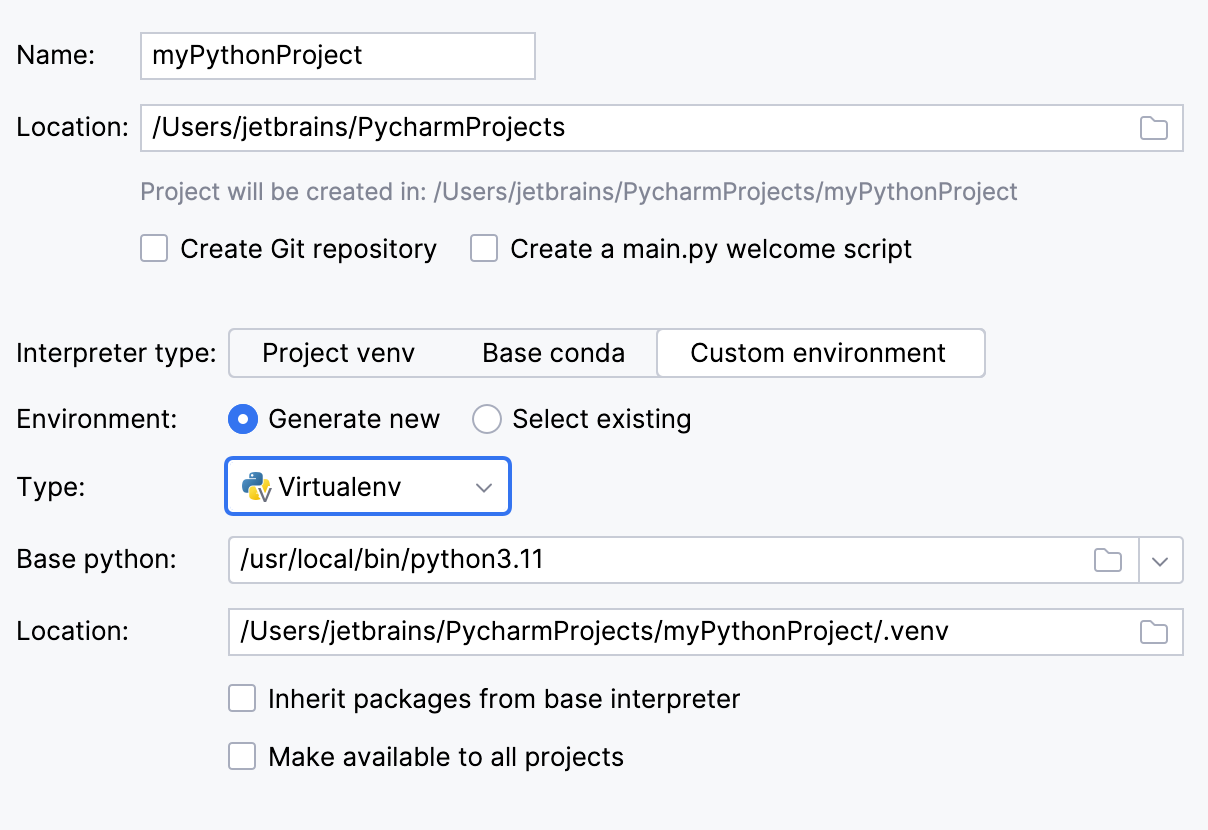
Specify the location of the new virtual environment in the Location field, or click
and browse for the location in your file system. The directory for the new virtual environment should be empty.
Choose the base interpreter from the list, or click
and find the Python executable in your file system.
Select the Inherit global site-packages checkbox if you want all packages installed in the global Python on your machine to be added to the virtual environment you're going to create. This checkbox corresponds to the
--system-site-packagesoption of the virtualenv tool.Select the Make available to all projects checkbox if you want to reuse this environment when creating Python interpreters in PyCharm.
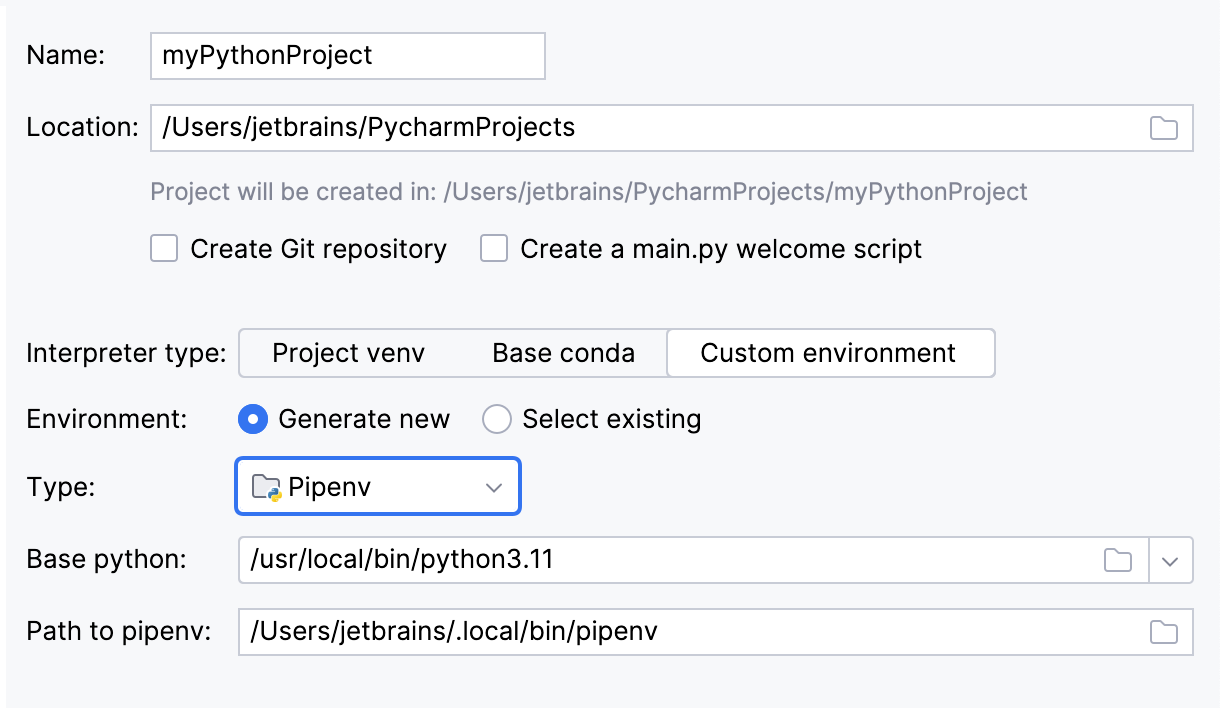
Choose the base interpreter from the list, or click
and find the Python executable in your file system.
If you have added the base binary directory to your
PATHenvironmental variable, you don't need to set any additional options: the path to the pipenv executable will be autodetected.If the pipenv executable is not found, follow the pipenv installation procedure to discover the executable path, and then specify it in the dialog.
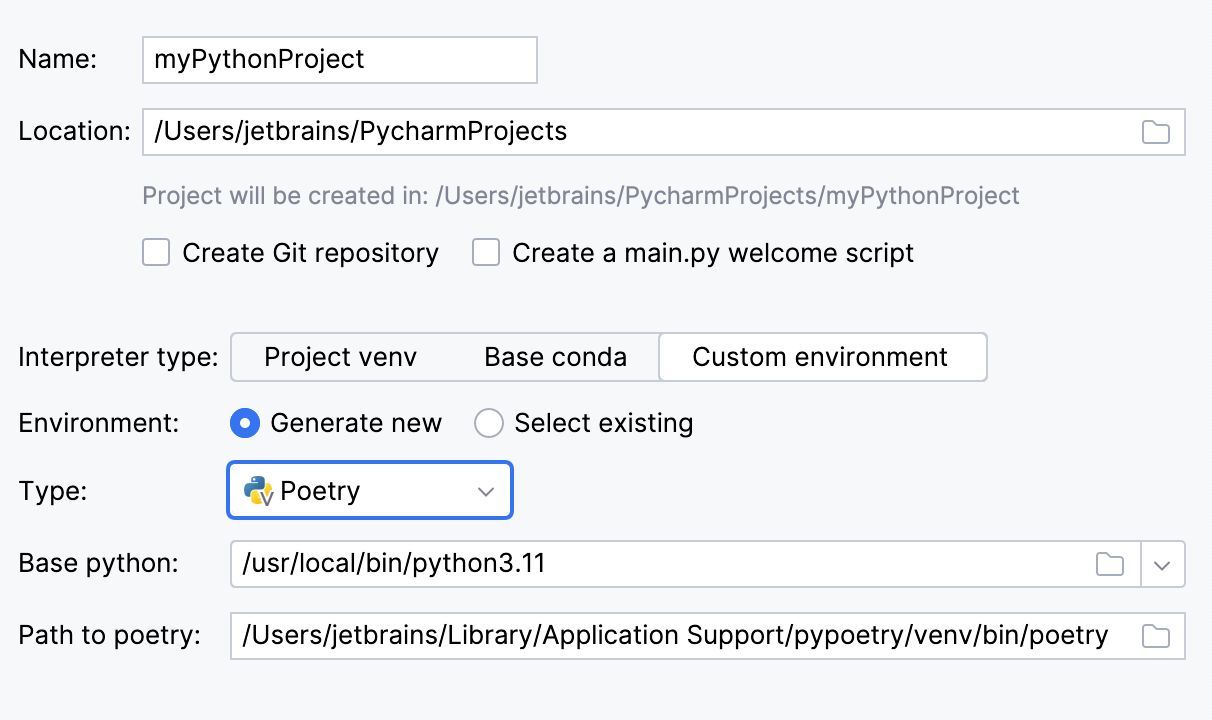
Choose the base interpreter from the list, or click
and find the Python executable in your file system.
If PyCharm doesn't detect the poetry executable, specify the following path in the dialog, replacing
jetbrainswith your username:/Users/jetbrains/Library/Application Support/pypoetry/venv/bin/poetryC:\Users\jetbrains\AppData\Roaming\pypoetry\venv\Scripts\poetry.exe/home/jetbrains/.local/bin/poetry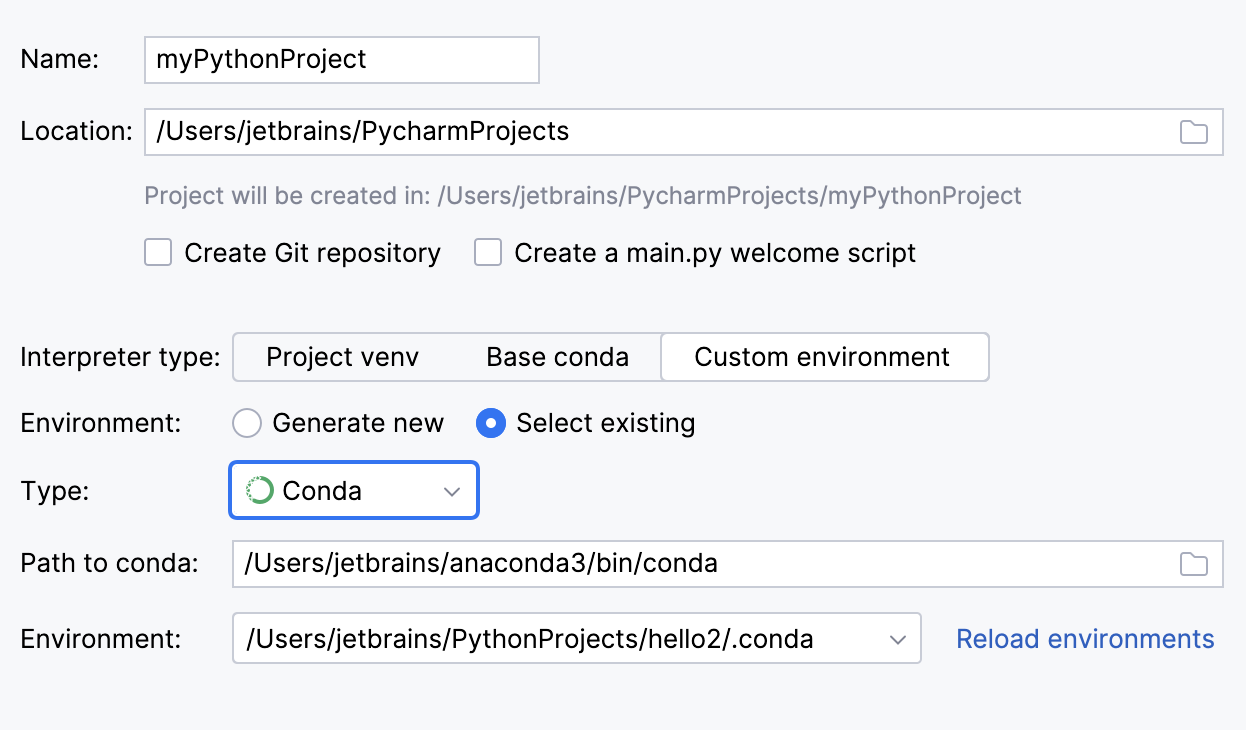
To reuse an existing conda environment:
Switch Type to Conda.
Normally, PyCharm will detect conda installation.
Otherwise, specify the location of the conda executable, or click
to browse for it.
Select the environment from the list. If you specified the path to conda manually, you may need to reload environments.
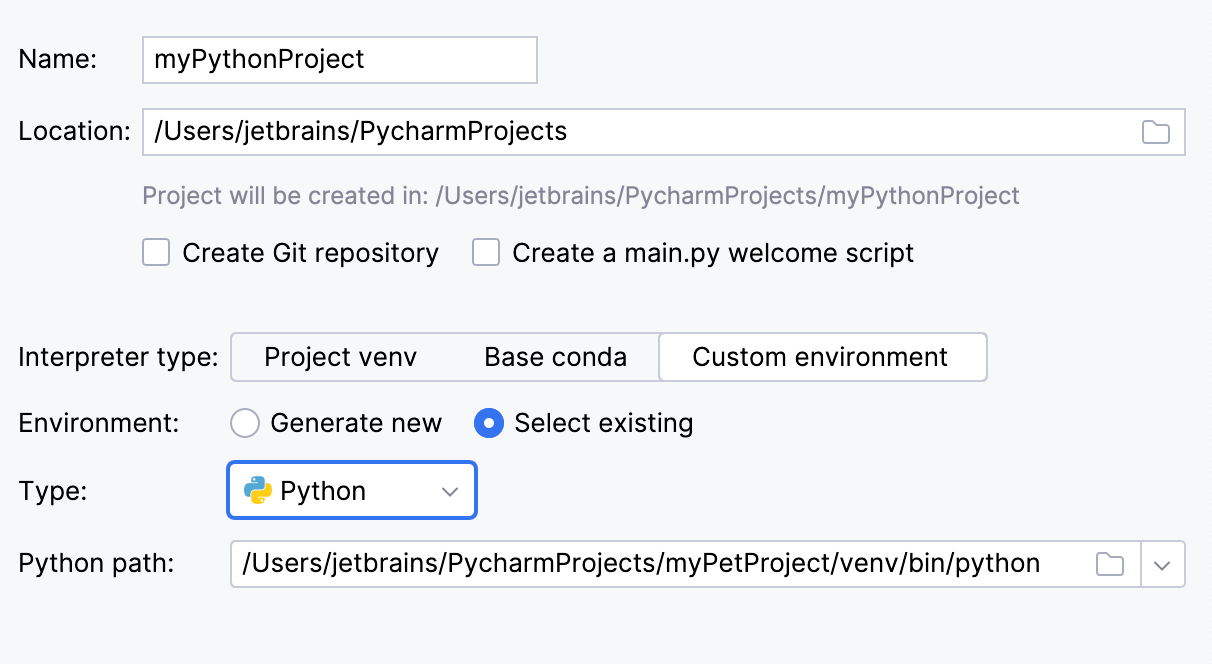
To reuse a Virtualenv, Pipenv, or Poetry environment:
Switch Type to Python.
Select the Python executable from the list or click
to browse for it.
Click
More Settings, and specify the following:
Specify the name of the Pyramid project in the Project name field.
From the Template language list, select the language to be used.
From the Backend list, select a backend for Pyramid cookiecutters. The possible options are:
None: URL dispatch for routing
SQLAlchemy: SQLite for persistent storage, SQLAlchemy for an ORM, URL dispatch for routing, and Alembic for database migrations
ZODB: ZODB for persistent storage and traversal for routing
Click Create.
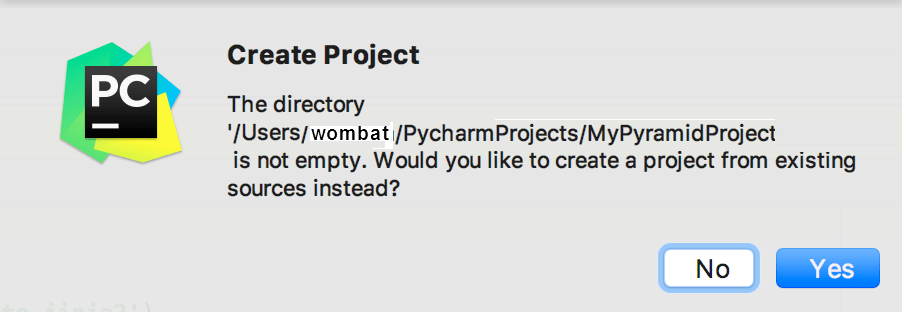
If the following alert pops up, click No.
PyCharm creates a project, installs Pyramid and its dependencies, and produces specific directory structure, which you can explore in the Project tool window. Open any file in the project directory. If there are unsatisfied package requirements, PyCharm suggests to resolve or ignore them:

You should install the dependencies to be able to run the development server.
When you create a Pyramid project, you must run
setup.py developto install the project for development. PyCharm might inform you to do so as shown in the screenshot below:
Alternatively, you can select and enter
develop. Another popup appears Run Setup Task develop. Click OK.If you created an alchemy-based project, you need to initialise the database, open the terminal (make sure virtual environment is active) and run the command:
initialize_PROJECTNAME_db development.ini(Replace
PROJECTNAMEwith your exact project name.)