FastAPI
FastAPI is a web framework for building APIs with Python. It requires the versions of Python 3.6 and later. PyCharm Professional provides the following support for developing FastAPI applications:
Create a FastAPI project
In the main menu, go to , or click the New Project button in the Welcome screen.
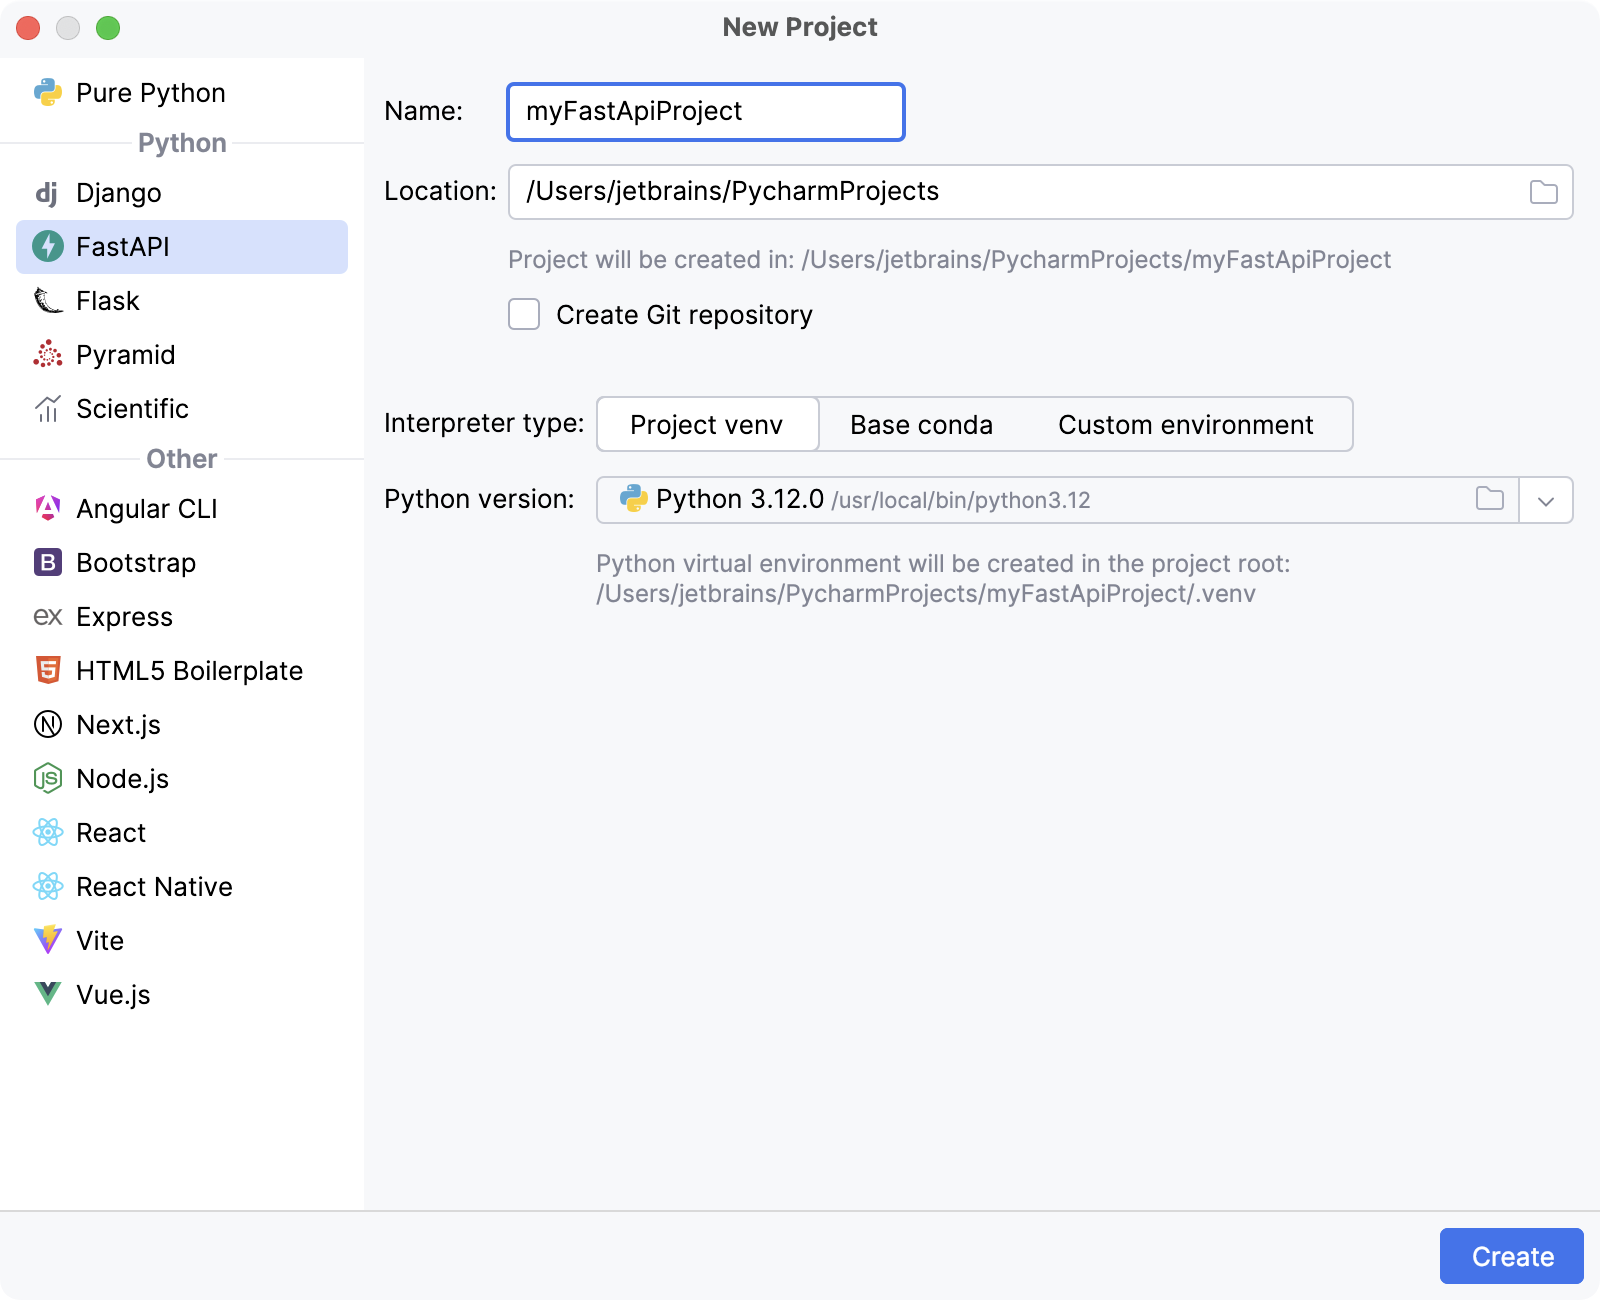
In the New Project dialog, do the following:
Select FastAPI as the project type.
Specify the project location.
Select Create Git repository to put the project under Git version control.
If you want to proceed with the Project venv or Base conda interpreter, select the corresponding option and click Create.
- Project venv
PyCharm creates a virtualenv environment based on the system Python in the project folder.
- Base conda
PyCharm configures conda base environment as the project interpreter.
To configure an interpreter of other type or to use an existing environment, select Custom environment.
The following steps depend on your choice:
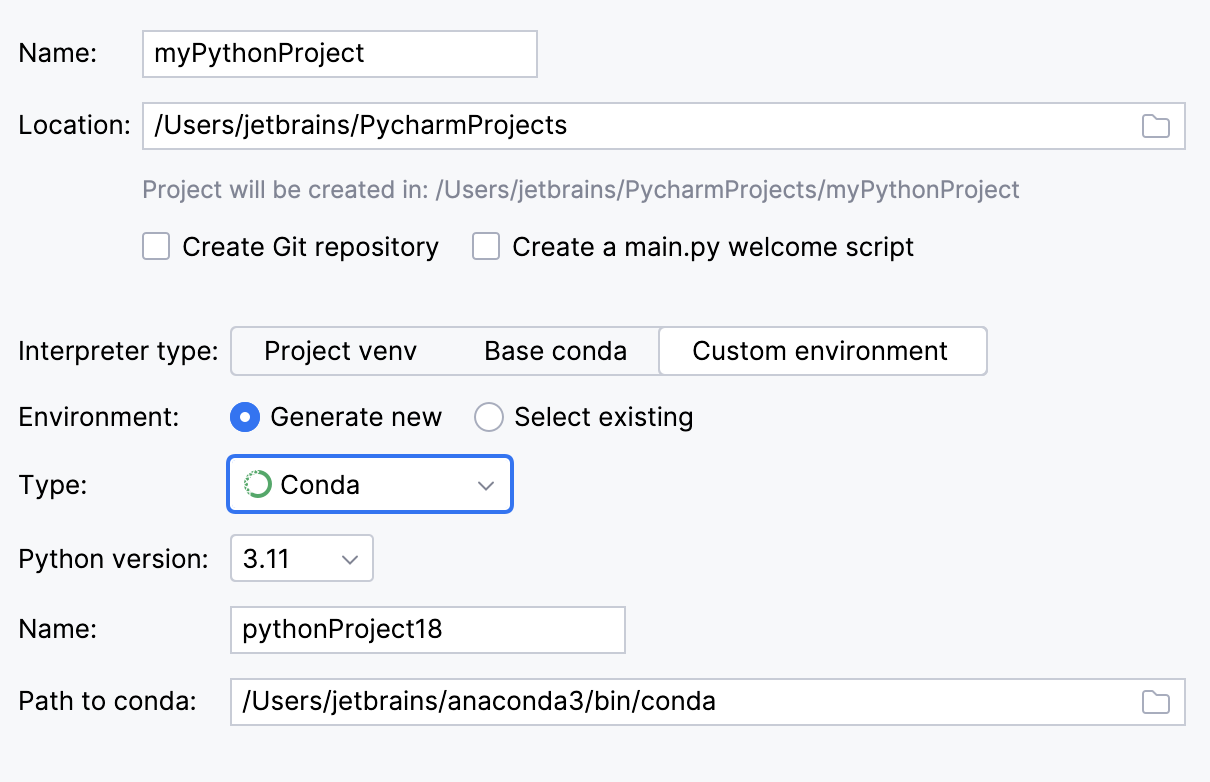
Select the Python version from the list.
Normally, PyCharm will detect conda installation.
Otherwise, specify the location of the conda executable, or click
to browse for it.
Specify the environment name.
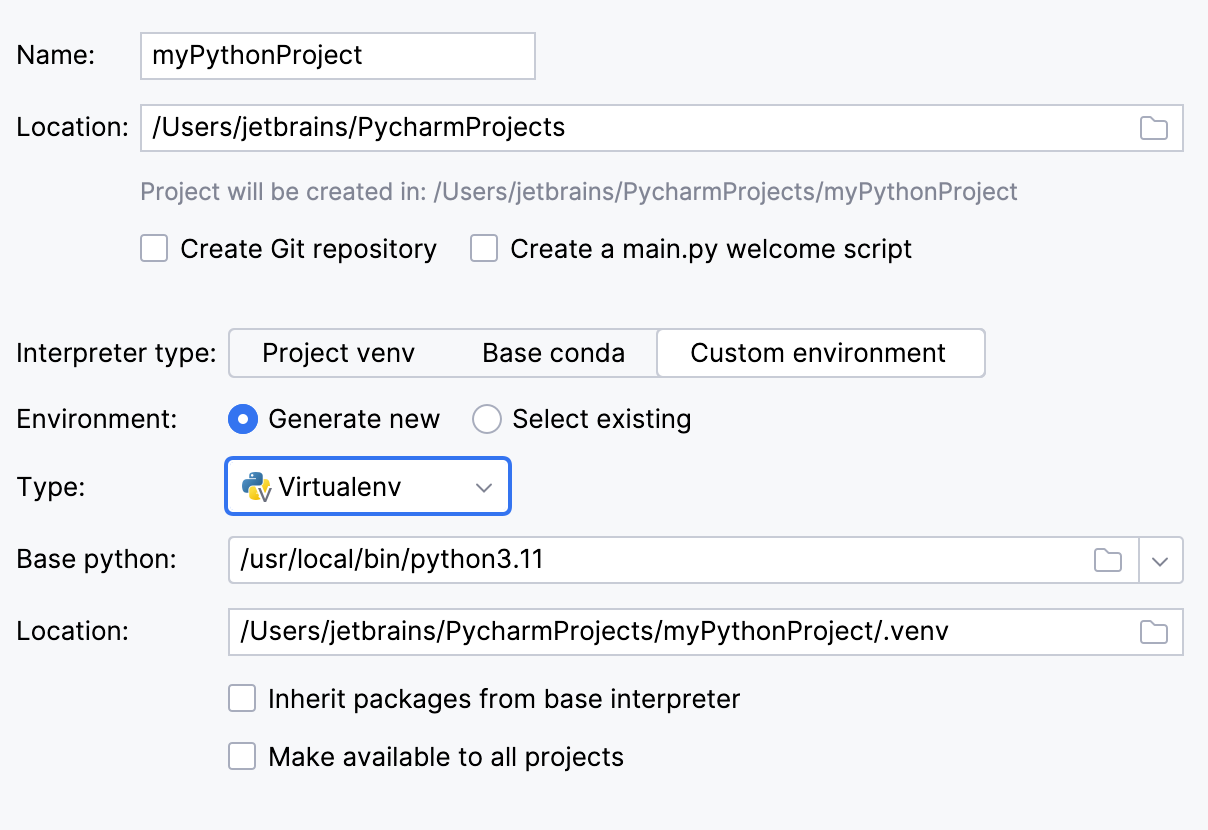
Specify the location of the new virtual environment in the Location field, or click
and browse for the location in your file system. The directory for the new virtual environment should be empty.
Choose the base interpreter from the list, or click
and find the Python executable in your file system.
Select the Inherit global site-packages checkbox if you want all packages installed in the global Python on your machine to be added to the virtual environment you're going to create. This checkbox corresponds to the
--system-site-packagesoption of the virtualenv tool.Select the Make available to all projects checkbox if you want to reuse this environment when creating Python interpreters in PyCharm.
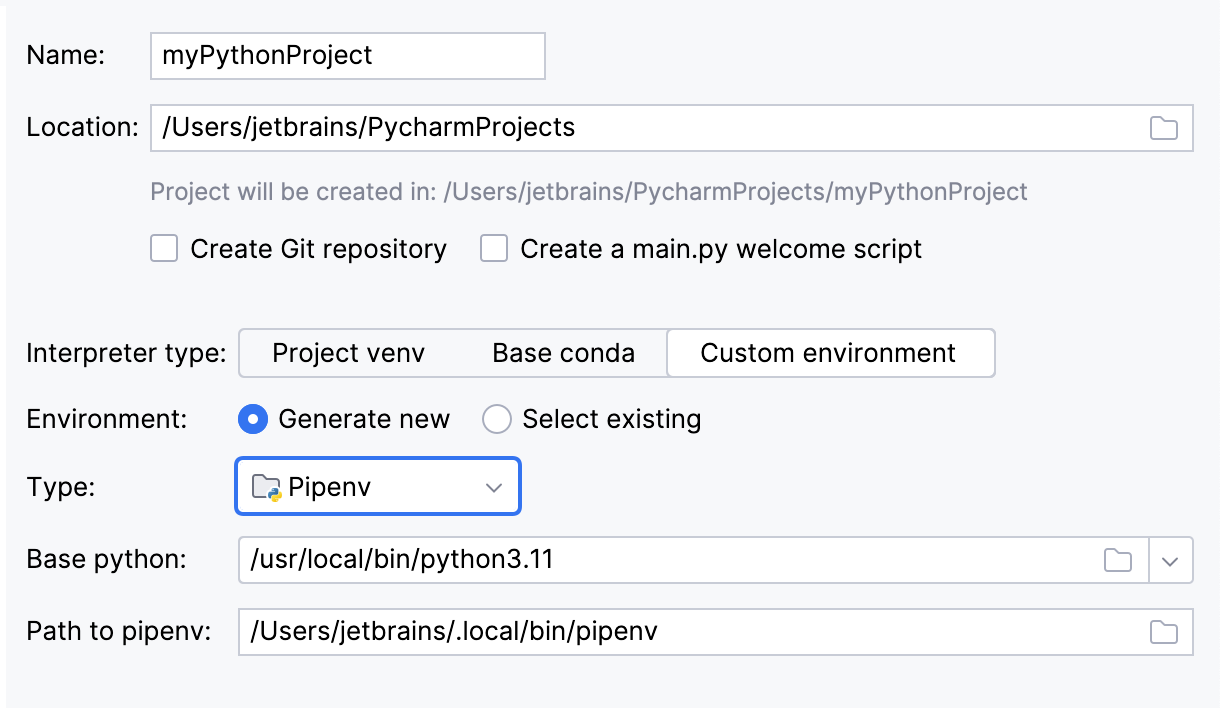
Choose the base interpreter from the list, or click
and find the Python executable in your file system.
If you have added the base binary directory to your
PATHenvironmental variable, you don't need to set any additional options: the path to the pipenv executable will be autodetected.If the pipenv executable is not found, follow the pipenv installation procedure to discover the executable path, and then specify it in the dialog.
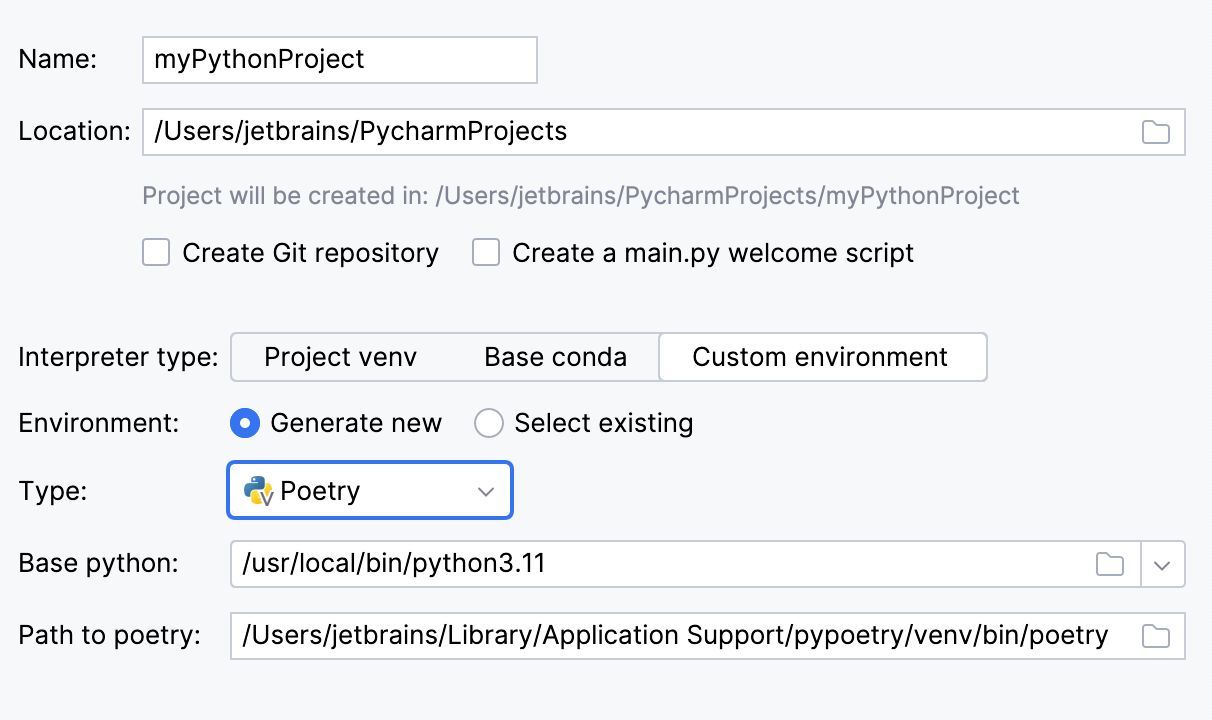
Choose the base interpreter from the list, or click
and find the Python executable in your file system.
If PyCharm doesn't detect the poetry executable, specify the following path in the dialog, replacing
jetbrainswith your username:/Users/jetbrains/Library/Application Support/pypoetry/venv/bin/poetryC:\Users\jetbrains\AppData\Roaming\pypoetry\venv\Scripts\poetry.exe/home/jetbrains/.local/bin/poetry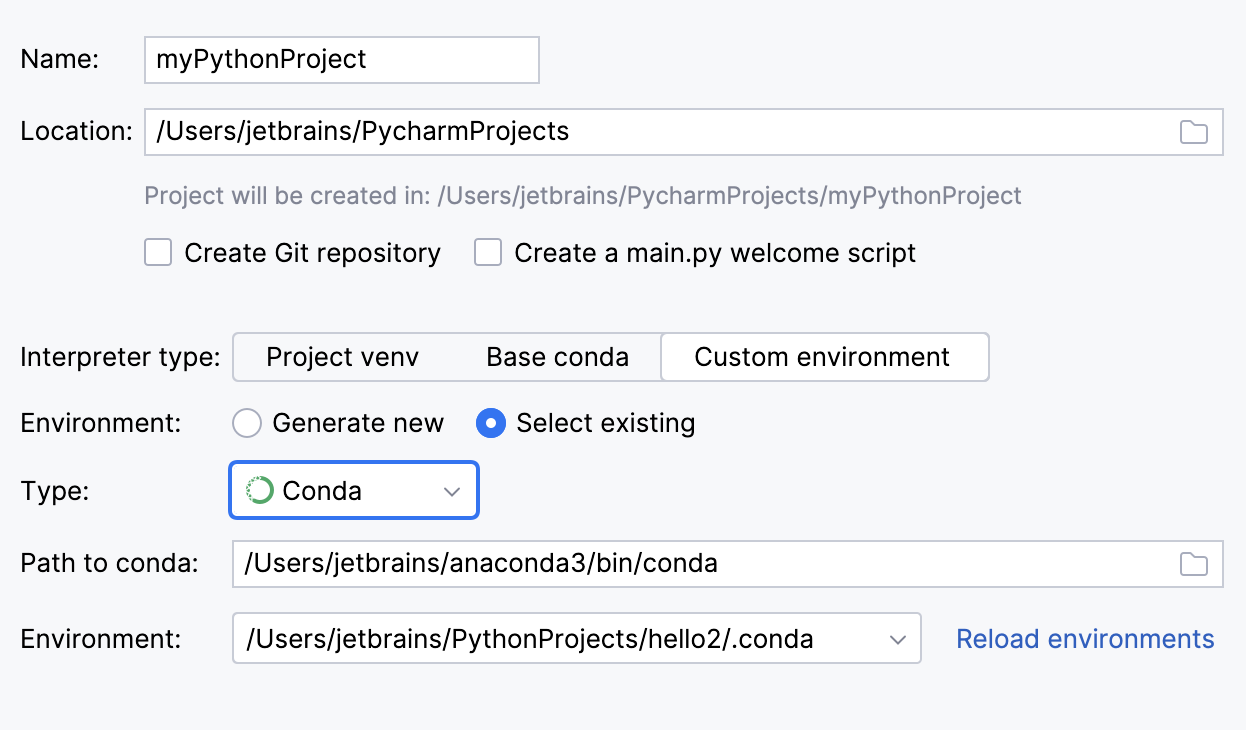
To reuse an existing conda environment:
Switch Type to Conda.
Normally, PyCharm will detect conda installation.
Otherwise, specify the location of the conda executable, or click
to browse for it.
Select the environment from the list. If you specified the path to conda manually, you may need to reload environments.
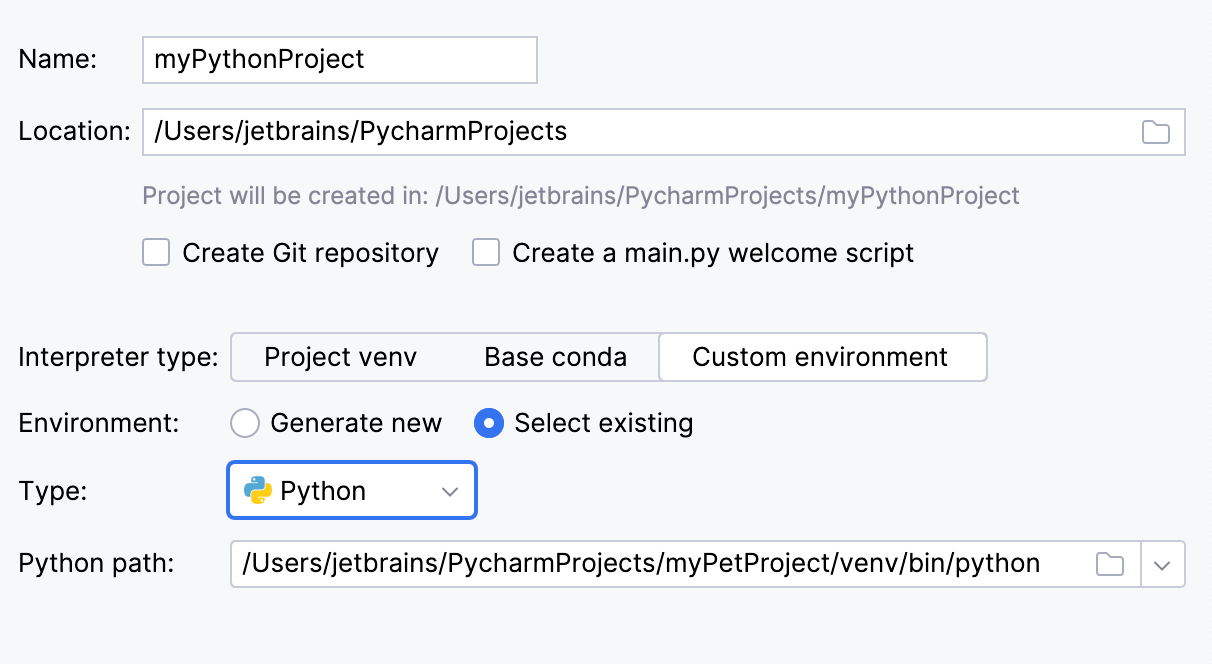
To reuse a Virtualenv, Pipenv, or Poetry environment:
Switch Type to Python.
Select the Python executable from the list or click
to browse for it.
Click Create.
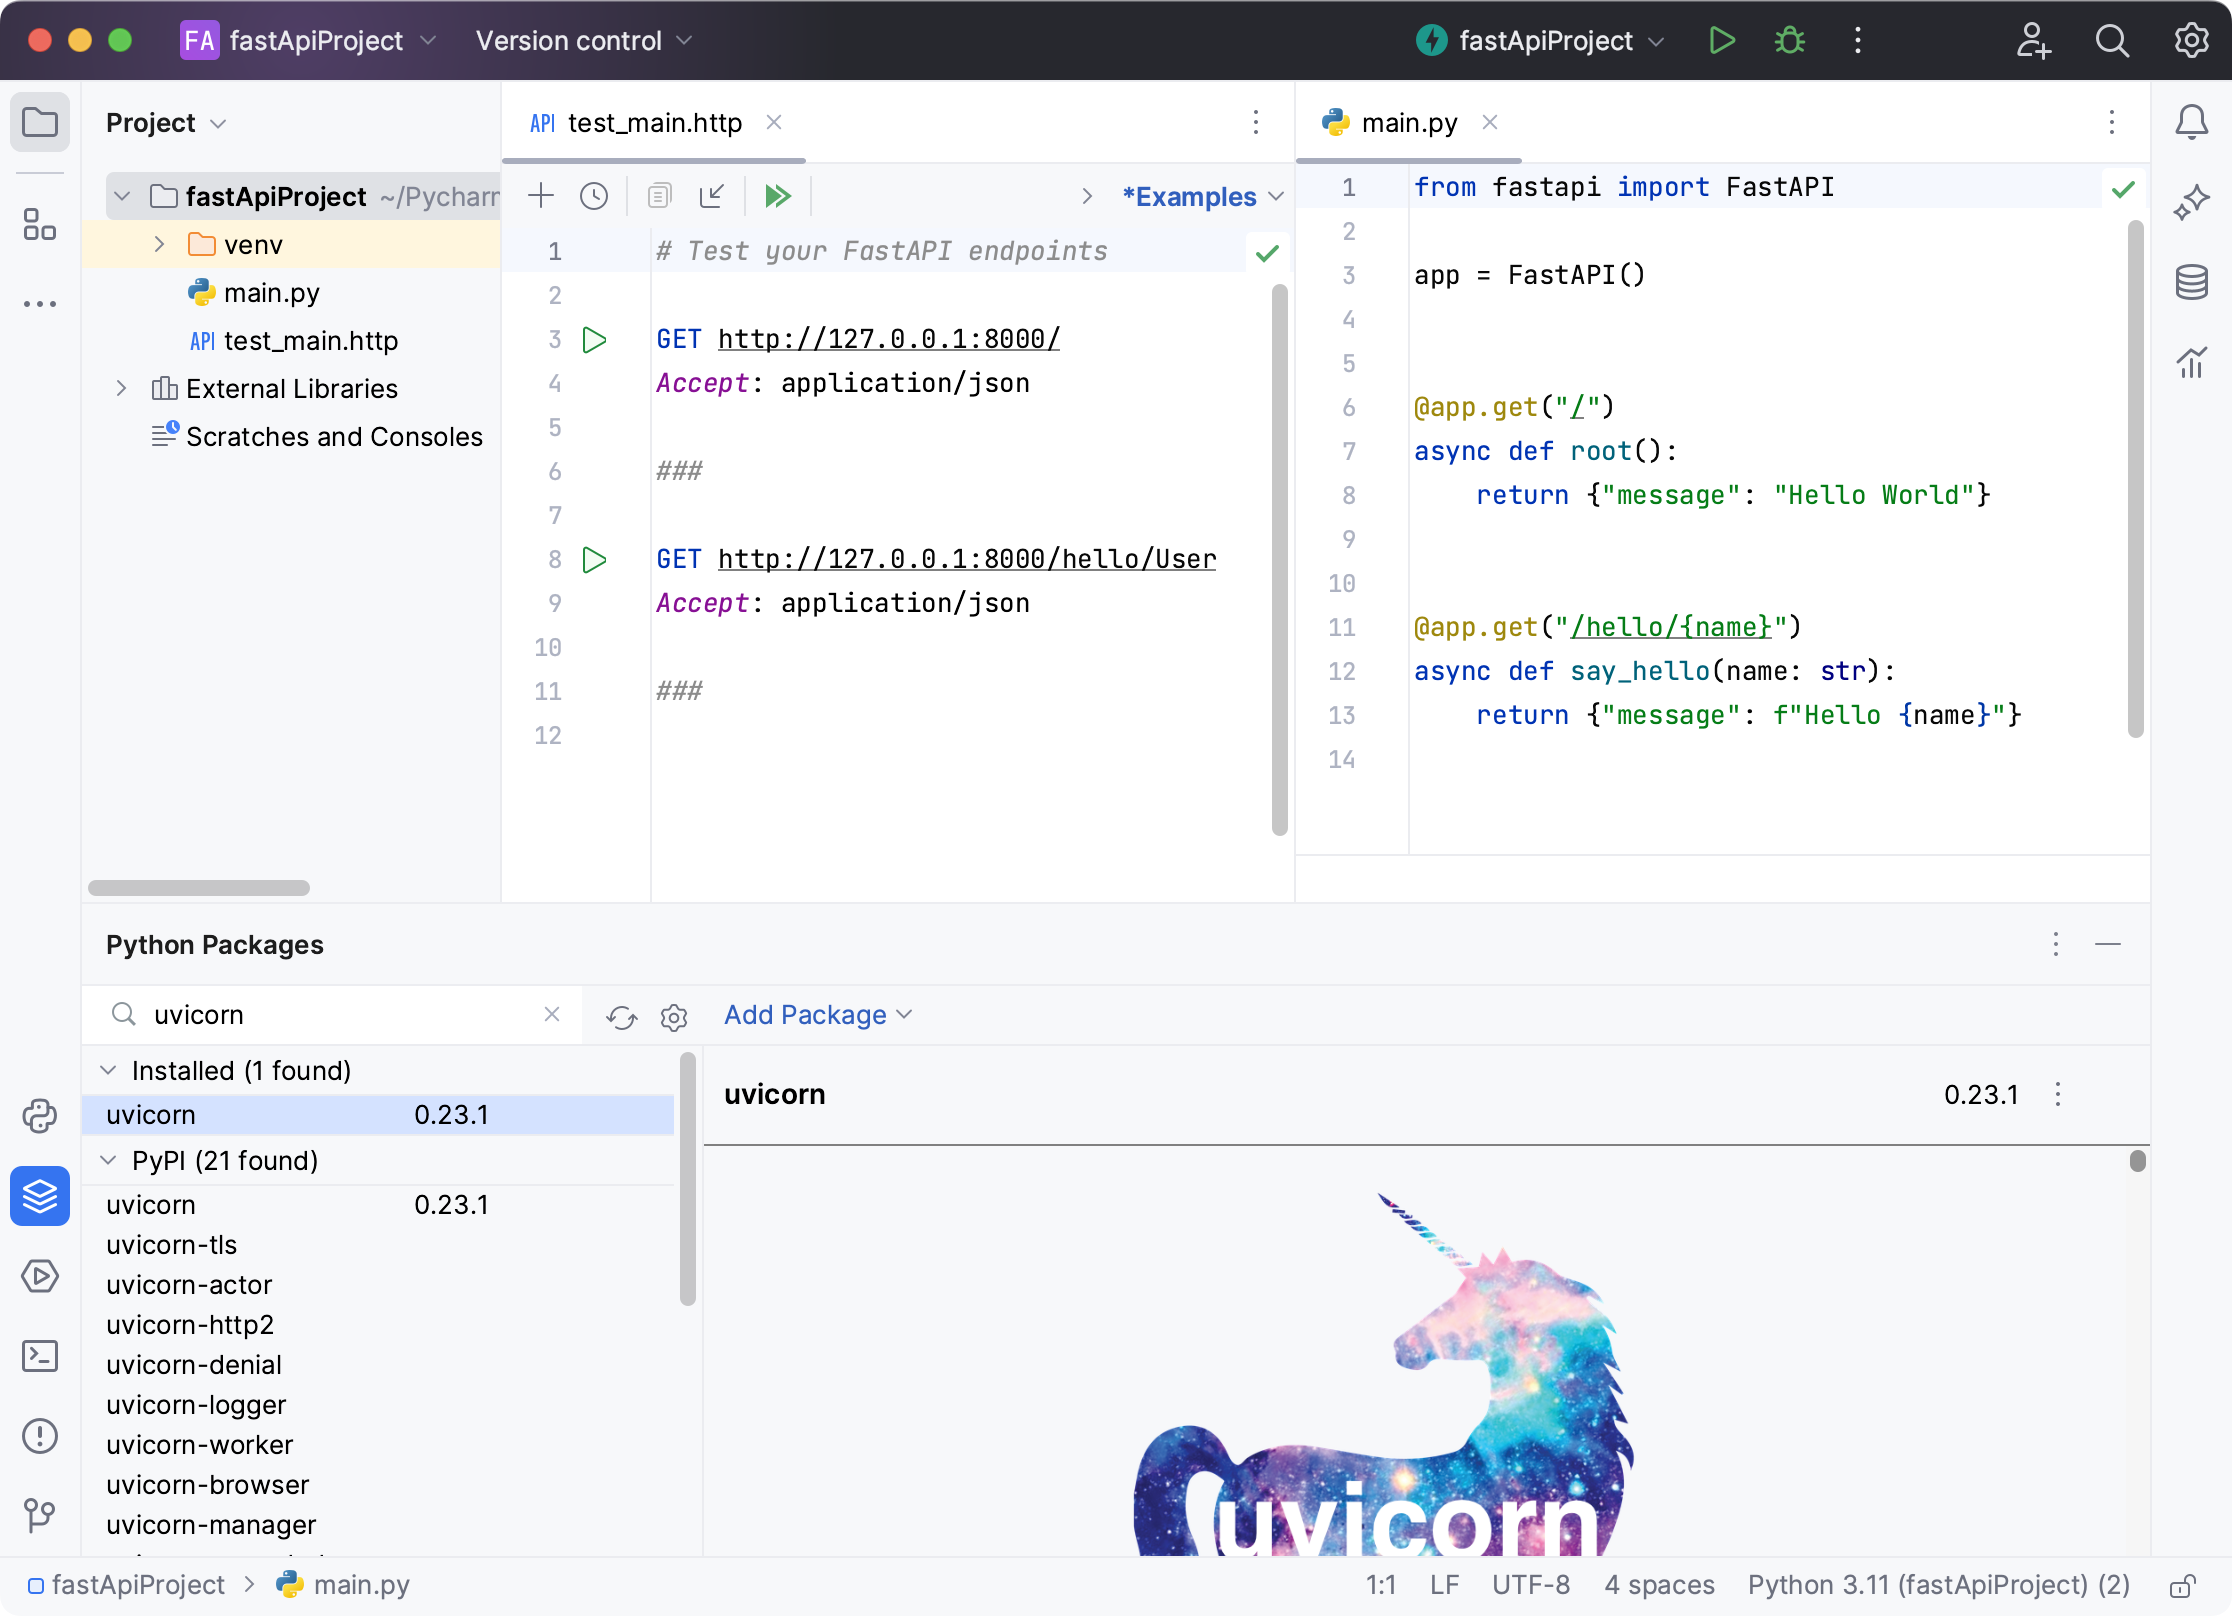
PyCharm creates a Python environment (or reuses the existing one) and installs the fastapi and uvicorn packages. It also adds the main.py and test_main.http files with some default code constructs.
Use coding assistance to develop an application
When developing FastAPI applications, you can benefit from coding assistance available in the IDE.
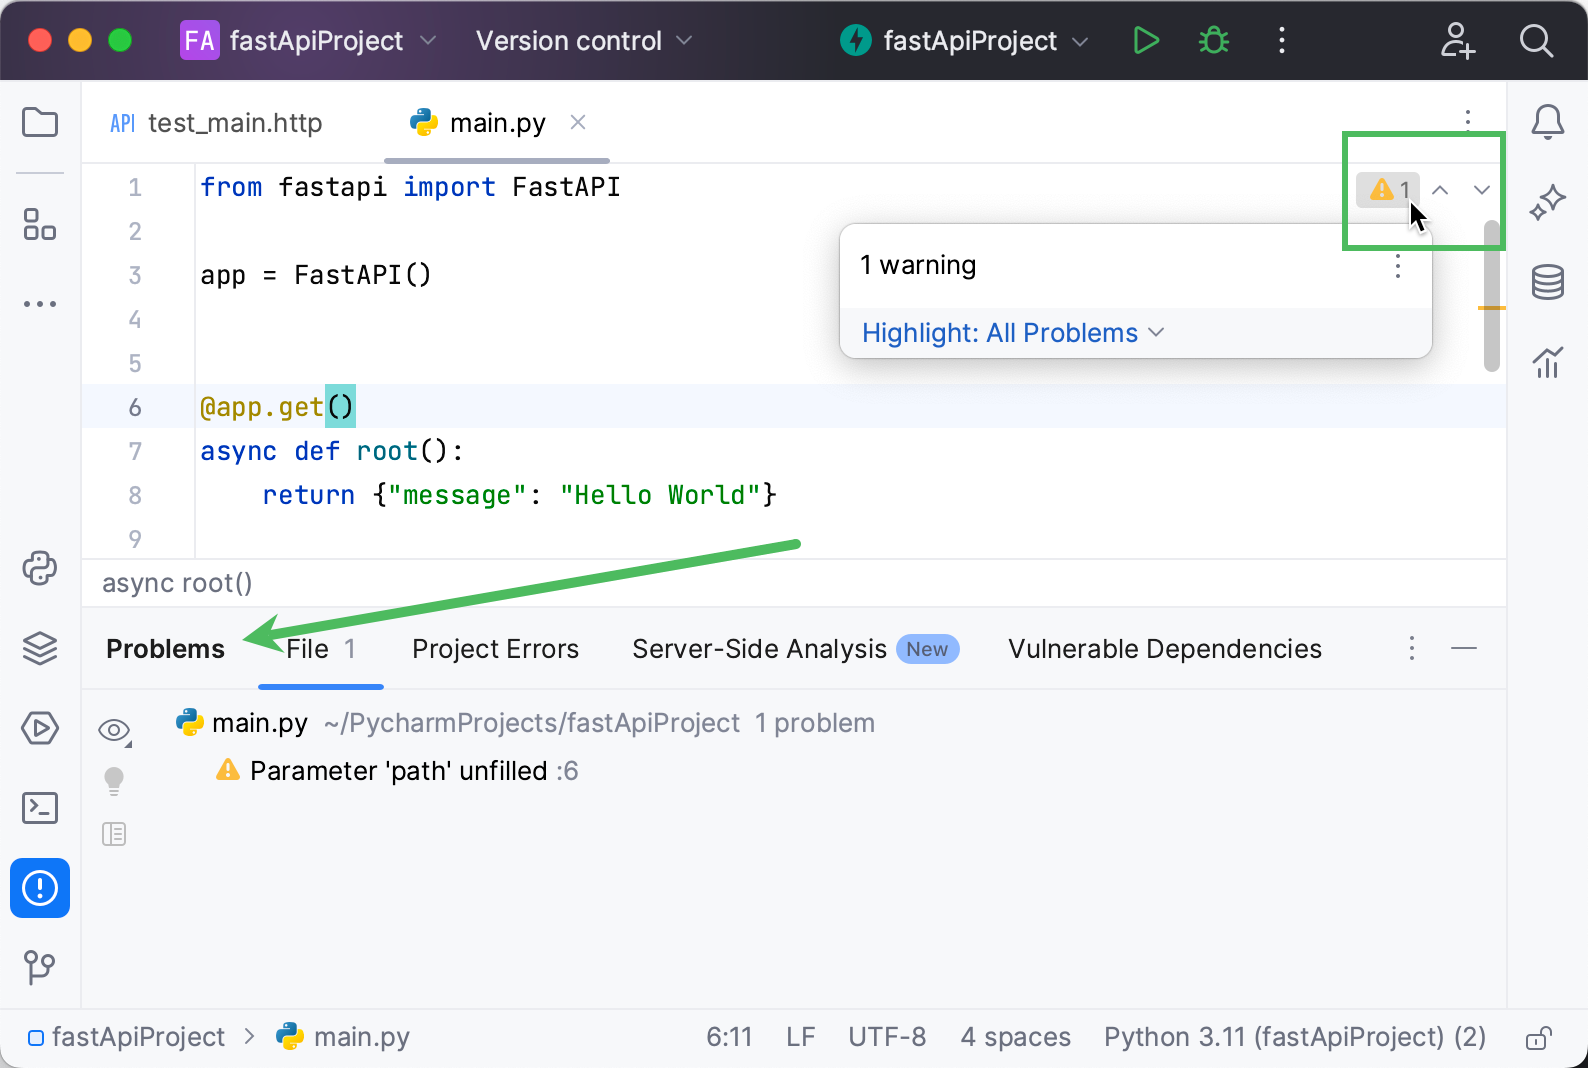
Use inspections to analyze code problems. You can use the inspection widget to briefly preview the summary of the issues. Click the widget to get more information on each detected problem in the Problems tool window.
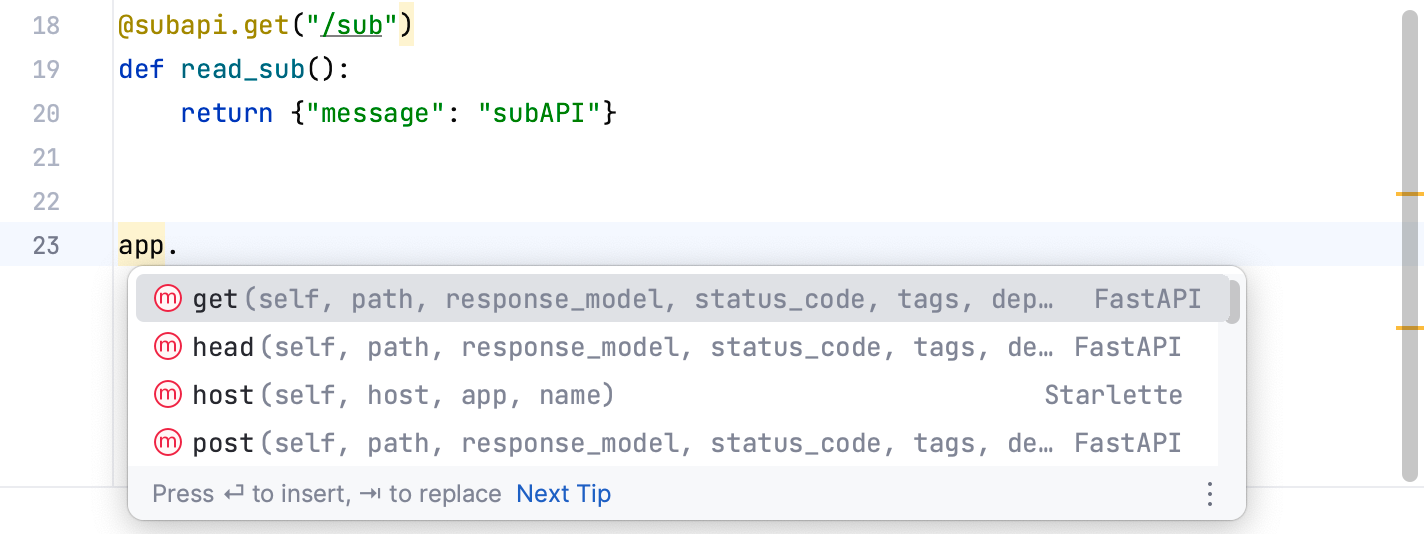
You can use context-aware code completion to speed-up the coding process. Just start typing a code construct and the completion popup appears. You can also press Ctrl+Space to show available items.

Launch and modify run/debug configurations
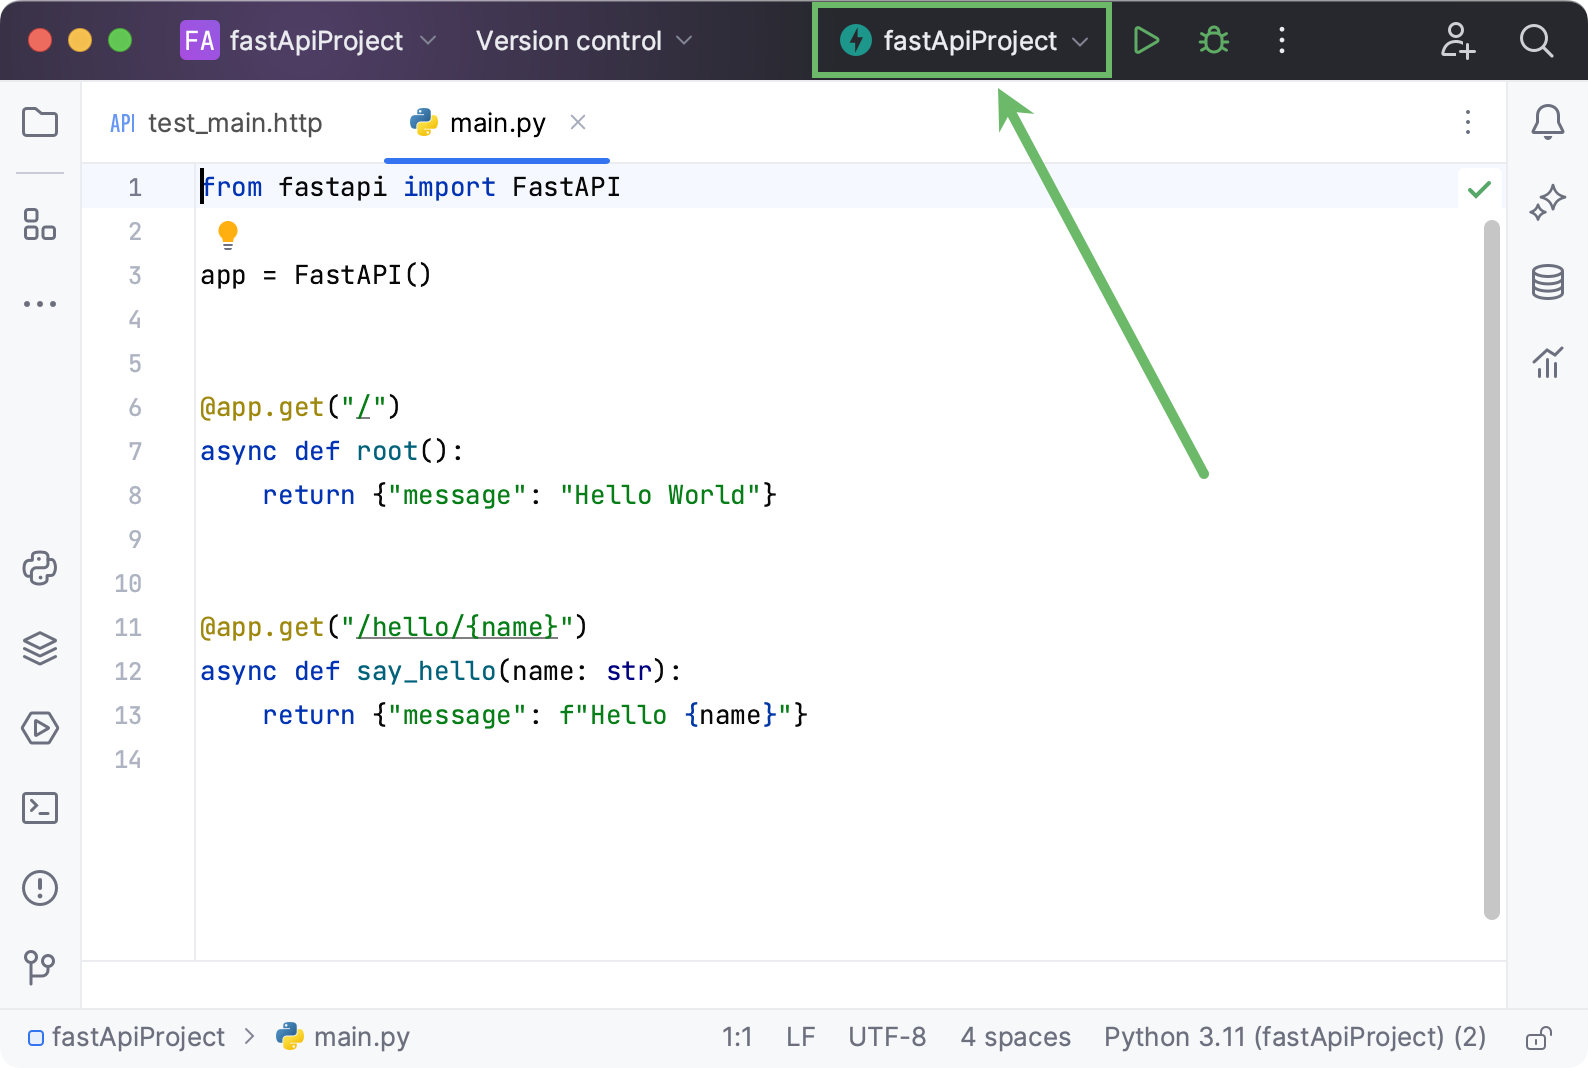
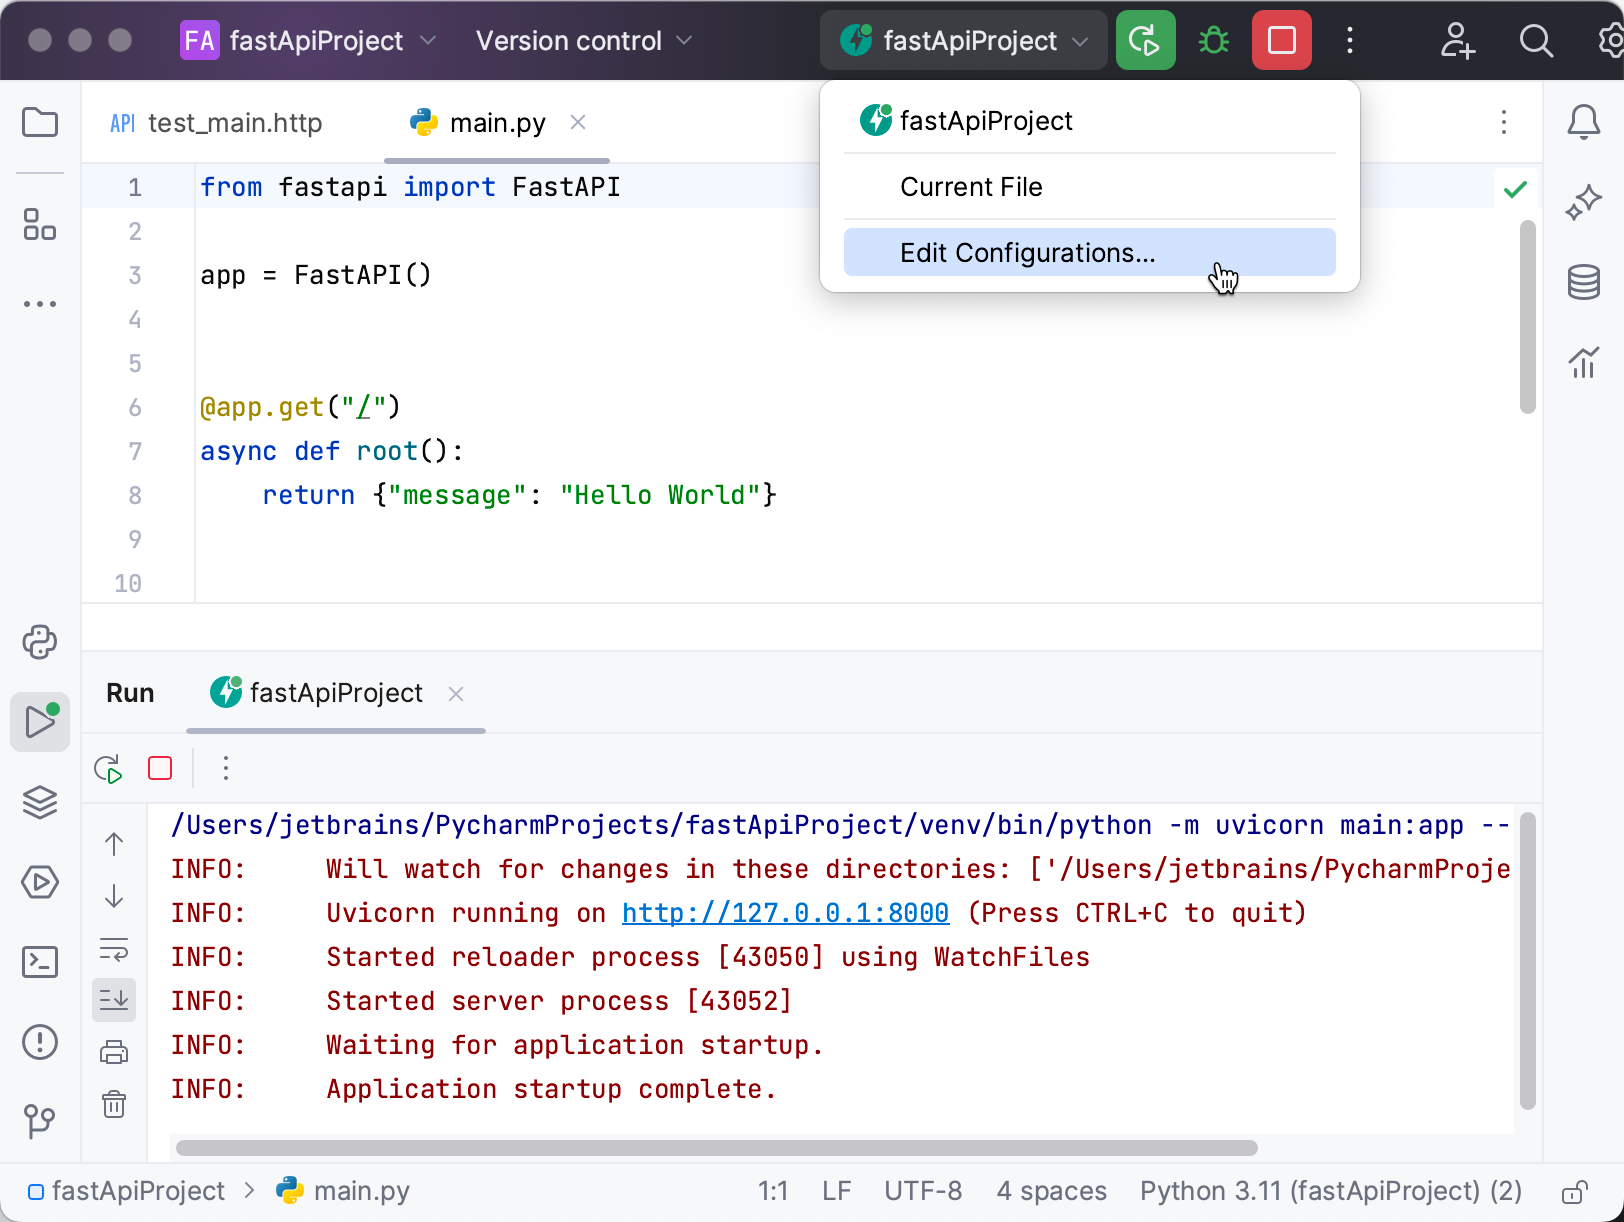
Once you have created a new project, PyCharm provides you with a run/debug configuration, so that you can execute your FastAPI application. The created configuration is selected in the list of the available run/debug configurations. Click
in the Run widget to launch your application.
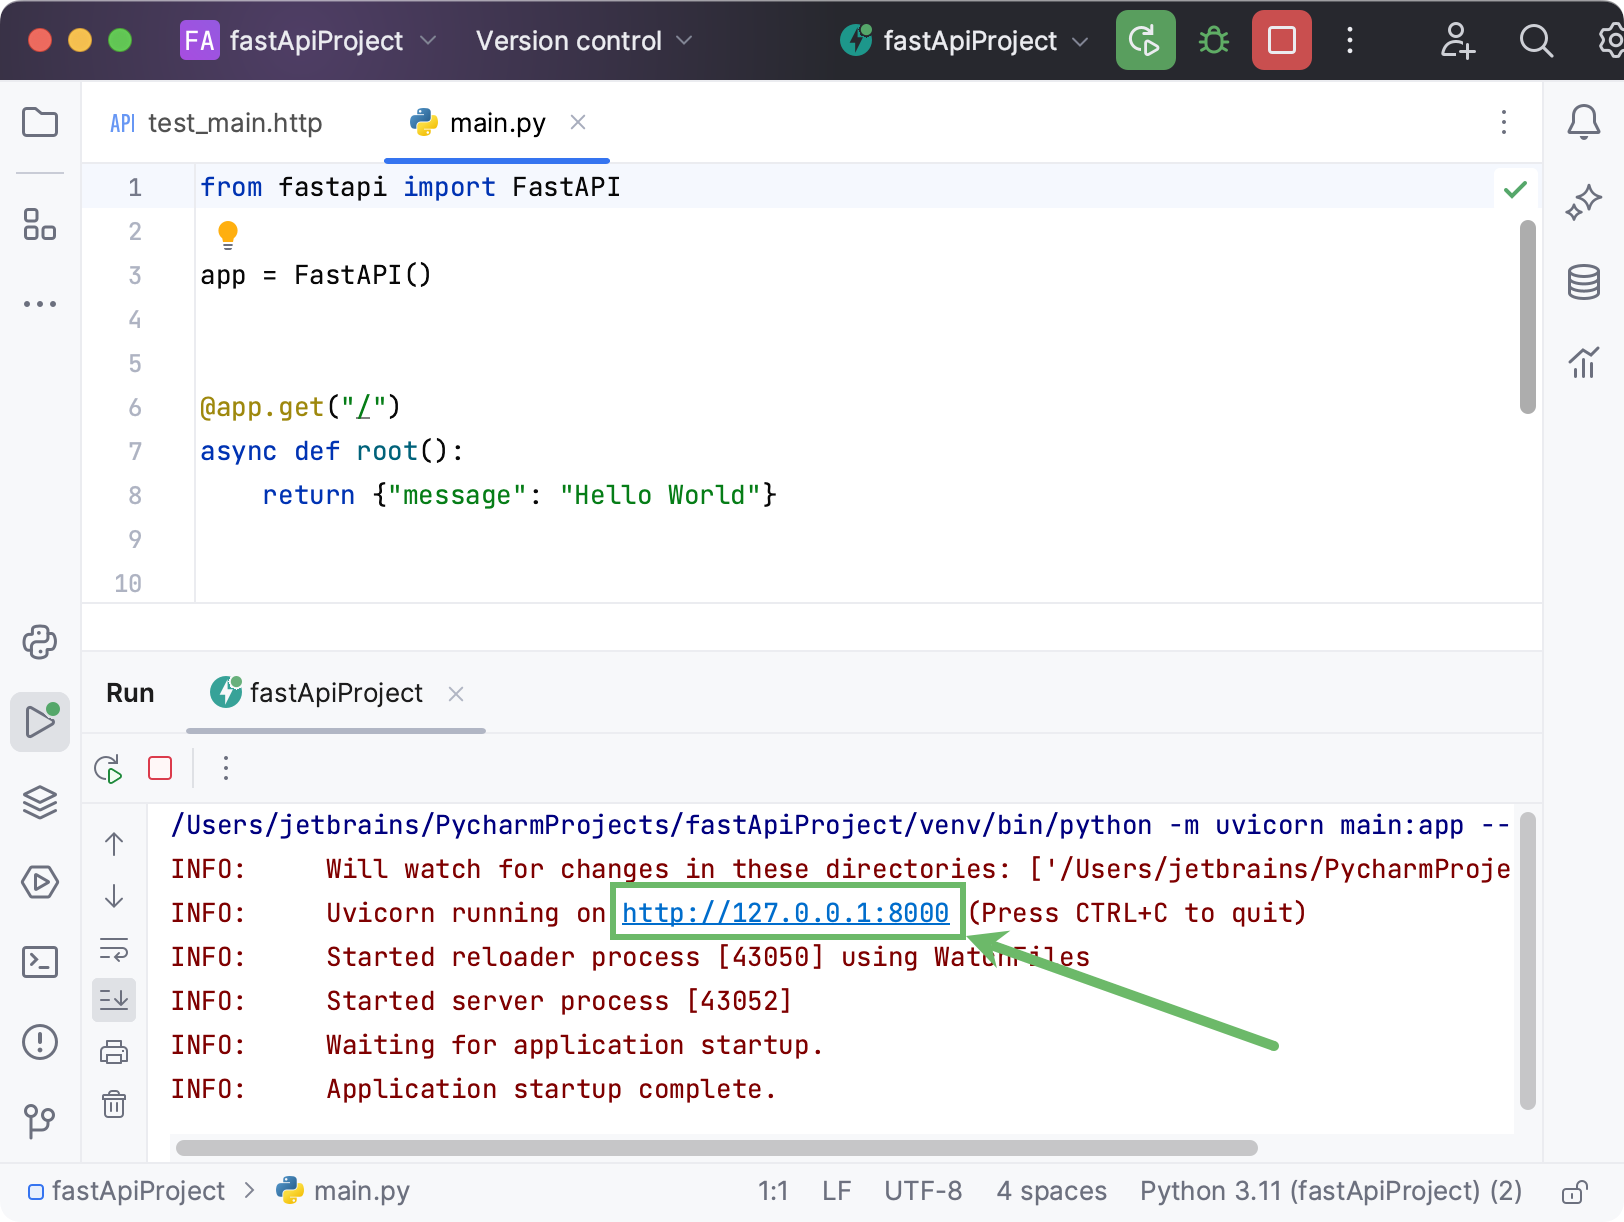
The target application is executed in the Run tool window. You can click the link to preview the application in a browser.
You can modify the default run/debug configuration created with the project. Select from the list of the available configurations:
Select the target configuration in the left pane and modify its parameters, for example, you can add more uvicorn options (in this example:
--reload delay 10).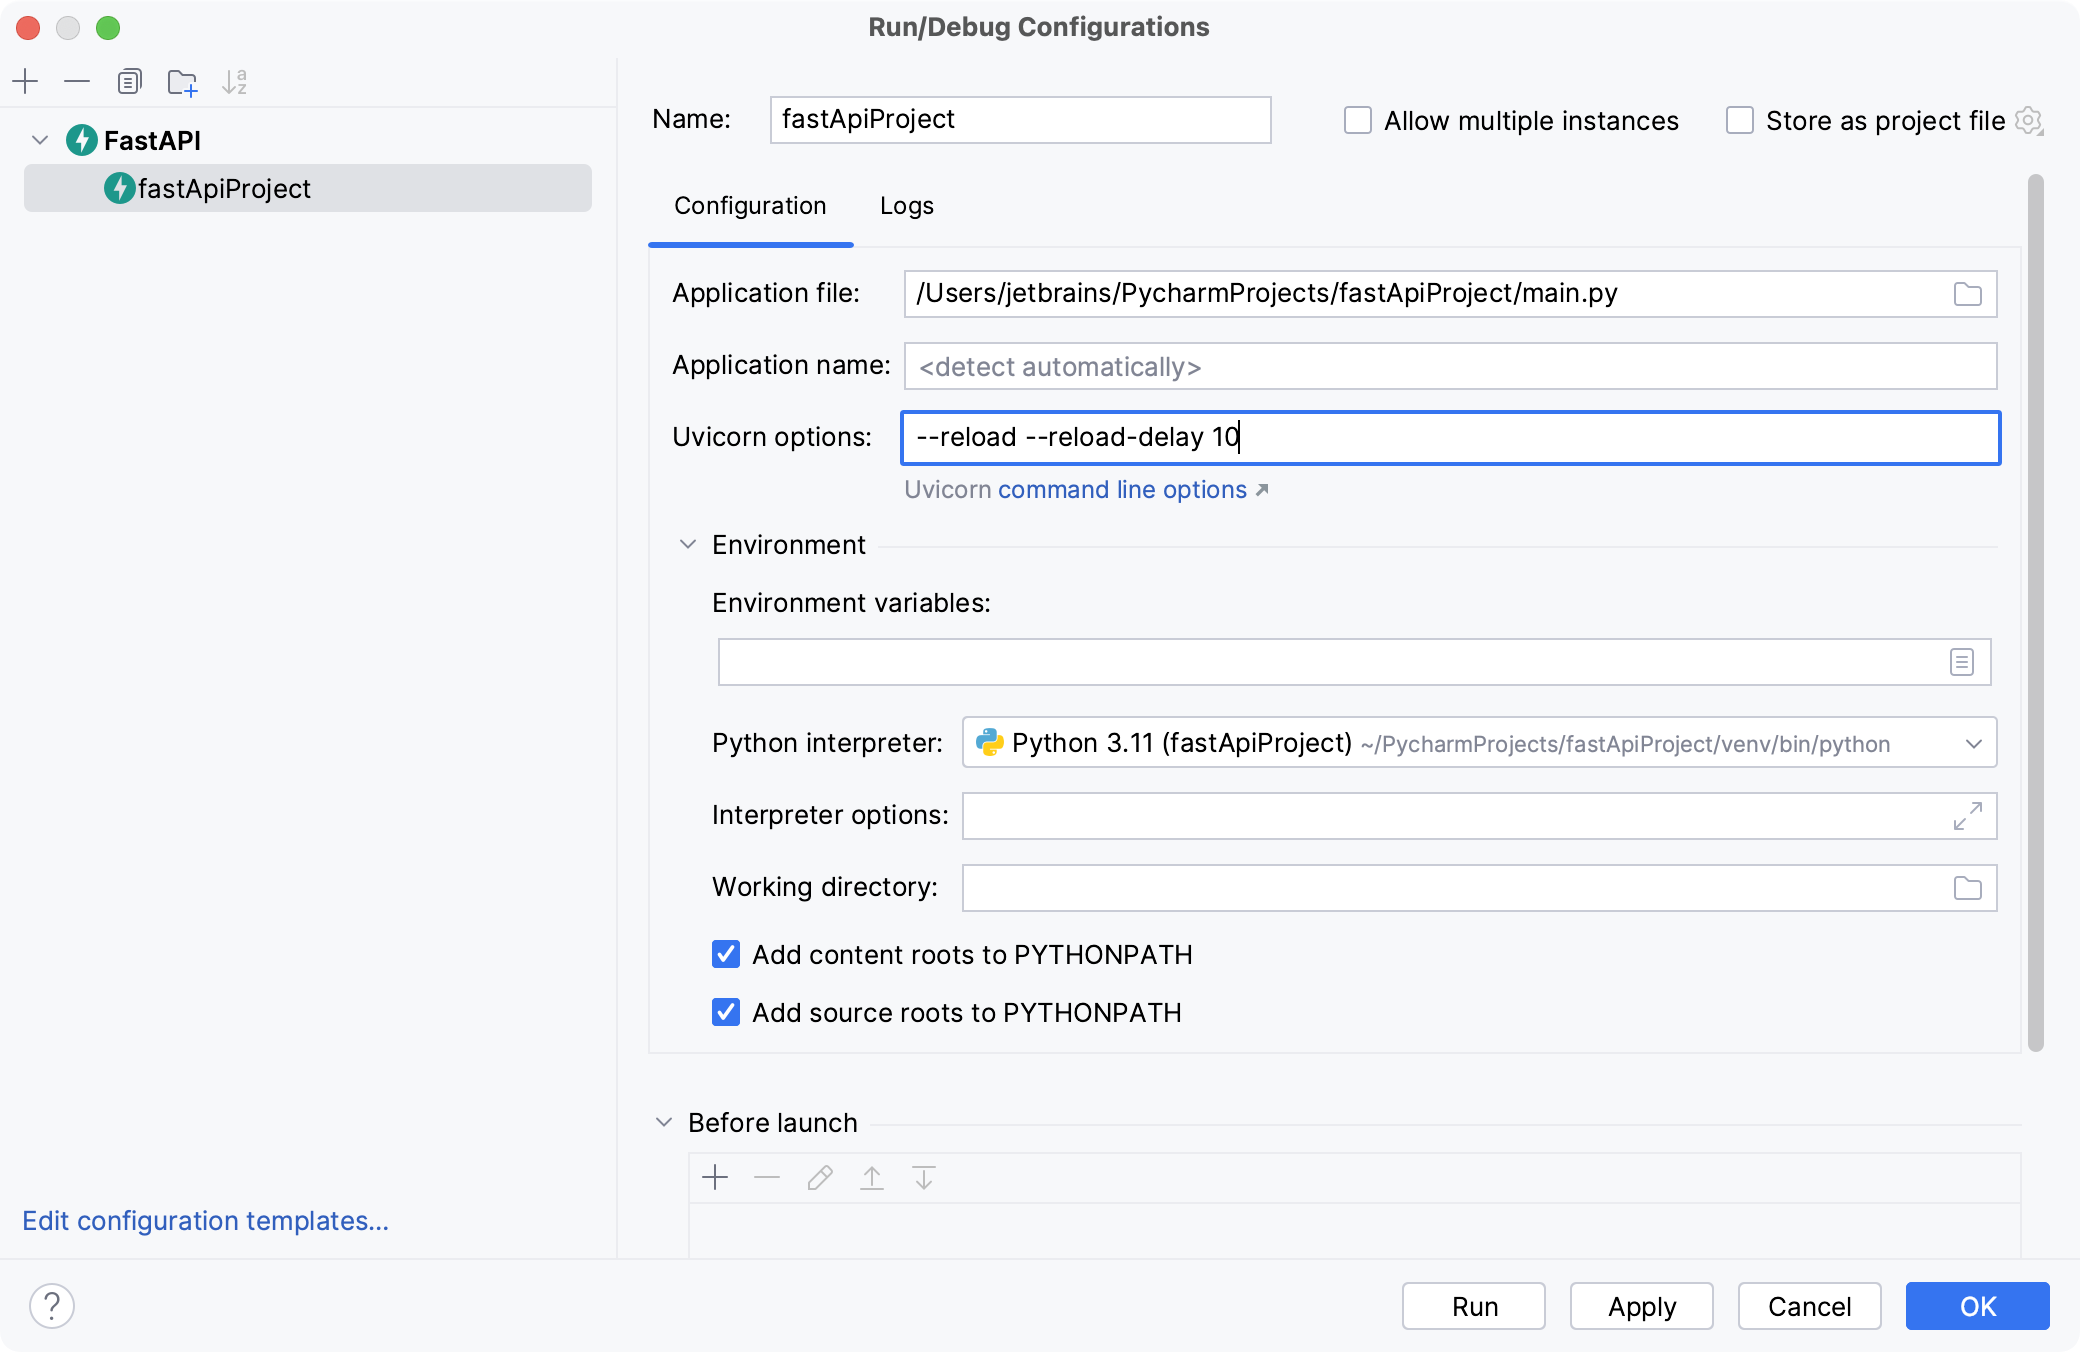
For more information about working with run/debug configurations, refer to Run/debug configurations.
You can also execute the .http file to test GET requests. You can run each request separately, or you can click
on the .http file toolbar to test all requests at once.
Select an option to execute requests without an environment or create an environment in either a public or a private file.
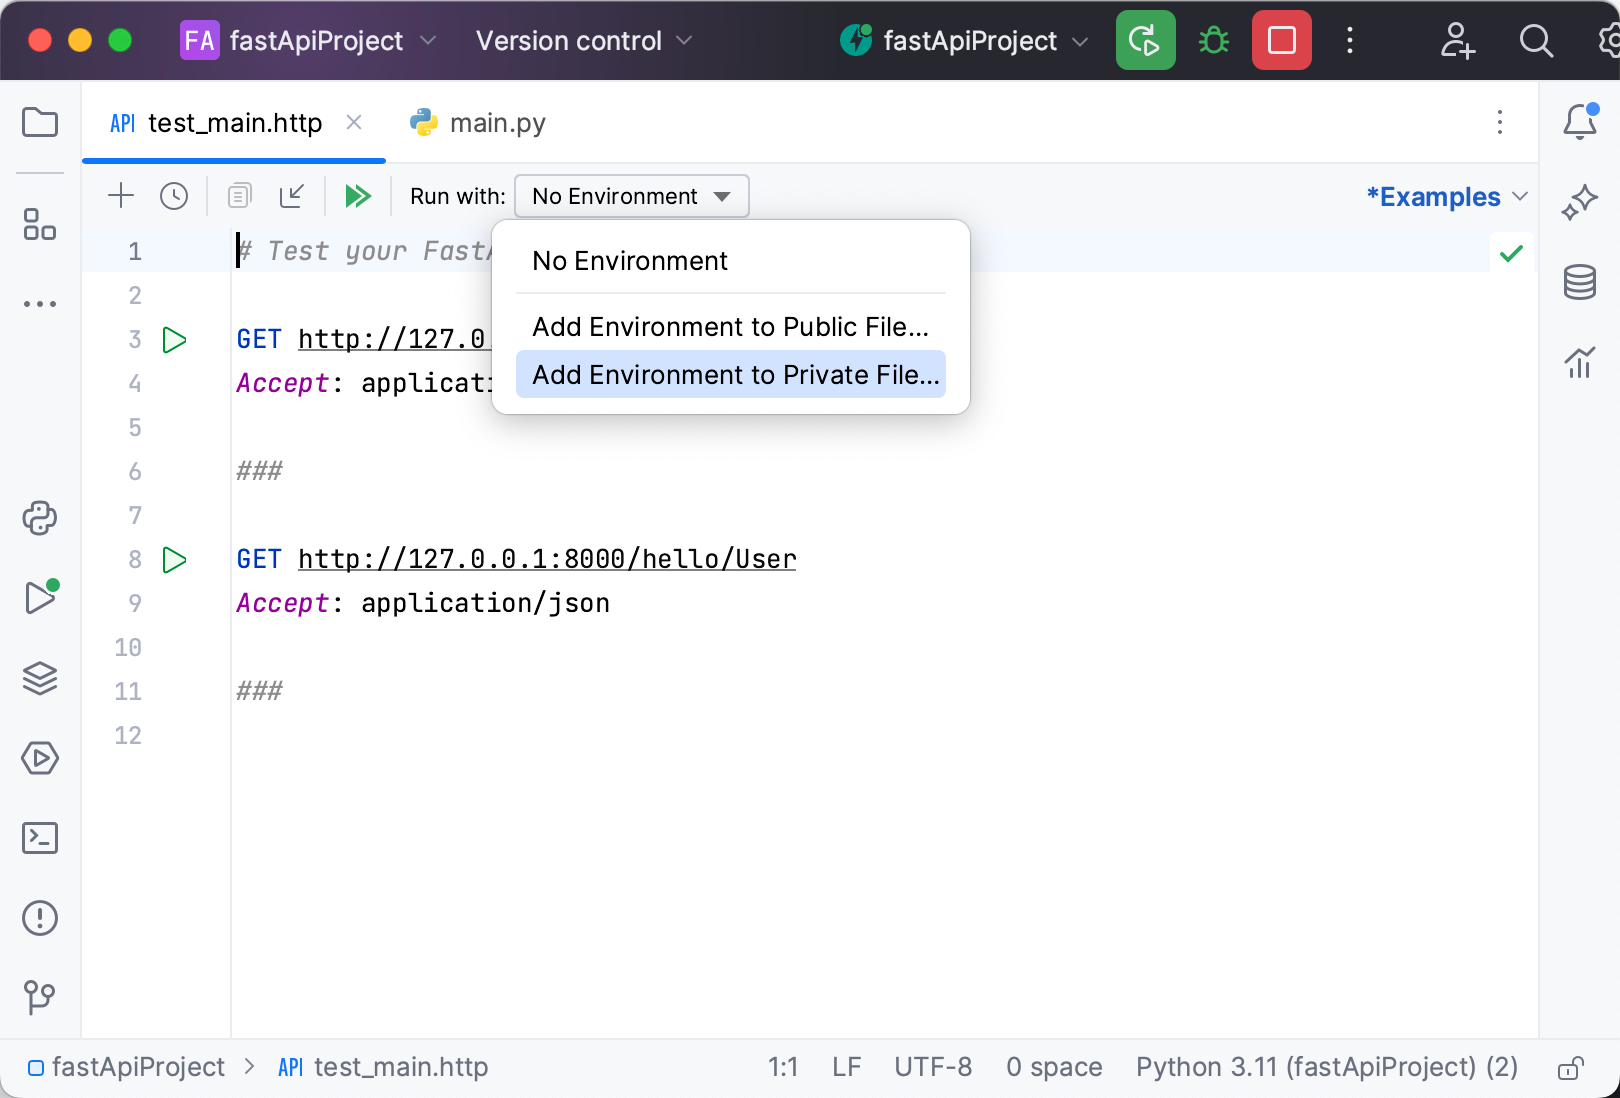
PyCharm executes GET tests in the Services tool window. You can select a particular request to preview the summary of its execution status.

Lean more about HTTP requests in Execute HTTP requests.
Manage Endpoints
You can preview, modify, create, and test endpoints of your FastAPI application.
Make sure the Endpoints plugin is enabled in the settings. Press Ctrl+Alt+S to open settings and then select . Click the Installed tab. In the search field, type Endpoints. For more information about plugins, refer to Managing plugins.
Select to open the Endpoints tool window.
Alternatively, click
More tool windows on the left, and then select Endpoints.
The Endpoints tool window contains the list of endpoints defined in the application.
The dedicated pane shows the details of the selected endpoint including the documentation, the generated HTTP requests, examples, and the generated OpenAPI specification.
Double-click any endpoint in the list to navigate to its declaration. You can also right-click any item in the list to open the context menu.
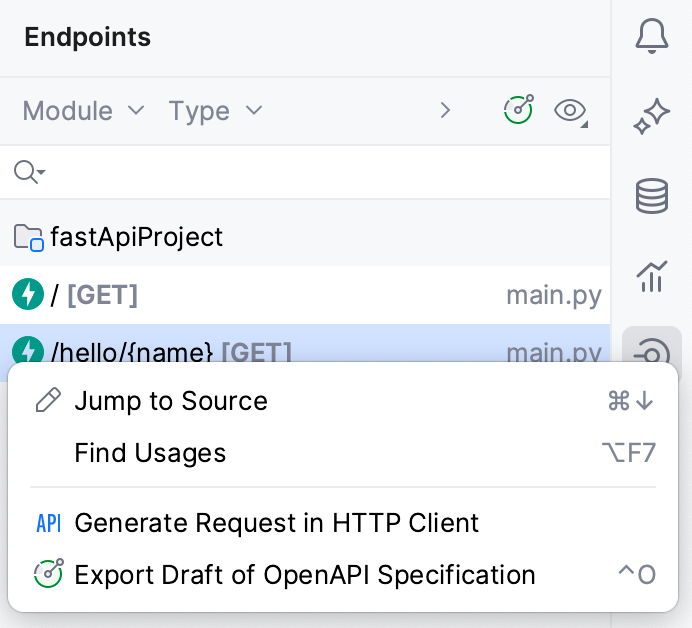
Use coding assistance to create and modify endpoints:
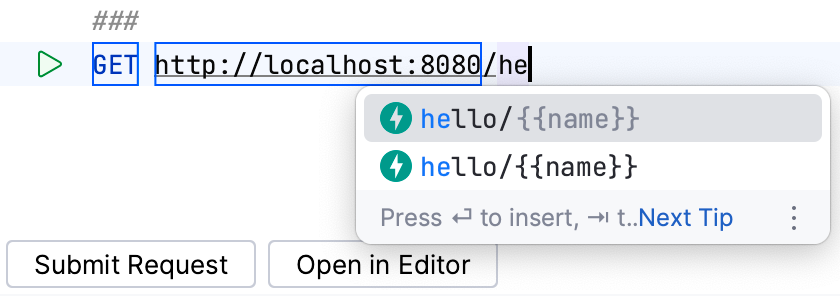
Code completion
PyCharm completes endpoint names as you are typing them in Python files, HTTP clients, and other project files.
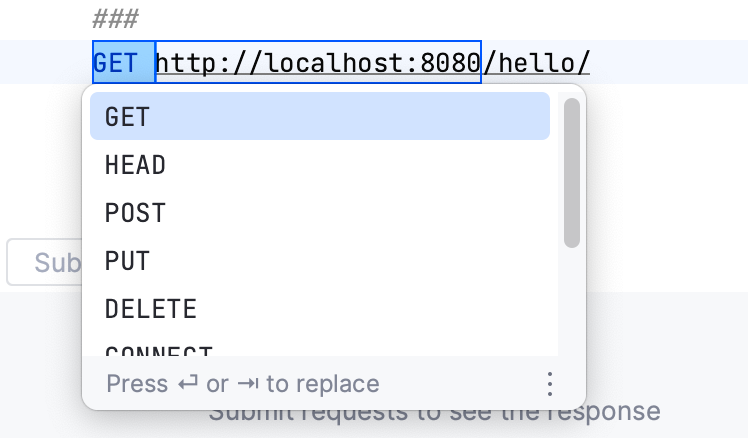
Live templates
With the live templates available for HTTP clients, you can quickly modify request methods, URLs, and variables.
Refactoring
If you need to rename an endpoint, use the Rename refactoring. Select an endpoint in the editor, press Shift+F6, and type its new name.
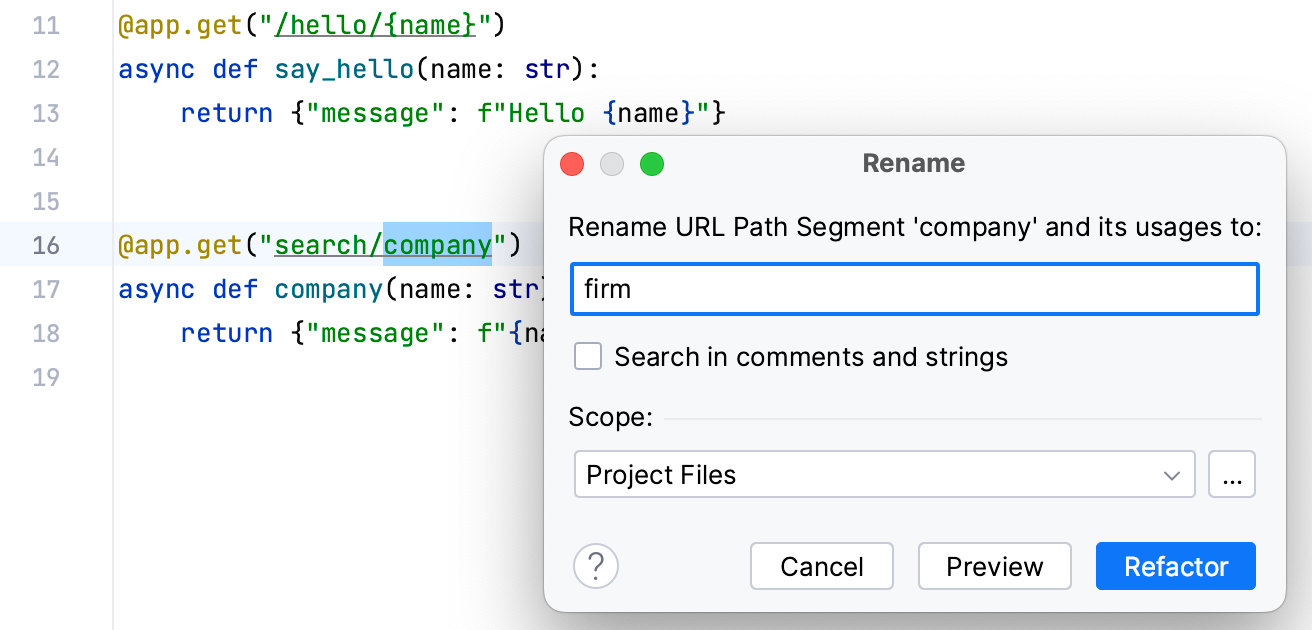
Renaming happens in all occurrences across the project.
To open the HTTP client in a separate tab, click Open in Editor on the HTTP Client tab. PyCharm opens a temporary scratch file with the HTTP request. Use
in the gutter to run the request.
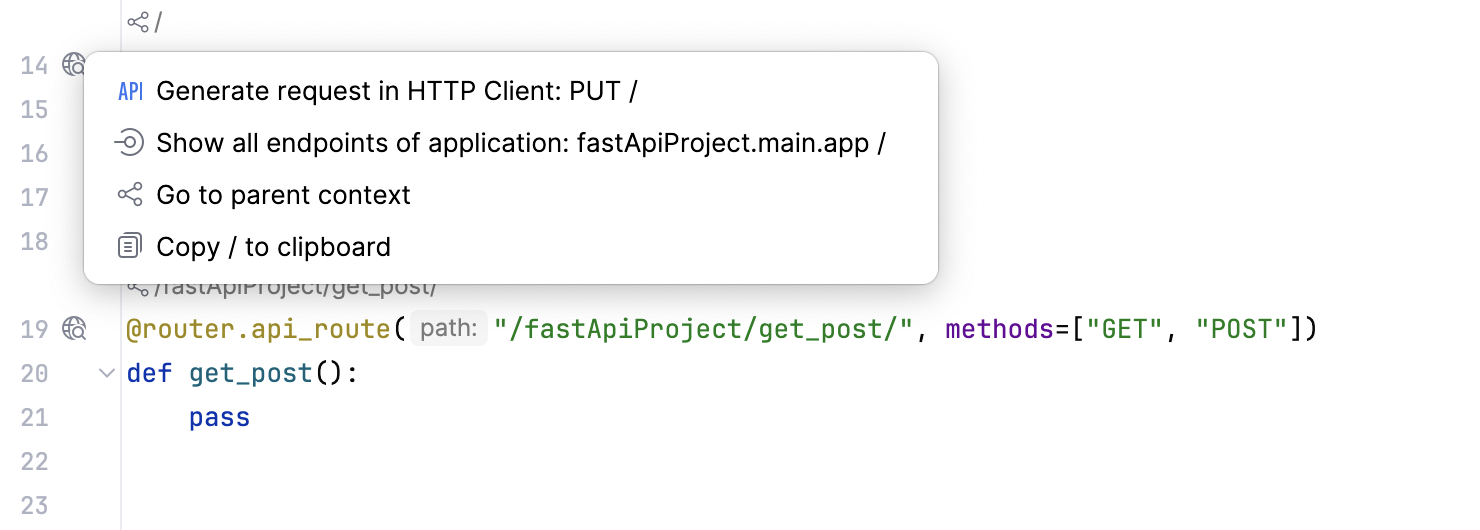
Click the
icon in the gutter to manage an endpoint.
You can test an endpoint by running the request in the HTTP Client, view all lower-level endpoints, navigate one level up, or copy the URL to the clipboard.
For more information, refer to Endpoints tool window.