Configure a Python interpreter
Python interpreters in PyCharm
To work with your Python code in PyCharm, you need to configure at least one Python interpreter. You can use a system interpreter that is available with your Python installation. You can also create a Virtualenv, pipenv, Poetry, uv, hatch or conda virtual environment. A virtual environment consists of a base interpreter and the installed packages.
With PyCharm Pro, you can also configure interpreters to execute your Python code on remote environments by using SSH, Docker, Docker Compose, or WSL (only for Windows).
When you configure a Python interpreter, you need to specify the path to the Python executable in your system. So, before configuring a Python interpreter, you need to ensure that you've downloaded Python and installed it in your system and you are aware of a path to it.
You can create several Python interpreters based on the same Python executable. This is helpful when you need to create different virtual environments for developing different types of applications. For example, you can create one virtual environment based on Python 3.12 to develop Django applications and another virtual environment based on the same Python 3.12 to work with scientific libraries.
Python interpreters can be configured for a new project or for the current project (you can create a new interpreter or use one of the existing interpreters).
Configuring an existing Python interpreter
At any time, you can switch the Python interpreter either by using the Python Interpreter selector or in Settings.
Switch the Python interpreter using the Python Interpreter selector
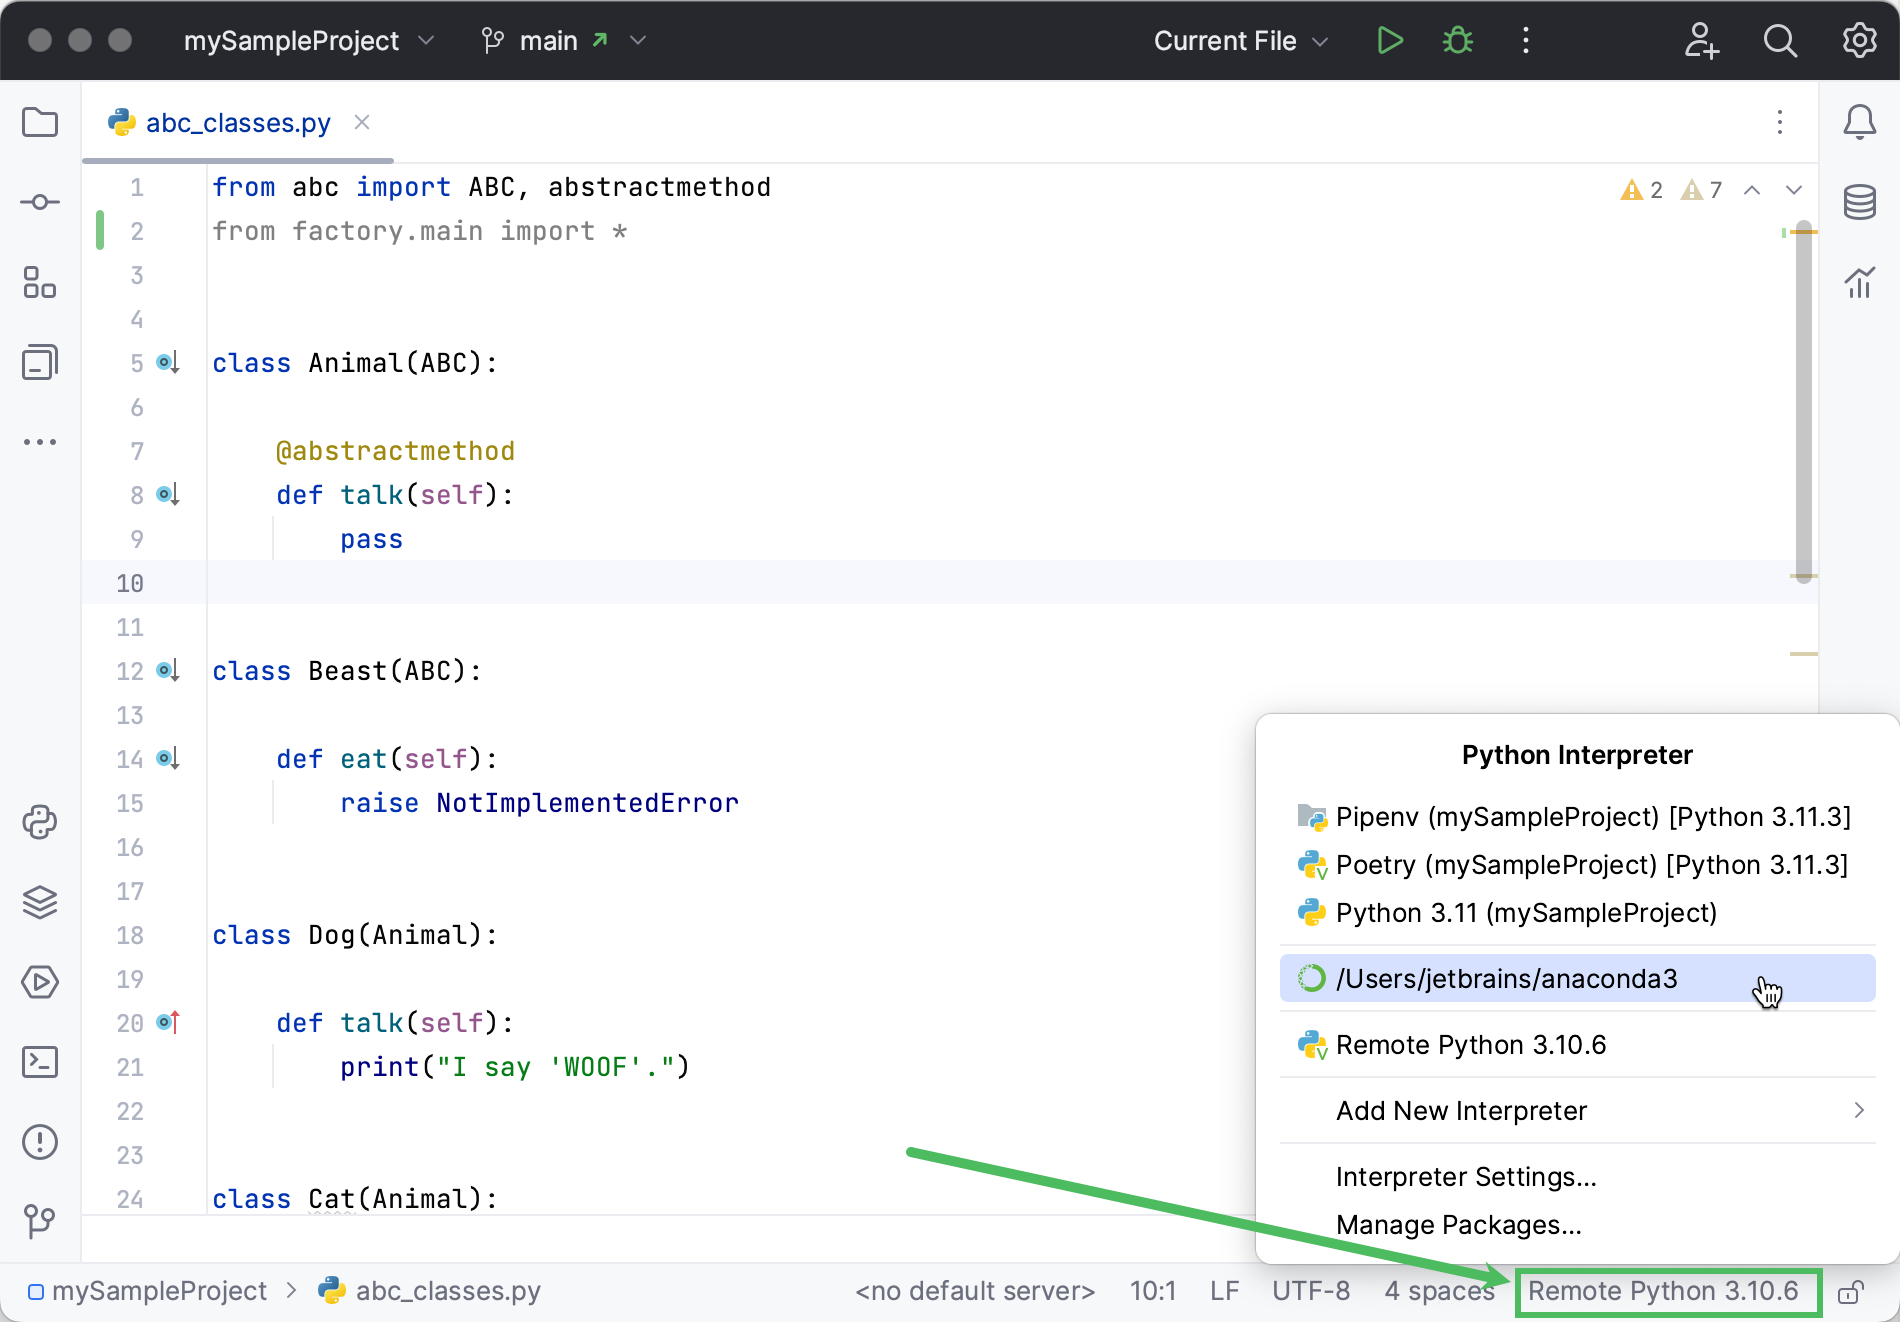
The Python Interpreter selector is located on the status bar. It is the most convenient and quickest way to switch the Python interpreter. Click it and select the target interpreter:
Switch the Python interpreter in the IDE settings
Press Ctrl+Alt+S to open settings and then select .
Click the drop-down and select the required Python interpreter:
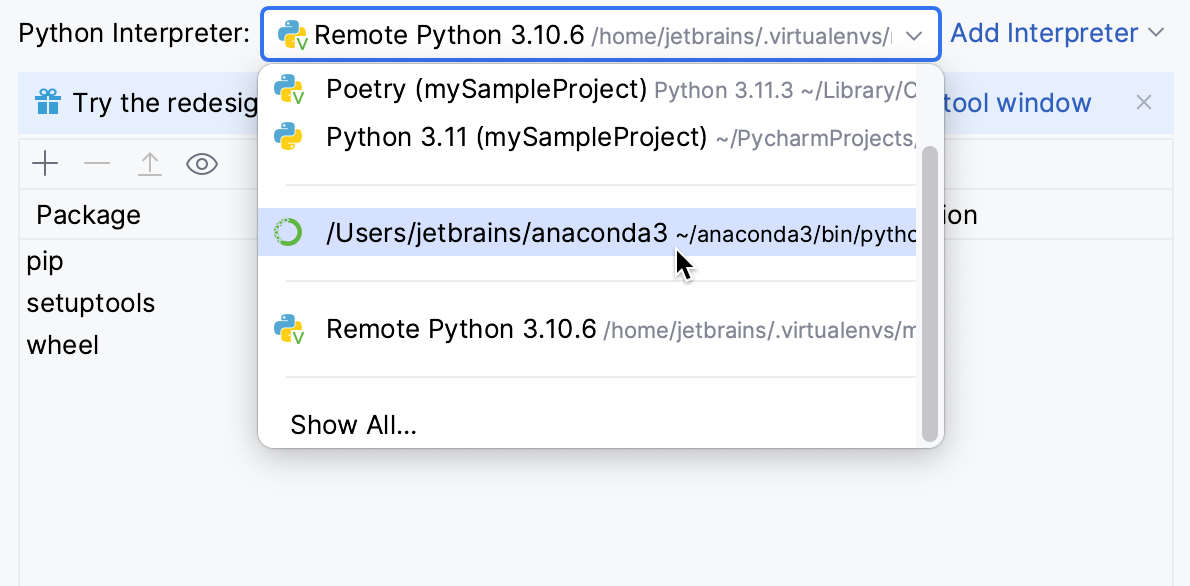
If it is not on the list, click Show All. Then select the required interpreter in the left pane and click OK.
When PyCharm stops supporting any of the outdated Python versions, the corresponding Python interpreter is marked as unsupported.
When you change the project interpreter and select an SSH interpreter, you might need to synchronize the local content with the target server. Mind a notification balloon in the lower-right corner:

You can choose to enable the automatic uploading of files to the server:
Click Auto-upload files to start uploading on the next save.
Click Sync and auto-upload files to immediately sync the files and upload them on every save in future.
Modify a Python interpreter
Press Ctrl+Alt+S to open settings and then select .
Expand the list of the available interpreters and click Show All.
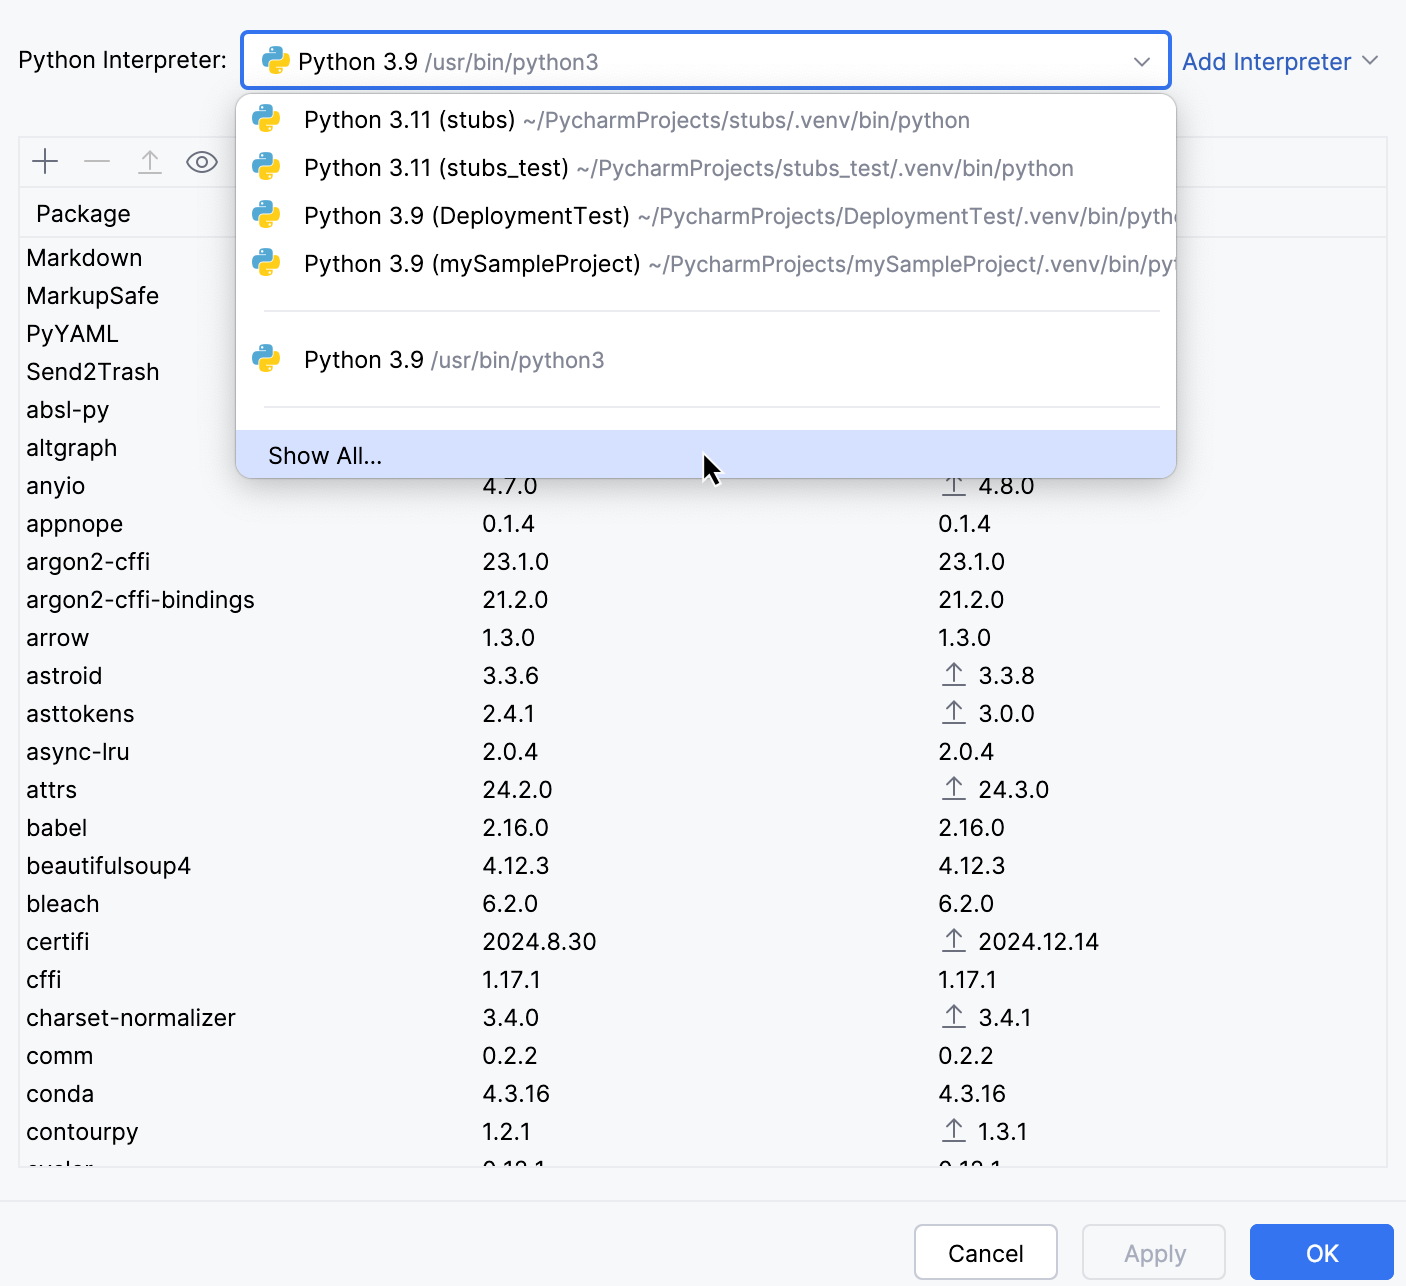
You can modify the path to the Python executable in the Interpreter path field.
When the Associate this virtual environment with the current project checkbox is enabled, the interpreter is available only in the current PyCharm project.
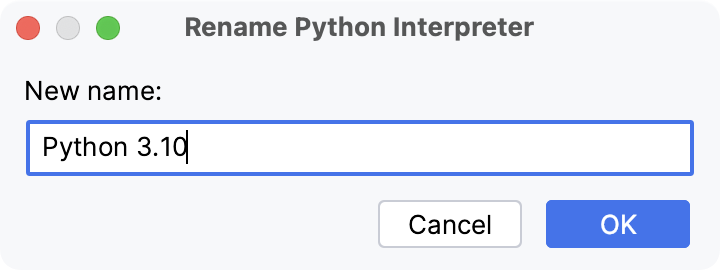
To change the interpreter name, select the target interpreter and click
.
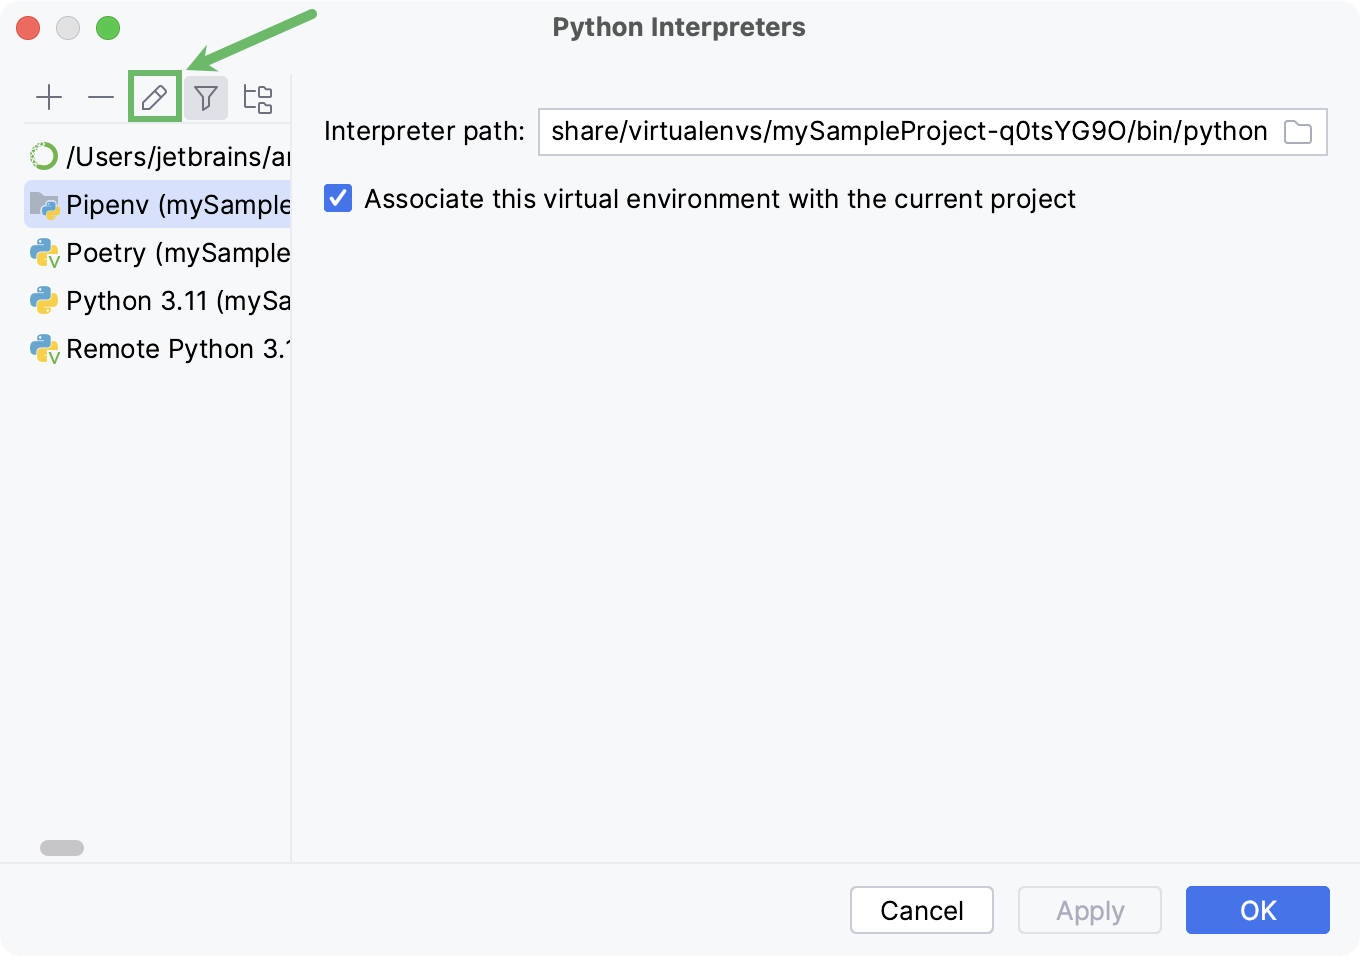
The Python interpreter name specified in the Name field becomes visible in the list of available interpreters. Click OK to apply the changes.
Remove a Python interpreter
If you no longer need a Python interpreter for a project, you can remove it from the project settings.
Do one of the following:
Press Ctrl+Alt+S to open settings and then select .
Click the Python Interpreter selector and choose Interpreter Settings.
Expand the list of the available interpreters and click Show All.

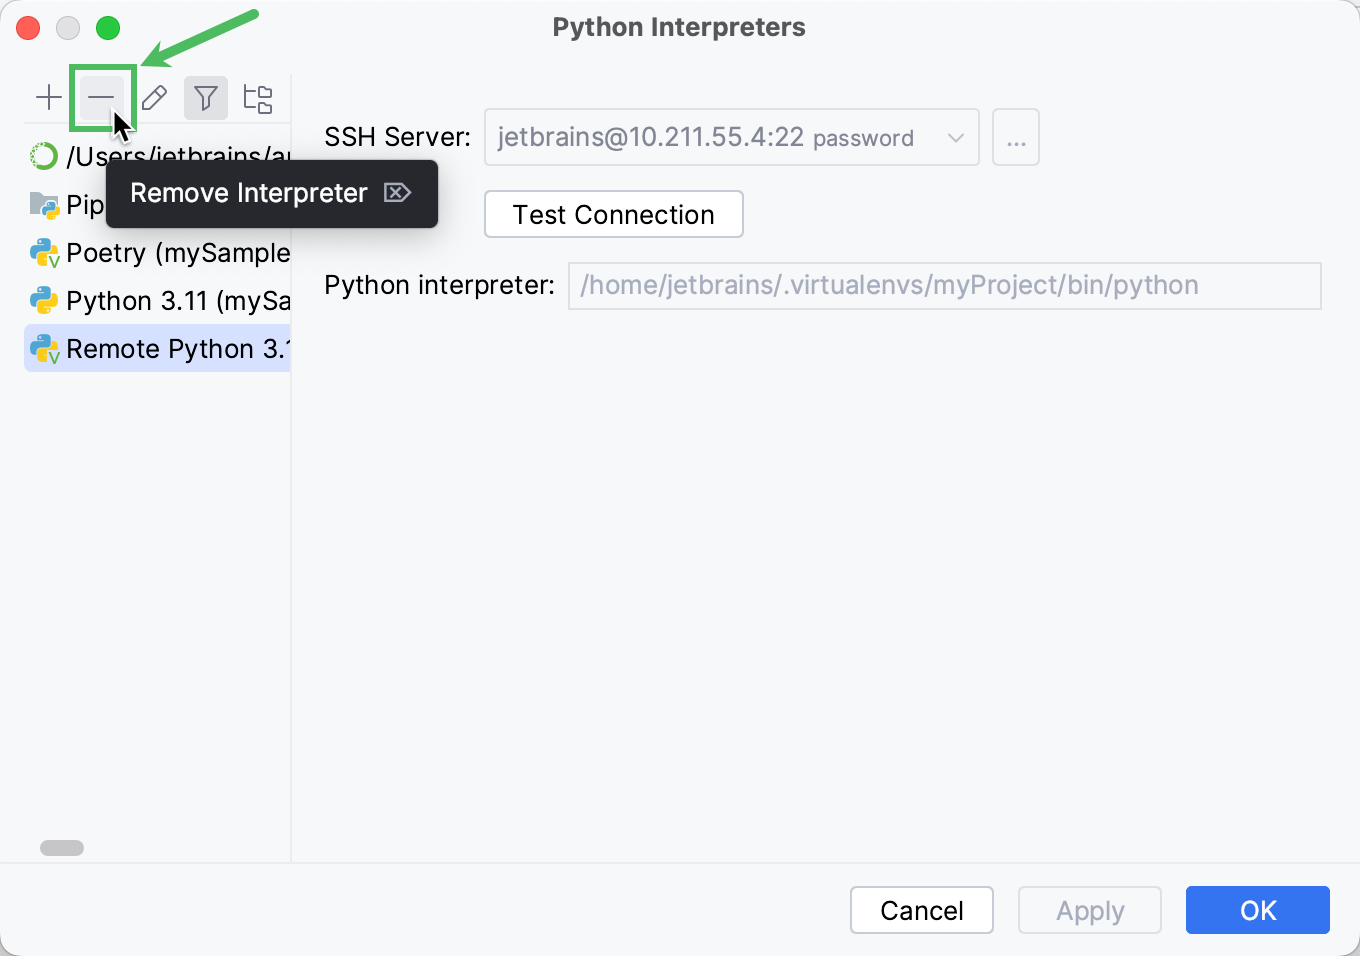
Choose the interpreter that you want to remove and click
.
Creating a new Python interpreter
Configuring local Python interpreters
To configure a local Python interpreter for the current project, follow one of the procedures below:
Create a virtualenv environment
Do one of the following:
Click the Python Interpreter selector and choose Add New Interpreter.
Press Ctrl+Alt+S to open Settings and navigate to .
Click the Python Interpreter selector and choose Interpreter Settings. Click the Add Interpreter link next to the list of the available interpreters.
Click the Add Interpreter link next to the list of available interpreters and select Add Local Interpreter.
The following actions depend on whether you want to generate a new virtual environment or to use an existing one.
- New virtualenv environment
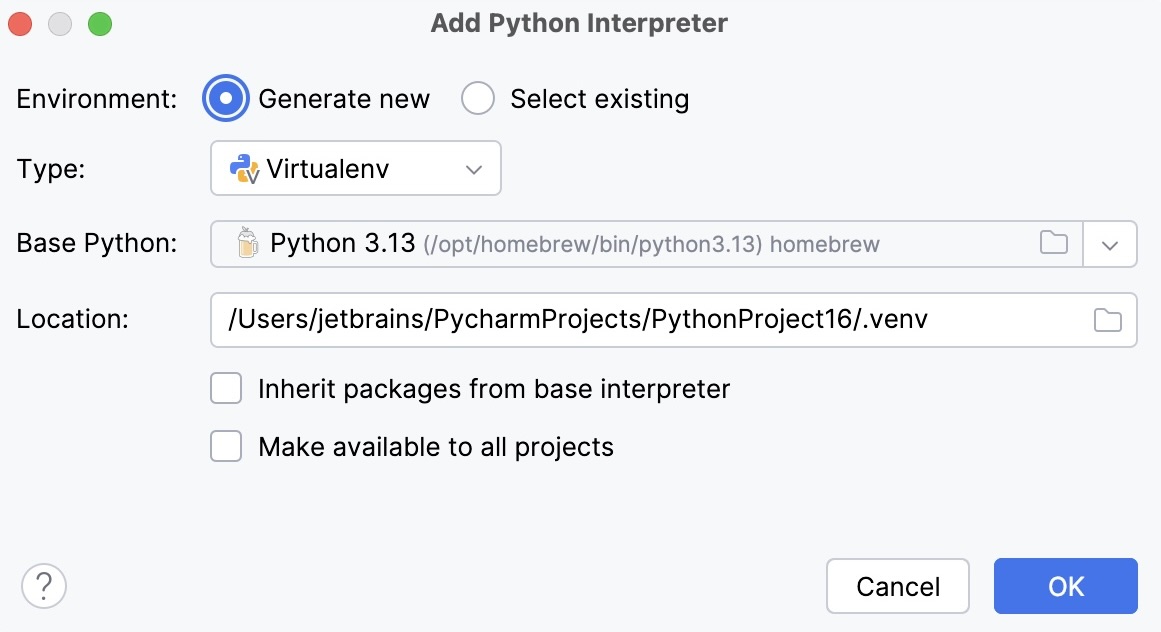
Select Virtualenv from the list of environment types.
Select the base interpreter from the list, or click
and find the Python executable in your file system.
Specify the location of the new virtual environment in the Location field, or click
and browse for the location in your file system. The directory for the new virtual environment should be empty.
Select the Inherit packages from base interpreter checkbox if you want all packages installed in the global Python on your machine to be added to the virtual environment you're going to create. This checkbox corresponds to the
--system-site-packagesoption of the virtualenv tool.Select the Make available to all projects checkbox if you want to reuse this environment when creating Python interpreters in PyCharm.
- Existing virtualenv environment
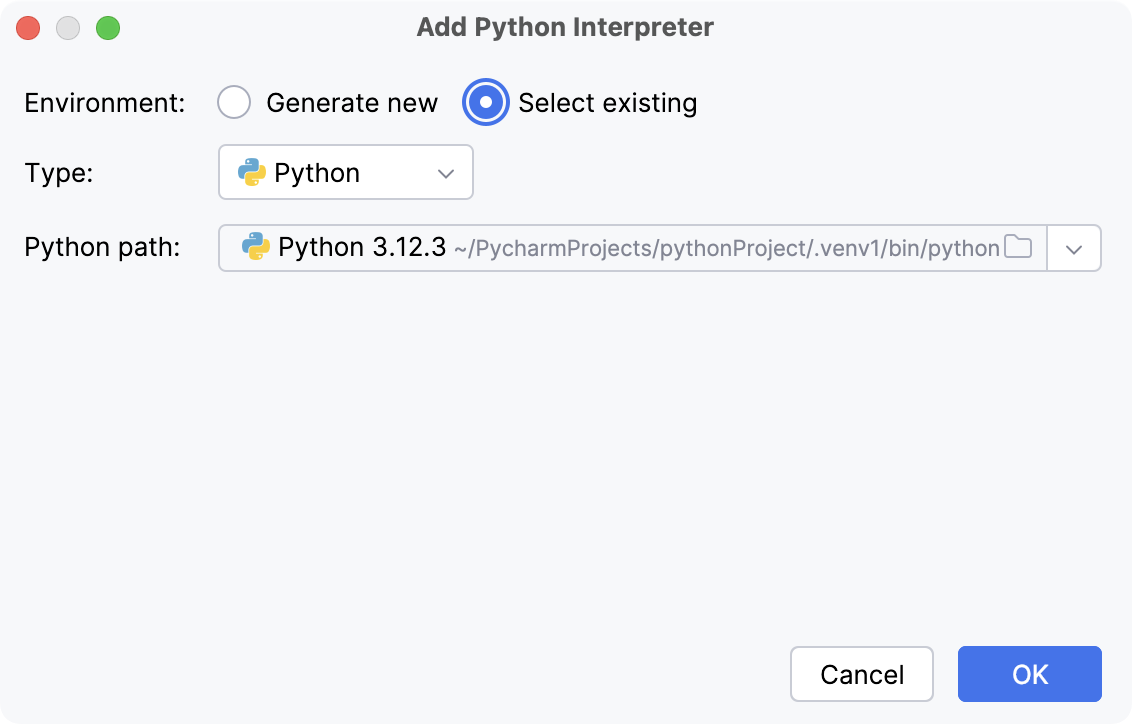
Select Python from the list of environment types.
Select the required interpreter from the list.
If the required interpreter is not on the list, click
, and then browse for the required Python executable (for example, venv/bin/python on macOS or venv\Scripts\python.exe on Windows).
The selected virtual environment will be reused for the current project.
Click OK to complete the task.
For more information, refer to Configure a virtualenv environment.
Create a conda environment
Ensure that Anaconda or Miniconda is downloaded and installed on your computer, and you are aware of a path to its executable file.
For more information, refer to the installation instructions.
Do one of the following:
Click the Python Interpreter selector and choose Add New Interpreter.
Press Ctrl+Alt+S to open Settings and navigate to .
Click the Python Interpreter selector and choose Interpreter Settings. Click the Add Interpreter link next to the list of the available interpreters.
Click the Add Interpreter link next to the list of available interpreters and select Add Local Interpreter.
The following actions depend on whether you want to create a new conda environment or to use an existing one.
- New conda environment
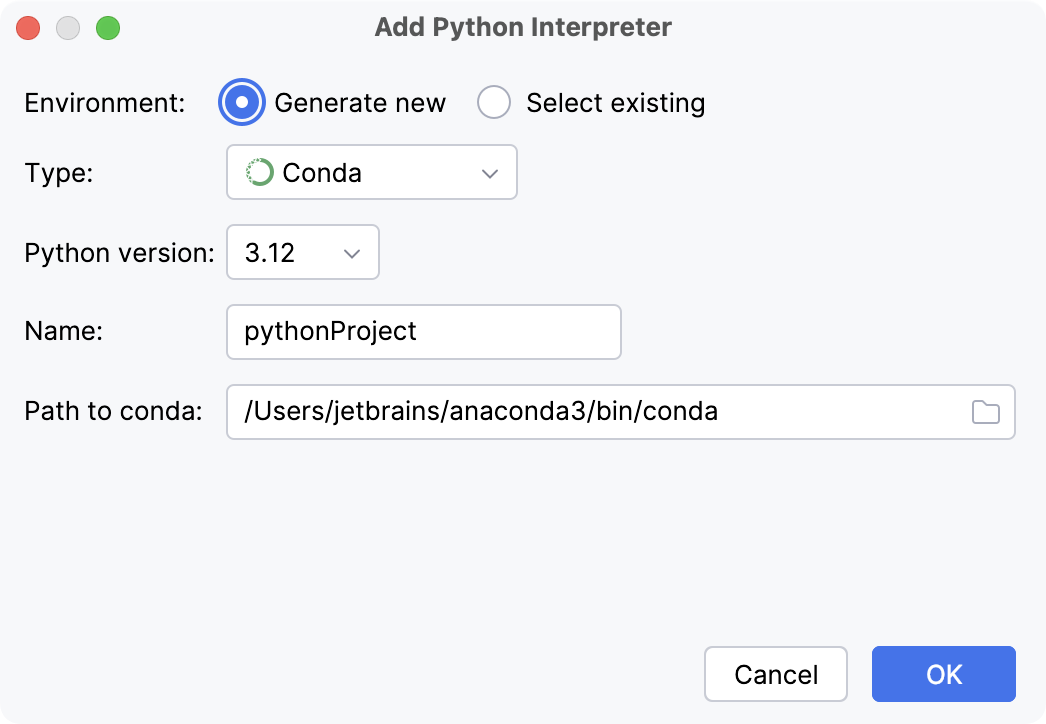
Select Conda from the list of environment types.
Select the Python version from the list.
Specify the environment name.
PyCharm will detect a conda installation.
If PyCharm did not detect the installation automatically, specify the location of the conda executable, or click
to browse for it.
- Existing conda environment
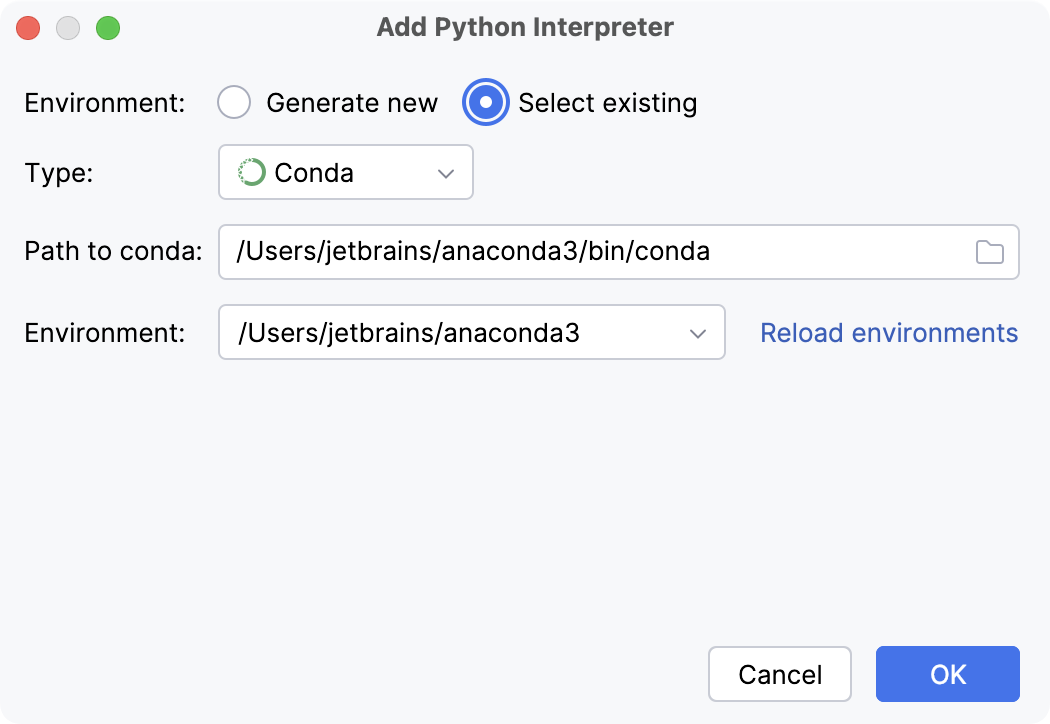
Select Conda from the list of environment types.
PyCharm will detect a conda installation.
If PyCharm did not detect the installation automatically, specify the location of the conda executable, or click
to browse for it.
Select the environment from the list.
The selected conda environment will be reused for the current project.
Click OK to complete the task.
For more information, refer to Configure a conda virtual environment.
Create a pipenv environment
Do one of the following:
Click the Python Interpreter selector and choose Add New Interpreter.
Press Ctrl+Alt+S to open Settings and navigate to .
Click the Python Interpreter selector and choose Interpreter Settings. Click the Add Interpreter link next to the list of the available interpreters.
Click the Add Interpreter link next to the list of available interpreters and select Add Local Interpreter.
Select Pipenv from the list of environment types.
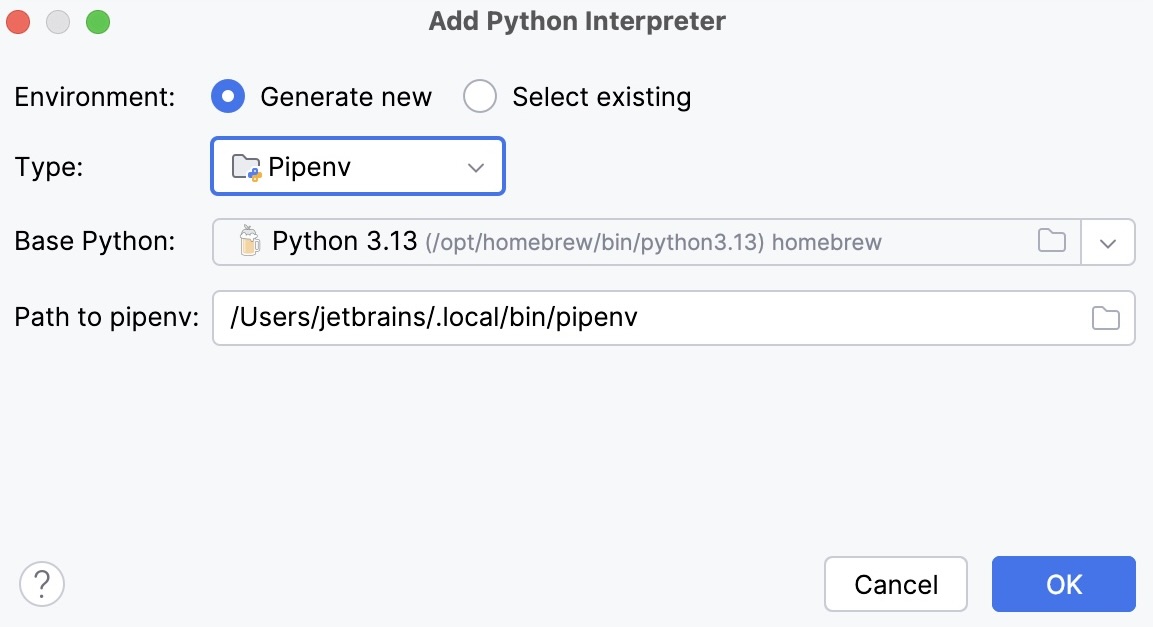
Select the base interpreter from the list, or click
and find the Python executable in your file system.
If you have added the base binary directory to your
PATHenvironmental variable, you do not need to set any additional options: the path to the pipenv executable will be autodetected.If PyCharm does not detect the pipenv executable, click Install pipenv via pip to allow PyCharm to install it for you automatically.
Alternatively, follow the pipenv installation procedure to discover the executable path and then specify it in the dialog.
Click OK to complete the task.
When you have set the pipenv virtual environment as a Python interpreter, all available packages are added from the source defined in Pipfile. The packages are installed, removed, and updated in the list of the packages through pipenv rather than through pip.
For more information, refer to Configure a pipenv environment.
Create a Poetry environment
Do one of the following:
Click the Python Interpreter selector and choose Add New Interpreter.
Press Ctrl+Alt+S to open Settings and navigate to .
Click the Python Interpreter selector and choose Interpreter Settings. Click the Add Interpreter link next to the list of the available interpreters.
Click the Add Interpreter link next to the list of available interpreters and select Add Local Interpreter.
The following actions depend on whether you want to create a new Poetry environment or to use an existing one.
- New Poetry environment
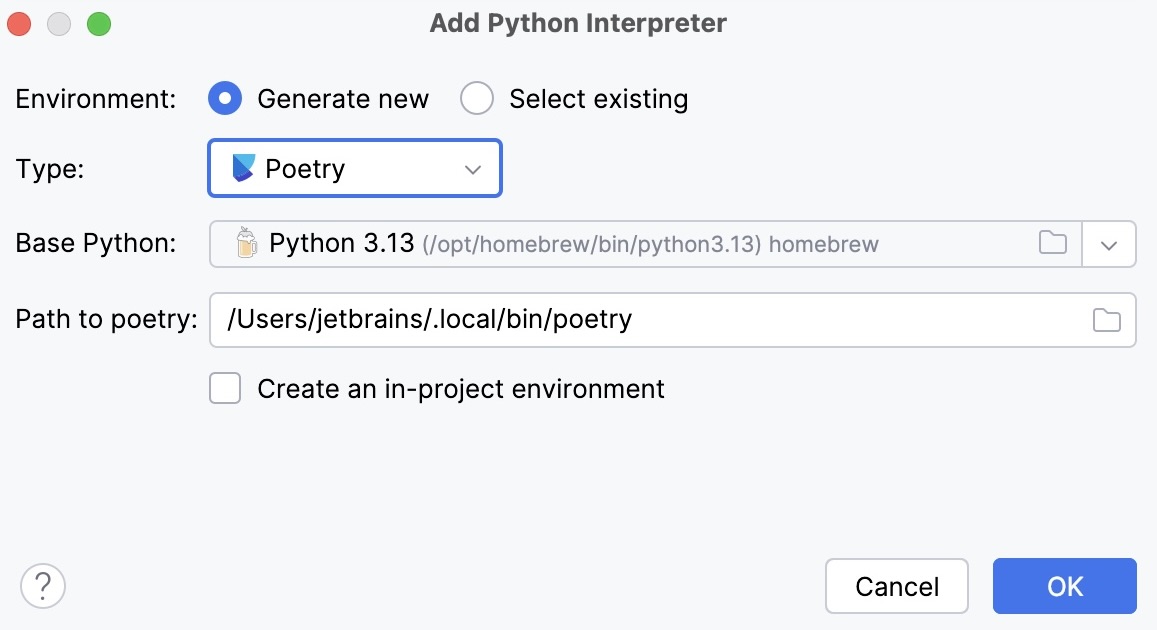
Select Poetry from the list of environment types.
Select the base interpreter from the list or click
and find the Python executable in your file system.
PyCharm will detect a Poetry installation.
If PyCharm does not detect the Poetry installation, click Install poetry via pip to allow PyCharm to install Poetry for you automatically.
Alternatively, specify the location of the Poetry executable, or click
to browse for it.
- Existing Poetry environment
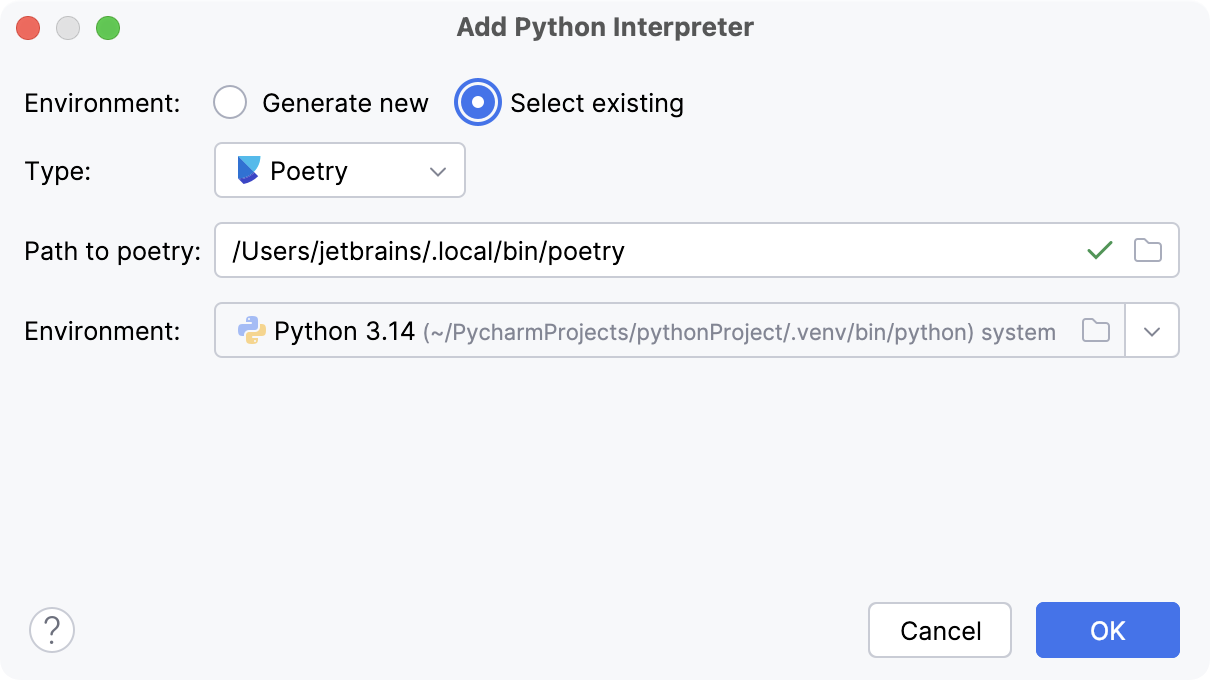
Select Poetry from the list of environment types.
PyCharm will detect a Poetry installation.
If PyCharm did not detect the installation automatically, specify the location of the executable, or click
to browse for it.
Select the environment from the list.
The selected Poetry environment will be reused for the current project.
Click OK to complete the task.
For more information, refer to Configure a Poetry environment.
Create a uv environment
Do one of the following:
Click the Python Interpreter selector and choose Add New Interpreter.
Press Ctrl+Alt+S to open Settings and navigate to .
Click the Python Interpreter selector and choose Interpreter Settings. Click the Add Interpreter link next to the list of the available interpreters.
Click the Add Interpreter link next to the list of available interpreters and select Add Local Interpreter.
The following actions depend on whether you want to generate a new virtual environment or to use an existing one.
- New uv environment
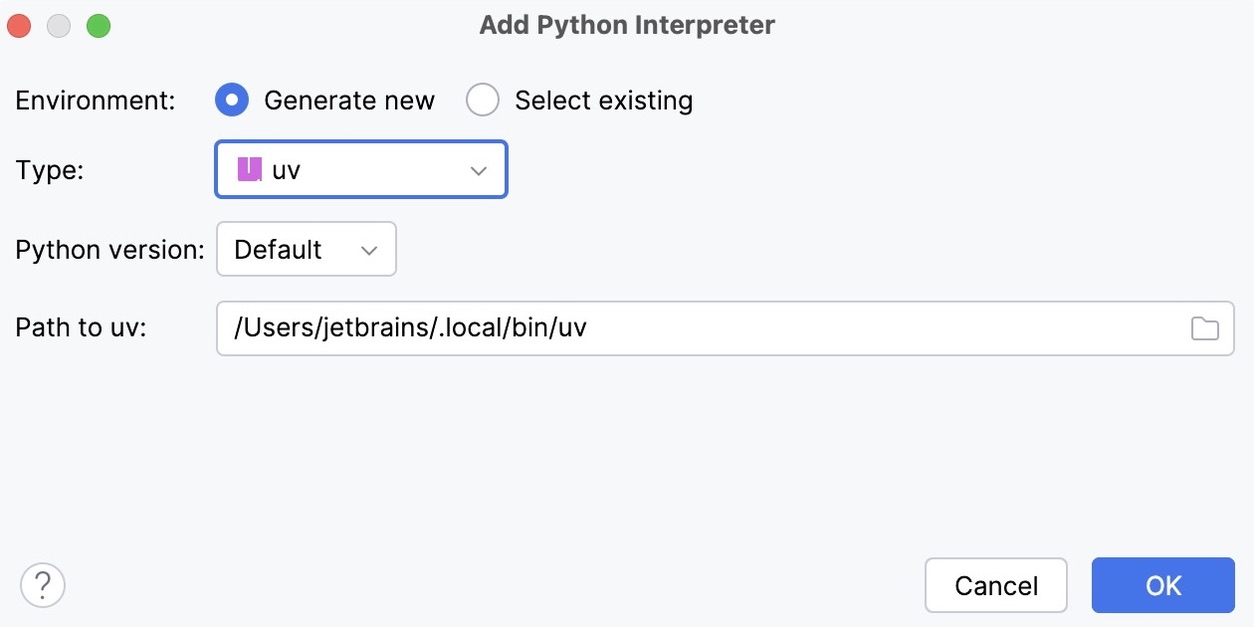
Select uv from the list of environment types.
Select the Python version from the list.
PyCharm will detect a uv installation.
If PyCharm did not detect the installation automatically, specify the location of the uv executable, or click
to browse for it.
- Existing uv environment
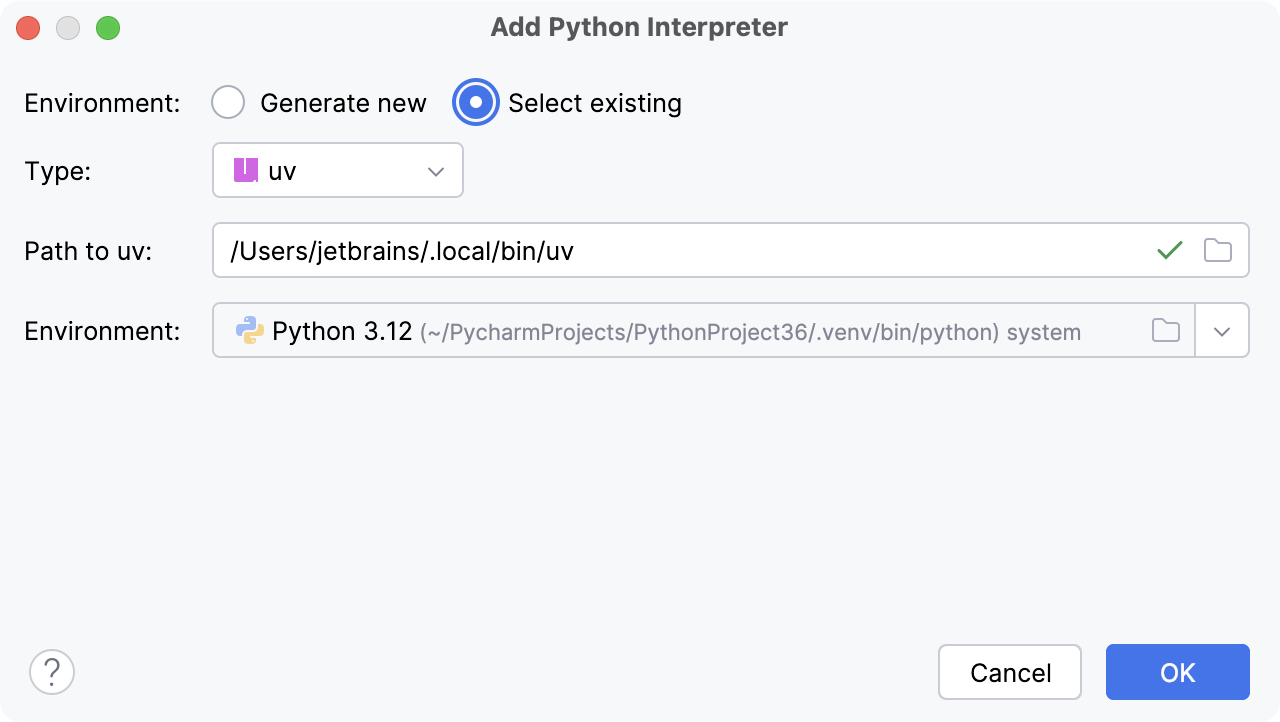
Select uv from the list of environment types.
PyCharm will detect a uv installation.
If PyCharm did not detect the installation automatically, specify the location of the uv executable, or click
to browse for it.
Select the environment from the list.
The selected uv environment will be reused for the current project.
Click OK to complete the task.
For more information, refer to Configure a uv environment.
Create a Hatch environment
Do one of the following:
Click the Python Interpreter selector and choose Add New Interpreter.
Press Ctrl+Alt+S to open Settings and navigate to .
Click the Python Interpreter selector and choose Interpreter Settings. Click the Add Interpreter link next to the list of the available interpreters.
Click the Add Interpreter link next to the list of available interpreters and select Add Local Interpreter.
The following actions depend on whether you want to generate a new virtual environment or to use an existing one.
- New Hatch environment
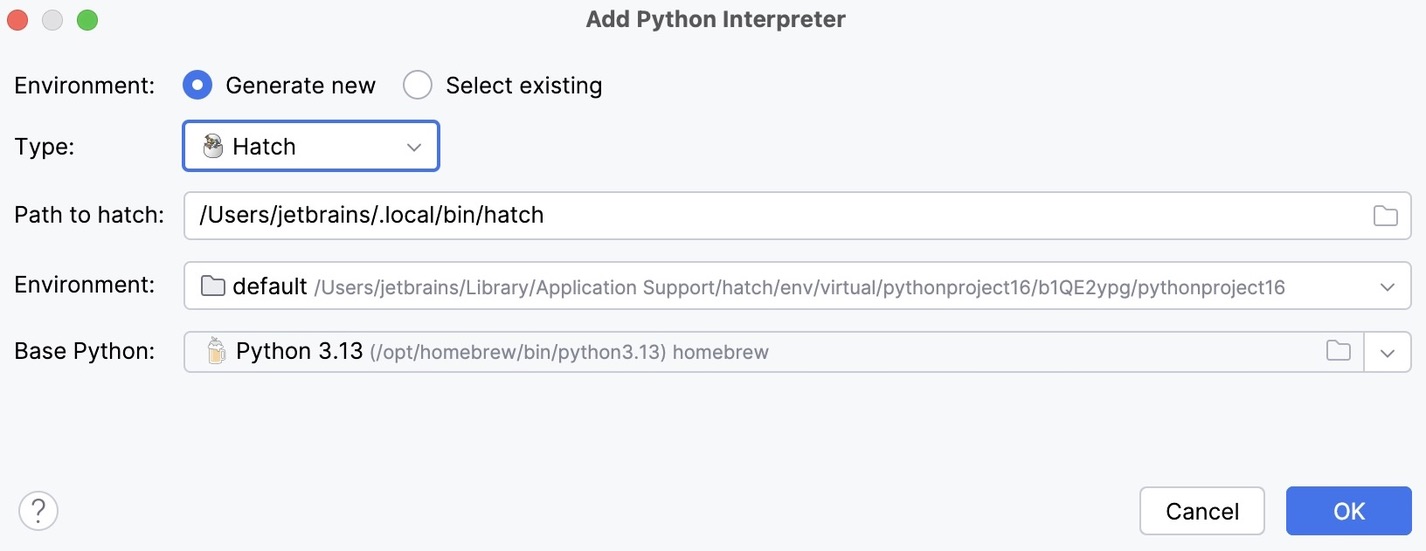
Select Hatch from the list of environment types.
PyCharm will detect a Hatch installation.
If PyCharm did not detect the installation automatically, specify the location of the Hatch executable, or click
to browse for it.
Select an environment.
Hatch environments are workspaces designed for various project-specific tasks. If no environment is explicitly selected, Hatch will use the default environment.
Select the base interpreter from the list, or click
and find the Python executable in your file system.
- Existing Hatch environment
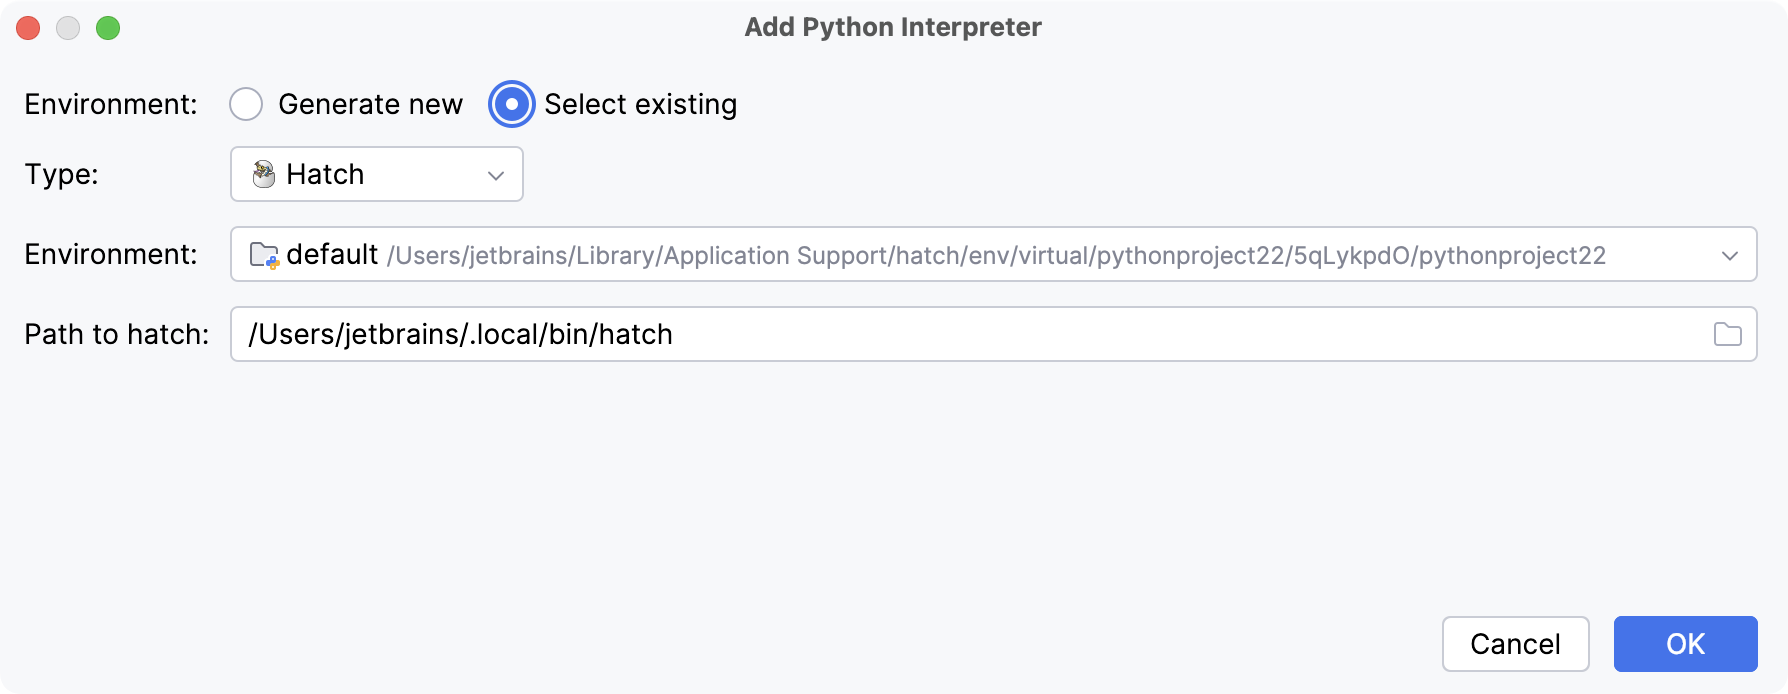
Select Hatch from the list of environment types.
PyCharm will detect a Hatch installation.
If PyCharm did not detect the installation automatically, specify the location of the Hatch executable, or click
to browse for it.
Select the environment from the list.
Click OK to complete the task.
For more information, refer to Configure a Hatch environment.
Configuring remote Python interpreters
When a remote Python interpreter is added, at first the PyCharm helpers are copied to the remote host. PyCharm helpers are needed to run remotely the packaging tasks, debugger, tests, and other PyCharm features.
Next, the skeletons for binary libraries are generated and copied locally. Also, all the Python library sources are collected from the Python paths on a remote host and copied locally along with the generated skeletons. Storing skeletons and all Python library sources locally is required for resolve and completion to work correctly.
PyCharm checks the remote helpers version on every remote run, so if you update your PyCharm version, the new helpers will be uploaded automatically, and you don't need to recreate remote interpreter.
Configure a WSL interpreter
Do one of the following:
Click the Python Interpreter selector and choose Add New Interpreter.
Press Ctrl+Alt+S to open Settings and navigate to .
Click the Python Interpreter selector and choose Interpreter Settings. Click the Add Interpreter link next to the list of the available interpreters.
Click the Add Interpreter link next to the list of available interpreters and select On WSL.
Wait until PyCharm detects Linux on your machine and completes introspection. Click Next to proceed:
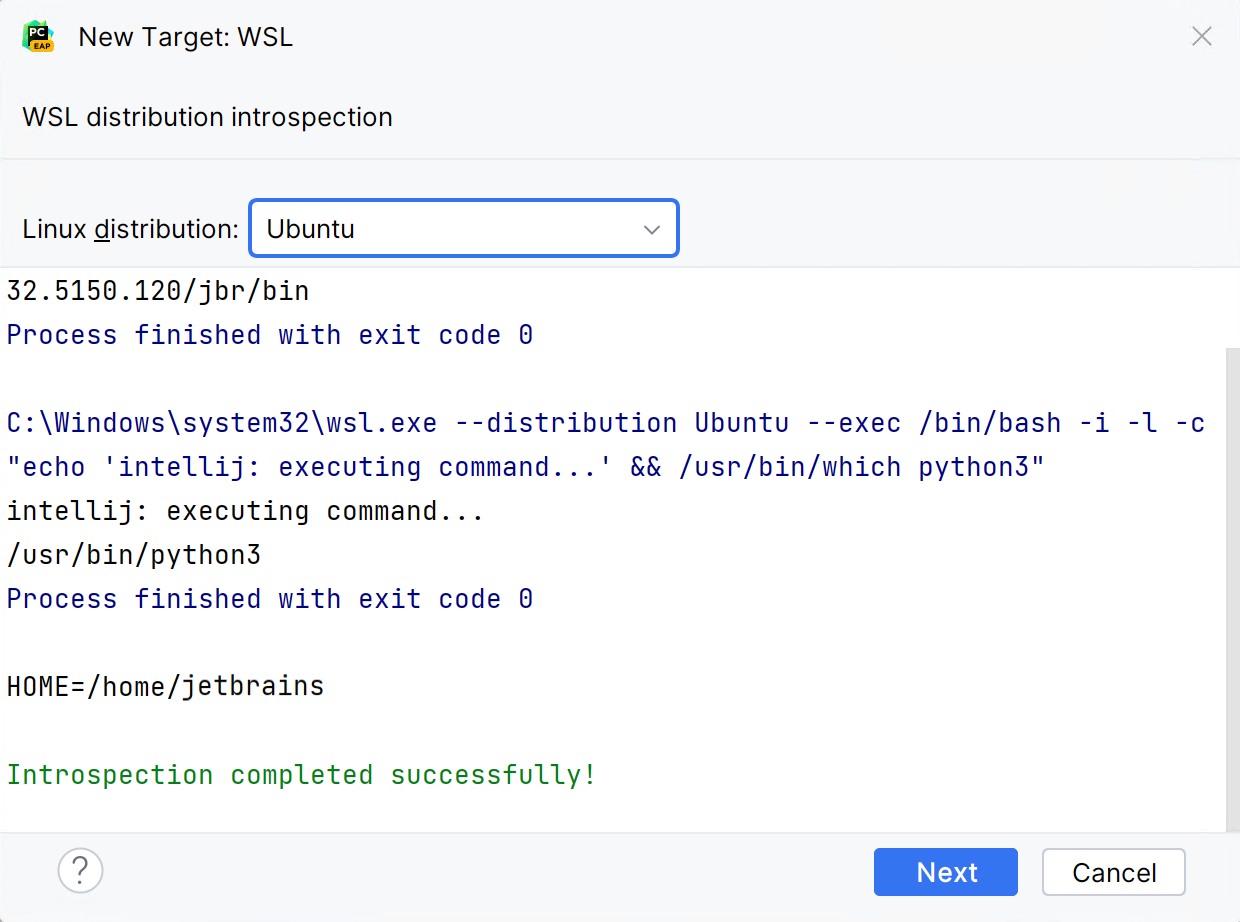
In the left-hand pane of the dialog, select the type of the WSL interpreter you want to create: Virtual Environment, Conda Environment, or System Interpreter.
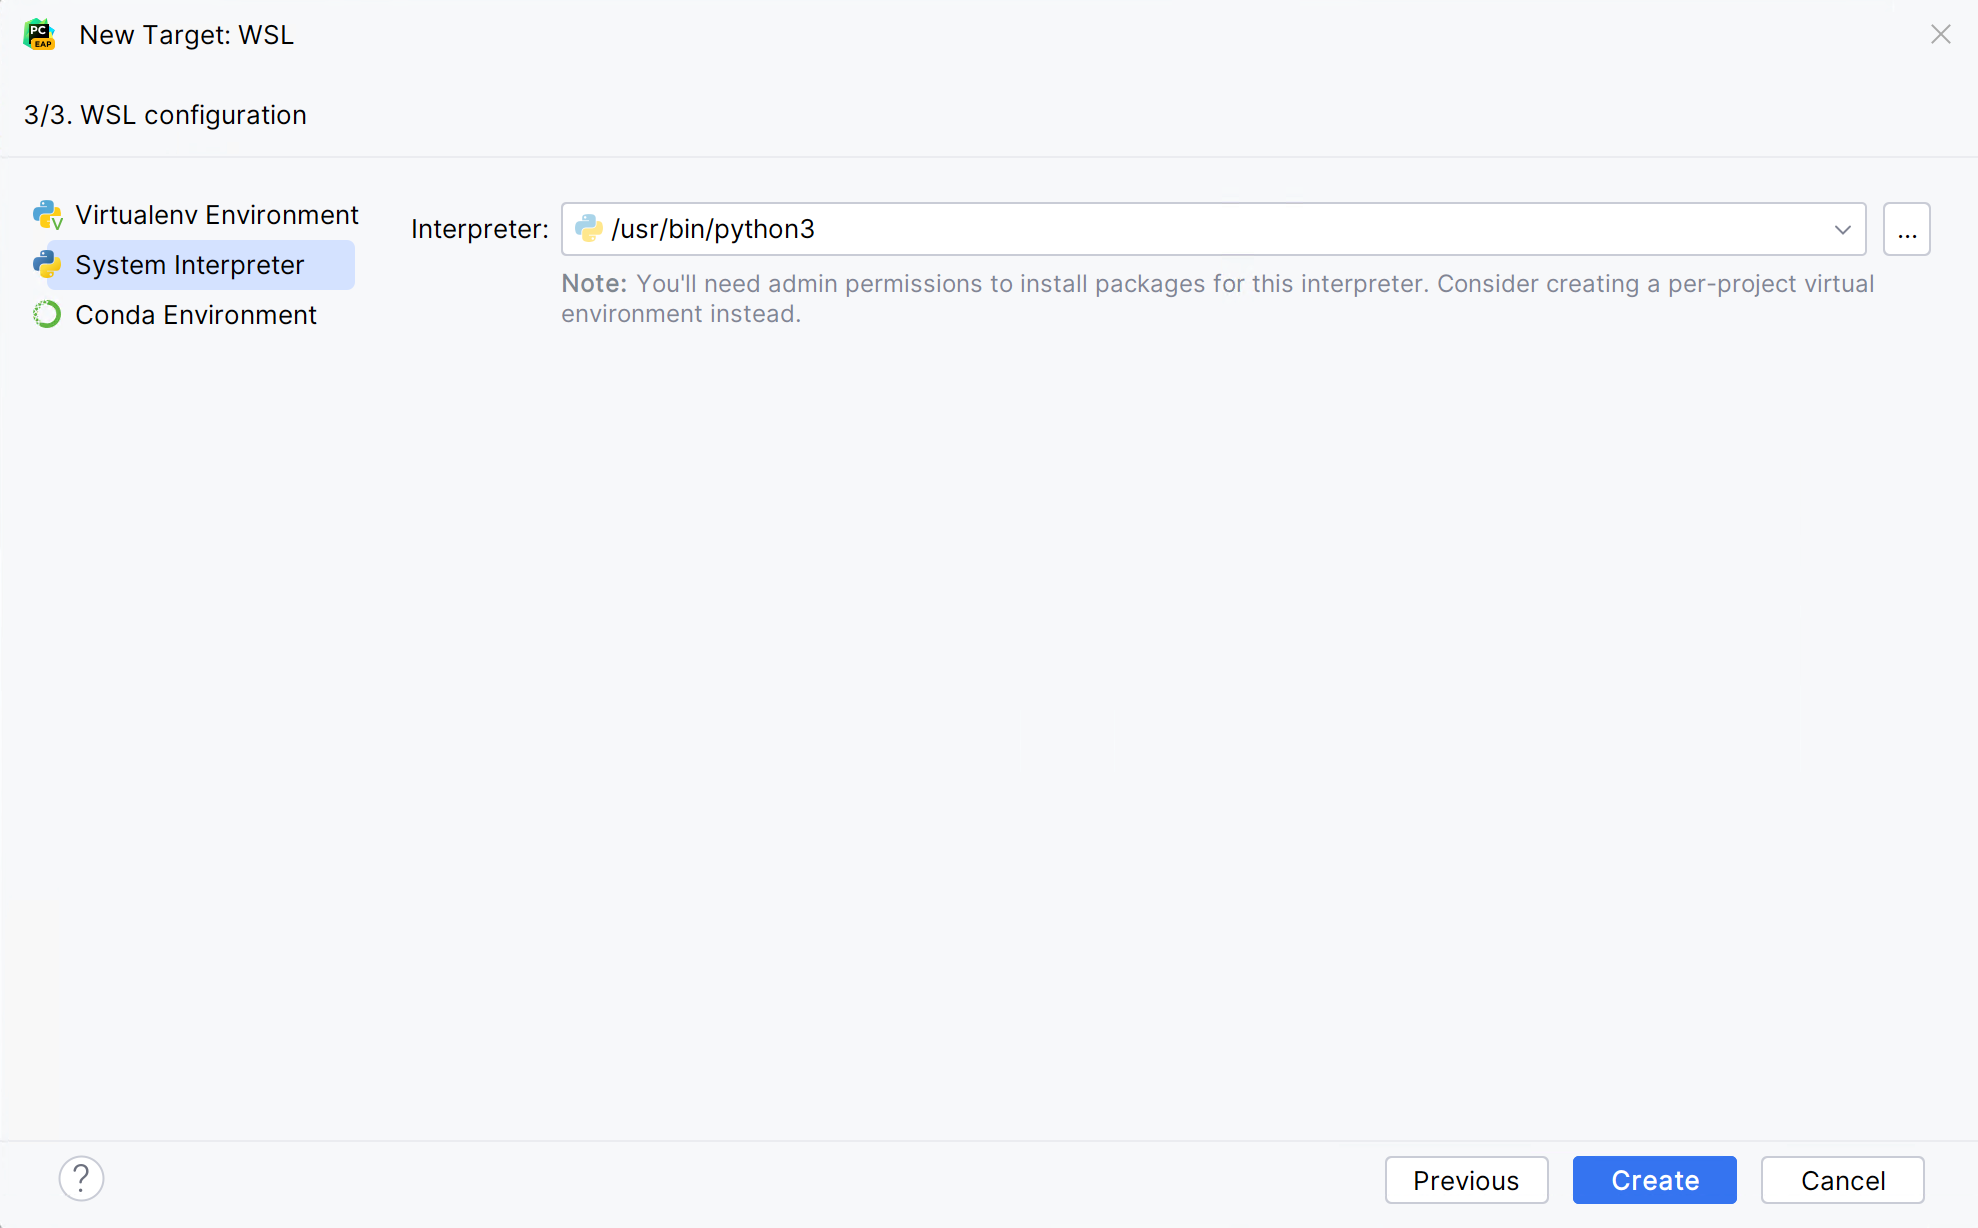
For a system interpreter, just provide the path to the Python executable in the selected Linux distribution.
For virtual and conda environments, you can provide a path to a Python executable of an existing environment in the selected Linux distribution or create a new environment based on the specified Python.
Once done, the new interpreter will be added to your project, and the default mnt mappings will be set.
For more information, refer to Configure an interpreter using WSL.
Configure an interpreter using SSH
Ensure that there is an SSH server running on a remote host, since PyCharm runs remote interpreters via ssh-sessions.
Do one of the following:
Click the Python Interpreter selector and choose Add New Interpreter.
Press Ctrl+Alt+S to open Settings and navigate to .
Click the Python Interpreter selector and choose Interpreter Settings. Click the Add Interpreter link next to the list of the available interpreters.
Click the Add Interpreter link next to the list of available interpreters and select On SSH.
Select an option to create a new SSH connection, then specify server information (host, port, and username).
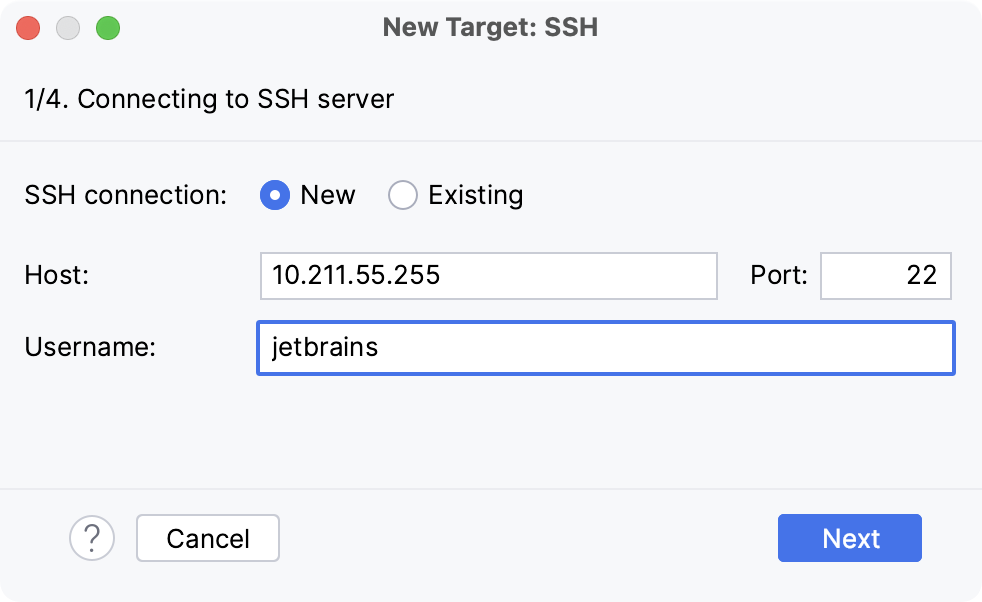
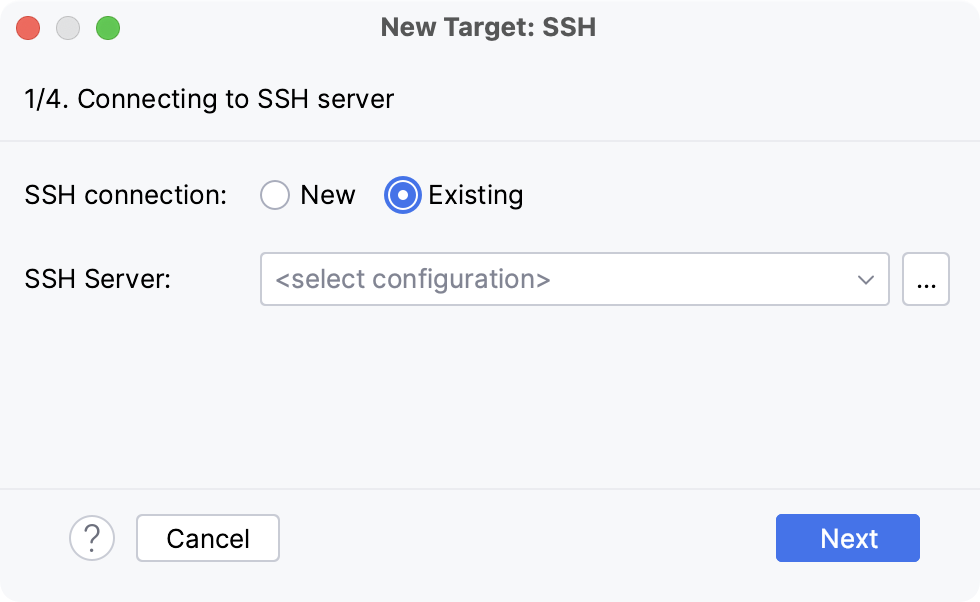
Alternatively, you can select Existing and choose any available SSH configuration from the list. To create a new SSH configuration, follow the steps below:
- Creating an SSH configuration
Click
next to the list of configurations:
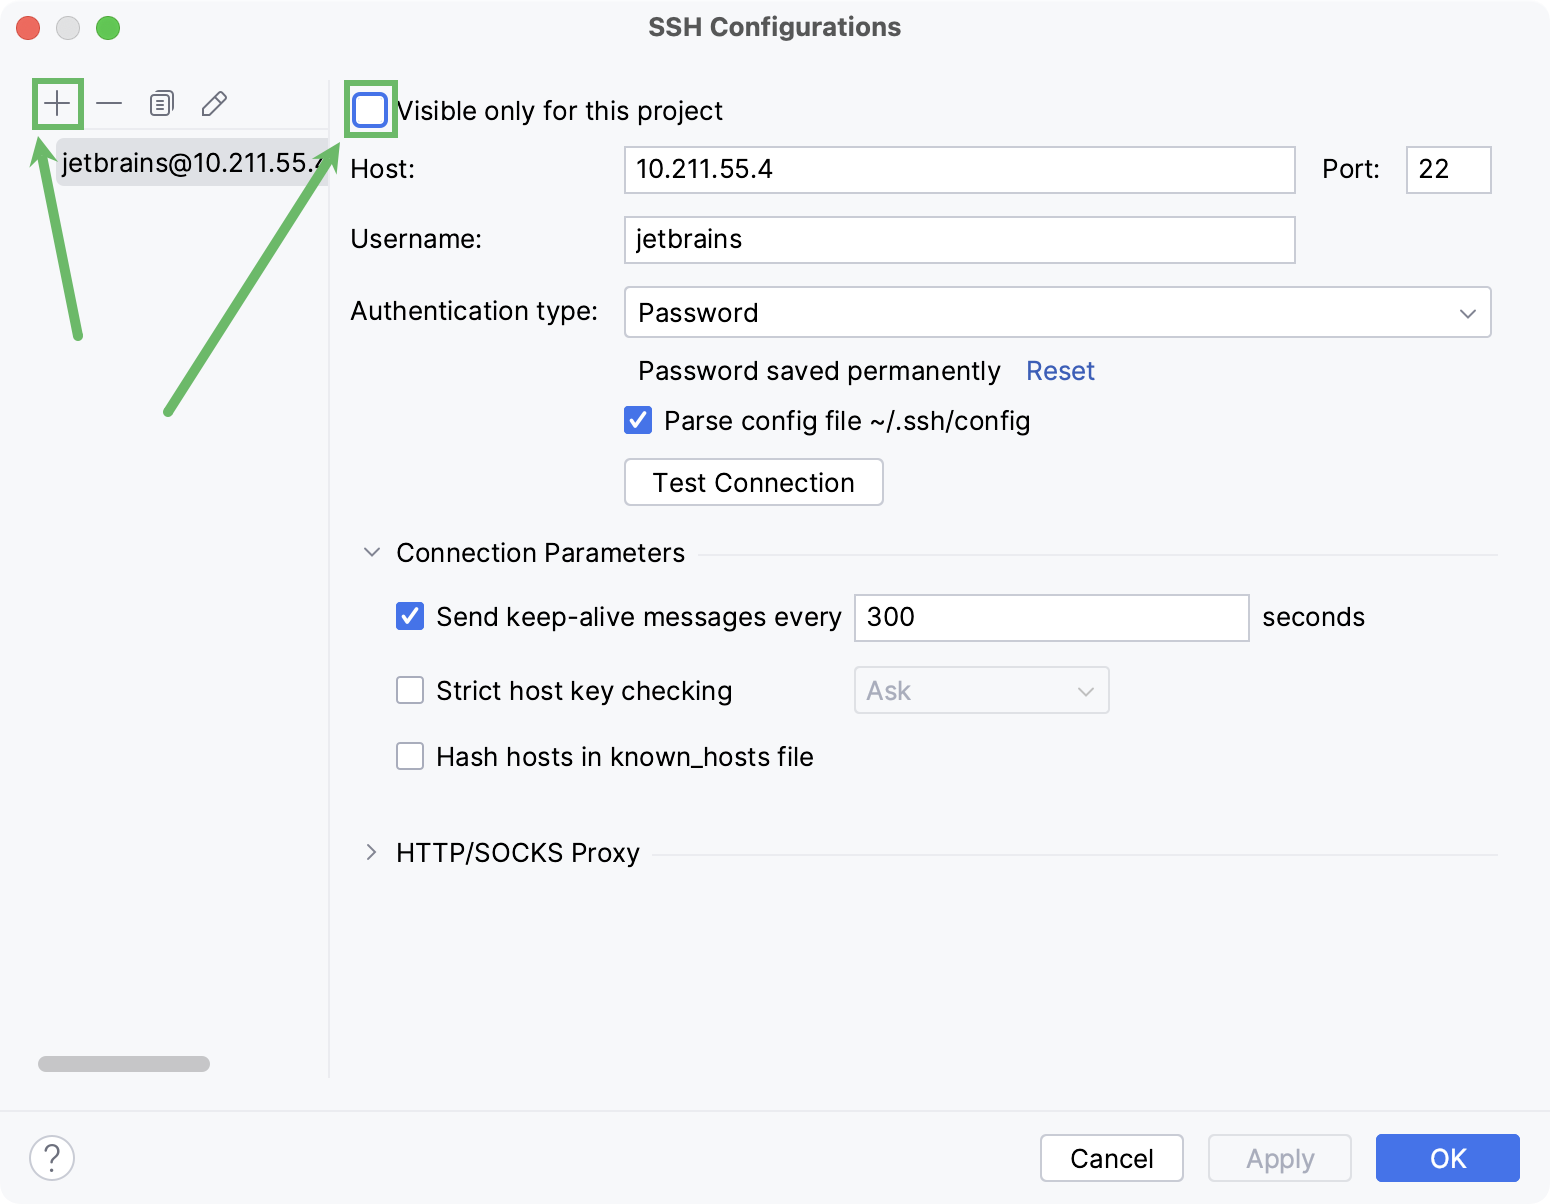
Click
, disable the Visible only for this project checkbox, and fill in the required fields:
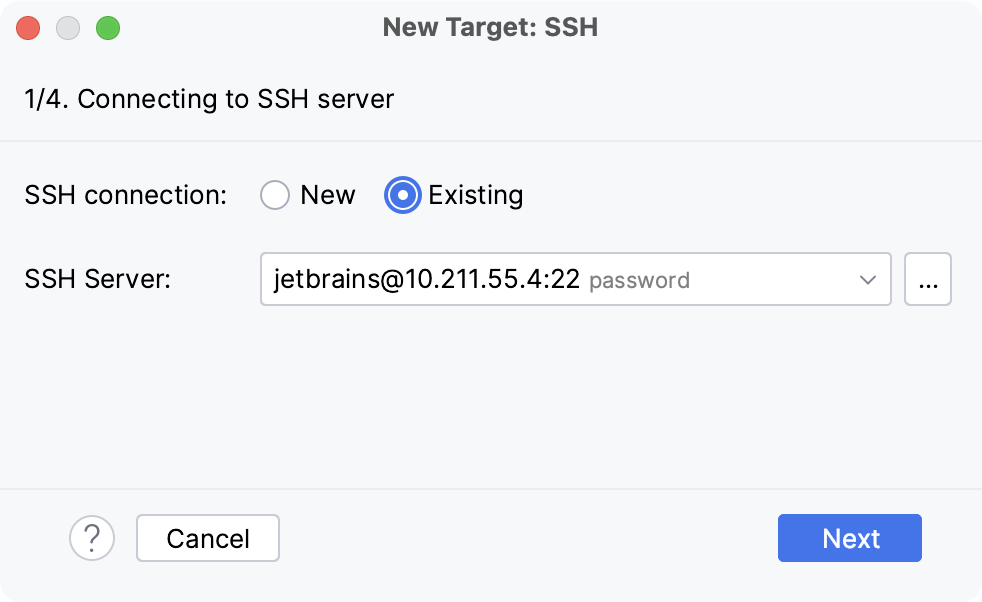
Once done, the newly created SSH configuration will appear in the list of available configurations. It will also become available in the SSH Deployment Configurations settings. Click Next to proceed:
In the next dialog window, provide the authentication details to connect to the target server.
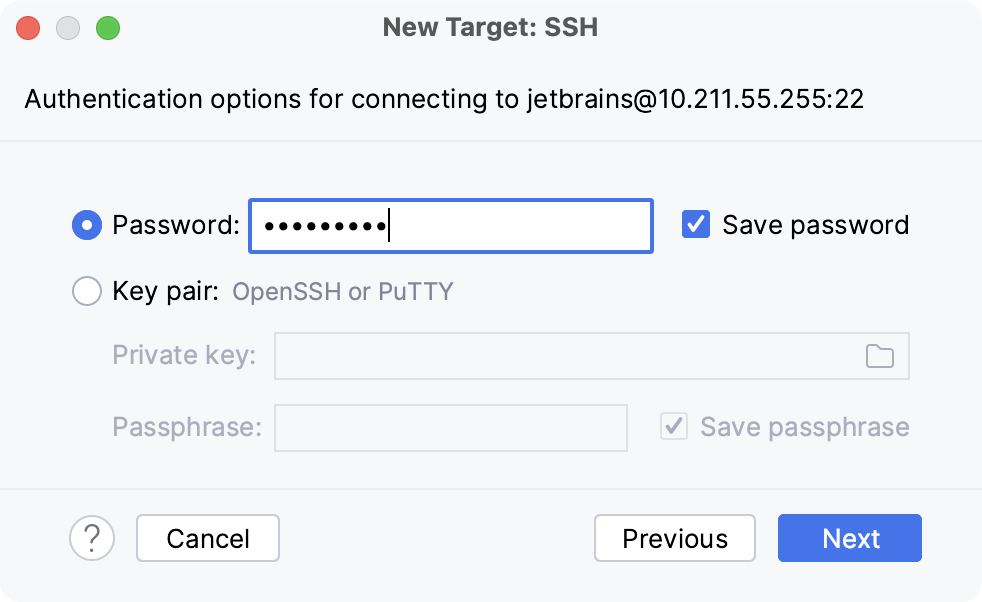
Select Password or Key pair (OpenSSH or PuTTY) and enter your password or passphrase. If Key pair (OpenSSH or PuTTY) is selected, specify:
Private key: location of the file with a private key
Passphrase: similar to a password, it serves to encrypt the private key.
Click Next to proceed.
Wait until PyCharm completes the introspection of the SSH server.
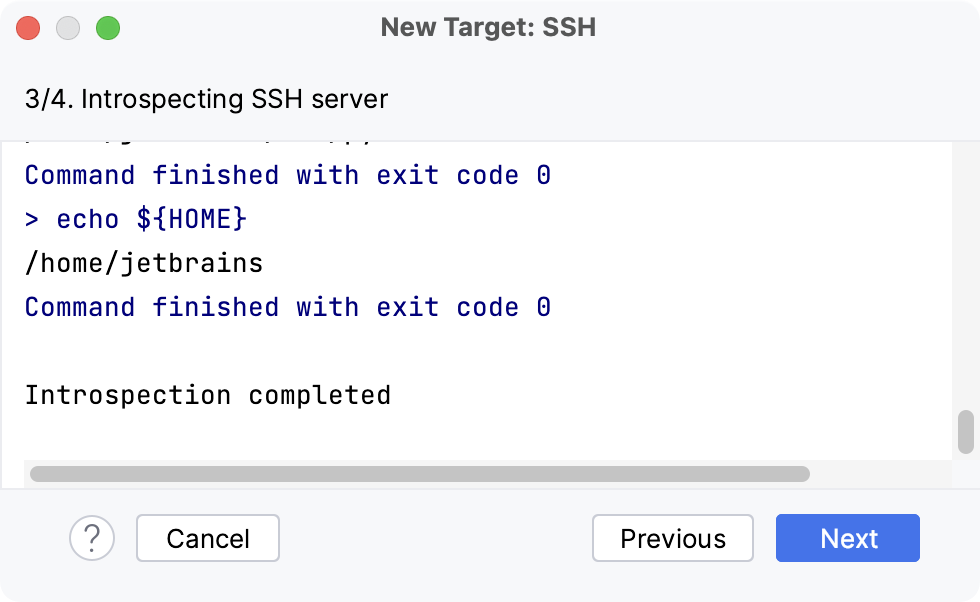
In the next dialog, select a type of Python environment to configure on the SSH server.
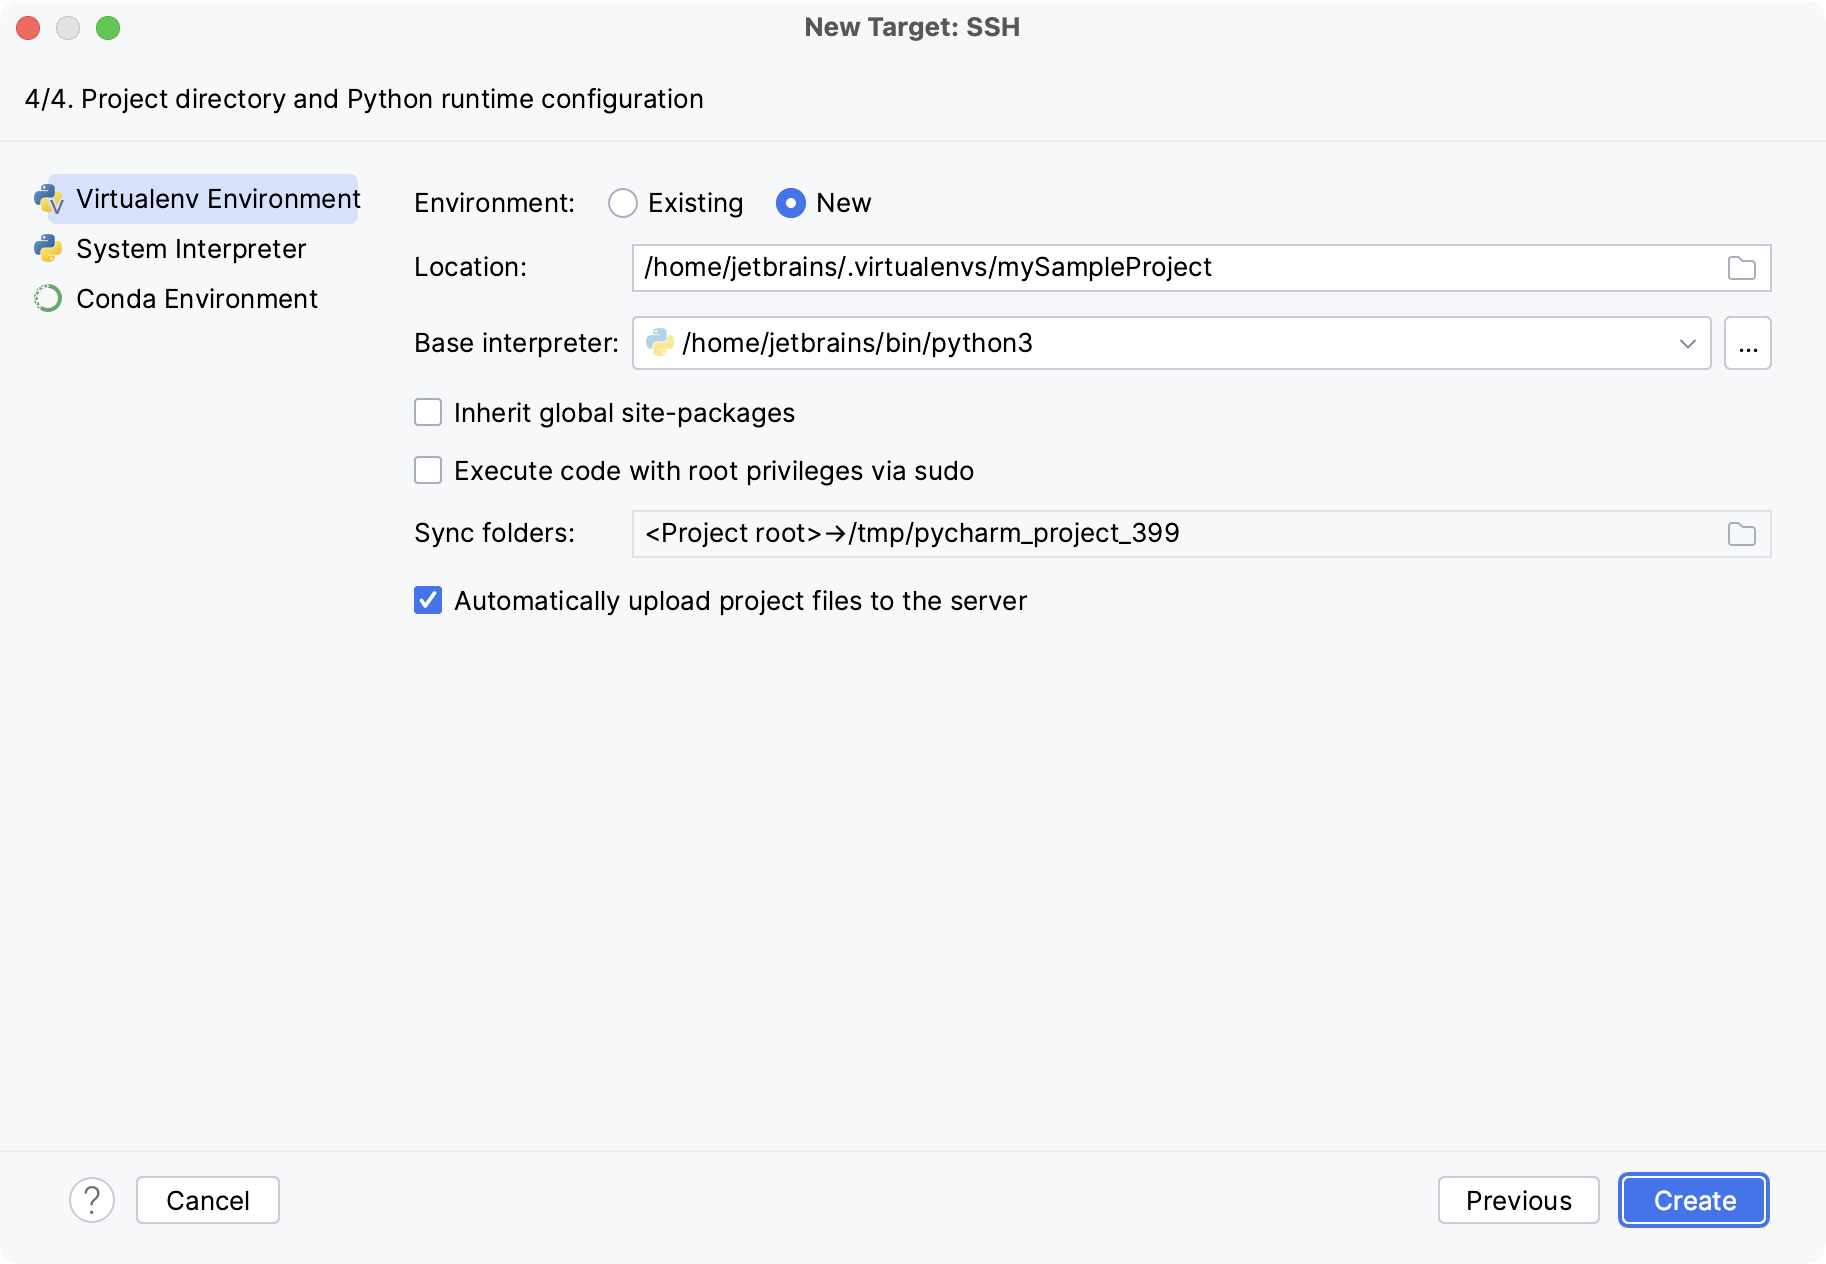
You can create a new virtual environment or сonda environment, select an existing one, or use a system interpreter.
Select the Inherit packages from base interpreter checkbox if you want all packages installed in the global Python on your machine to be added to the virtual environment you're going to create. This checkbox corresponds to the
--system-site-packagesoption of the virtualenv tool.If you need to execute your Python code on the SSH server as a sudo user, enable the Execute code with root privileges via sudo checkbox.
You can configure the path mappings between your local project and the server. To do that, click the Browse icon in the Sync folders field and enter the path to the local project folder and the path to the folder on the remote server.
Click Create to complete adding the interpreter.
For more information, refer to Configure an interpreter using SSH.
Configure an interpreter using Docker
Do one of the following:
Click the Python Interpreter selector and choose Add New Interpreter.
Press Ctrl+Alt+S to open Settings and navigate to .
Click the Python Interpreter selector and choose Interpreter Settings. Click the Add Interpreter link next to the list of the available interpreters.
Click the Add Interpreter link next to the list of available interpreters and select On Docker.
Select an existing Docker configuration in the Docker server dropdown.
Alternatively, click
and perform the following steps to create a new Docker configuration:
- Create a Docker configuration
Click
to add a Docker configuration and specify how to connect to the Docker daemon.
The connection settings depend on your Docker version and operating system. For more information, refer to Docker connection settings.
The Connection successful message should appear at the bottom of the dialog.
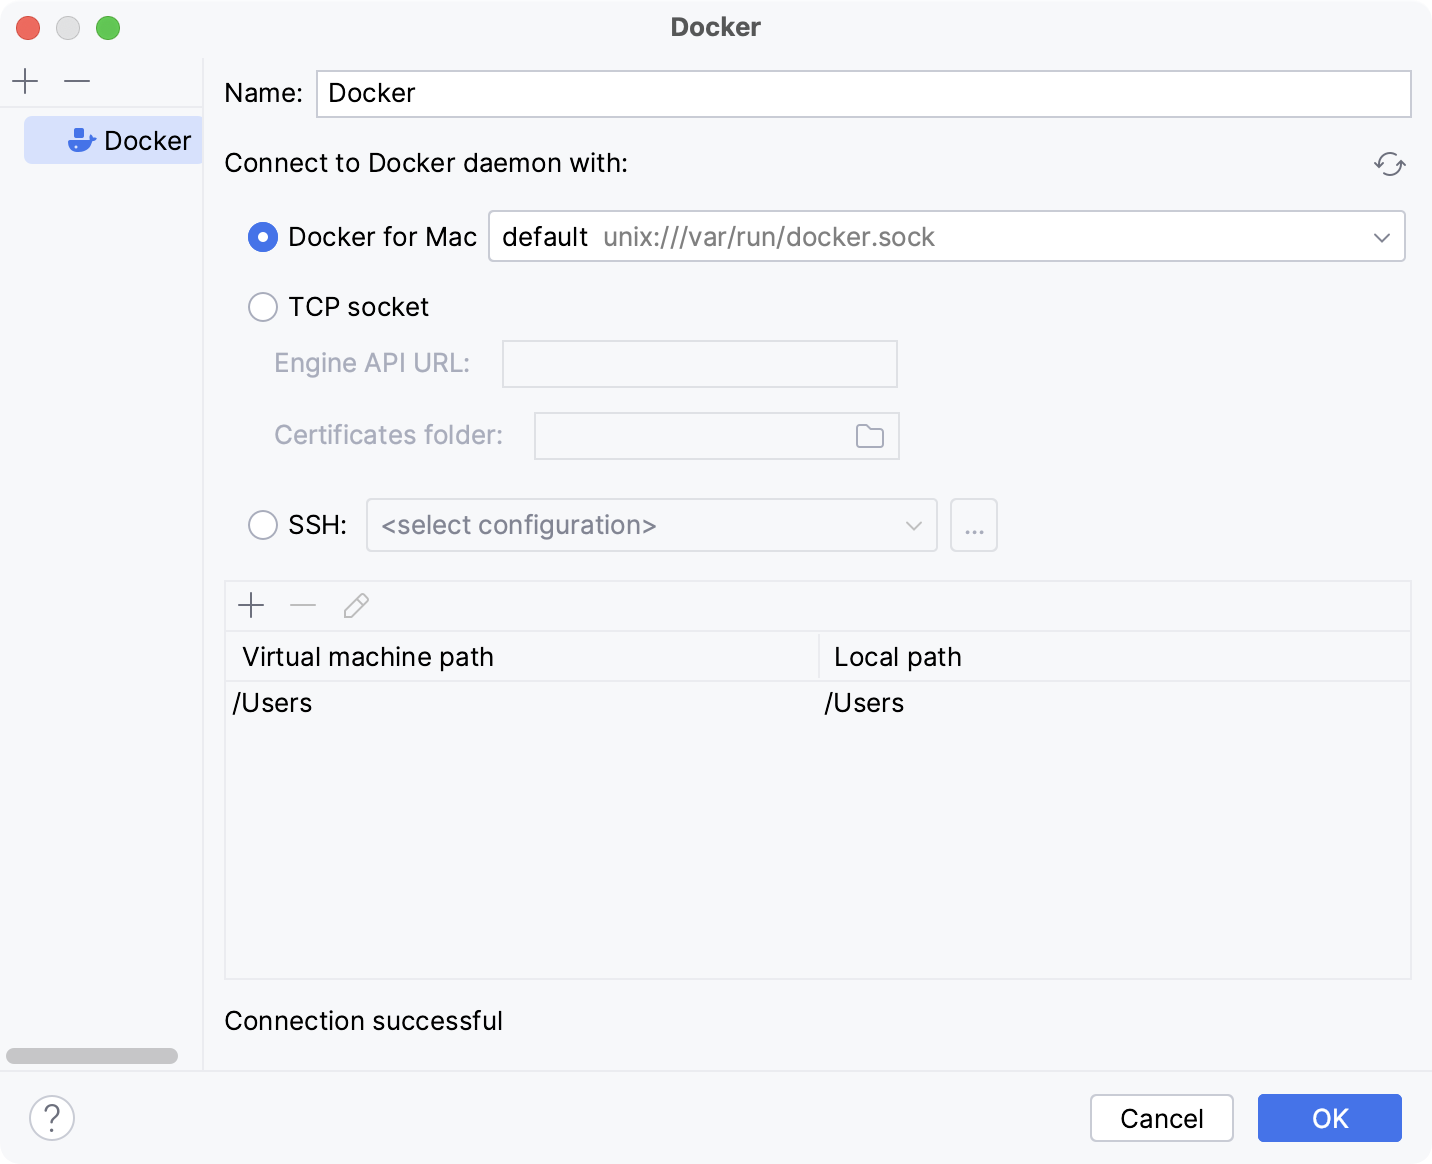
For more information about mapping local paths to the virtual machine running the Docker daemon when using Docker on Windows or macOS, refer to Virtual machine path mappings for Windows and macOS hosts. You will not be able to use volumes and bind mounts for directories outside of the mapped local path.
This table is not available on a Linux host, where Docker runs natively and you can mount any directory to the container.
The following actions depend on whether you want to pull a pre-built image from a Docker registry or to build an image locally from a Dockerfile.
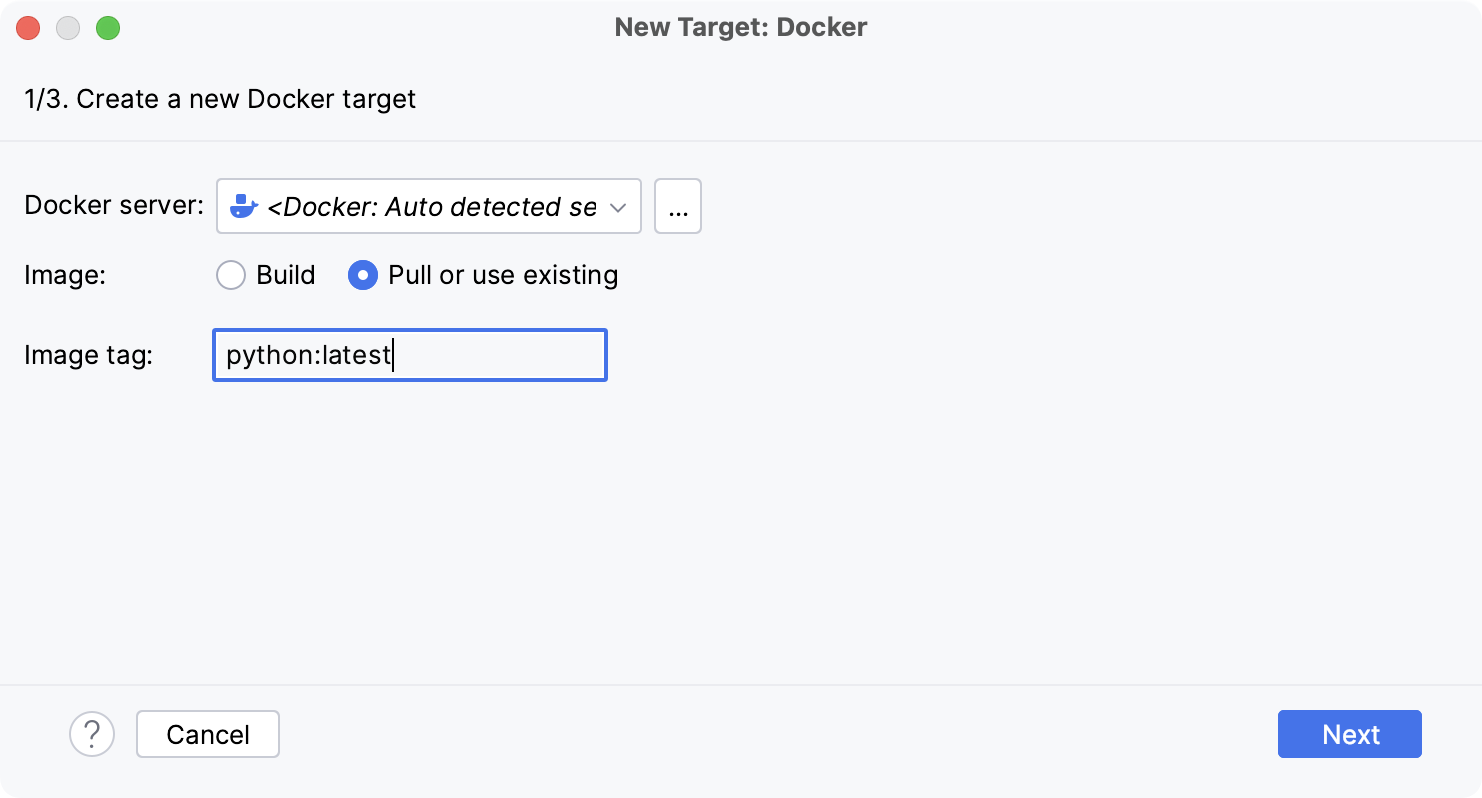
- Pull a Docker image
Select Pull or use existing and specify the tag of the desired image in the Image tag field.
- Build a Docker image
Select Build and change the default values in the Dockerfile and Context folder fields if necessary.
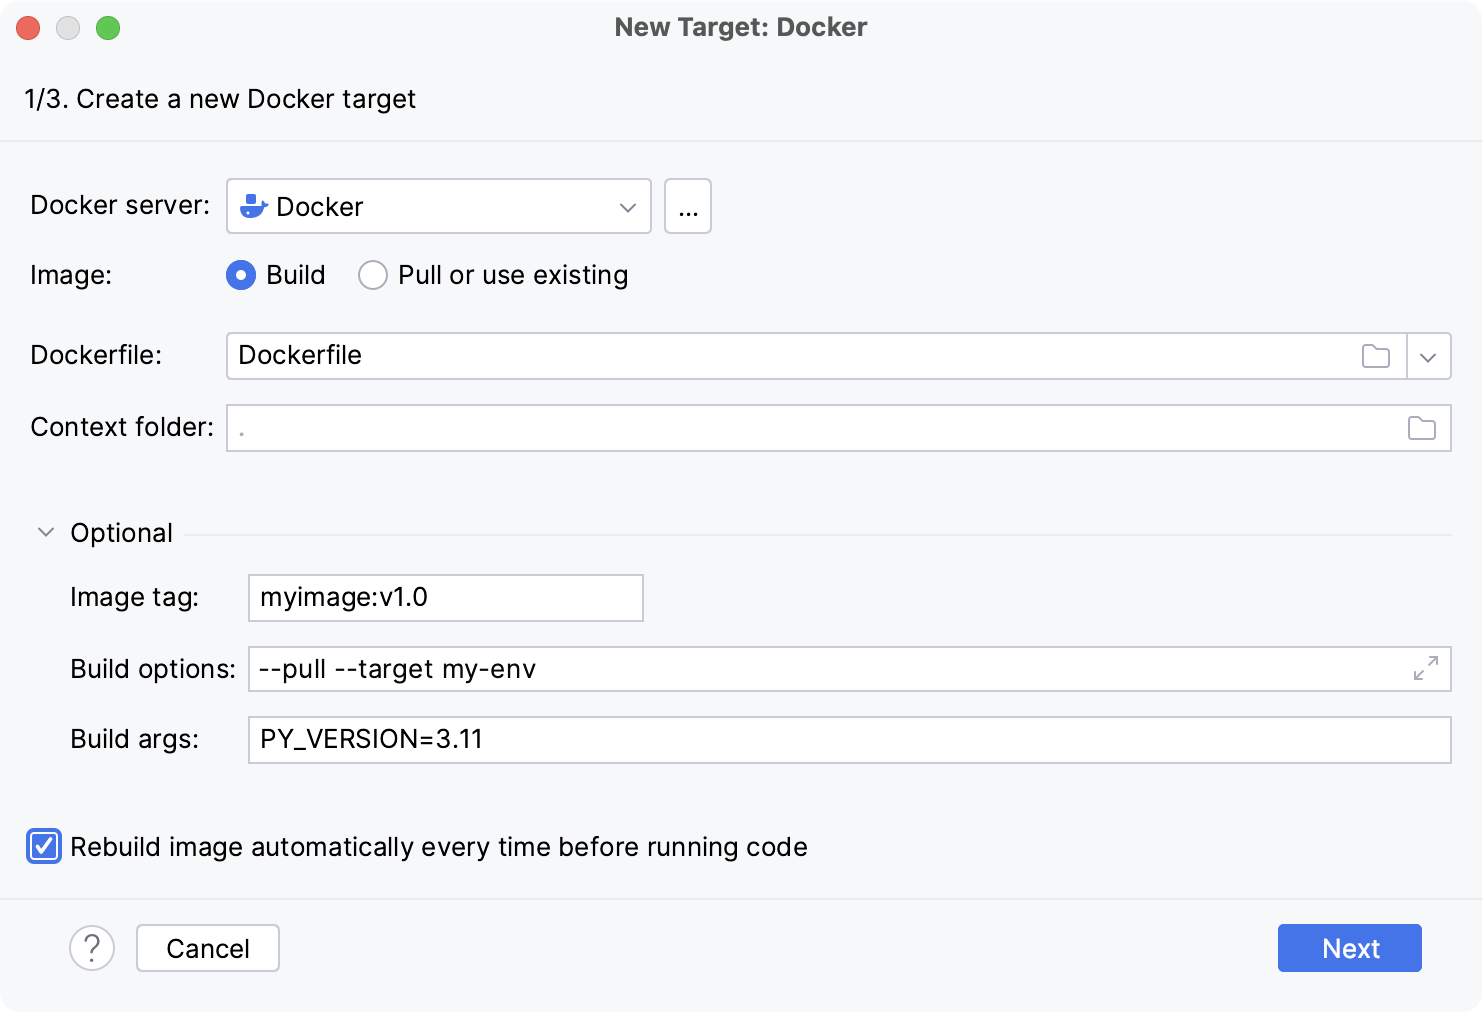
If required, expand the Optional section and specify the following:
Image tag
Specify an optional name and tag for the built image.
This can be helpful for referring to the image in the future. If you leave the field blank, the image will have only a random unique identifier.
Build options
Set supported
docker buildoptions.For example, you can specify metadata for the built image with the
--labeloption.Build args
Specify the values for build-time variables that can be accessed like regular environment variables during the build process but do not persist in the intermediate or final images.
This is similar to using the
--build-argsoption with thedocker buildcommand.These variables must be defined in the Dockerfile with the
ARGinstruction. For example, you can define a variable for the version of the base image that you are going to use:ARG PY_VERSION=latest FROM python:$PY_VERSIONThe
PY_VERSIONvariable in this case will default tolatestand the Dockerfile will produce an image with the latest available version of Python, unless you redefine it as a build-time argument. If you set,PY_VERSION=3.10, Docker will pullpython:3.10instead, which will run a container with Python version 3.10.Redefining the
PY_VERSIONargument is similar to setting the following command-line option:--build-arg PY_VERSION=3.10You can provide several arguments separated by spaces.
Wait for PyCharm to connect to the Docker daemon and complete the container introspection.
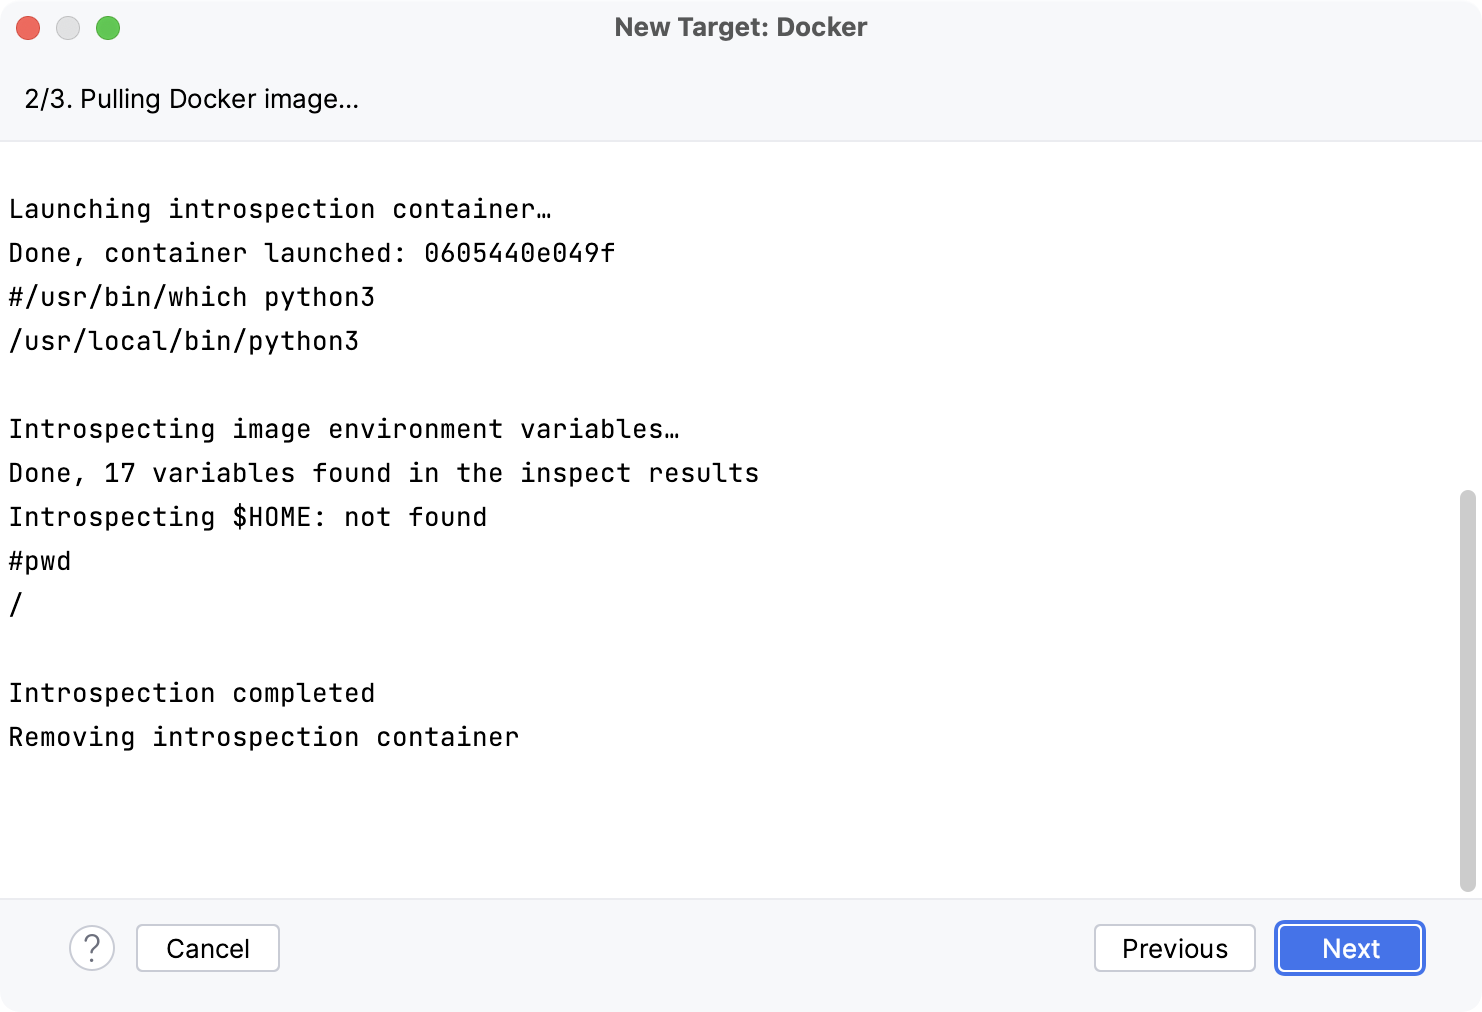
Next, select an interpreter to use in the Docker container. You can choose any virtualenv or conda environment that is already configured in the container or select a system interpreter.
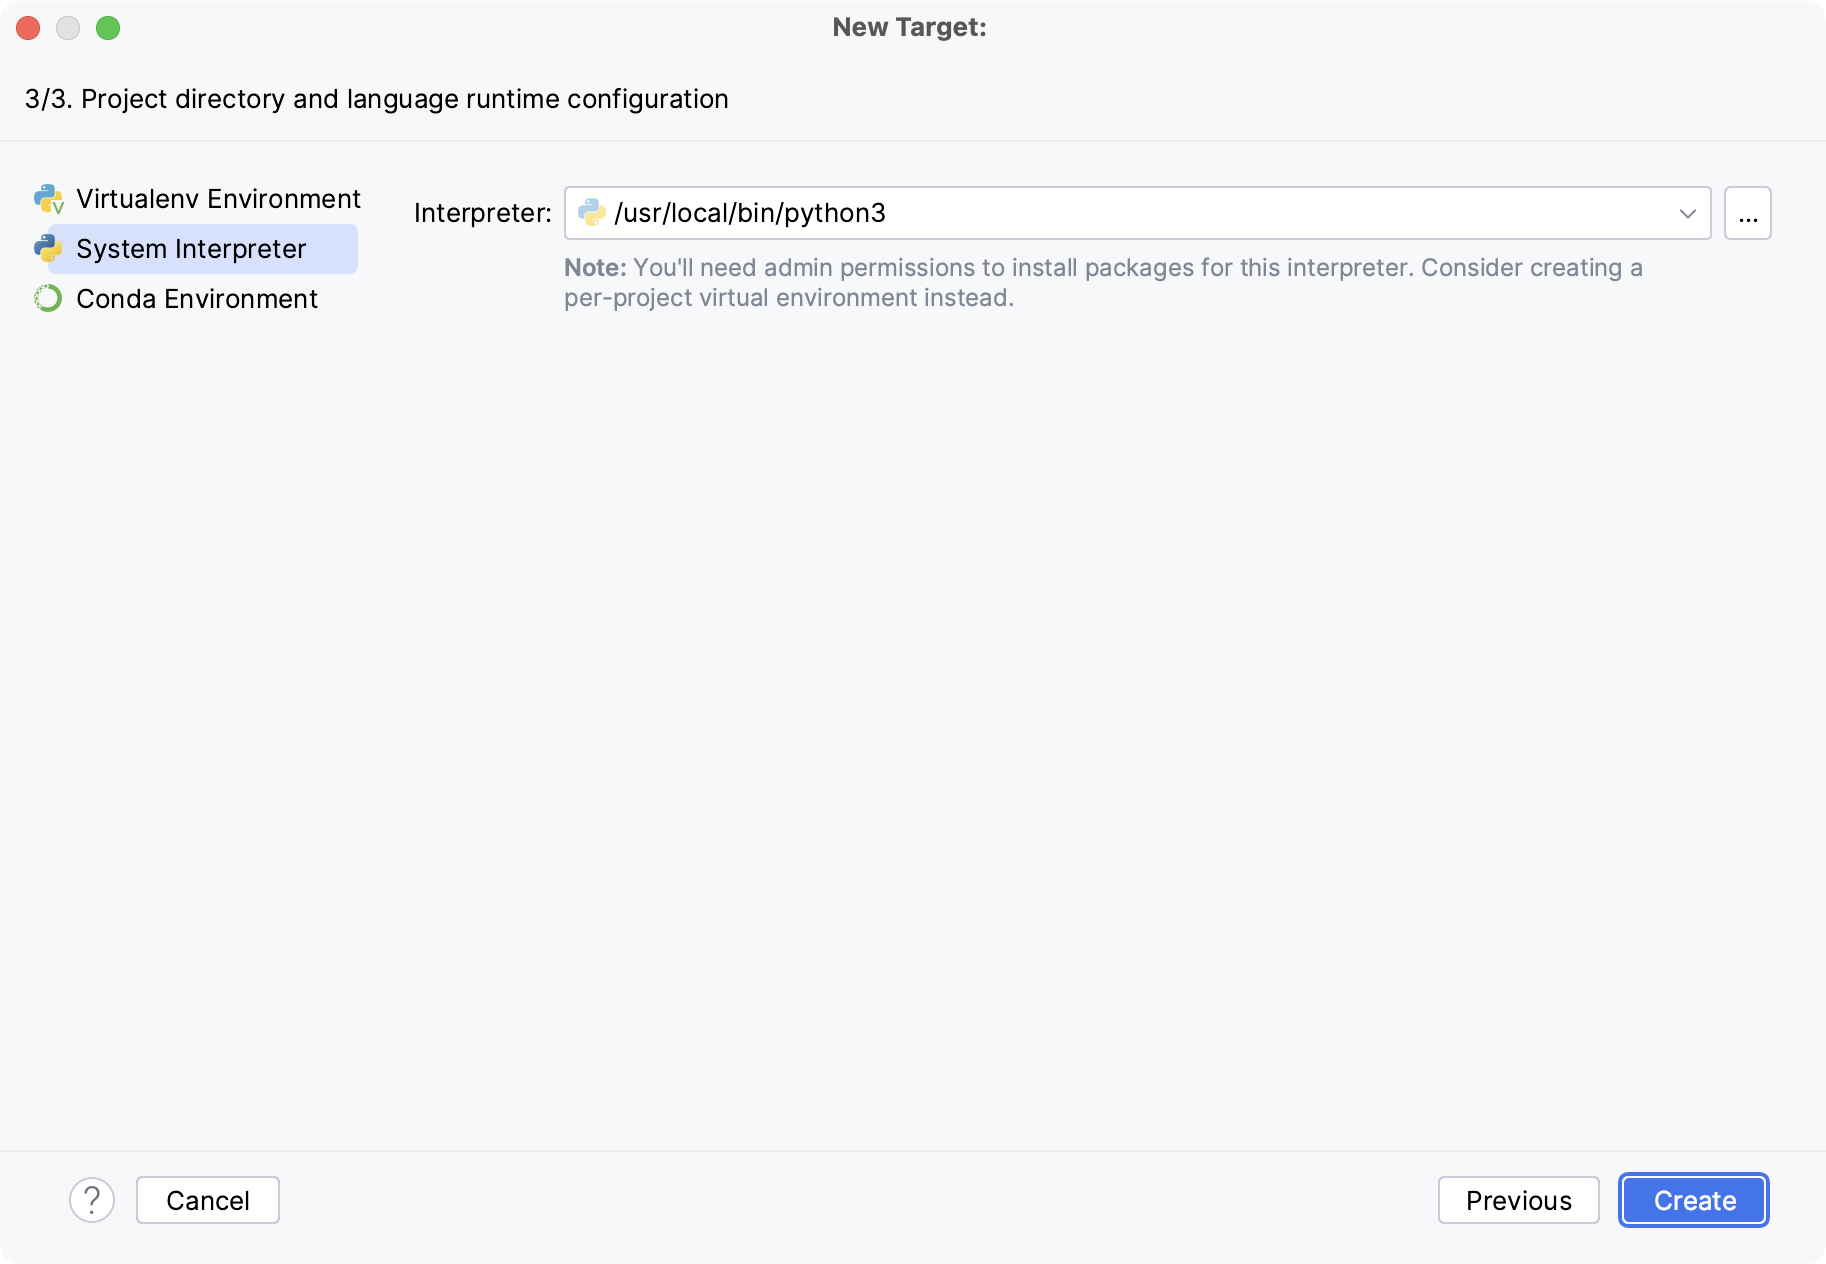
Click OK.
The configured remote interpreter is added to the list.
For more information, refer to Configure an interpreter using Docker.
Configure an interpreter using Docker Compose
Do one of the following:
Click the Python Interpreter selector and choose Add New Interpreter.
Press Ctrl+Alt+S to open Settings and navigate to .
Click the Python Interpreter selector and choose Interpreter Settings. Click the Add Interpreter link next to the list of the available interpreters.
Click the Add Interpreter link next to the list of available interpreters and select On Docker Compose.
Select Docker configuration in the Server dropdown.
Specify the docker-compose.yml file in Configuration files and select the service.
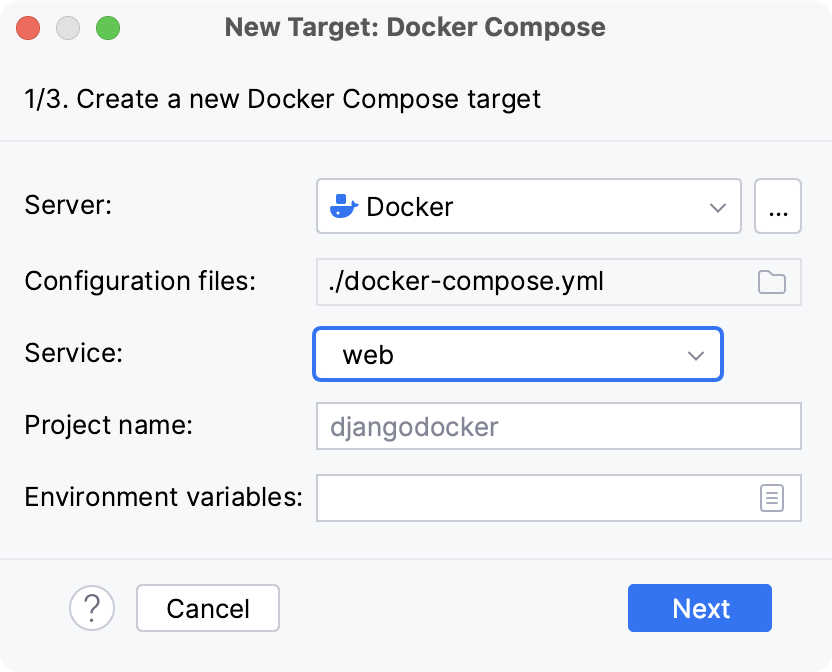
Optionally, specify environment variables and edit the Compose project name.
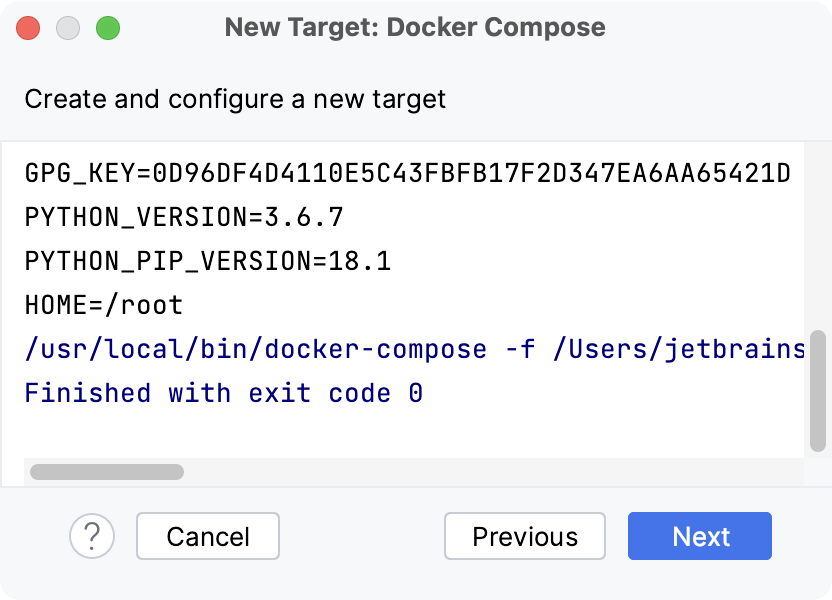
Wait until PyCharm creates and configures a new target:
Select an interpreter to use in the container. You can choose any virtualenv or conda environment that is already configured in the container, or select a system interpreter.
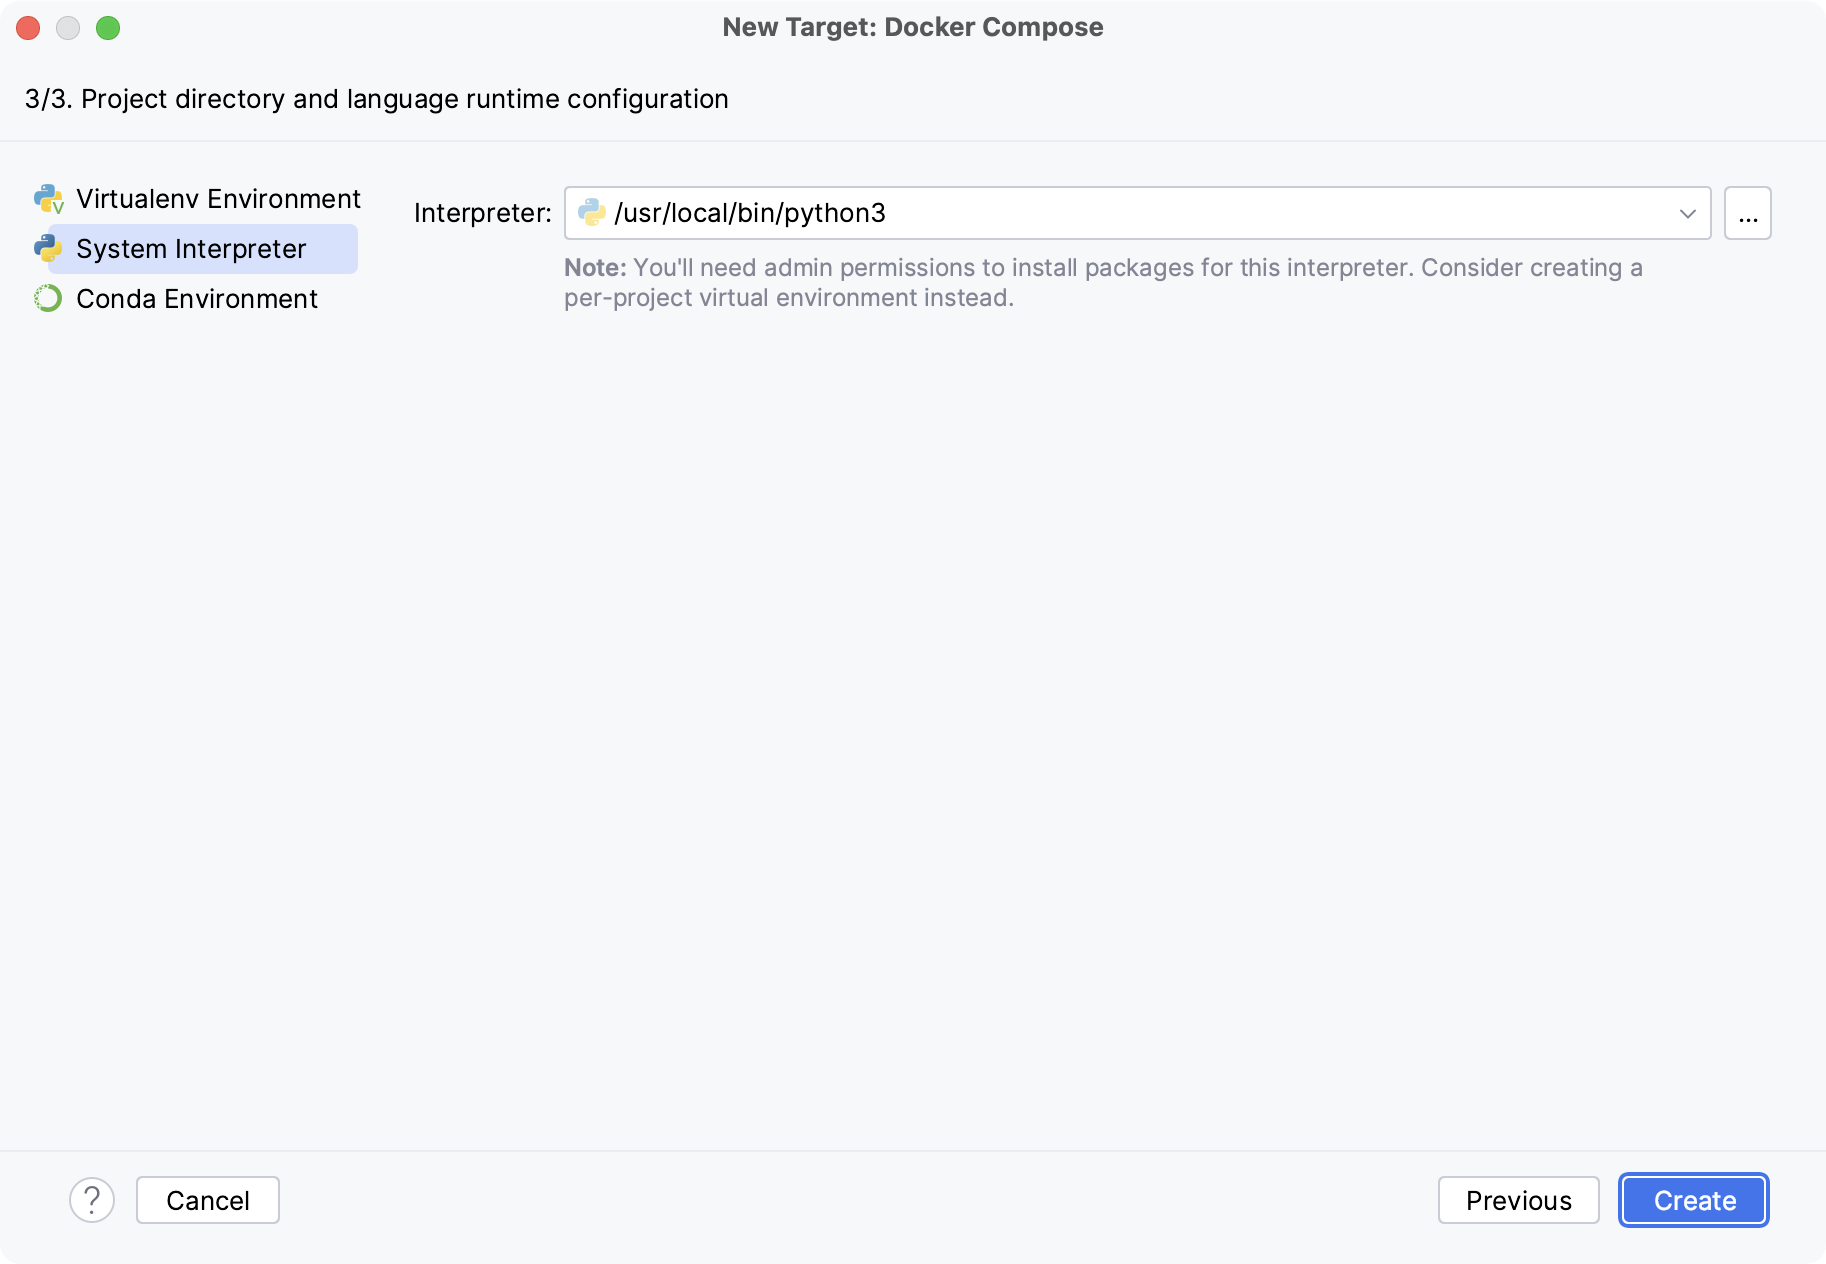
Click OK.
The configured remote interpreter is added to the list.
For more information, refer to Configure an interpreter using Docker Compose.
Setting the default interpreter
In PyCharm, you can specify a default interpreter. It will be set automatically for all the existing projects that do not contain an .idea folder when you first open them.
Go to .
Select Python Interpreter settings. Then either choose an existing interpreter from the Python interpreter list or click
to add a new interpreter. Click OK to save the changes.
Managing interpreter packages
For each interpreter, you can install, upgrade, and delete Python packages. By default, PyCharm uses pip to manage project packages. For conda environments you can use the conda package manager.
PyCharm smartly tracks the status of packages and recognizes outdated versions by showing the number of the currently installed package version (column Version), and the latest available version (column Latest version). When a newer version of a package is detected, PyCharm marks it with the arrow sign and suggests upgrading it.
By default, the Latest version column shows only stable versions of the packages. If you want to extend the scope of the latest available versions to any pre-release versions (such as beta or release candidate), click Show early releases.
You can upgrade several packages at once. Hold Cmd (macOS) or Ctrl on (Unix or Windows), left-click to select several items in the list of packages, and then click Upgrade.
See the detailed instructions:
If you are looking for a more convenient way to search for Python packages, preview the documentation, and manage Python package repositories, try the Python Packages tool window. For more information, refer to Manage packages in the Python Packages tool window.