Create unit tests
ReSharper provides an easy and effective way to create unit tests for a selected class: It will create a test class, test method, and even a new test project if necessary.
If AI Assistant is activated, you can opt to generate actual testing logic for the created test.
Create unit test for a class
In the editor, place the caret at a class that you want to create a unit test for.
Press Control+T C, or alternatively open the Generate Code Alt+Insert menu and choose Unit Test.
If your solution contains a test project with a test class that matches the name of your class, ReSharper will add a new test method in that class using the corresponding live template. Note that in version 2023.3, generation of testing logic with AI is not supported in this case. This will be fixed in the next version. As a workaround, rename the existing test class.
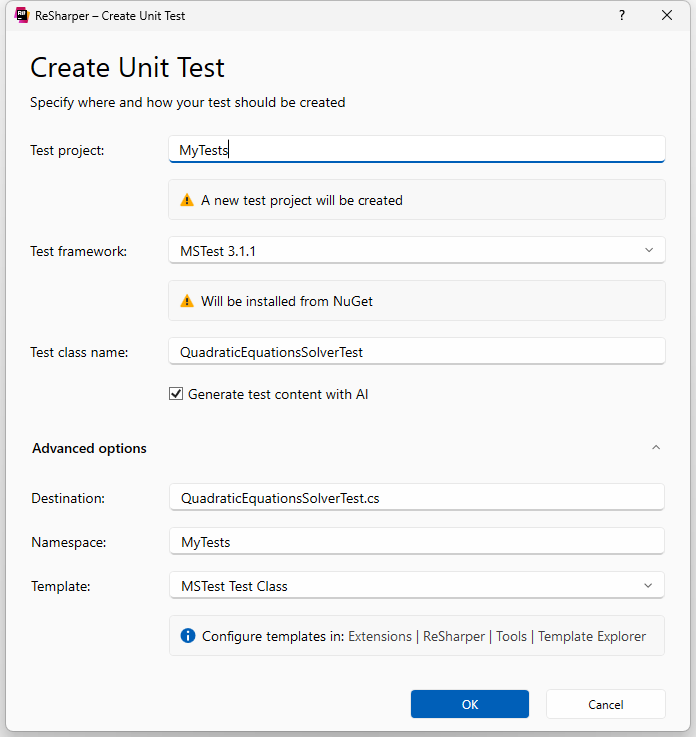
Otherwise, the Create Unit Test dialog will open:

In the dialog, specify where and how the test should be created:
Test project: Type in a name for a new project or choose an existing test project from the drop-down selector.
Test framework: Choose one of the supported unit test frameworks (NUnit, xUnit, or MSTest). In the selector, you will see, which framework versions are already used in the target project or in your solution — it is recommended to select these versions for consistency. However, you can also select the latest version of the desired framework, and it will be installed from NuGet. The framework will be referenced in the target project, and the test class will be created from a file template corresponding to that framework.
Test class name: The name for the test class will be automatically suggested according to the pattern that you can configure under Test class naming convention on the page of ReSharper options . It is recommended to use the suggested name because ReSharper will use it to link the class and its tests when you navigate to and from the test.
Generate test content with AI: If AI Assistant is activated, you can opt to generate actual testing logic for the created test.
Destination (Advanced): Use this field to specify a custom relative path to the file where the test class will be created.
Namespace (Advanced): Use this field to specify a custom namespace for the created test class.
Template (Advanced): Use this field to choose a file template that will be used for the created test class.
Click OK to create the test. If necessary, ReSharper will create a new test project and a test class, and then it will do one of the following:
If the Generate test content with AI was selected, ReSharper will populate the test class with one or more test methods that will check the logic of the originally selected class.
Note that there may be some unresolved symbol references in the generated code because of missing project references or using directives. In most cases, these are easy to fix: press Alt+Enter on a highlighted reference and choose Import missing references in file.
Otherwise, ReSharper will deploy the specified live template for the test method. Type in a method name to finish the template session and then specify your test logic.
File templates for new test classes
When creating a new test class, ReSharper uses a file template specific for the target test framework. By default, ReSharper provides a single template for each supported framework:
If necessary, you can modify those templates or create more templates for your test classes. To make sure that your custom file templates are suitable for creating unit test classes, the Availability of the template must cover test projects with the desired framework:

Live templates for new test methods
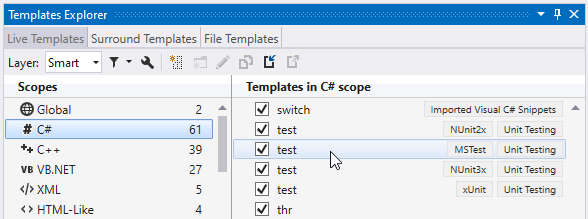
When generating a test method, ReSharper deploys a live template specific for the target framework. If necessary, you can customize each template for your needs. To do so, select from the menu, switch to the Live Templates tab, select C# or VB.NET under Scopes, and then double-click the test template for the desired test framework.

Annotating tests with test subject mentions
When creating a test class, ReSharper can annotate it with a special attribute that links the test with its subject and allows for navigation between them. By default, ReSharper uses the [TestSubject] attribute from JetBrains.Annotations, but if you want to use another attribute for this purpose, configure the test class template accordingly and then specify this attribute on the page of ReSharper options Alt+R, O.
Also on that options page, you can use the Annotate with test subject mention selector to choose when to add the annotation.
This feature is supported in the following languages and technologies:
The instructions and examples given here address the use of the feature in C#. For more information about other languages, refer to corresponding topics in the ReSharper by language section.