Create custom code inspections and quick-fixes
If you see an issue or a bad practice in your code, but ReSharper does not detect it, you can create a custom code inspection. Additionally, you can specify code that should replace the problematic code, in other words, a custom quick-fix.
If the custom inspection is created correctly, it will be able to find all similar issues in your codebase and highlight the problematic code right in the editor.
To create custom inspections, you can harness the Structural Search and Replace mechanism.
To illustrate creating custom inspection, let's imagine that we do not like the following code:
.. and would rather replace it with:
Create a custom code inspection with a quick-fix
In the editor, select a piece of code that should be considered as a problem.
Right-click the selection and choose Search with Pattern.
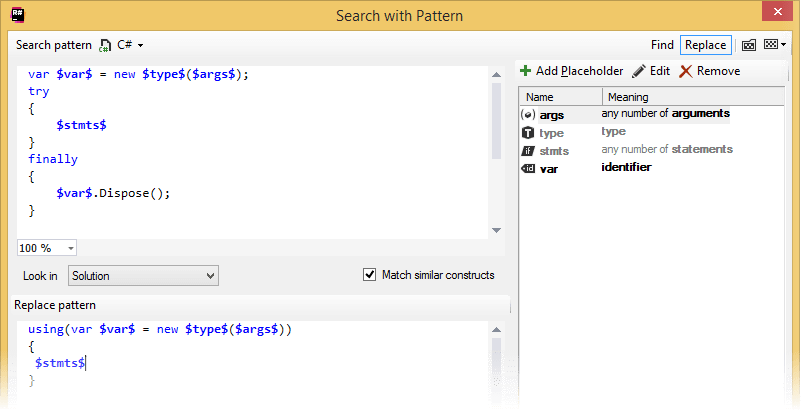
ReSharper displays the Search with Pattern dialog with the selected code pre-parsed as the search pattern. Some identifiers, arguments, types, and so on, are automatically replaced with placeholders:

To make the inspection pattern more universal, edit the recognized placeholders: and replace other code items with more placeholders. For instance, we can replace the single statement in the
tryblock in our example, with a placeholder that matches any number of statements.To specify a quick-fix for the problem, click Replace in the right upper corner of the dialog.
In the Replace pattern area, specify a pattern that should be used to replace the problematic code. Use the same placeholders for the variable code items.
Here is how the refined pattern and a quick-fix would look for our example:
Click Save and then Close when finished. The custom inspection is saved in the pattern catalog using the smart save logic.
Note that the problematic piece of code is not yet highlighted in the editor. We need to do a couple of things more to make it work.
Select from the main menu or press Alt+R O, then choose on the left.
In the list of patterns, find the pattern that corresponds to the custom inspection you've just created. By default its severity level is set to 'Do not show', which means that ReSharper will ignore the issues corresponding to your custom inspection.
To enable the inspection, choose any other severity level, for example, 'Suggestion'.
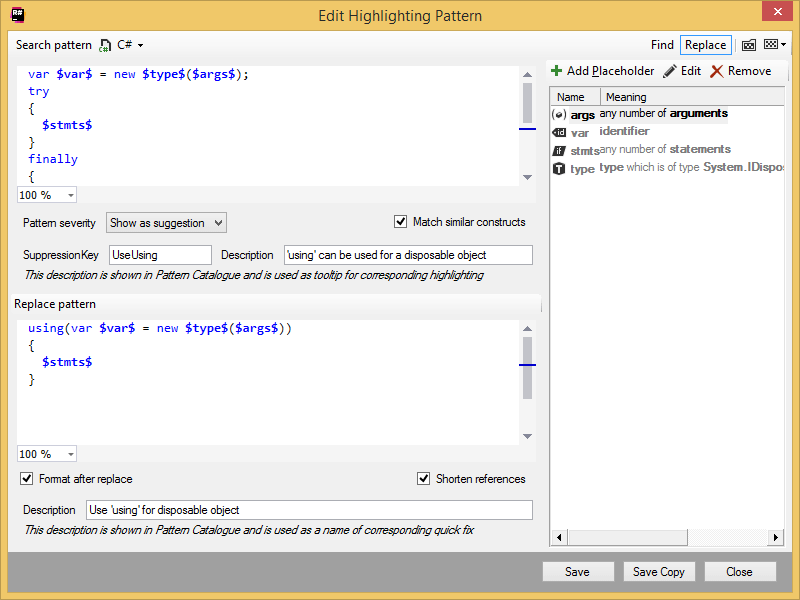
Lastly, we can specify descriptions that will be shown for the custom inspection and the corresponding quick-fix.
To do so, double-click the pattern and then, in the Edit Highlighting Pattern dialog that opens, specify the descriptions in the corresponding fields:
Save changes to the pattern, close it, and then click Save again on the Custom Patterns page of the ReSharper options.
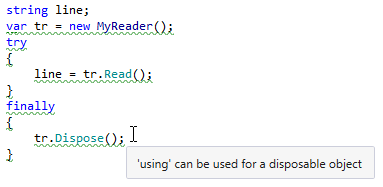
Now the problem is recognized and highlighted in the editor. The specified description appears when you hover over it:
As we have refined the inspection pattern, it will find similar problems even with different number of arguments in the constructor call or different number of statements:
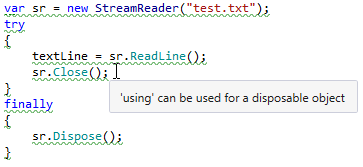
The quick-fix for the custom inspection looks and works exactly the same as the built-in quick-fixes.
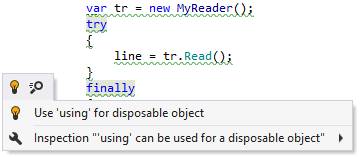
If you need to find the problem described by your custom pattern in a larger scope, you have several options:
Choose the inspection pattern on the page of ReSharper options and click Search Now on the page toolbar.
Run code inspection in the desired scope and then analyze your custom problems with the rest of detected code issues.
Use the Find Similar Issues action that appears in the inspection options when you press Alt+Enter on the highlighted code in the editor.
This feature is supported in the following languages and technologies:
The instructions and examples given here address the use of the feature in C#. For more information about other languages, refer to corresponding topics in the Languages and frameworks section.