Create new Unreal Engine entities
JetBrains Rider offers a set of predefined templates for Unreal Engine classes and dedicated actions to create a new class, plugin, and module, allowing you to automate boilerplate code generation and switch between the IDE and Unreal Editor less often.
New Unreal Class
All predefined templates for Unreal Engine classes are available on the page of JetBrains Rider settings.
Create a new Unreal Engine class
In the Solution Explorer, select a source folder where you want to create a new class.
From the context menu, select .

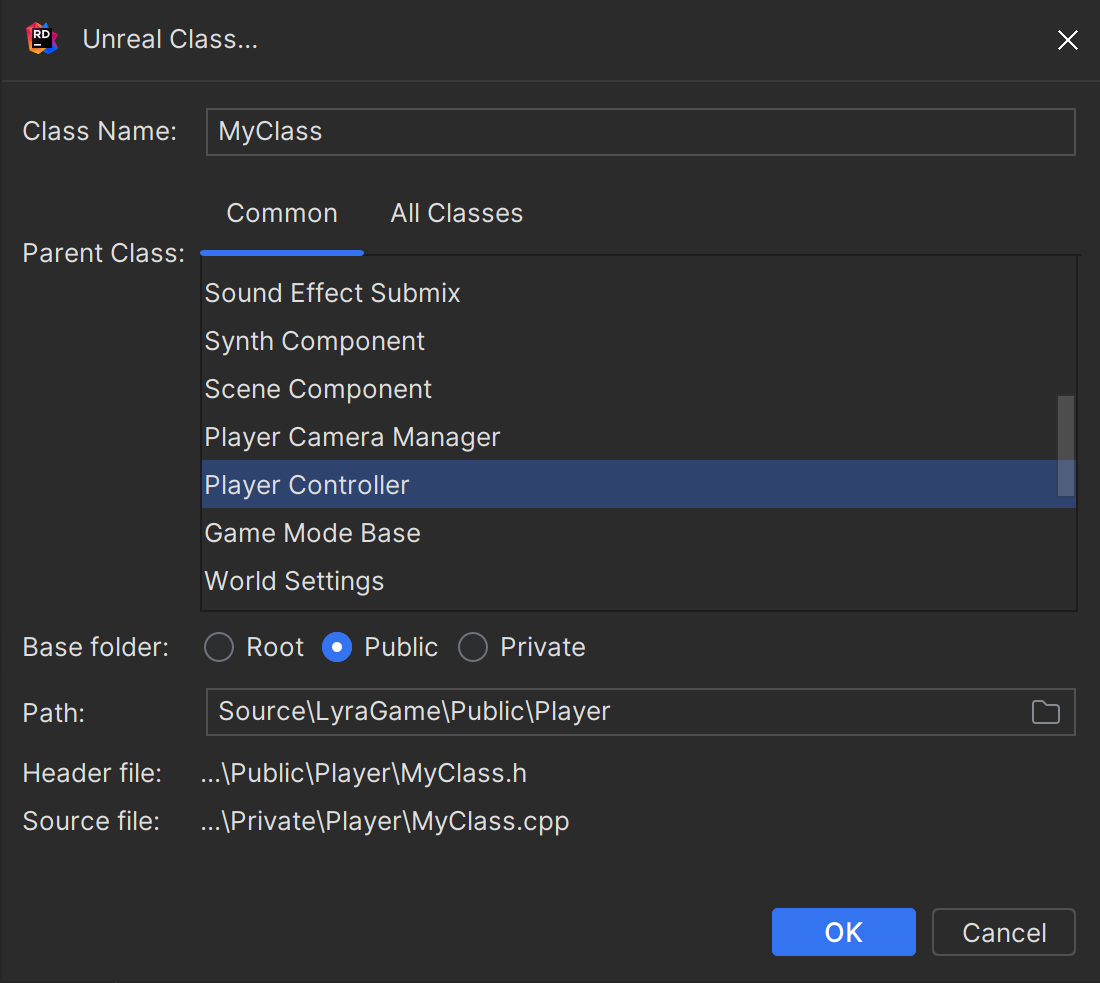
Specify the name of the new class.
Choose the class you would like your new class to derive from. The parent class can be a common gameplay class or any arbitrary Unreal Engine class available in the current context.
Choose the root, Public, or Private folder to put the resulting generated files relatively under the initially selected source folder.
Alternatively, manually specify the path where the header and source files will be generated.
Click OK. The newly generated header and source files with template code will be added to the corresponding folders and opened in the editor.
New Unreal Module
When creating a new module with game logic, you regularly do many things: add a folder, add a Build.cs file into this folder, create a class that initializes the module, and update the .uproject and Target.cs files. JetBrains Rider helps you automate these tasks.
Create a new Unreal Engine module
In the Solution Explorer, select a source folder where you want to create a new module.
From the context menu, select .

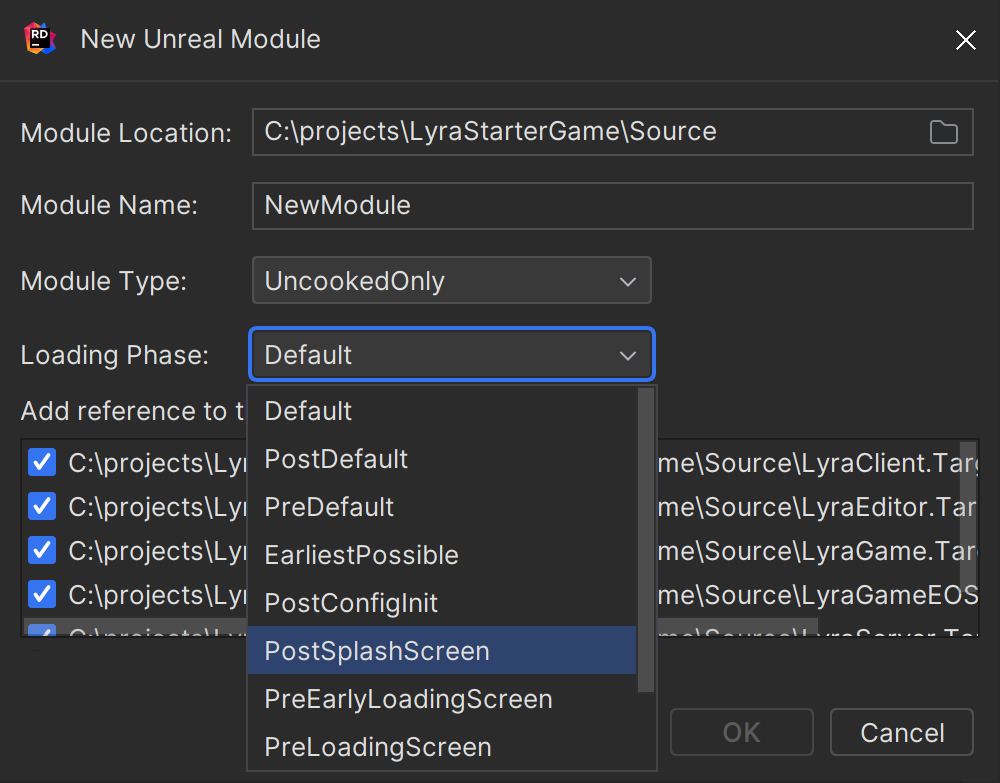
Specify the name of the new module.
Choose a module type from the list.
Select the loading phase.
Choose
Target.csfiles where you want to add module references.
Click OK. Depending on the selected module type, JetBrains Rider will generate the
Build.csfile and the module’s source and header files.
New Unreal Plugin
JetBrains Rider allows you to create several different types of plugins, similar to using the New Unreal Plugin button in the Unreal Editor's Plugin Browser but right in the IDE.
Create a new Unreal Engine plugin
In the Solution Explorer, select a project or folder where you want to create a new plugin.
From the context menu, select .

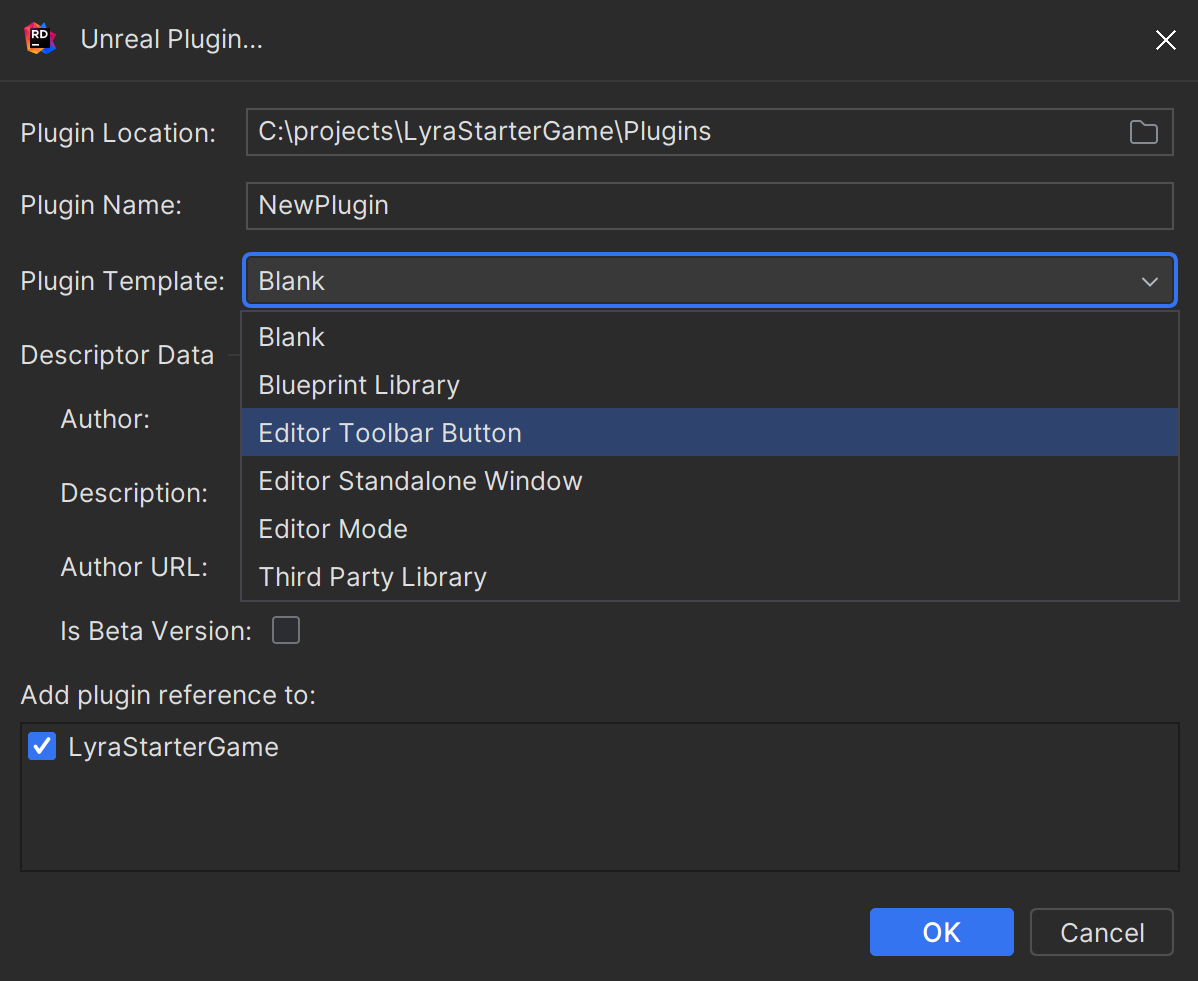
Specify the name of the new plugin.
Choose a plugin template from the list.
Specify Descriptor Data.
Choose projects where you want to use a new plugin and add references.
Click OK. Depending on the selected plugin template, JetBrains Rider will generate the
.upluginfile that describes the plugin and modules with all the required source files.