Tutorial: Docker Compose as a remote interpreter
Docker is a tool for building, sharing, and running containerized applications. RubyMine provides integration with Docker and allows you to perform all the required actions in your project - from building images to executing commands inside running containers. Moreover, RubyMine enables you to use the running Docker container as a remote interpreter. This means that you can run, debug, and test your application in an isolated environment right from the IDE.
In this tutorial, we'll show how to debug the sample Rails application with the remote Docker Compose interpreter. This application consists of a web frontend and a database backend. We'll configure the application to run it using two separate services, assign the web service a remote interpreter, and try debugging capabilities.
Prerequisites
In this tutorial, we’ll use Mac with macOS, with RubyMine installed. Moreover, the following prerequisites should be met to complete all steps:
Verify that Docker is installed and running.
Make sure that the Docker plugin is enabled.
Build and run the application with Compose
In this chapter, we'll run our application in two separate services: web for a front-end and db for a database. To do this, we need to reconfigure database settings in the database.yml file. Then, we can run docker-compose up. Perform the following steps:
Go to the config/database.yml file and comment Control+/ the following code:
development: <<: *default adapter: sqlite3 database: db/development.sqlite3 ... test: <<: *default adapter: sqlite3 database: db/test.sqlite3Uncomment Control+/ the part that configures using the Postgres database for the development environment:
development: <<: *default adapter: postgresql encoding: unicode host: db username: postgres password: database: sample_rails_app_db ... test: <<: *default adapter: postgresql encoding: unicode host: db username: postgres password: database: sample_rails_app_db_testOpen the docker-compose.yml file. Note that the following command is used for the web service to keep it running:
web: # command: tail -f /dev/nullWe need the web service running because RubyMine uses the
docker-compose execcommand to analyze the Ruby environment and add Docker Compose as a remote interpreter. In case the web service is not running, RubyMine runs it automatically withdocker-compose run. If necessary, you can change this behavior and use another way to analyze the Ruby environment.Click
in the gutter and wait until Docker Compose pulls/builds the images and starts containers.
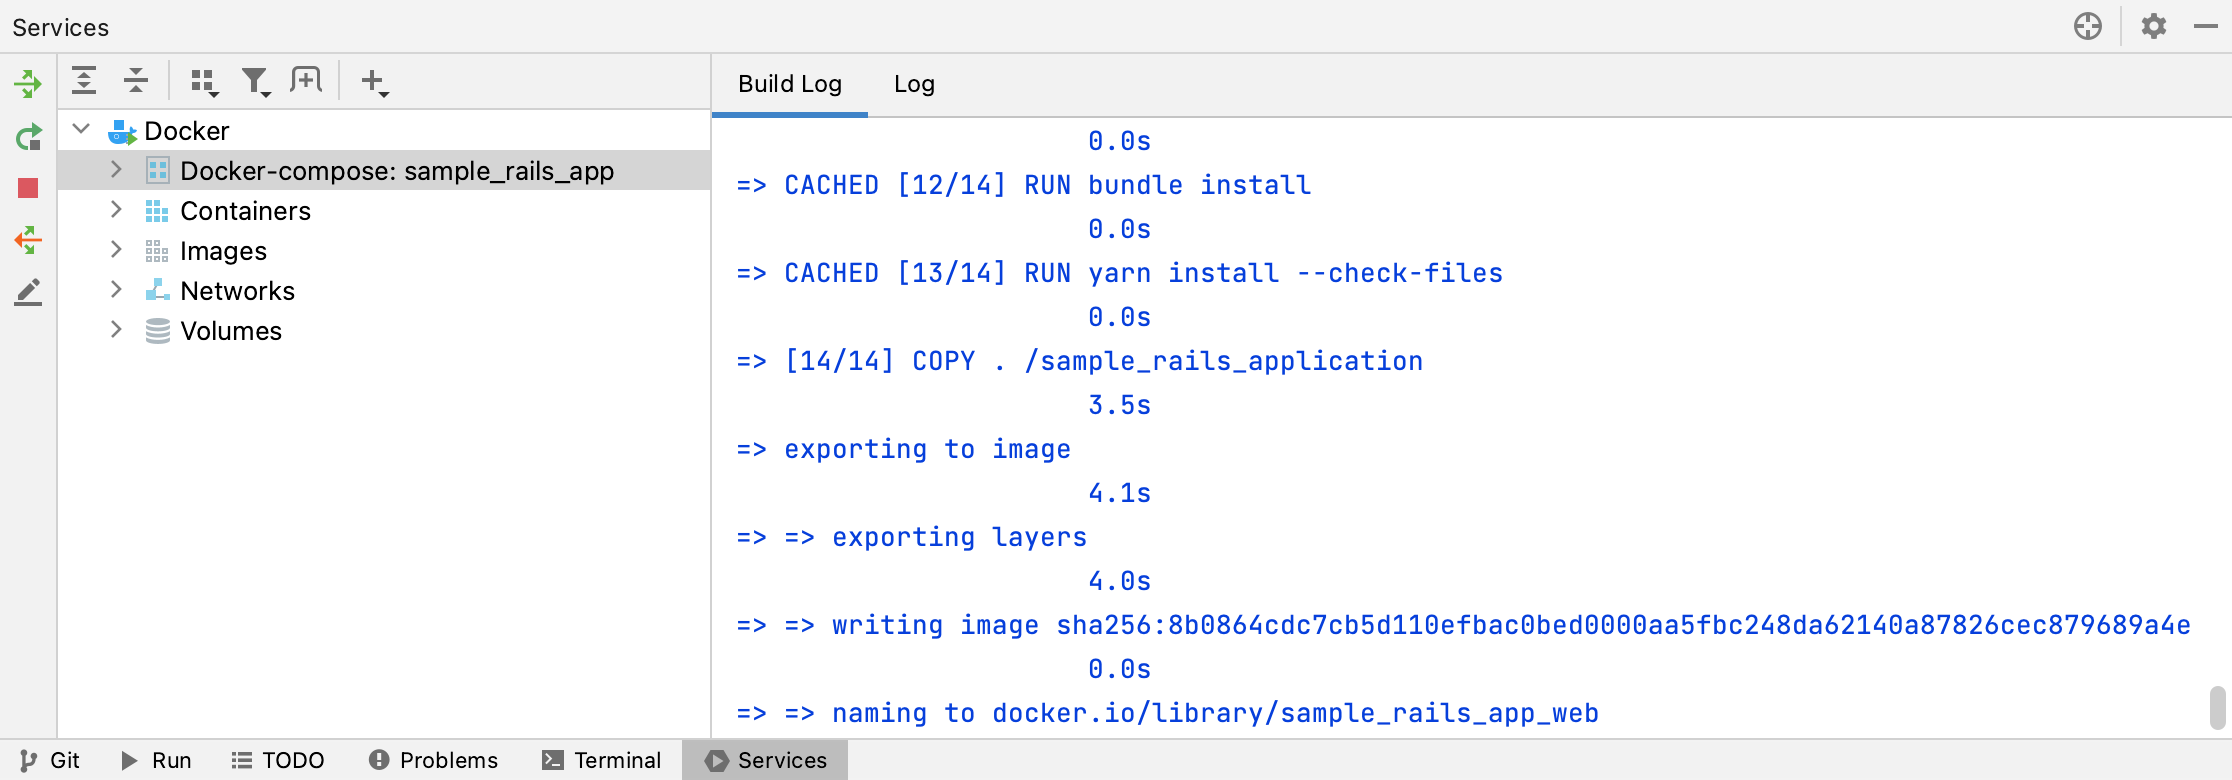
Alternatively, you can run the
docker-compose upcommand in the RubyMine terminal.
Configure Compose as a remote interpreter
Configuring Docker Compose as a remote interpreter consists of two parts:
(Optional) Specifying how the IDE interacts with Docker to analyze the Ruby environment.
Configure a remote interpreter
Open the Settings dialog Control+Alt+S, go to the Languages & Frameworks | Ruby SDK and Gems page.
Click
and select Remote Interpreter or Version Manager.
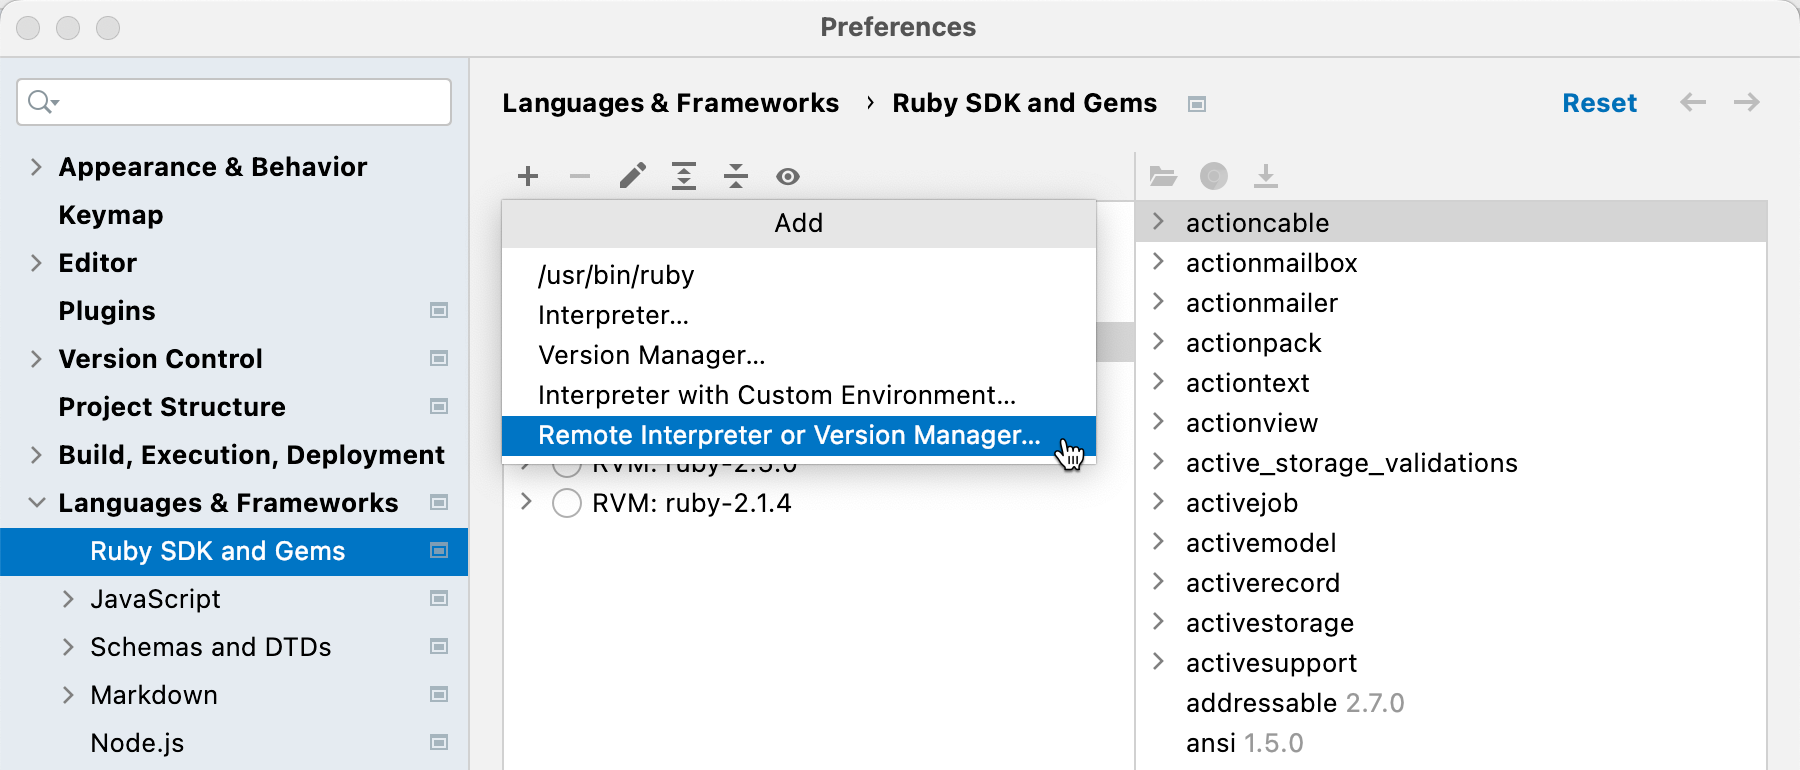
In the invoked dialog, select Docker Compose and specify the following options:
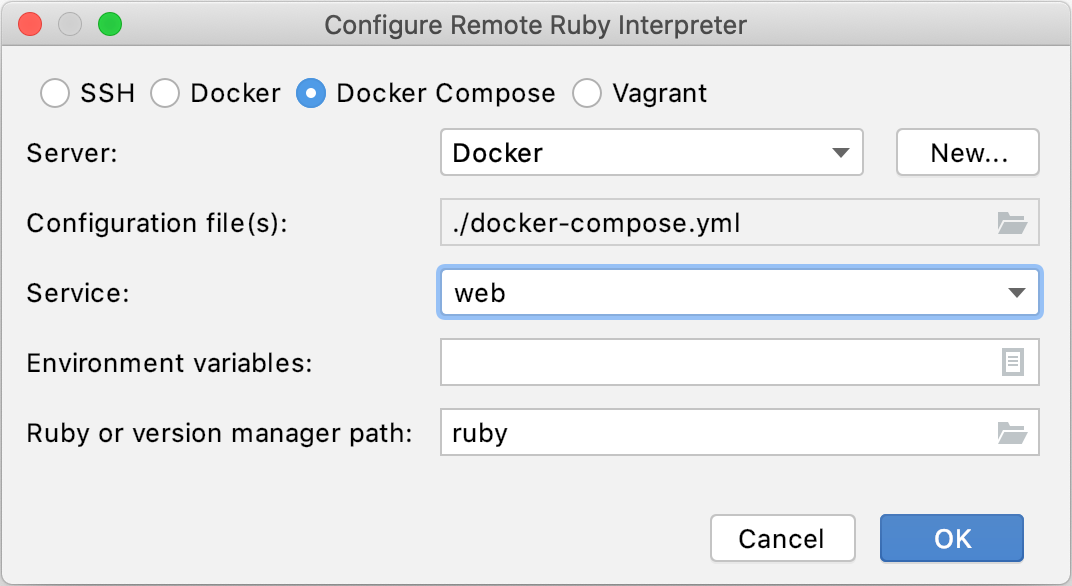
Server: this option specifies a Docker server used to run a container.
Configuration files: leave the docker-compose.yml file.
Service: select the web service.
Ruby or version manager path: leave the default ruby value to detect a path to the Ruby interpreter automatically. You can also manually specify the path to the interpreter or the version manager executable.
Select the added SDK in the Ruby SDK and Gems page and click OK.

Wait until RubyMine finishes the indexing process and creates helper Docker images and containers.

(Optional) Configure Ruby Docker integration
To work with the Ruby interpreter inside Docker, the IDE analyzes the Ruby environment by running specific commands inside a container, such as which ruby, gem env, and rbconfig. You can select whether to execute these commands in a target container (docker-compose exec), create a new environment (docker-compose run), or use the dedicated service container for this purpose.
Open the Settings dialog Control+Alt+S and go to the Build, Execution, Deployment | Docker | Ruby Settings page.
Specify how RubyMine analyzes the Ruby environment by running specific commands inside a container:
docker-compose execif the project is up, otherwisedocker-compose rundocker-compose exec, run the project withdocker-compose upif requireddocker execin an SDK container, create the SDK container if requireddocker-compose run
Configure gem synchronization
Periodically, RubyMine launches gem synchronization to collect information about the gems installed in the Docker Compose interpreter and determine the available features. For example, RubyMine checks if the rubocop gem is installed before running Rupocop inspections.
Open the Settings dialog Control+Alt+S and go to the Build, Execution, Deployment | Docker | Ruby Settings page.
Select one of the following options to copy the information about the Ruby interpreter and installed gems to RubyMine's local cache:
Use a running container if the project is up; otherwise, use a new container: select this option to run gem synchronization within a running container. If there are no running containers, RubyMine will create and start a new container, and then perform gem synchronization within that container once.
Always use a new container: select this option to create and start a new container every time RubyMine performs gem synchronization.
Create a database and run migrations
Before debugging our Rails application, we need to create the database and run migrations.
Press Control twice and type db:create. Select
rake db:createin the dropdown and press Enter. Leave the default settings in the invoked Execute 'db:create' dialog and click OK.Finally, to migrate the database, press Control twice, type db:migrate, select
rake db:migratein the dropdown and press Enter. Click OK in the invoked dialog.
Run the application
Let's run our application before debugging to see how it works:
Select the sample_rails_app configuration on the toolbar and click
Shift+F10.

Open a browser, enter the 0.0.0.0:3000 address, and press Enter to see our working application.
To stop the application, click
Control+F2 on the toolbar.
Compose run/debug configuration settings
Before running a debugging session, let's examine startup settings related to Docker Compose:
Press Control+Shift+A and start typing edit configurations. Select Edit Configurations and press Enter.

In the invoked Run/Debug Configurations dialog, select the Development configuration under the Rails node.
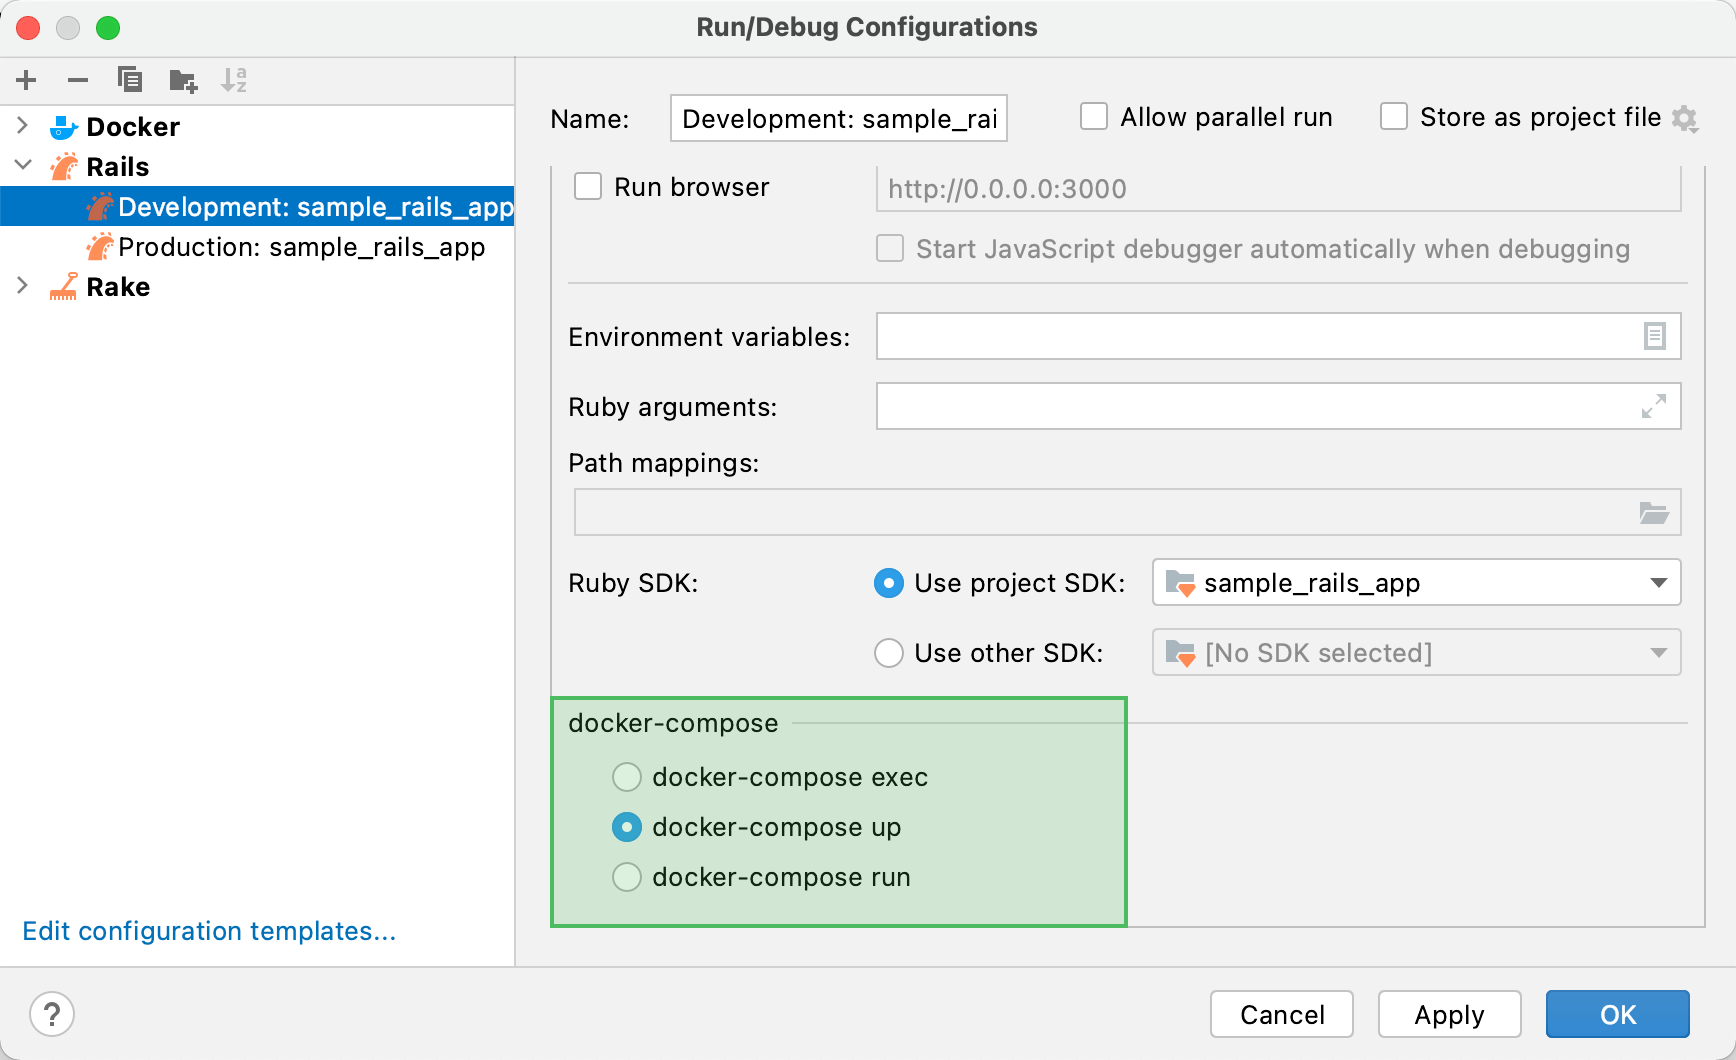
In the docker-compose group, you can see the following options for running/debugging Rails applications:
docker-compose exec - RubyMine runs a command in an already running container.
docker-compose up - RubyMine starts a service used as a remote interpreter with additional settings (for example, exposes additional ports required for the debugger).
docker-compose run - RubyMine runs a command in a new container.
Leave the default docker-compose up and click OK.
Debug the application
Open the users_controller.rb file and set a breakpoint within the
createmethod next to the line where a new user is created.
Select the sample_rails_app run/debug configuration and click
Shift+F9.

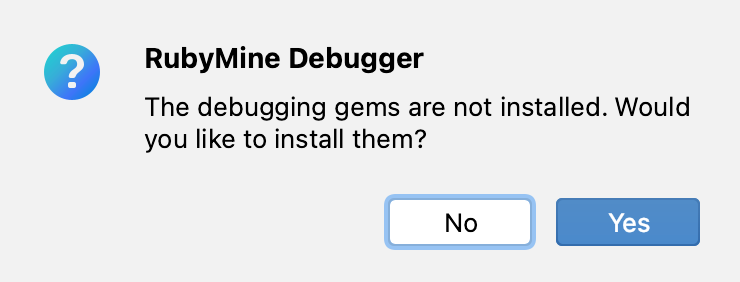
RubyMine will suggest installing the debugging gems. Click Yes.
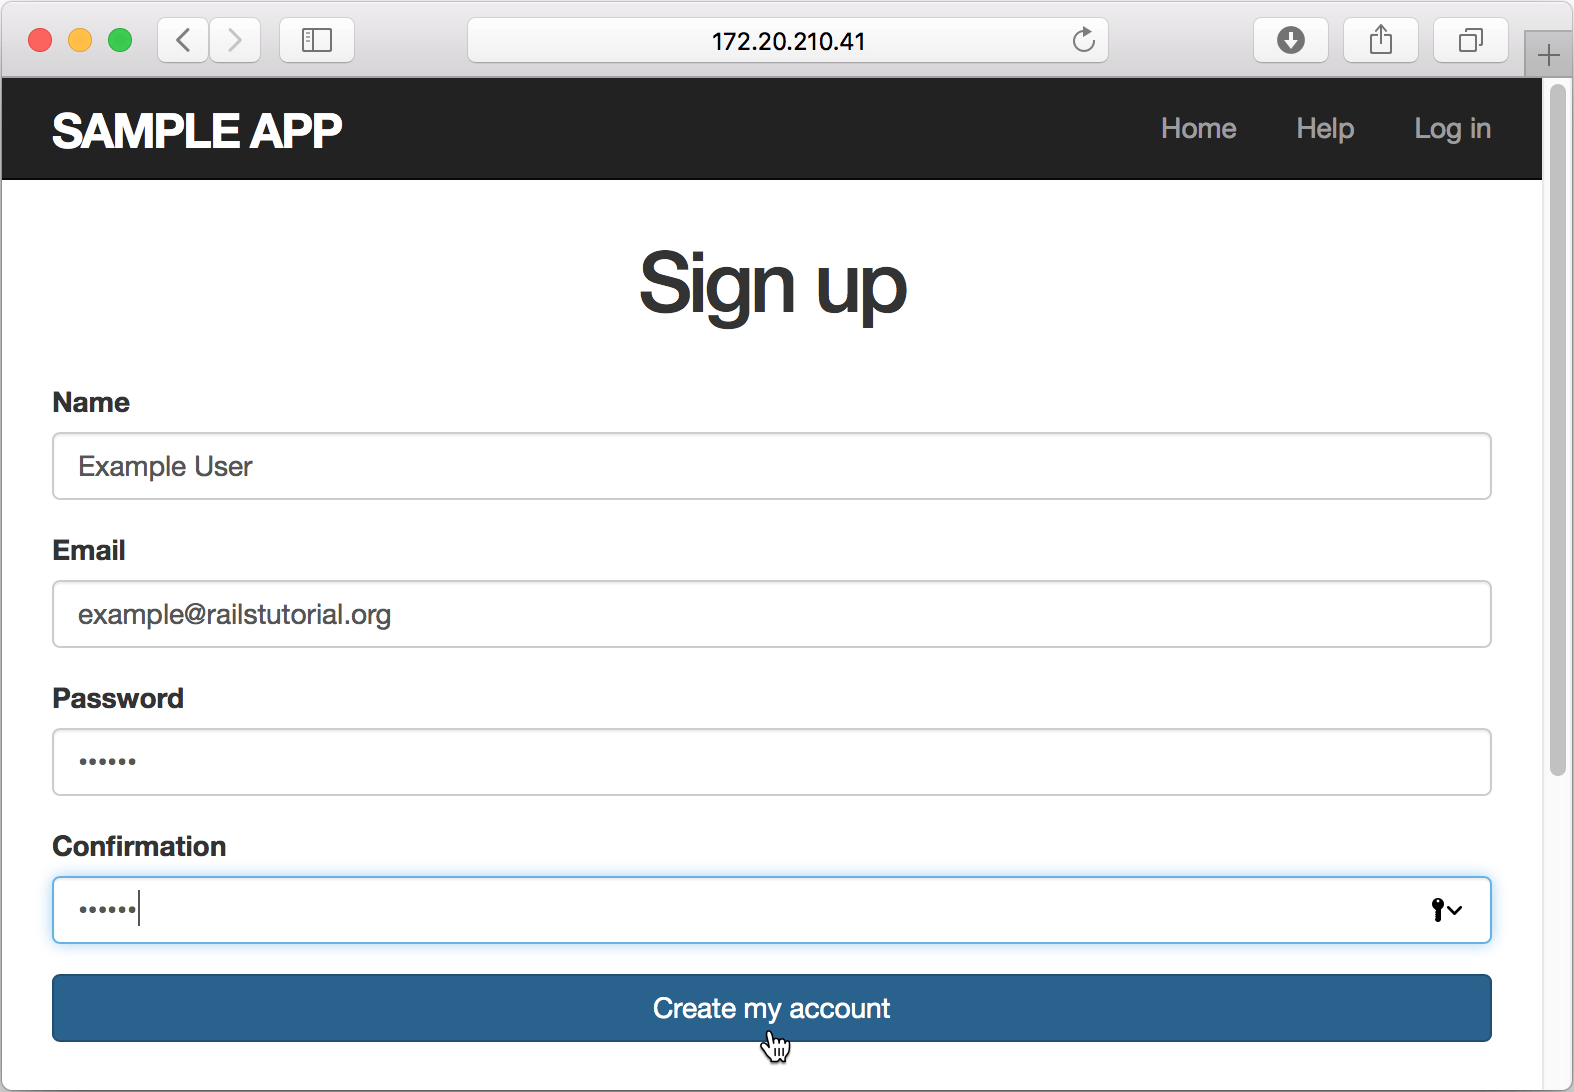
Open your browser and specify the application address 0.0.0.0:3000.
Click the Sign up now! button. On the Sign up page, enter the required user parameters and click Create my account.
The debugger pauses its session on a breakpoint and enables you to examine the application state.
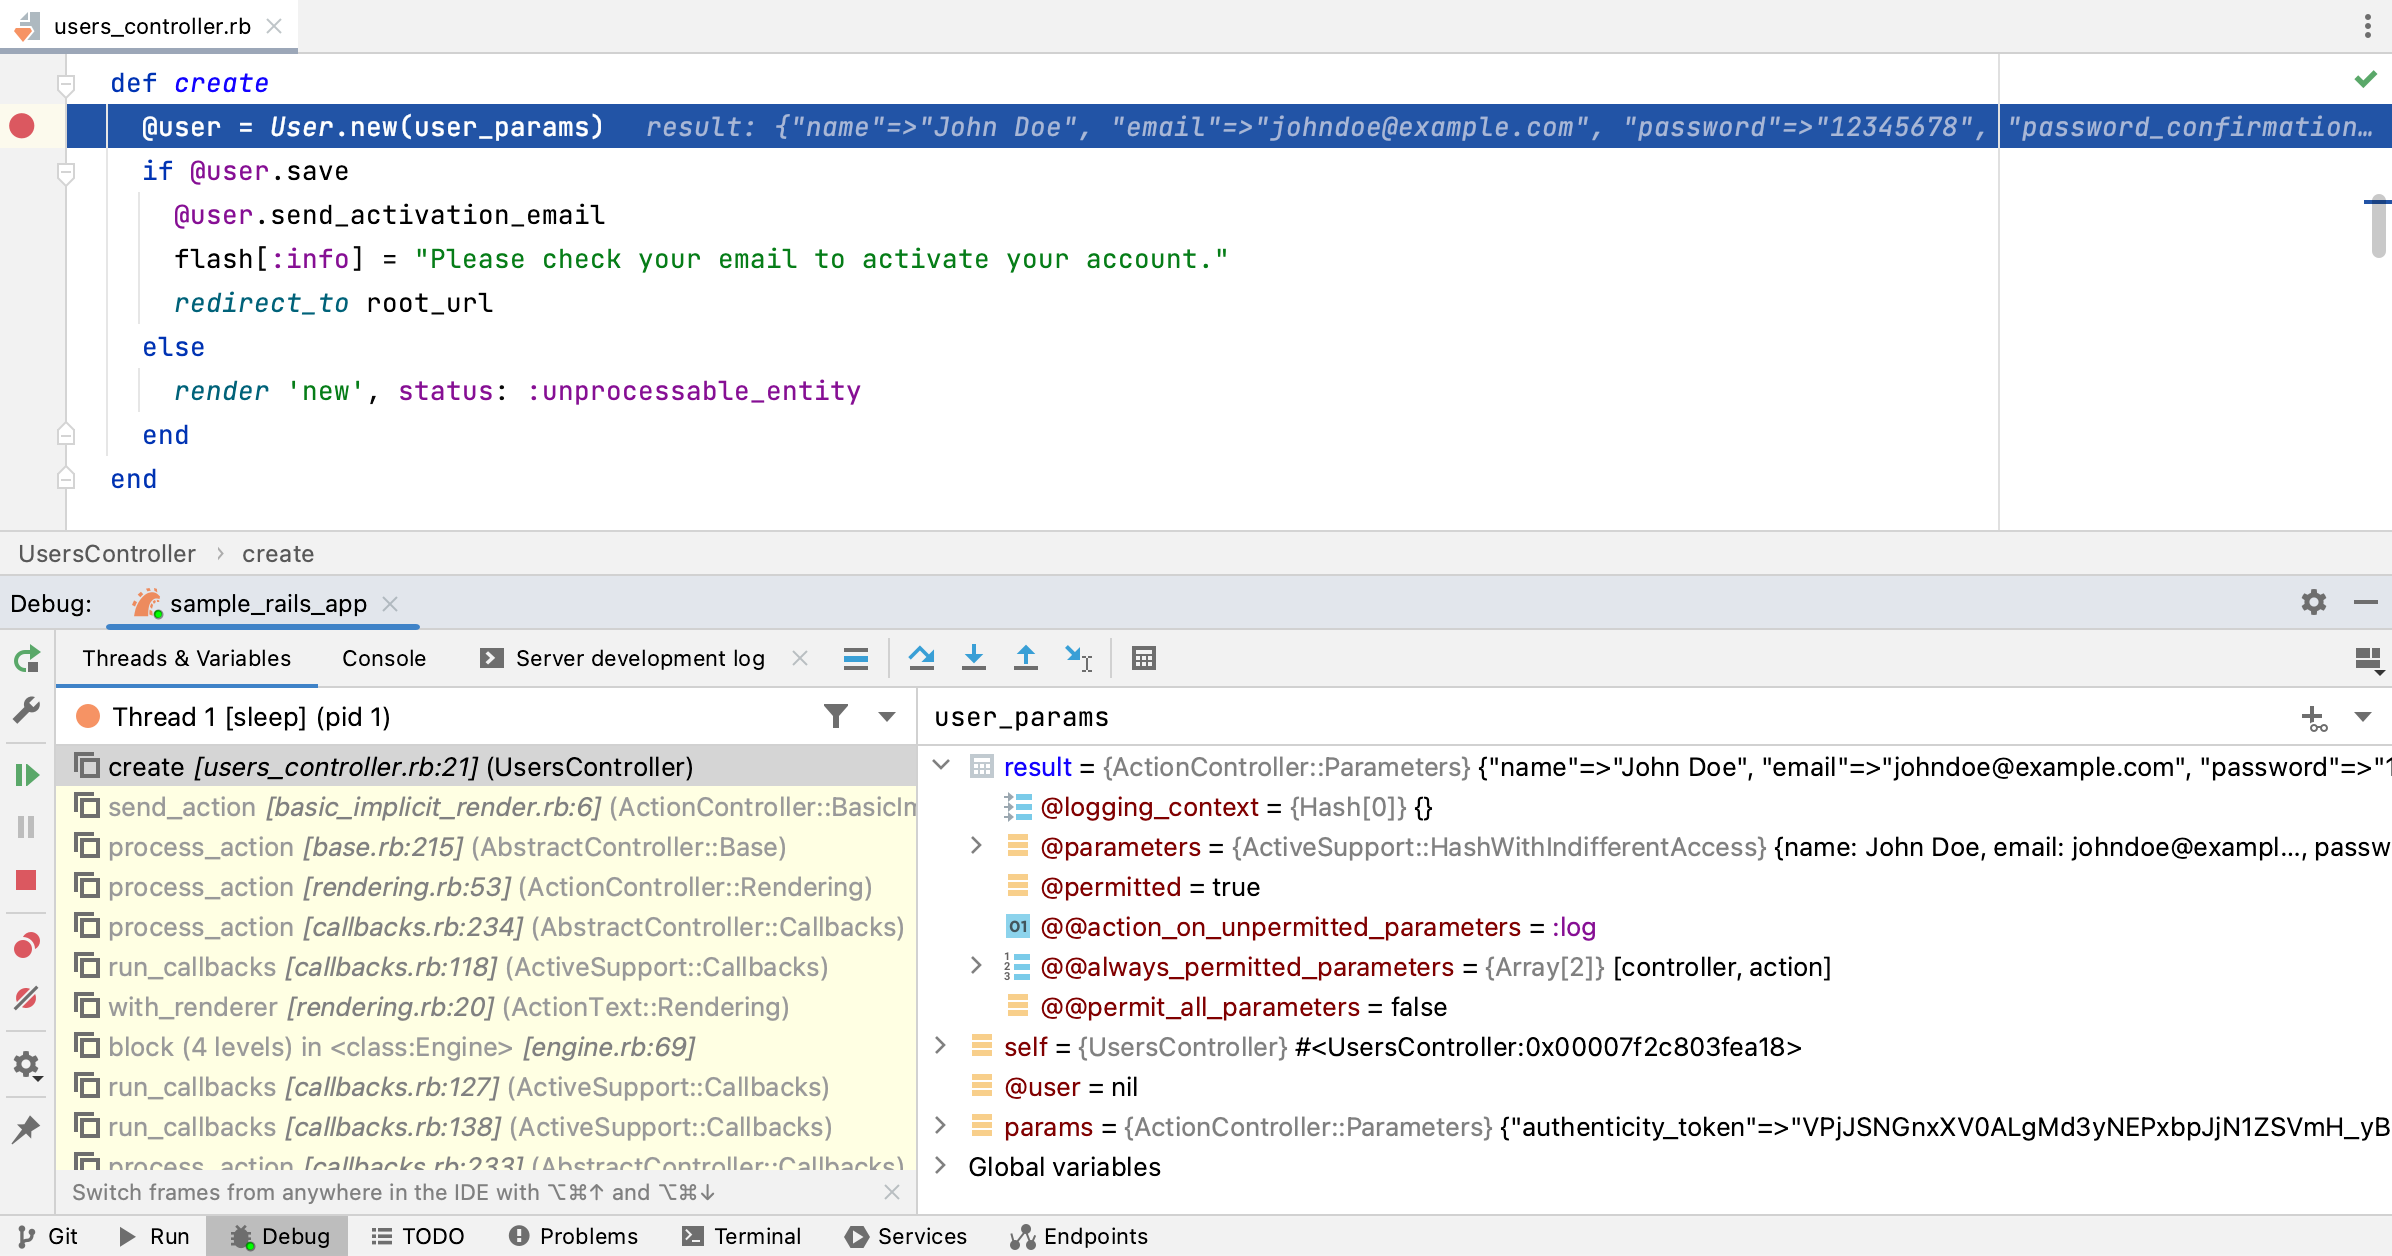
For instance, you can check user parameters specified on the Sign up page.