Main Actions on Builds
This article describes what actions can be applied to builds in TeamCity.
Run Build
TeamCity allows running builds:
Automatically, with various build triggers.
Manually, on demand.
To run a build manually, click Run in the upper right corner of the screen. This action is available in both Edit and View modes modes. If the Run button does not appear for a certain build configuration, it means you do not have enough permissions to start builds in it.
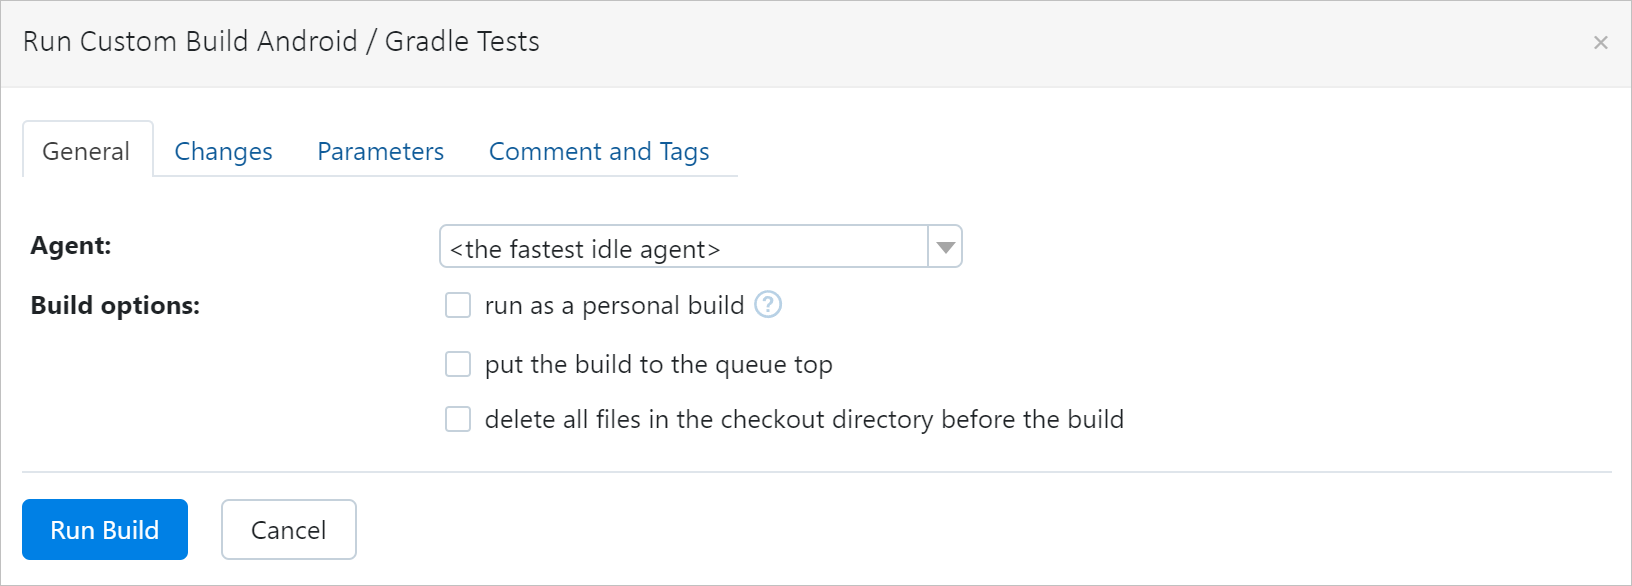
The context menu next to the Run button opens the build's settings menu, so you can initiate a custom build run. A custom run allows using different settings or/and source code than if running a regular build in the current configuration. This is handy if you want to try different build parameters or pretest local code without affecting common build settings or committing the code to the common repository. Read more about this functionality here.

Cancel Build
To cancel a running build, click the stop icon next to its progress bar. TeamCity will prompt to you to enter an optional reason for cancelling; you can also choose if this build should be automatically re-added to the queue.
Note that there is no way to pause and then continue a single build (though you can pause a whole build configuration). If cancelled, a build should be restarted from the first step.
Build Actions Menu
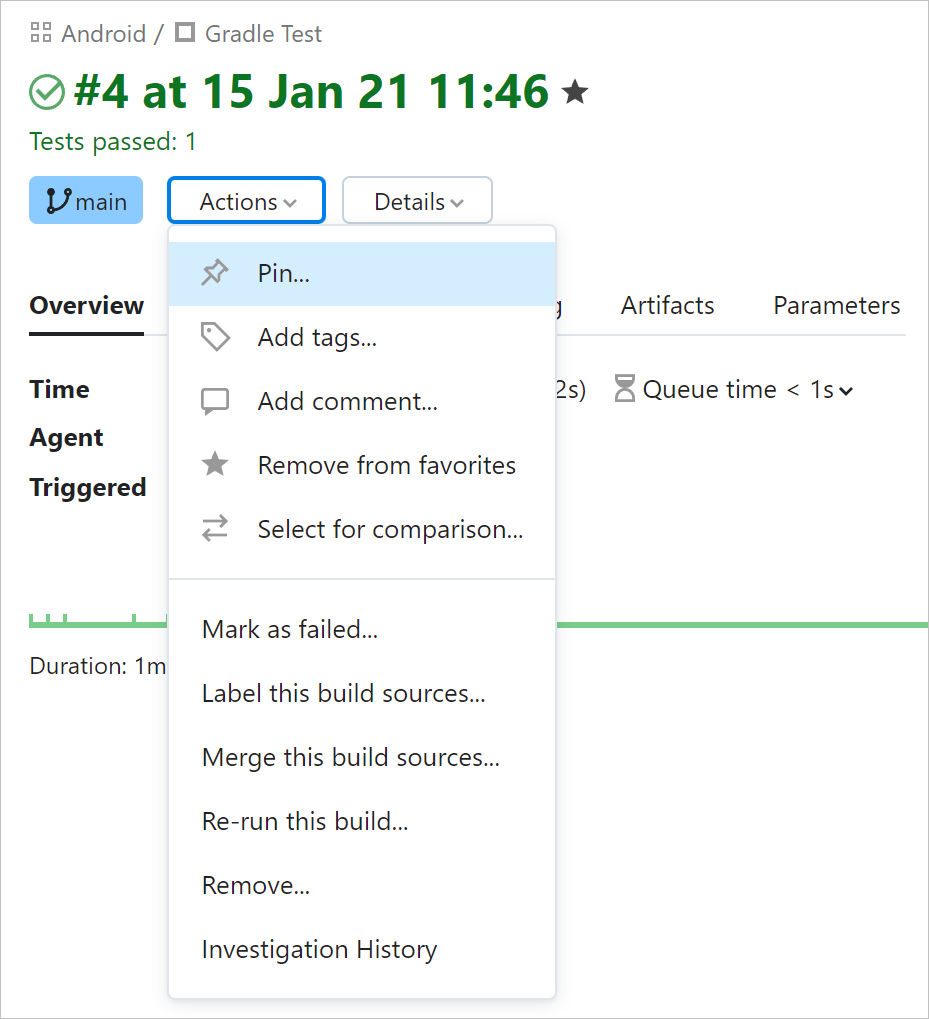
The following actions can be invoked from the single-build Actions menu. To open this menu from Build Configuration Home, click ![]() opposite the build in the list. To open it from the build's Overview, click Actions in the upper left corner.
opposite the build in the list. To open it from the build's Overview, click Actions in the upper left corner.

Re-run Build
This action will restart the current build only, omitting other builds in its chain if any. It might be helpful if the build failed due to certain infrastructure problems.
Remove Build
This action will delete the build from the list.
Pin Build
You can pin a build to prevent it from being removed during a scheduled clean-up.
If the current build is a part of a chain and has snapshot dependencies on other builds, you can choose to apply this action to all its preceding builds in the chain.
A pinned build can be unpinned manually anytime.
Add Tags to Build
Build tags are labels that can help:
Organize the history of your builds.
Quickly navigate to the builds marked with a specific tag.
Create an artifact dependency on a build with a particular tag.
In the Edit tags dialog, enter one or more tags separated by space, comma, or semicolon. For example, v2022 release will create two tags: v2022 and release.
If you click a certain tag when viewing a build list, this will filter out other builds, so you can focus only on the builds with this tag.
Apart from the Actions menu, you can tag a build in the Run Custom Build dialog and in the Pin Build dialog.
You can also add and modify build tags using service messages and TeamCity REST API.
Add Build to Favorites
You can add builds to favorites to have quick access to them. Favorite builds can also be set as a filter option for notifications.
When added to favorites, a build will be marked with a star icon ![]() . Clicking it will remove the "favorite" status.
. Clicking it will remove the "favorite" status.
TeamCity can automatically mark your manually triggered and personal builds as favorites. To achieve this, enable the respective setting in your user profile settings.
To view your favorites, click your avatar in the upper right corner of the screen and choose Favorite Builds.
Compare Two Builds
The Select for comparison action of the build's Actions menu (in Build Results) is available only in the new TeamCity UI. You can switch to it from a classic UI mode by clicking the magic wand icon in the upper right corner of the screen.
This action allows comparing the settings and results of the current build with any other build from this build configuration, side-by-side. It shows the statistics and differences of their parameters, revisions, statistics, and tests.
This mode is especially helpful when the current build configuration is managed and monitored by multiple users. For example, if a build has no changes in the project code but fails for no obvious reason, you can compare this build with the last successful build and analyze their differences to find the most probable cause of the failure.
Manually Change Build Status to Failed or Successful
Project administrators can manually change the successful build's status to failed, and vice versa. There are following common use cases for this:
From successful to failed:
The build has some problem which did not affect the final build status, but you want to reflect the problem's presence in the build history.
There is a known problem with the build, and you want this build to be ignored by a QA team.
You have previously mistakenly marked the build as successful.
From failed to successful:
You need to change the last successful build anchor when using build failure conditions. If your last build failed because of an incorrect value of a metric and this new value is valid, you can mark this build with a successful anchor.
You want to allow using an incorrectly failed build with good artifacts in Artifact Dependencies.
For a running personal build, you can mark the current failures as non-relevant to allow the pretested commit to pass.
The " Mark as successful " action is not available for builds that failed to start.
Label Build Sources
TeamCity can label (tag) sources of a particular build in your VCS repository. The list of applied labels and their application status is displayed on the Changes tab of Build Results.
You can configure automatic labeling or label each build manually, from the Actions menu. Manual labeling uses the VCS settings actual for the build.
Merge Build Sources
TeamCity can merge the code of one source branch to another: for example, after an approved code review.
You can configure automatic merge or do it manually for each build, from the Actions menu. The pop-up dialog will prompt you to select the destination branch for a merge and enter a merge commit message.
Build Configuration Actions Menu
The Build Configuration Home page has own Actions menu with a different set of actions. It allows you to:
Apply Action to Multiple Builds
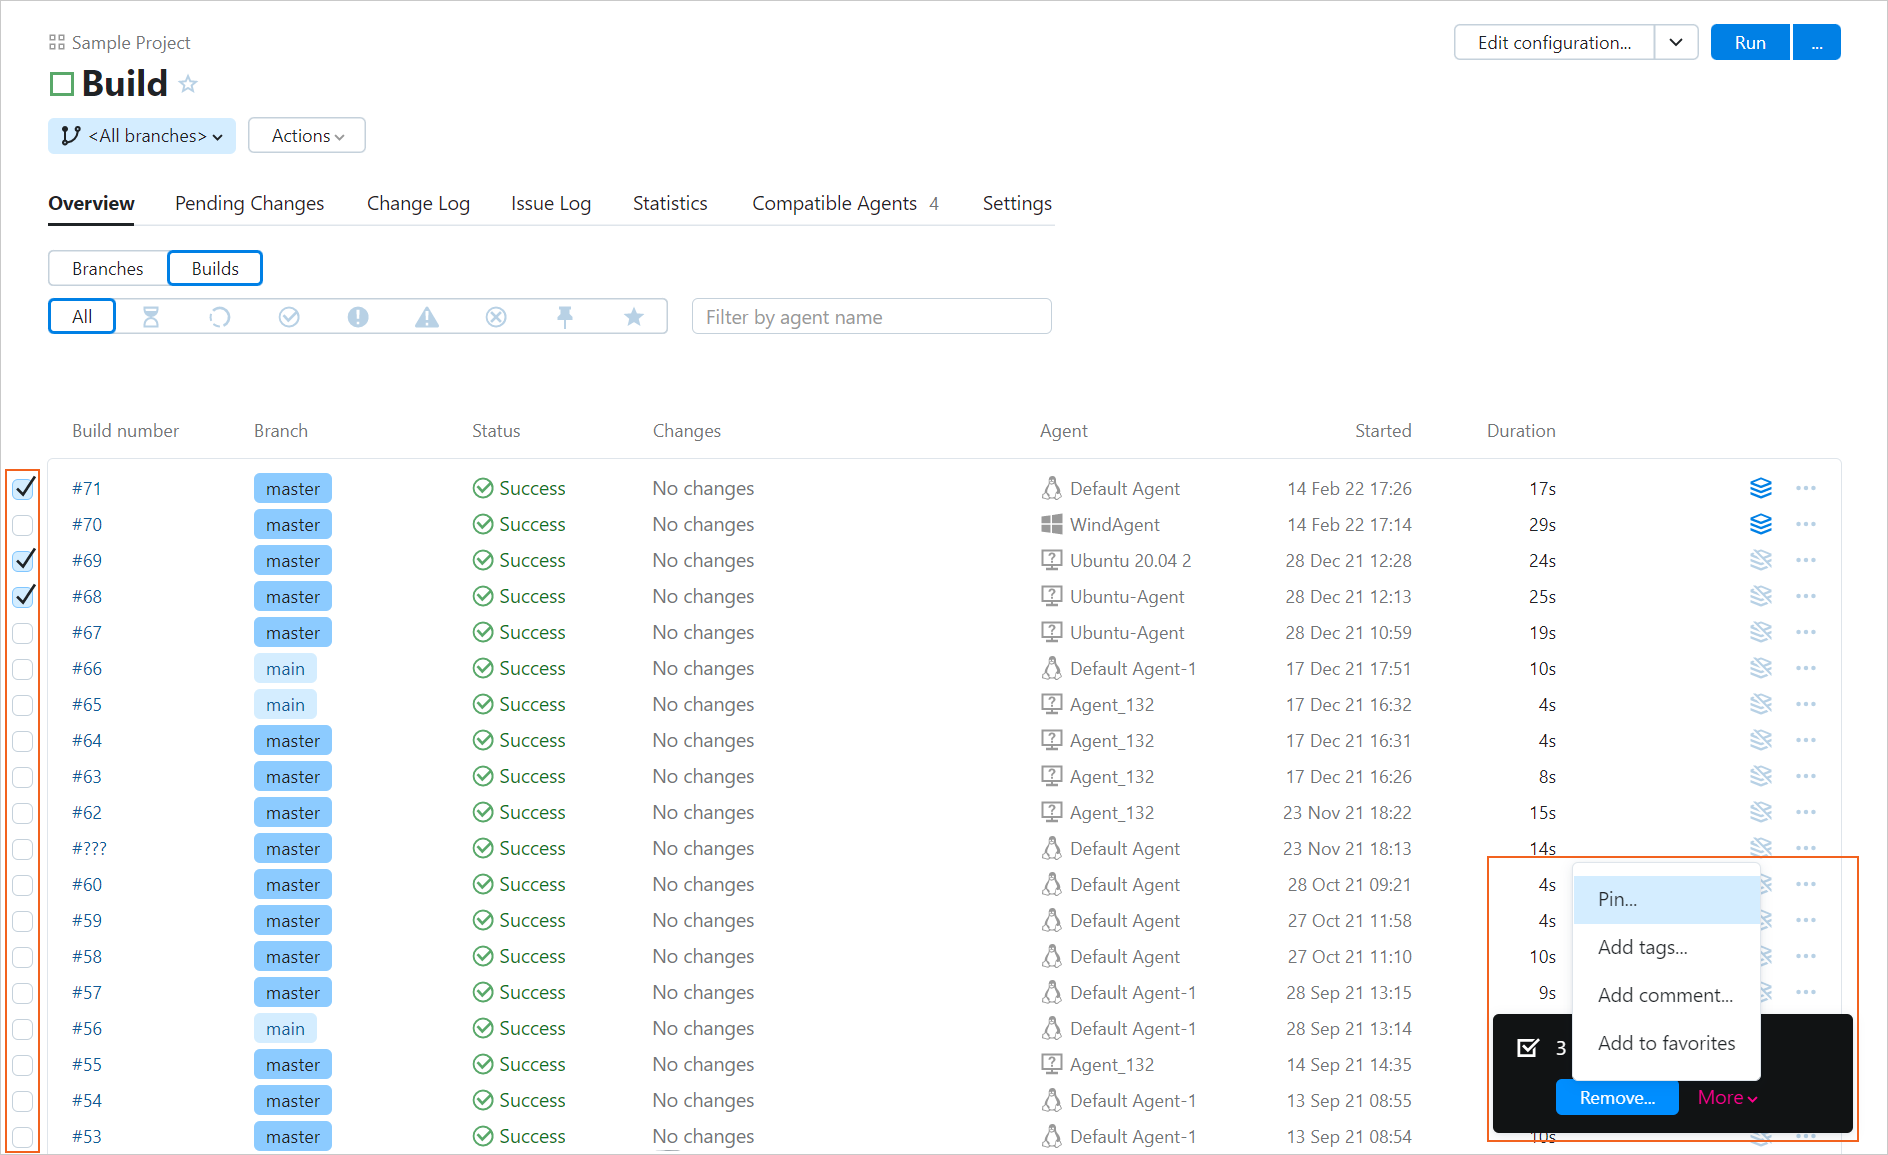
You can manage multiple builds at once (for example, pin, add tags, compare two builds, remove builds, add builds to favorites, or add comments). For this, select the required builds on the Overview tab of Build Configuration Home (checkboxes appear when hovering over builds), and use commands of the pop-up context menu. If you need to select a range of builds, press Shift and click build checkboxes at the edges of the range to be selected.
