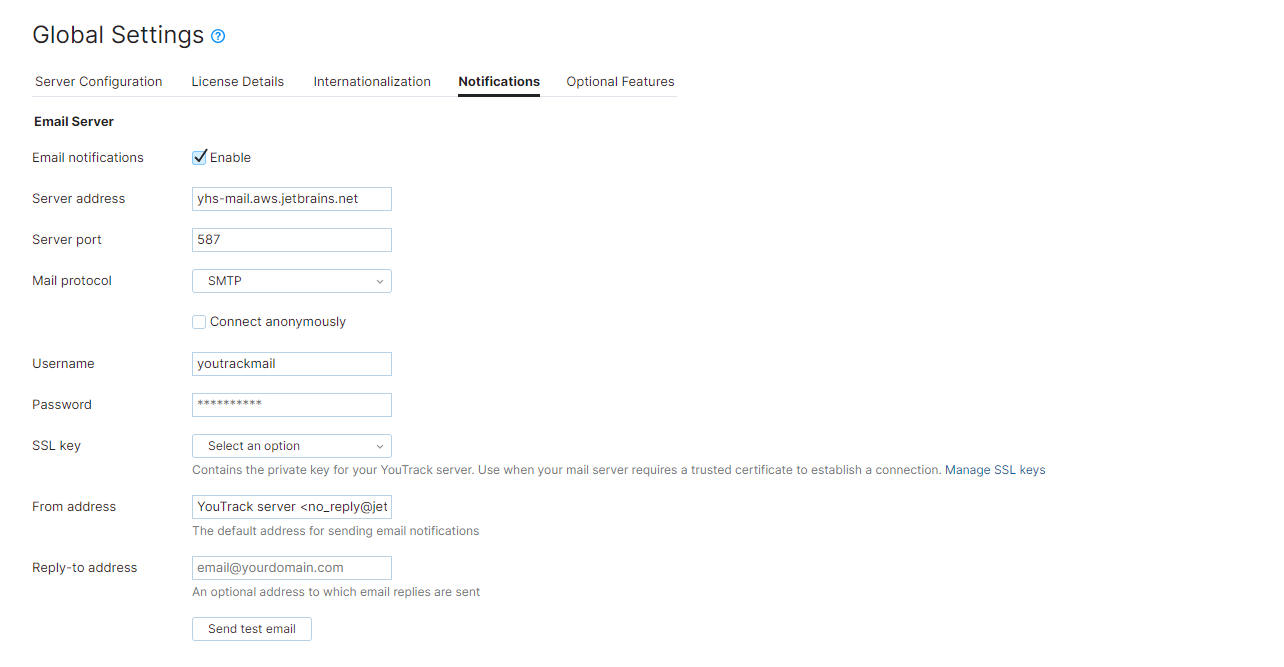
Enable Email Notifications
On the Global Settings page, you configure the connection between YouTrack and a mail server. This enables notifications in YouTrack over email.

To enable email notifications:
From the Administration menu, select .
Select the Notifications tab.
Select the Enable checkbox for the Email notifications setting.
Enter values for the following settings:
Setting Description Server address Enter the server address of your mail service. Server port Enter the connection port for the mail service. Mail protocol Select the protocol that is used by your mail service. Connect anonymously If your mail server does not require authentication, enable this option.
When enabled, YouTrack connects to your mail service without sending a username and password. The input fields for SMTP username and SMTP password are disabled. Values that are stored in these settings are ignored.
Username Enter the username of the account that is used to access the mail server.
If you're connecting to Gmail, additional security requirements may apply. For details, see Special Requirements for Connecting to Gmail.
Password Click the Change password button to specify the password for account that is used to access the mail service. SSL key Select a previously uploaded SSL key or trusted certificate for secure connection to your mail server. For details, see SSL Keys.
From address Enter the address that you want to use to send email notifications. For more information about email addresses, see From and Reply-to Addresses. Reply-to address Enter an optional address that you want to use for email replies. For more information about email addresses, see From and Reply-to Addresses. When finished, click the Save button.
Test the connection.
Check the email account that you sent the test message to and verify that the message was delivered.
If successful, the connection to your external mail service is configured and ready for use.
If unsuccessful, update your settings and test the connection until the message delivery is successful.
Special Requirements for Connecting to Gmail
Google accounts have settings that restrict access to third-party applications that use less secure sign-in technology. By their definition, this applies to connections that authenticate with a username and password, which are vulnerable to hijacking.
The setup requirements are based on the current setting for managing less secure apps. The requirements apply to the Google account that you use to authenticate with the Gmail server.
If you're connecting with a Google account that you manage yourself, generate an application-specific password (App Password) in your Google account and use it for authentication. Leave the option to enable access for less secure apps in your Google account Off.
App Passwords can only be used with accounts that have 2-Step Verification turned on.
If you use a Google account that is managed by your organization as part of Google Workspace, make sure that the option to Disable access to less secure apps is switched on.
The Google account that you store in the mailbox integration settings must have 2-Step Verification enabled. To connect to the Gmail service with this account, generate an application-specific password in your Google account.
For the Username, enter the username for your Google account.
For the Password, enter an application-specific password that you generated in Google.
While you may still allow access to less secure apps, Google has indicated that it will eventually discontinue support for this type of authentication. We strongly encourage you to enable 2-Step Verification and use an App Password to authenticate with the Gmail service.
Migrating from YouTrack InCloud to YouTrack Standalone
When you set up a YouTrack Standalone installation using a database that was previously exported from YouTrack InCloud, the settings that connect to the mail service that is hosted by JetBrains are still present in the database. This often happens when a company uses our free plan or trial to test the application in the cloud, then later decides to switch to an on-premises installation.
To ensure the deliverability of email messages that are sent from our hosted email service, connections from outside our hosted infrastructure are periodically blocked. If you're not already using your own email notification service, you need to set it up and connect it to your YouTrack Standalone installation. Otherwise, the email messages that are routed to our hosted service will not be delivered.
