OpenOCD support
If your embedded target supports on-chip debug with OpenOCD (Open On-Chip Debugger), use the OpenOCD Download & Run configuration. It works for CMake-based projects, including the case of STM32CubeMX, as well as Makefile projects, and custom build targets.
Required tools
OpenOCD will be used as a flash probe and remote gdbserver.
In , you can check whether the OpenOCD location was detected correctly and set the path manually if needed.
Toolchain
Your cross-compiler toolchain should be configured in advance.
For ARM Cortex-M and Cortex-R MCUs, install GNU ARM toolchain. After the installation, make sure the toolchain is presented in the system PATH: run
arm-none-eabi-gccfrom the command line, and your system should recognize this command.For all other platforms, install the platform-specific toolchain and set up the tools in or in your CMake script (take a look at the template CMakeLists.txt).
If you are working with an STM32CubeMX project, then installing STM32CubeCLT and STM32CubeMX is a part of the project set up, and STM32CubeMX generates the linker file automatically.
In addition to the tools required for all platforms, install the ST-LINK/V2 driver.
For GNU ARM Toolchain, use version 2019-q3 (and later) or 2018-q2 (and earlier). See the issue with 2018-q4.
Only the MinGW and MinGW-w64 environments are supported (CPP-15034).
Create an OpenOCD configuration
Go to , click
 and select OpenOCD Download & Run from the list of templates.
In the settings, you can select the client GDB debugger and board config file, adjust the GDB and Telnet ports, and set up Download/Reset options.

When setting up the board config file, you can provide the path manually or click Assist and choose from the standard options:

To adjust the board config file to your needs (for example, when you are working with a non-standard device or need to keep several config files), click Copy to Project & Use: the selected file will be copied into your project tree, and you'll be able to open it in the editor and modify as required.
Run/debug an OpenOCD configuration
When you Run
 this configuration, the compiled firmware is downloaded to the target board, and then the chip is reset.
When you Debug
 , the firmware is downloaded, the chip is reset, and then the remote debugger is attached to the MCU.
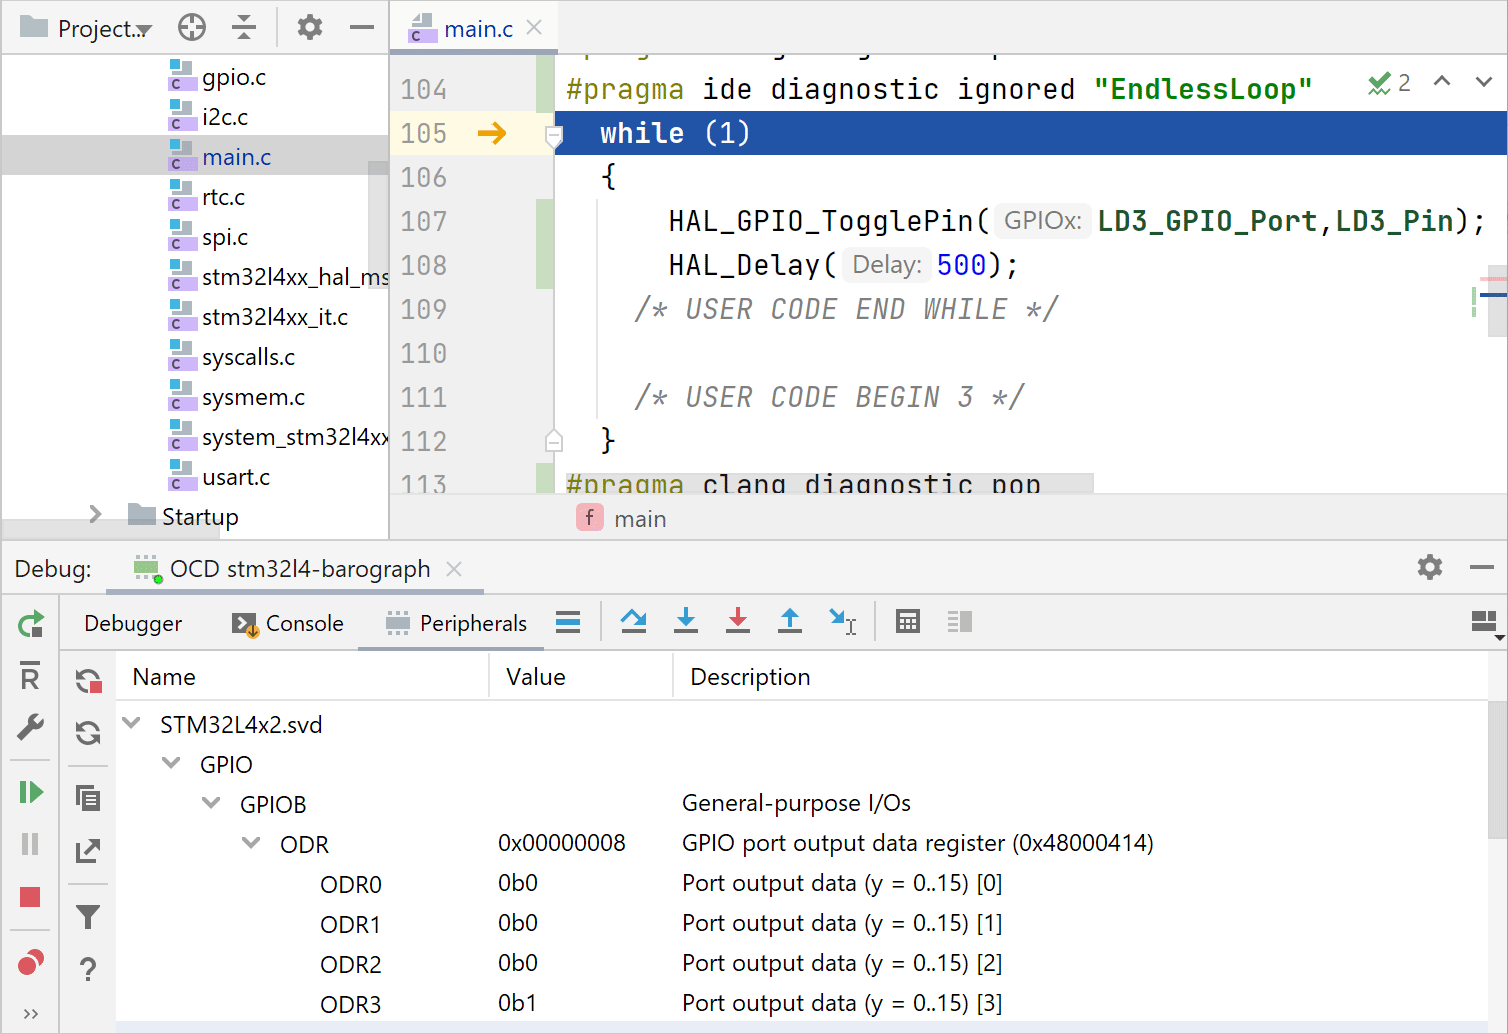
Now your firmware running on-chip can be debugged using the entire set of CLion debug features, including Memory view and the Peripherals tab showing peripheral registers and bits.
Also, notice the
 button on the left-hand bar of the Debugger tool window. When pressed, it sends the chip reset command selected in the Reset option of the configuration settings.