Add a new notebook
There are two ways to add a new notebook to a workspace. You can create a notebook, or you can import a notebook (.ipynb or .datalore) from your file system or a URL.
Create a notebook
On the Home page, click New notebook.

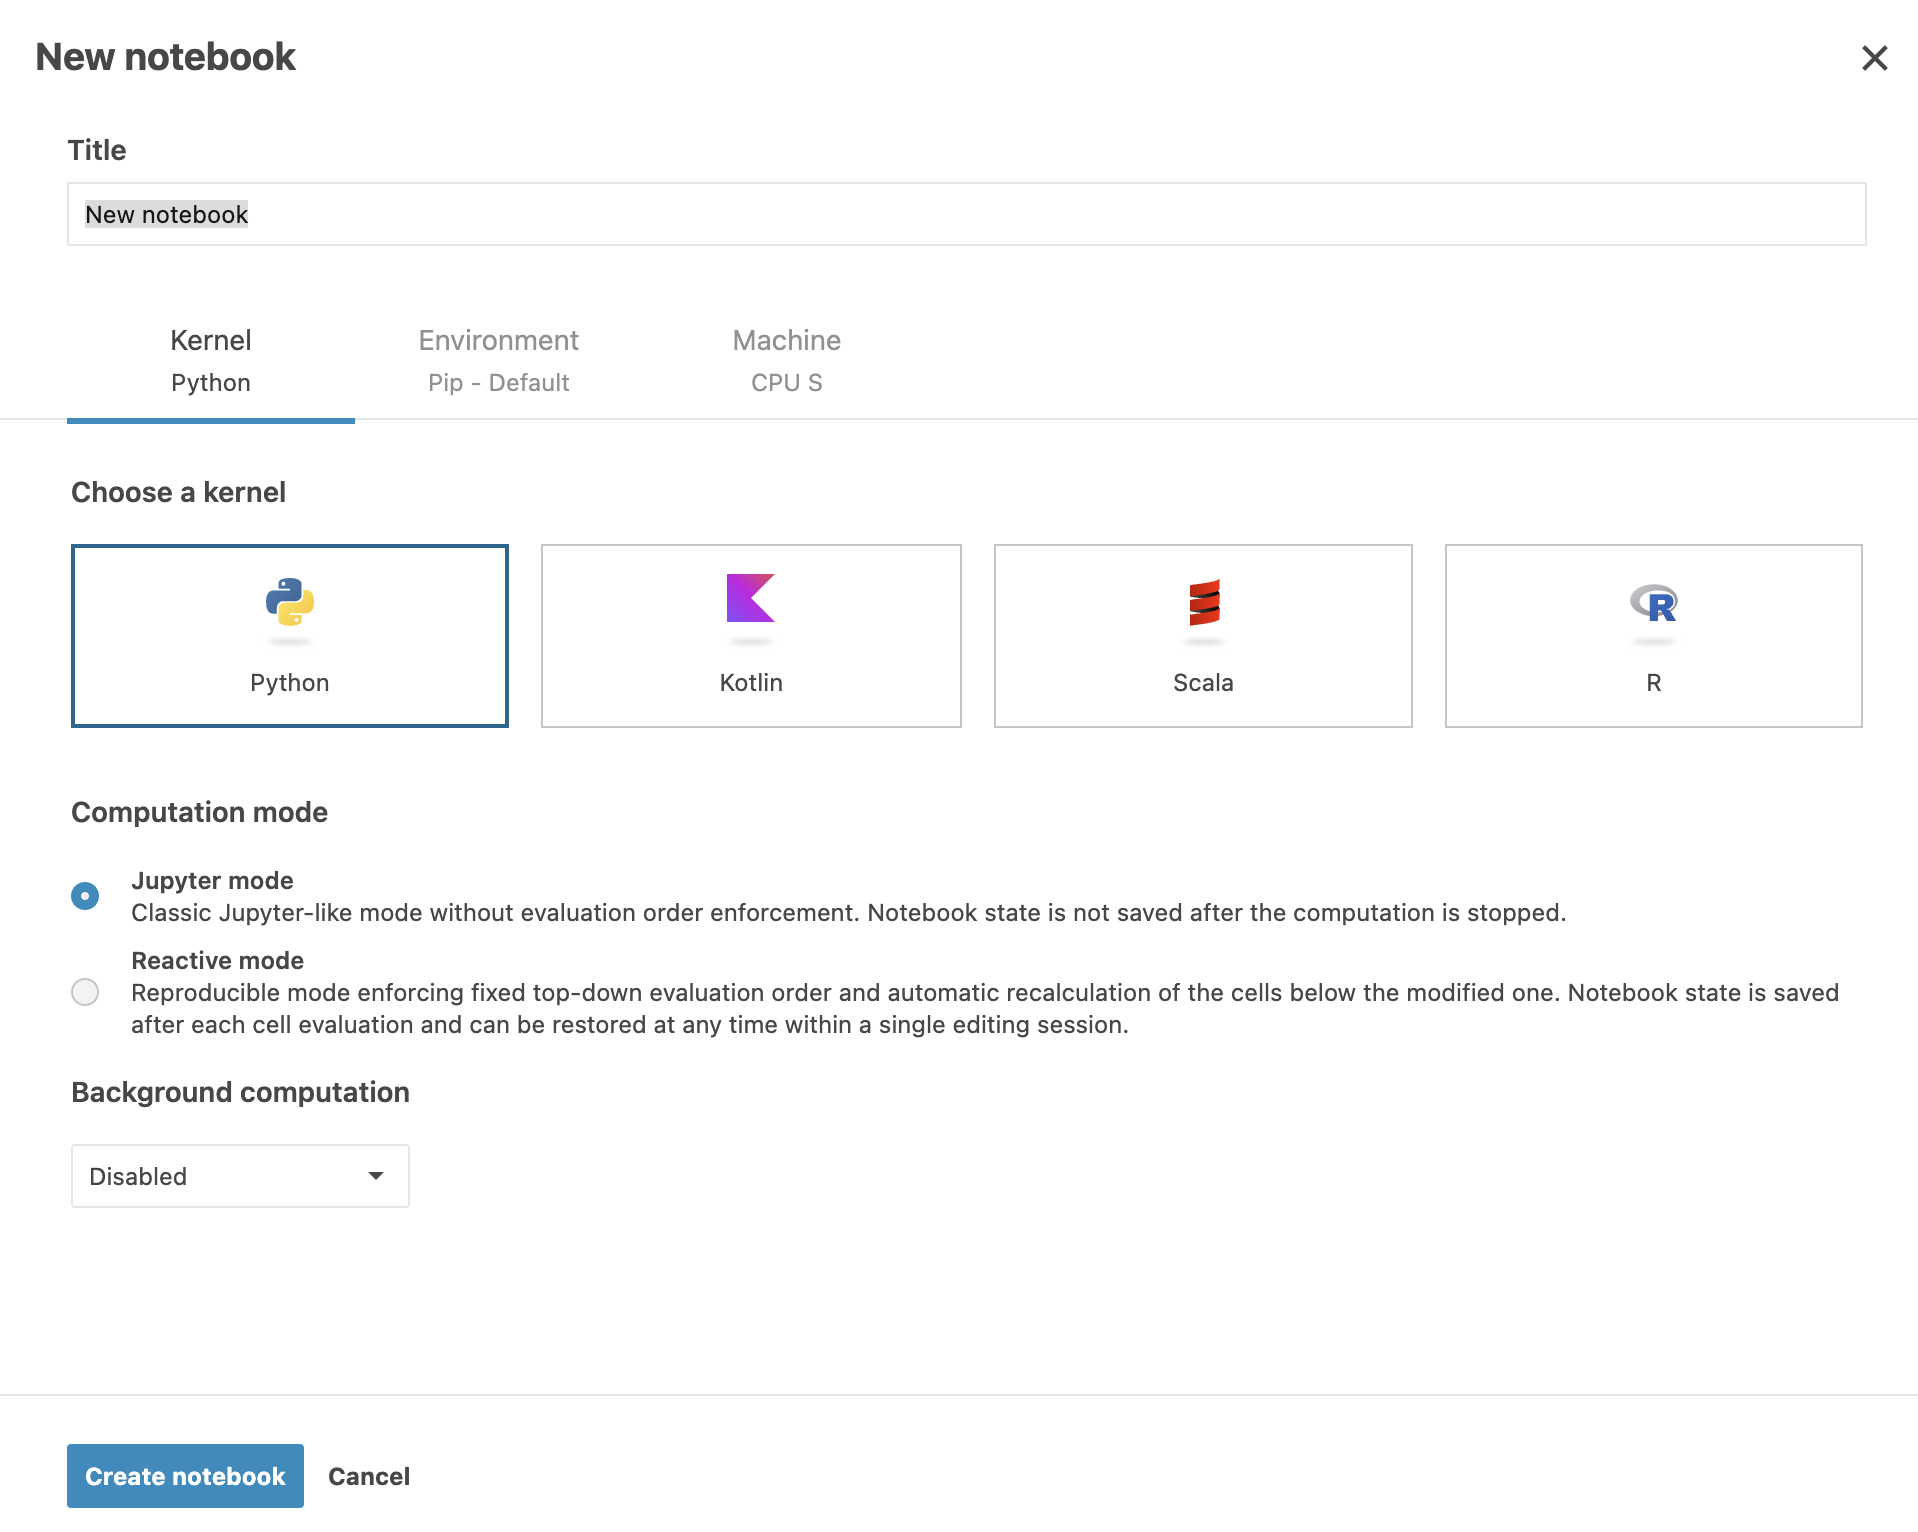
You are now redirected to the New notebook dialog.
Provide a new title for your notebook in the Title field.
On the Kernel tab:
Choose a kernel. Make your choice based on the language you want to use. The default Python kernel allows you to code in Python. Find more information about the kernels in Kernel management.
Under Computation mode, select whether you want to use Jupyter mode or Reactive mode.
(Optional) Under Background computation, expand the list to set up background computation (disabled by default). Find more details in Background computation.

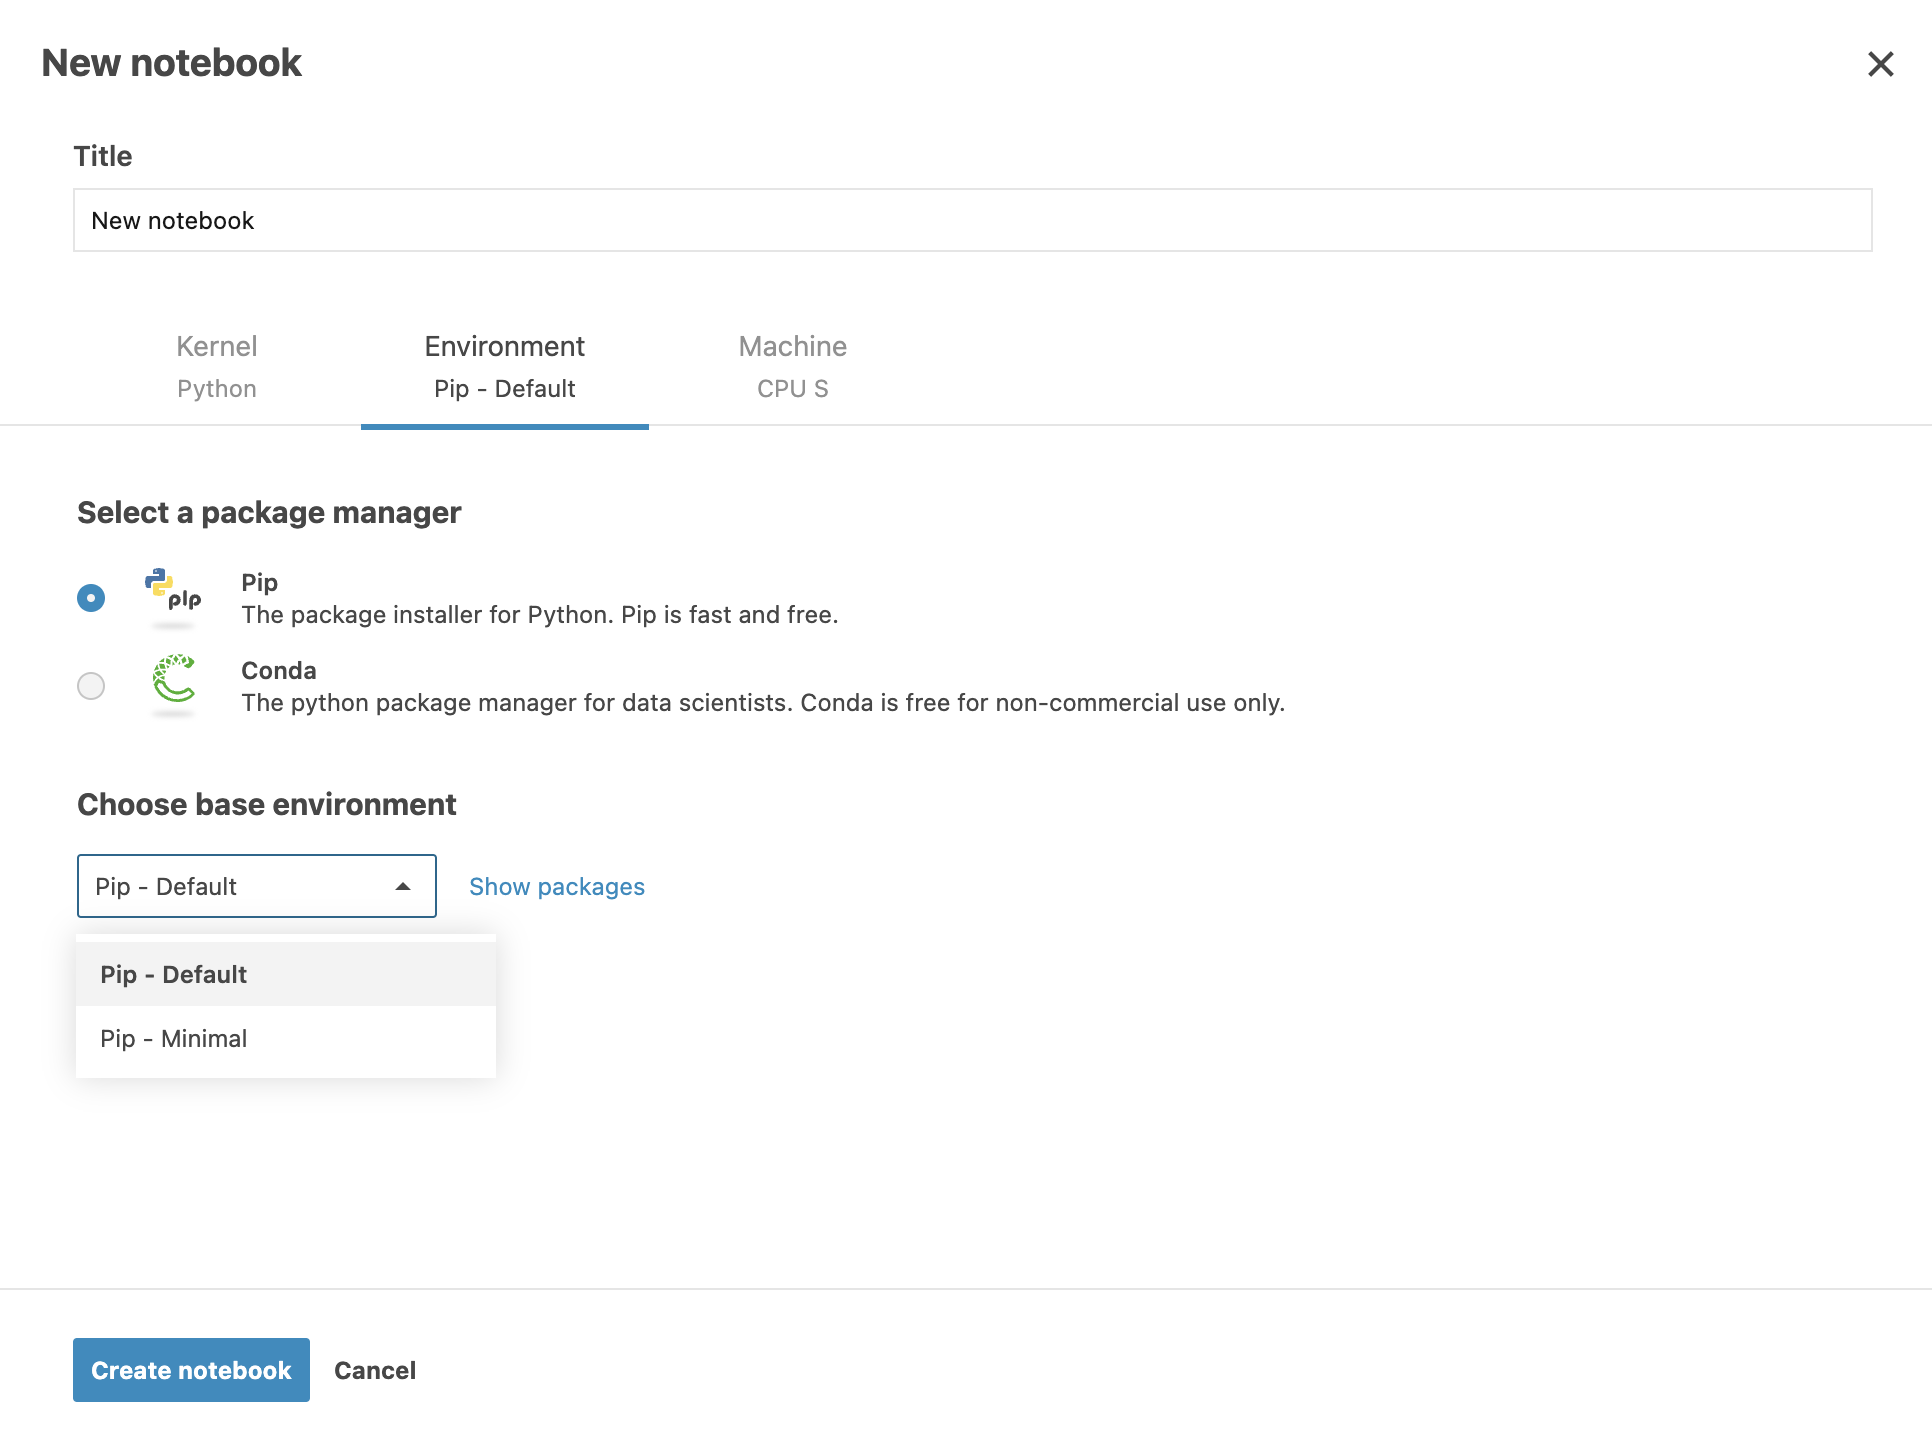
To set up environment for your notebook, switch to the Environment tab of the New notebook dialog. Do the following:
Select a package manager.
Choose a base environment.
Find more details in Environment.

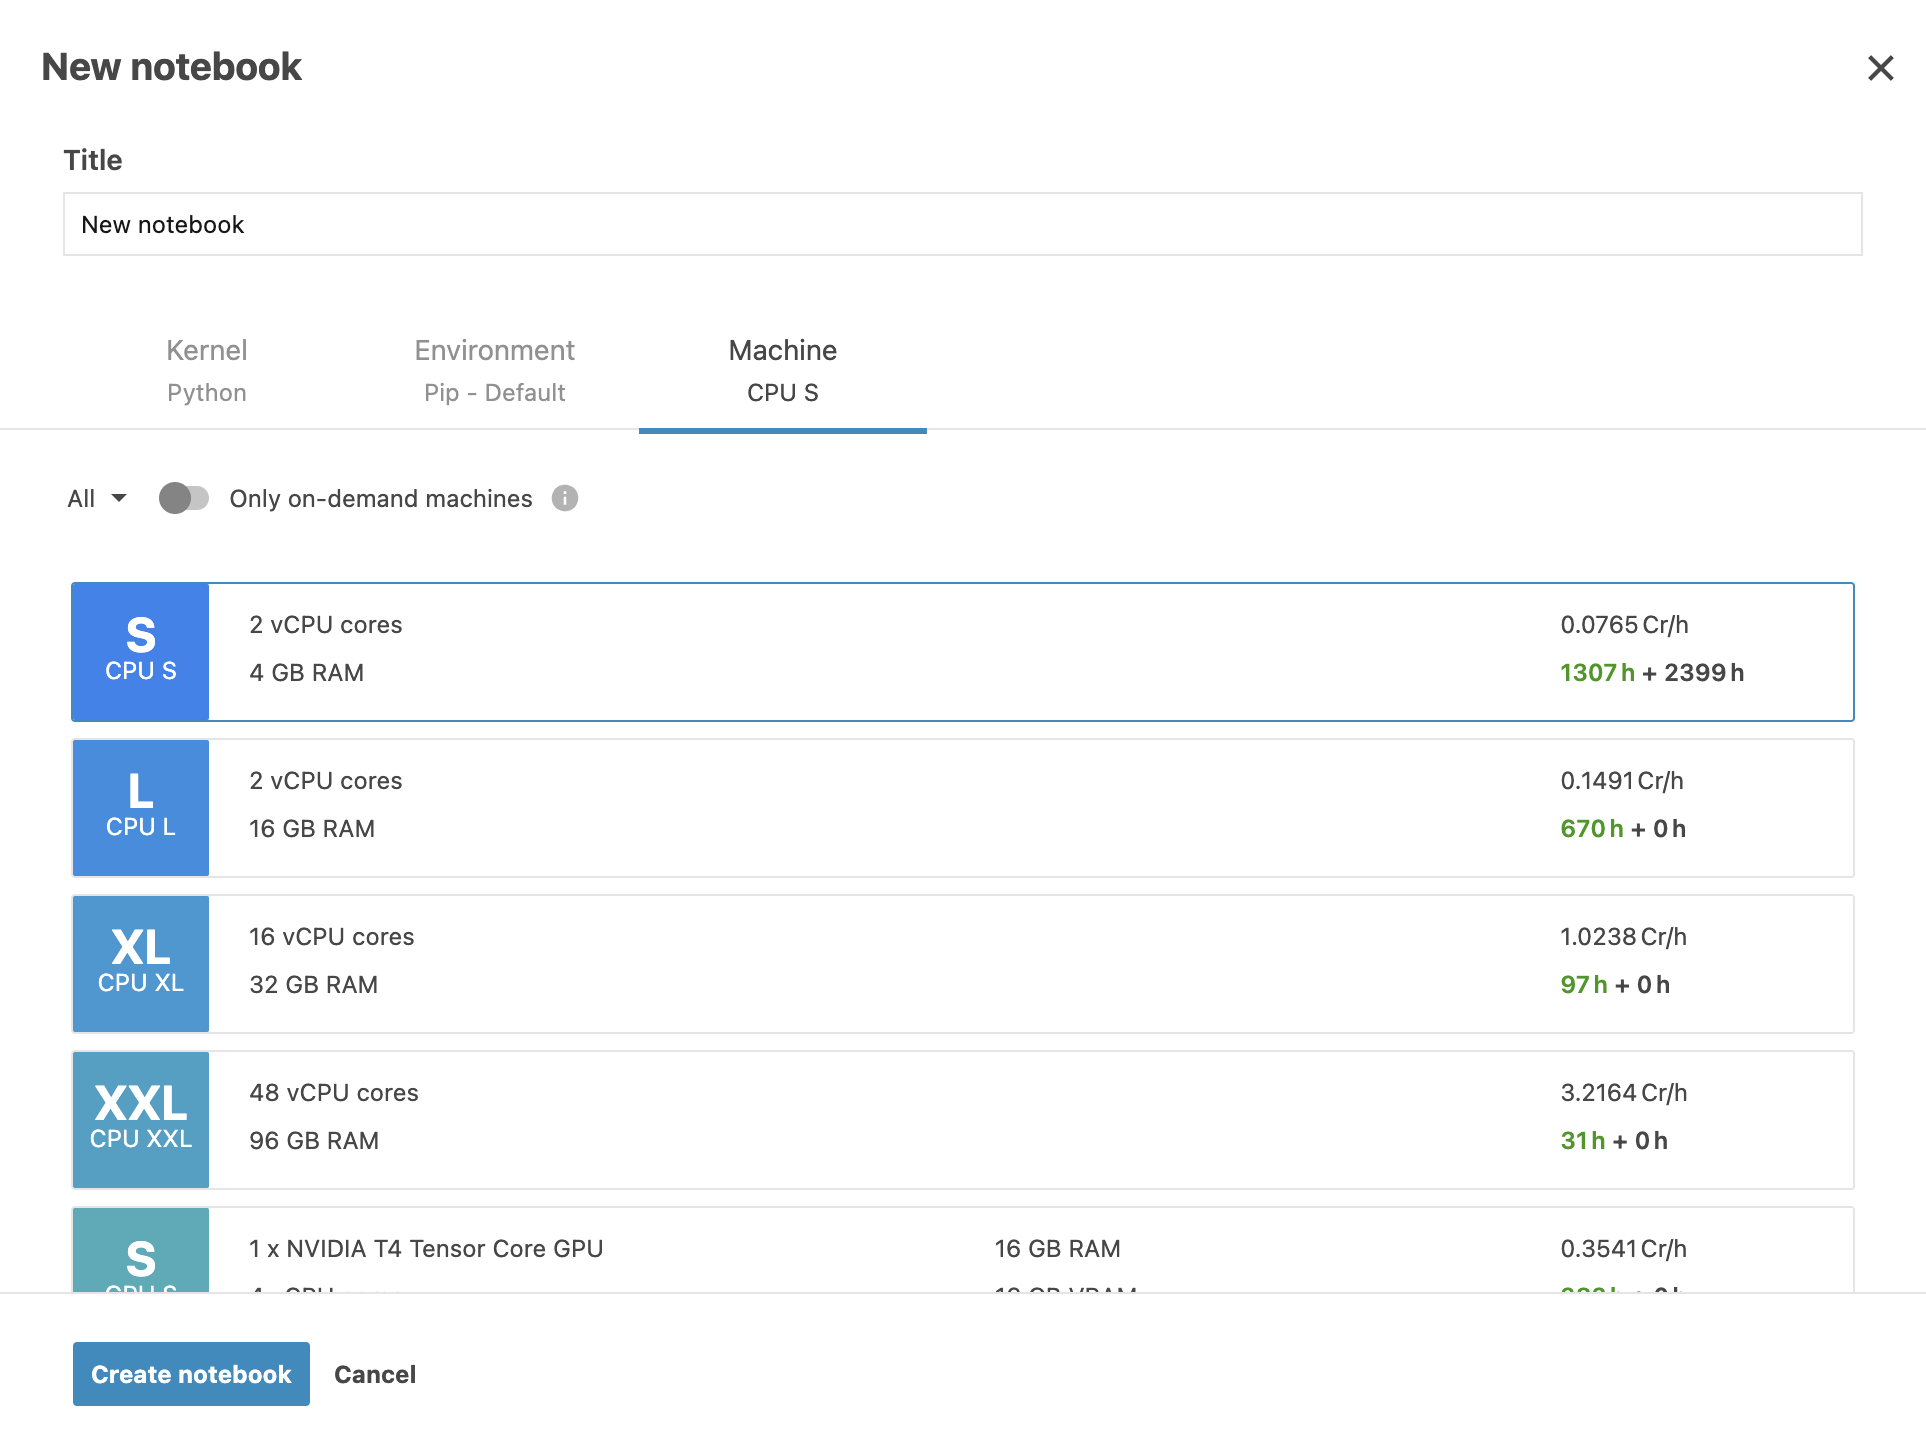
To set up your machine options, switch to the Machine tab of the New notebook dialog. You can do the following:
Select whether to use only on-demand machines.
Select a machine type for your computations.
Find more details in CPU and GPU machine options.

Press Enter or click the Create notebook to finish creating your notebook and open it in the editor.
Import a notebook
Click the arrow icon next to the New notebook button and select Import notebook.

Use one of the following options:
Specify the URL of the notebook you want to add and click Upload.
Drag the notebook from your file system.
Click Select a notebook from your computer to add the notebook using the file browser.

You can now see the Import dialog.