Kotlin Notebook
Kotlin Notebook brings the versatility of notebooks to IntelliJ IDEA.
Notebooks are interactive editors that integrate code, graphics, and text in a single environment. When using a notebook, you can run code cells and immediately see the output, gaining real-time code insights.
Kotlin Notebook is a plugin that allows you to create and edit notebooks smoothly within the IntelliJ IDEA ecosystem while coding with Kotlin.
Kotlin Notebook provides you with a rich set of tools to tackle tasks like:
Data analytics and visualization: you can intuitively retrieve, transform, plot, and model your data while getting outputs of your operations as you code.
Prototyping: you can run code in small chunks and see the results in real time. This hands-on environment enables rapid experimentation and iteration.
Explore and test APIs: Kotlin Notebook offers the ability to call APIs within cells and interact with external services.
Code documentation: you can include inline comments within code cells and text annotations within Markdown cells to provide further context, explanations, instructions, and more.
Additionally, you can effortlessly share your work across Kotlin Notebook, Datalore, and Kotlin-Jupyter Notebook without issues. This compatibility is possible because Kotlin Notebook is based on our Kotlin Kernel, ensuring seamless integration among our different Kotlin notebook solutions.
Explore the sections below to learn about the Kotlin Notebook's usage and key features!
Enable the Kotlin Notebook plugin
This functionality relies on the Kotlin Notebook plugin, which is bundled and enabled in IntelliJ IDEA by default. If the relevant features are not available, make sure that you did not disable the plugin.
Press Ctrl+Alt+S to open settings and then select .
Open the Installed tab, find the Kotlin Notebook plugin, and select the checkbox next to the plugin name.
Create a notebook
Use one of the following options to create a new notebook:
On the Welcome Screen, open the Kotlin Notebook node and click New Notebook. You can create a notebook as a scratch file without adding it to a project, or within a new or existing project.
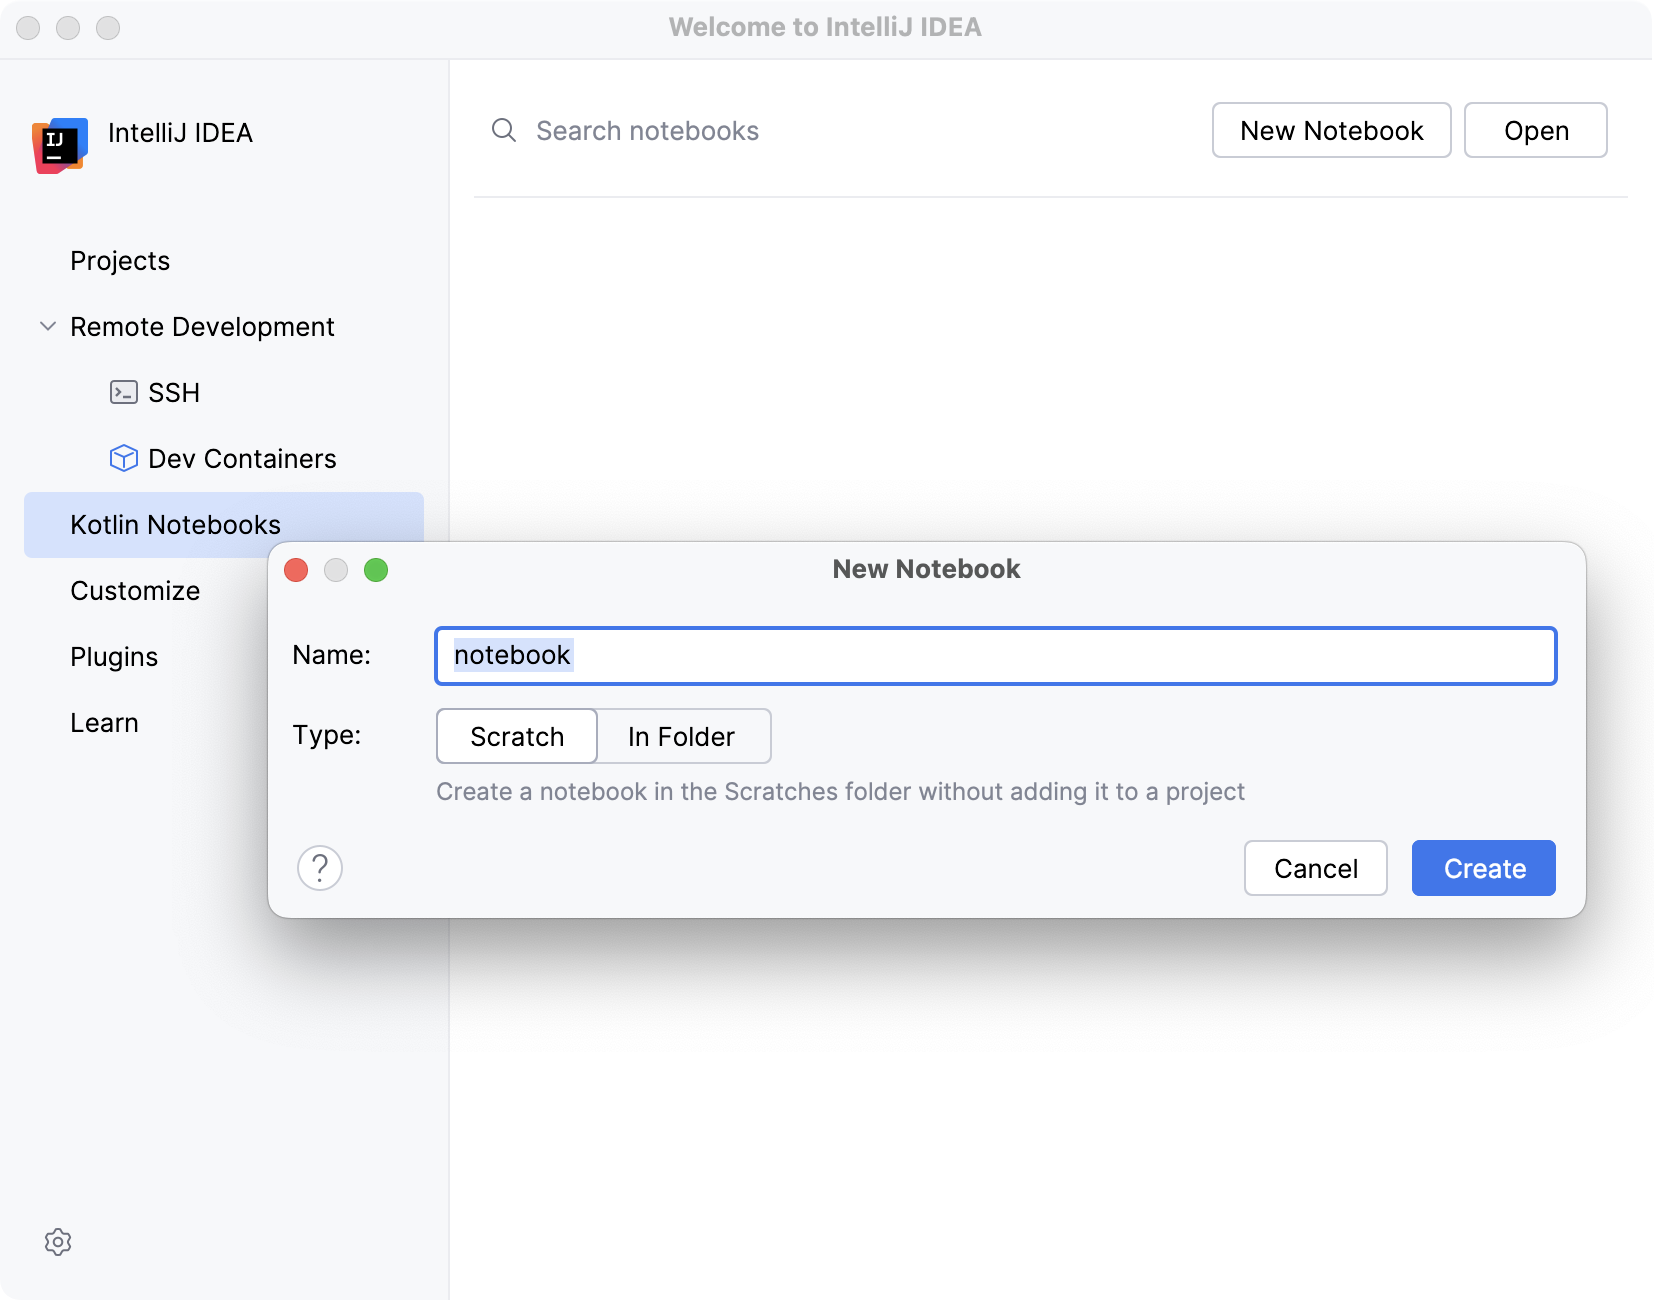
Select to create a new notebook in your current project or to create a notebook as a scratch file.
Right-click the directory in which you want to locate your notebook and select .
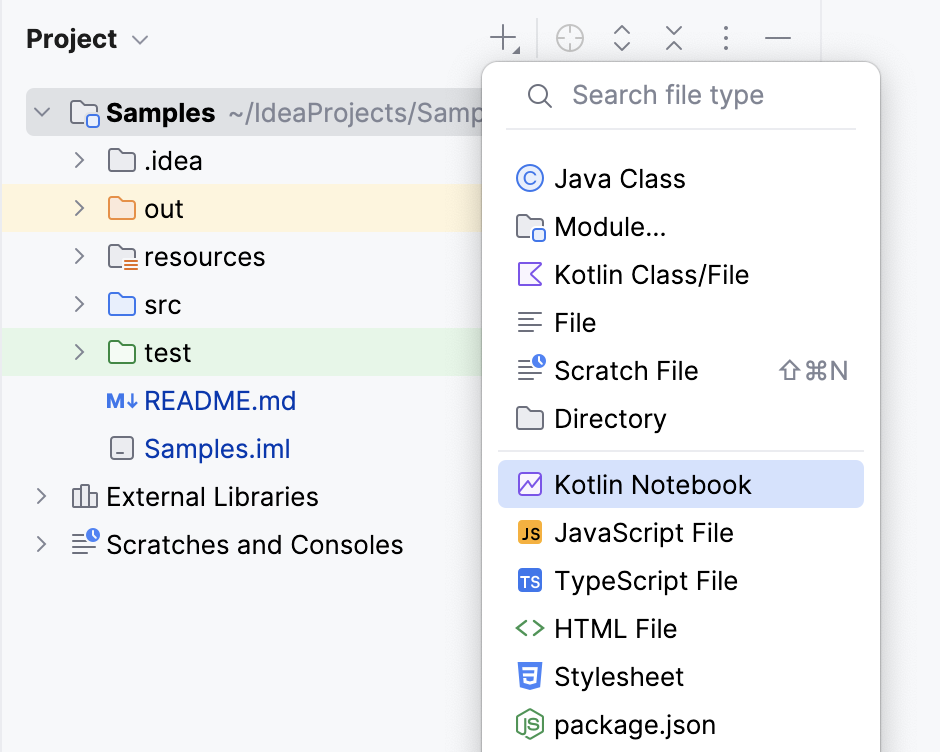
A file with a .ipynb extension is created.
Manage your notebook
At the top of your Kotlin Notebook, you can find the notebook toolbar. This toolbar contains buttons for quick cell actions that allow you to dynamically run or modify your code and see the output immediately.

The main actions you can perform from the toolbar are:
Add code cell below
Cut selection
Copy selection
Paste selection
Move cell up
Move cell down
Run cell and select below
Interrupt kernel
Restart kernel
Run all cells
Clear outputs
Delete cell
Code
Select type of cell
Create gist
See Kotlin Notebook settings
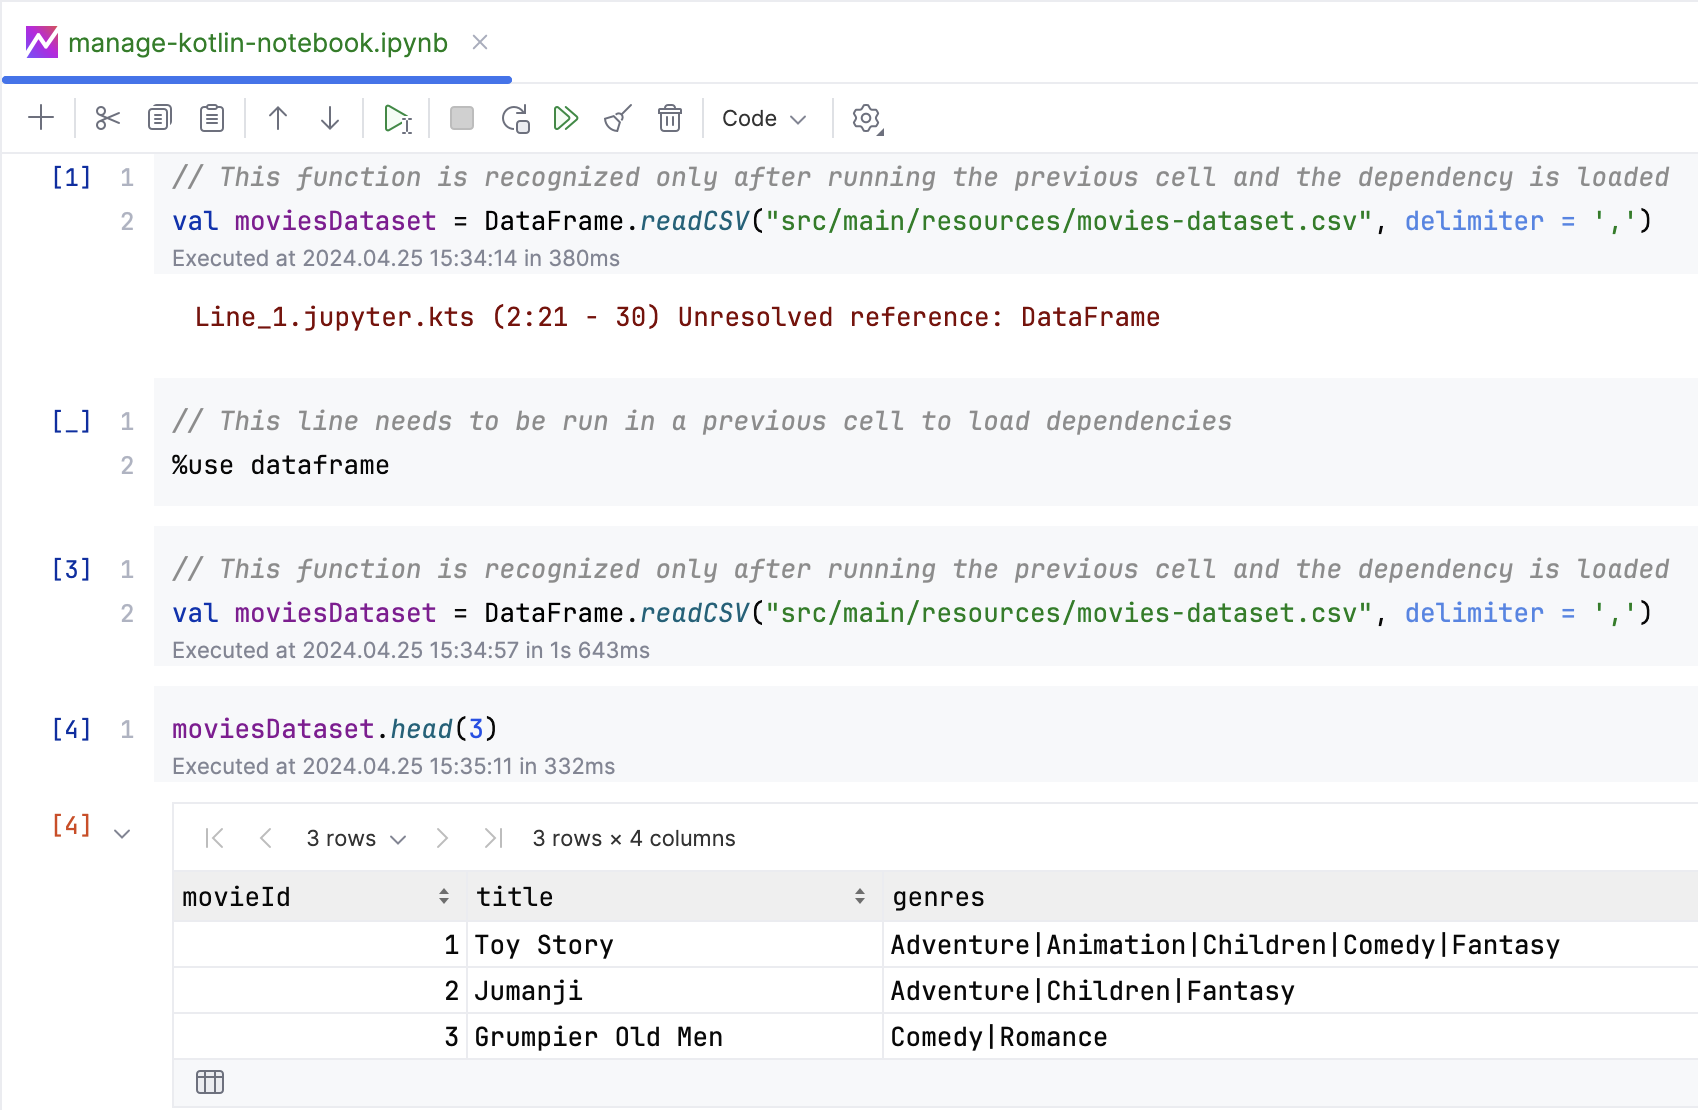
When working with notebooks, each cell contributes to the whole state of the notebook, but only after you run the cells. The order of cells in the notebook itself does not matter, but the order of running the cells does.
For example, when using a library, although you can run any cell at any time, you need to run the cell that imports the library before running the cells that call the library.
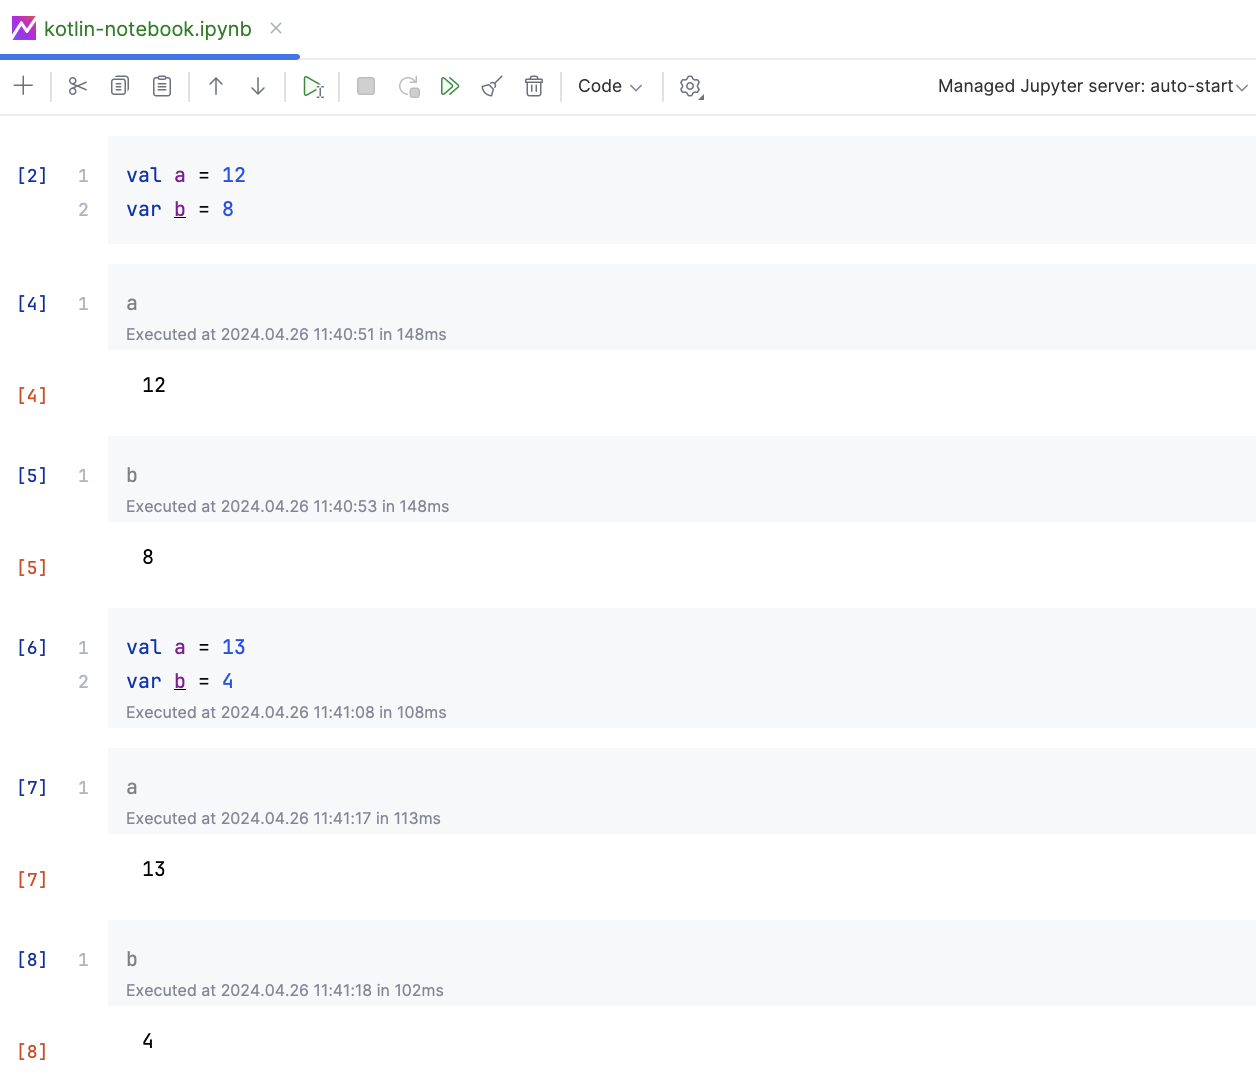
Unlike traditional programming, notebooks allow you to declare multiple variables with the same name within different cells. However, each new declaration of a variable with the same name overrides the previous ones. Only the most recent declaration you run is valid in subsequent cells.
Usually, notebooks have code running under the hood, which may cause unexpected behavior when joining cells. This behavior is because if one of the joined cells contains code that modifies the environment, the changes might not be immediately reflected in the following cell.
Notebooks may have limitations on certain language constructs. Generally, only valid function-level operations are allowed, like working inside a function body.
Access the Kotlin Notebook API
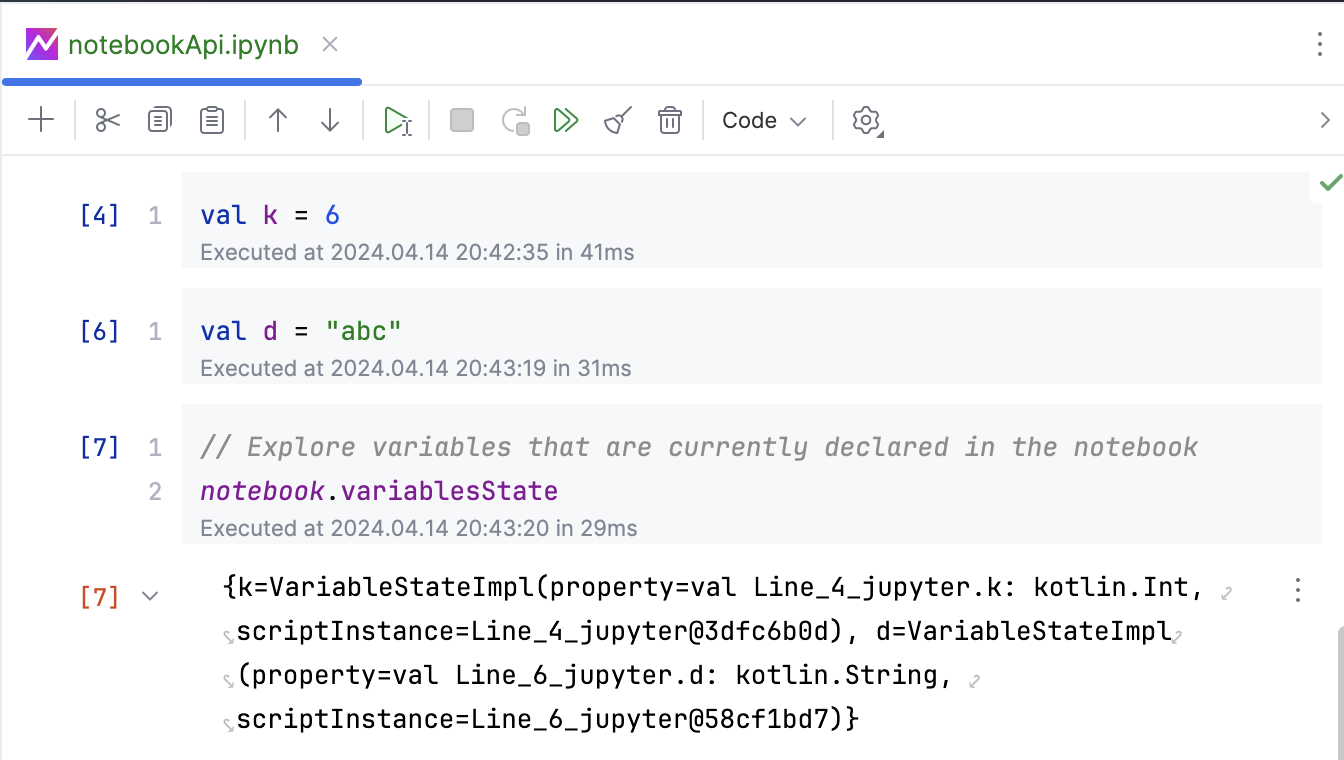
You can access the Kotlin Notebook API directly within cells. The Kotlin Notebook API provides functionality to customize and configure your notebook behavior, such as handling outputs, retrieving information from previously executed code snippets, seamless integration with libraries, and more.
For example, notebook is an entry point for the Kotlin Notebook API. You can use notebook with certain methods to retrieve notebook insights like the executed code cells or declared variables.
Add dependencies
You can add dynamic dependencies to your notebook from a remote Maven repository or local ones (local JARs). To add dependencies, you have two options: annotations or Gradle-like syntax.
Add dependencies using annotations
There are two annotations to manage dependencies in your Kotlin Notebook:
@file:DependsOn():In this annotation, you need to specify the coordinates of the dependency. This annotation adds artifacts (like JAR files) to the notebook's classpath. It supports absolute and relative paths to class directories or JARs, as well as Ivy and Maven artifacts:@file:DependsOn(“io.ktor:ktor-client-core-jvm:$ktorVersion“)@file:Repository():In this annotation, you need to specify the absolute path of the dependency. This annotation adds a directory or an Ivy or Maven repository to the notebook environment. To specify a Maven local repository, use@file:Repository("*mavenLocal").
Add dependencies using Gradle-like syntax
You can load any library from the Maven repository using Gradle-like syntax in any cell, specifying repositories, locations, and so on:
Utilize line magics
Kotlin Notebook provides special commands, starting with the % character, that interact with the notebook on a per-line basis. These commands, known as line magics, allow you to import libraries, configure output settings, and perform more operations.
Import supported libraries
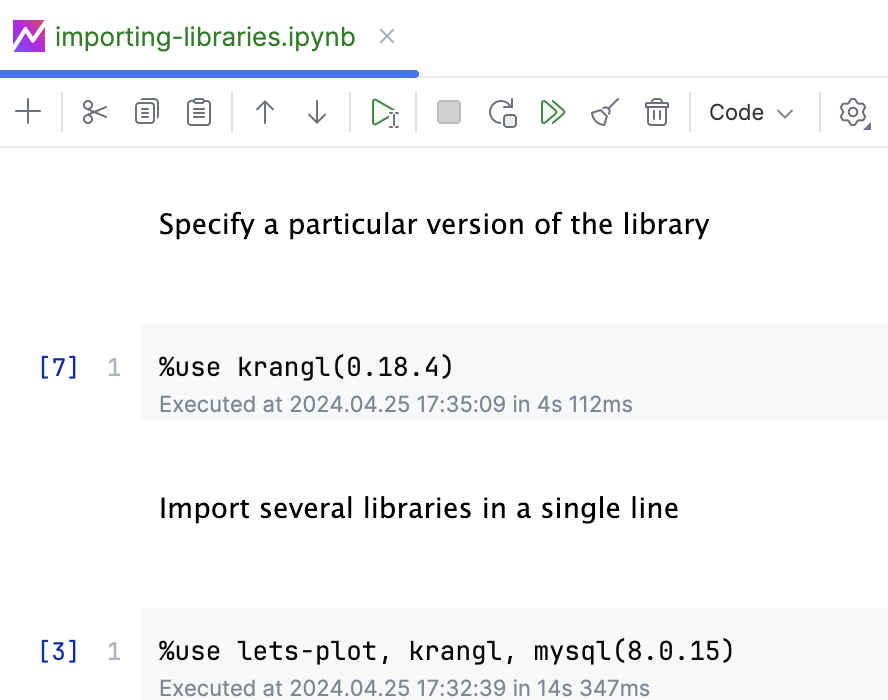
Kotlin Notebook comes with a set of integrated libraries to perform various tasks, from deep learning to HTTP networking. You can import these integrated libraries just by running the %use line magic before the library's name.
Along with the %use keyword, you can specify a particular library version or include several libraries using a single %use statement.
Integrate new libraries
You can add and use libraries that are not yet integrated into Kotlin Notebook. There are two ways to integrate a new library: creating a JSON library descriptor or using the Kotlin Notebook API.
Create a JSON library descriptor
To support a new library and make it available via the %use line magic, you need to create a library descriptor. The library descriptor is a .json file defining the most frequent library features, such as properties, renderers, and initial imports:
This example shows the usage of a custom renderer defined within the library descriptor:
Use the Kotlin Notebook API
To add a new library using the Kotlin Notebook API, you need to define an integration class within your library and ensure the integration class name is in the current notebook classpath.
Once you have defined the integration class, you can leverage all available integration features provided by the Kotlin Notebook API. These features enable seamless interaction between your library and the Kotlin Notebook environment.
You can use the available integration features directly from the notebook cells employing the USE {} block along with the feature method. Here is an example with the import () method:
Use REPL commands
Use REPL commands to explore your notebook environment, understand the classpath, and inspect the values of variables during execution.
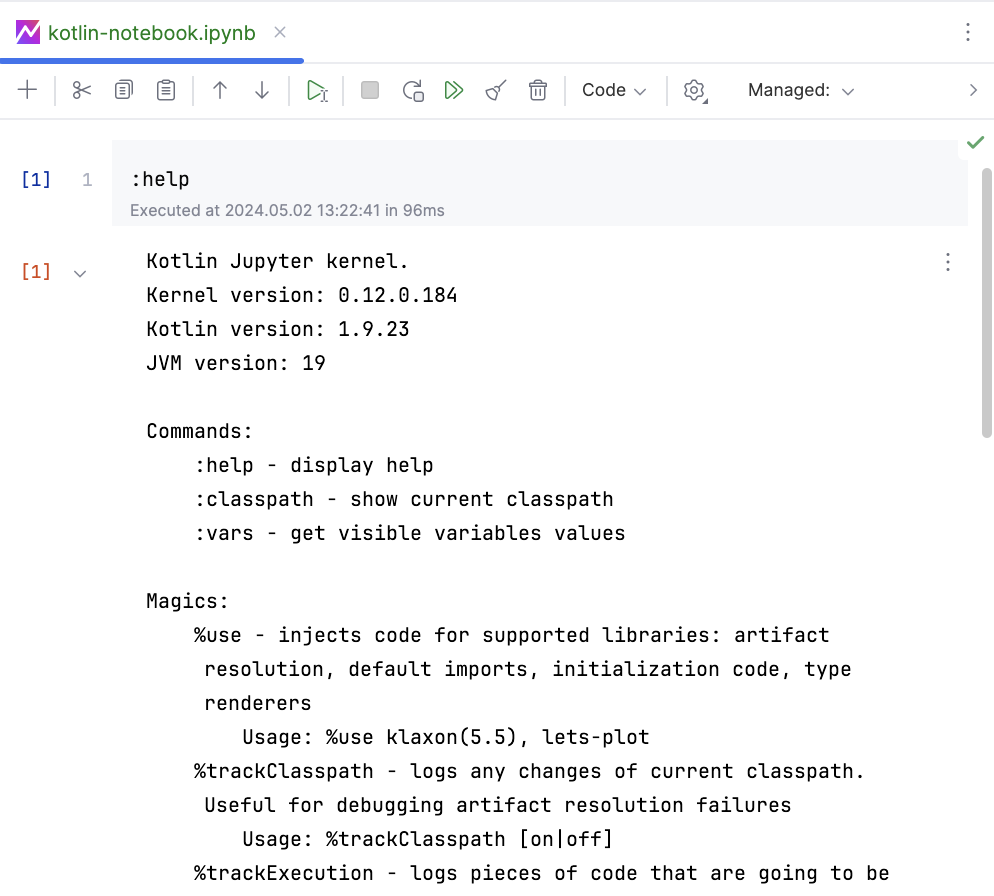
Kotlin Notebook supports the following REPL commands:
| Displays help information with details of the notebook version, line magics, and supported libraries. |
|---|---|
| Displays the current classpath of your notebook environment, showing a list of locations where the notebook searches for libraries and resources. |
| Displays information about the declared variables and their values. |
Render and display rich output
By default, Kotlin Notebook displays return values in text form. However, you can enrich the output by rendering graphics, HTML, or other MIME-encoded data format.
One approach is to send MIME-encoded results to the client using the MIME helper function. Another approach is to use the HTML helper function, which provides a simpler way to display HTML content directly. See samples of these functions in our Kotlin-Jupyter repository on GitHub.
Beyond these functions, Kotlin Notebook supports various features and mechanisms for rendering values:
Renderers: Transform values into other representations. Renderers are controlled via the
RenderersProcessormethod, and you can access it with thenotebookAPI entry point.DisplayResultandRenderable:Objects implementingDisplayResultandRenderableinterfaces are rendered to output JSON.Text rendering: Render objects to strings using text renderers. Text renderers are controlled via the
TextRenderersProcessormethod, and you can access it with thenotebookAPI entry point.Throwables rendering: Throwable renderers behave as regular renderers but handle exceptions and errors generated during cell execution.
Drag and drop data files
Effortlessly retrieve data with simple drag-and-drop functionality, bringing the data from your project directory to the notebook cells.
In a matter of clicks, load CSV, XLS, and JSON files and have them in a data-frame-like structure, ready to be processed. Check the video below to see the drag-and-drop functionality in action.
Export data and graphics
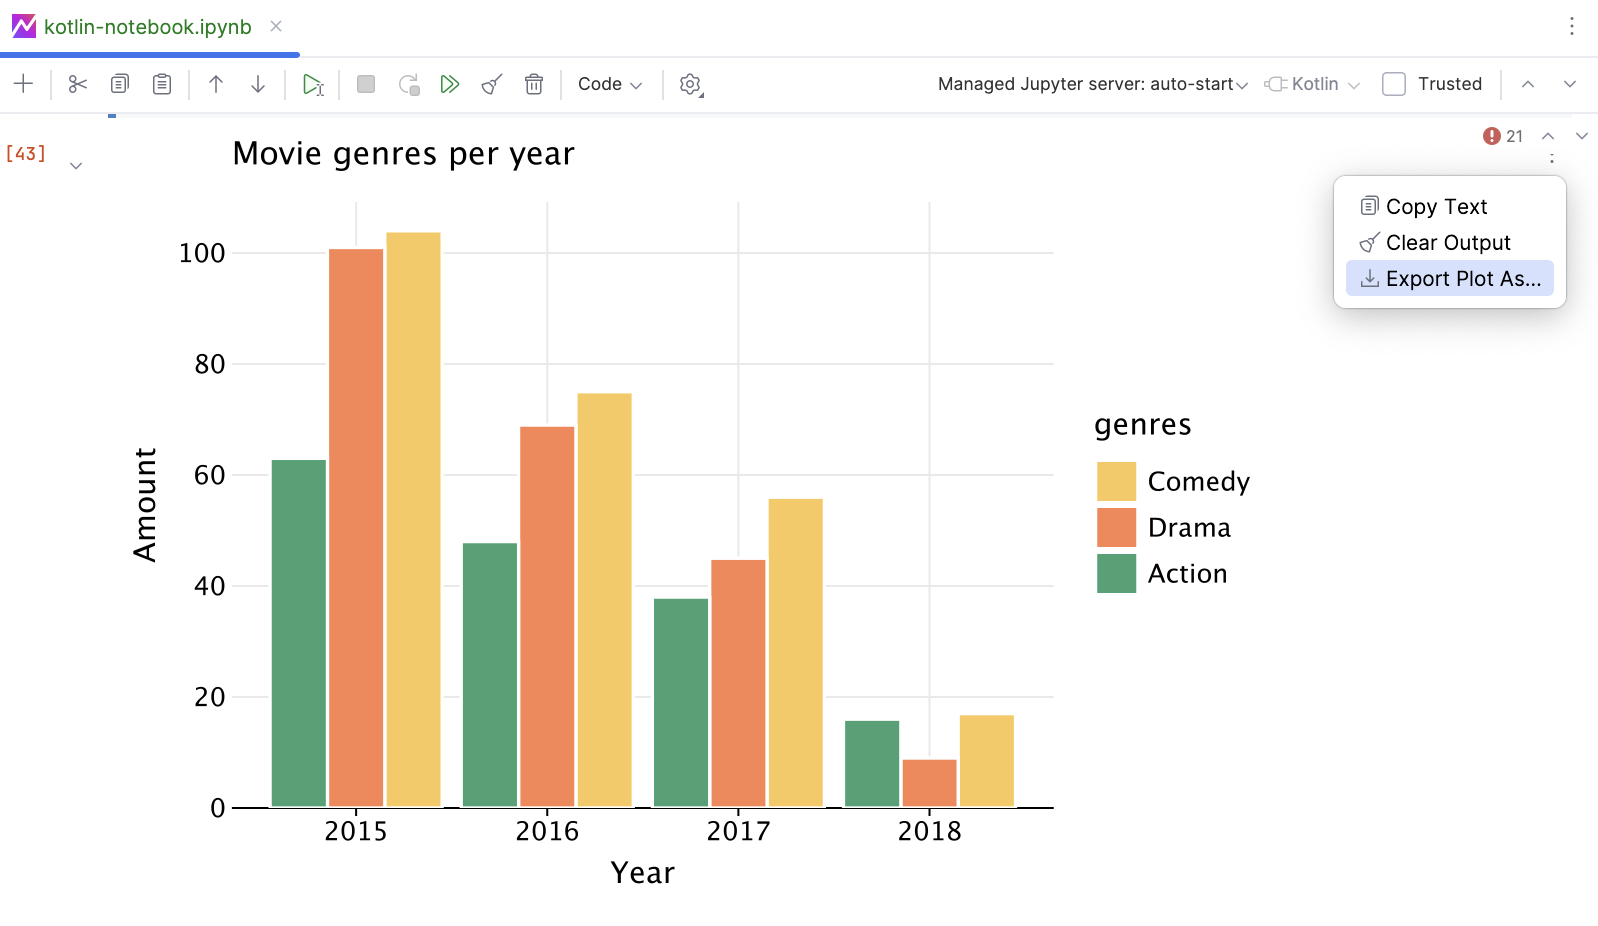
You can intuitively export both data and graphics from the notebook by clicking on the exporting options in the cells.
Analyse errors
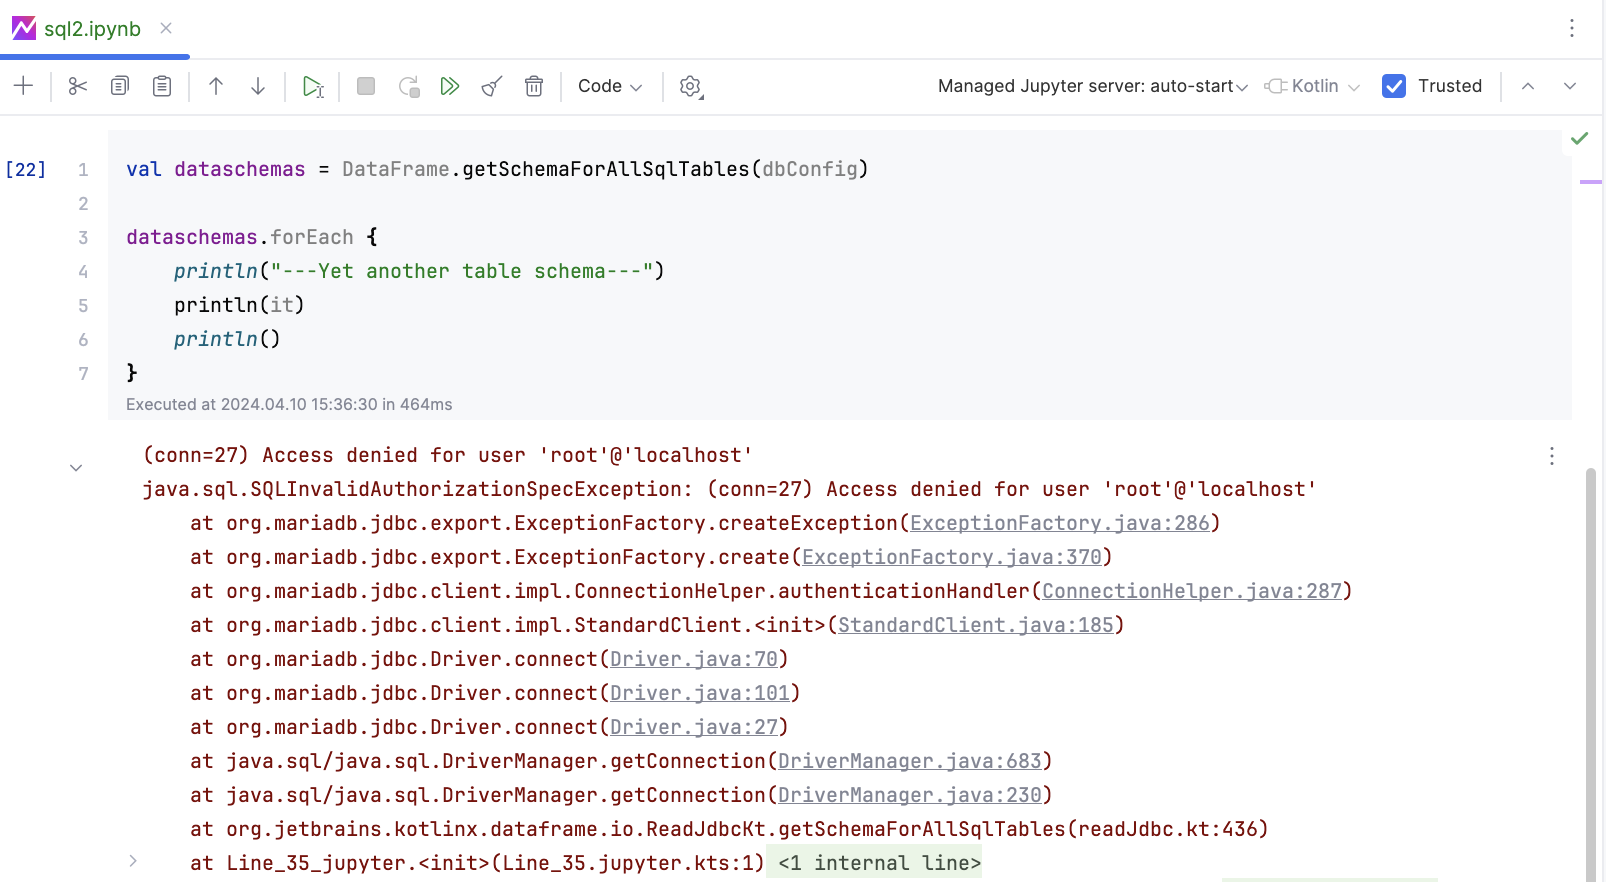
When something does not go as expected in your code, Kotlin Notebook displays error messages and a stack trace in the output cells, providing insights for debugging.
Best practices
Kotlin Notebook is a variant of Jupyter Notebooks and share a similar internal structure.
When you open a notebook and run the first cell, the notebook creates a session under the hood. This session communicates with a kernel, which keeps track of the notebook's runtime state throughout your work.
Working with a notebook has some implications compared to working with regular Kotlin files:
When the session is started, the project dependencies that you selected as notebook dependencies are compiled and added to the kernel's classpath. For this reason, if you make changes to your project code, these changes will be available within the notebook only after you restart the kernel.
Restarting the kernel is useful when the kernel becomes unresponsive or if you make significant changes to the environment. This action terminates the current running environment, clearing all the declared variables, functions, and objects.
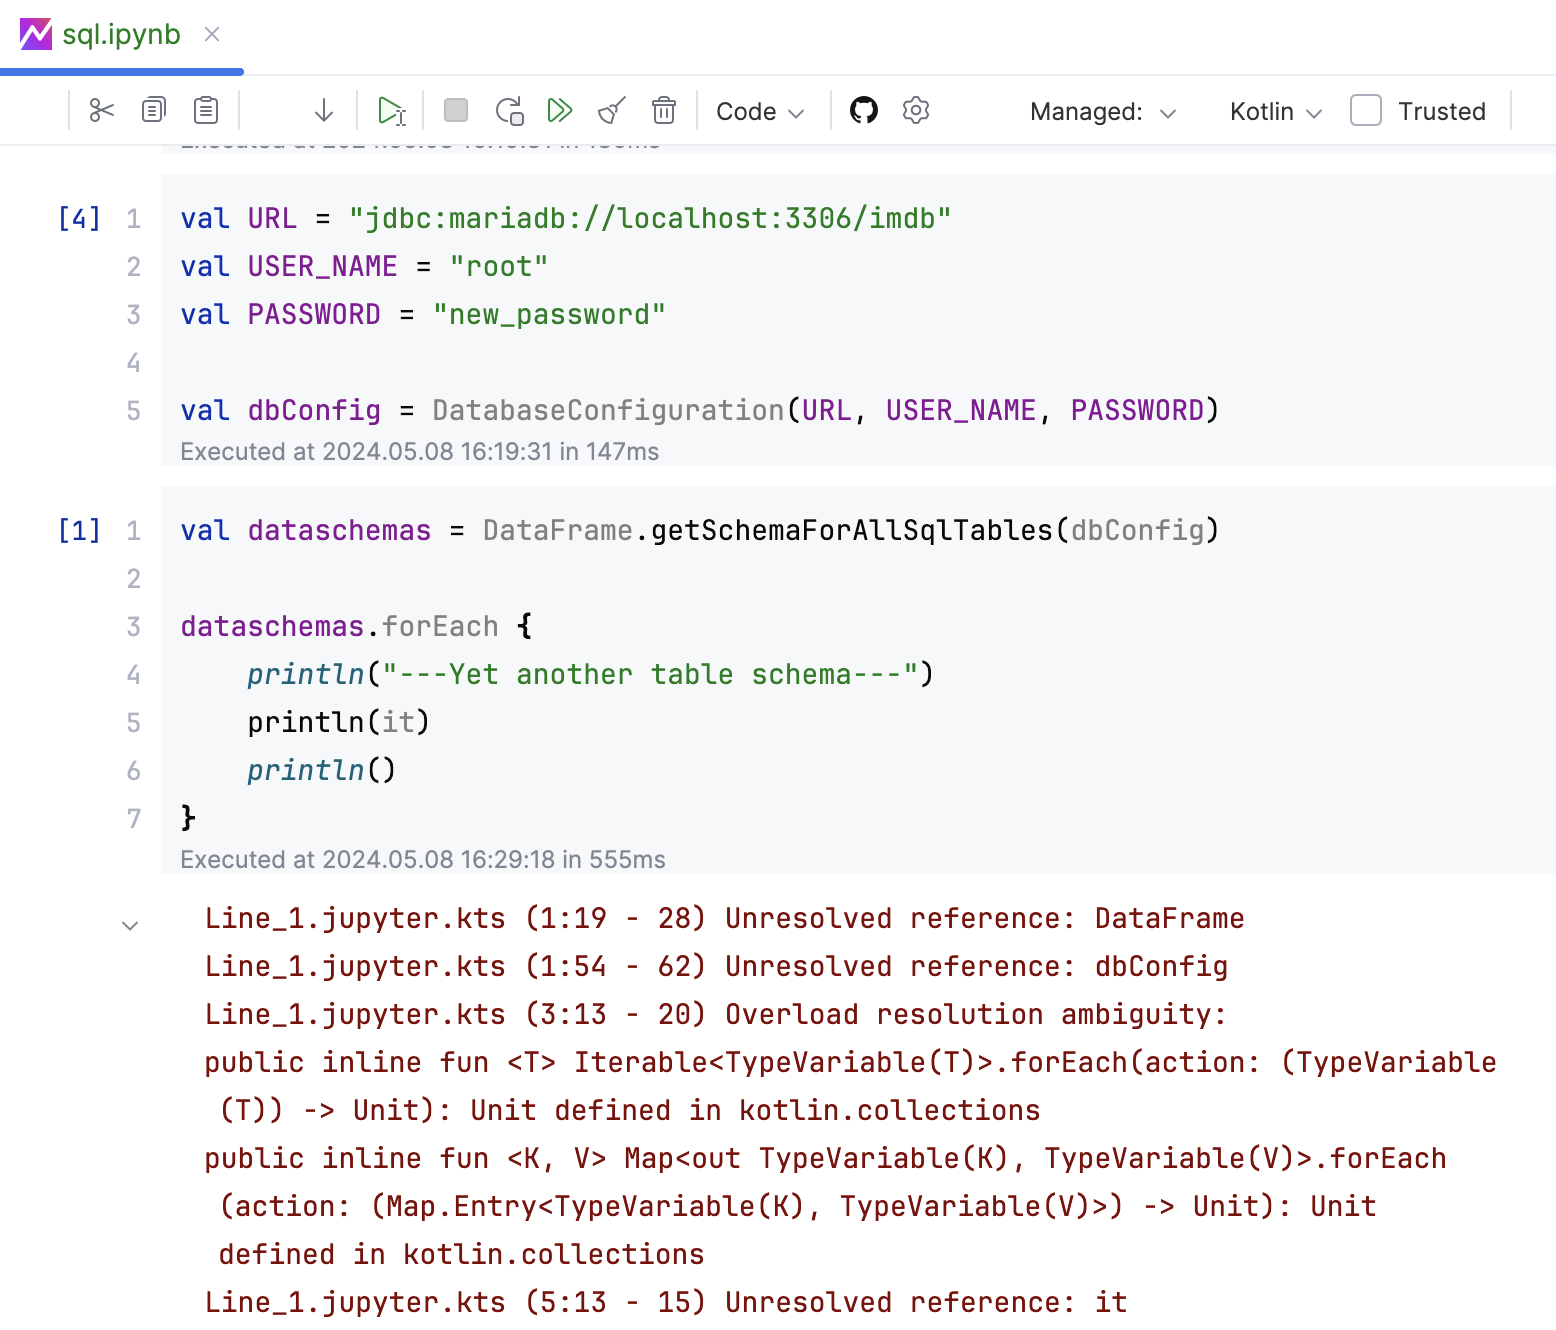
The state of a notebook combines aspects of runtime and compile time. For this reason, restarting the kernel clears all previously evaluated variables from the notebook's memory. This can result in unresolved symbol errors if one cell depends on the output of another cell.
Interrupting the kernel only pauses the current running cell without terminating the entire environment. This action is useful when you need to pause and resume the execution, for example, when a cell is taking too long to run.
The dependencies you add in cells become available only after you run those cells. This means that if you add a dependency and try to use that dependency in the same cell, the symbols from the dependency are marked as unresolved until you run the cell for the first time.

You can run the cells independently in any order, regardless of their position in the notebook. The notebook's runtime state depends on the order of execution, not the cell's position in the notebook.
The cells you run are marked with a number indicating the execution order. On the other hand, those cells that you have not run are marked with a * symbol. If you restart the kernel and click the Run All button, all the code cells run sequentially. Each cell is marked with a number matching their order of execution. When you run all the cells, the execution starts from the top to the button, so the order naturally aligns with the cells' position in the notebook.
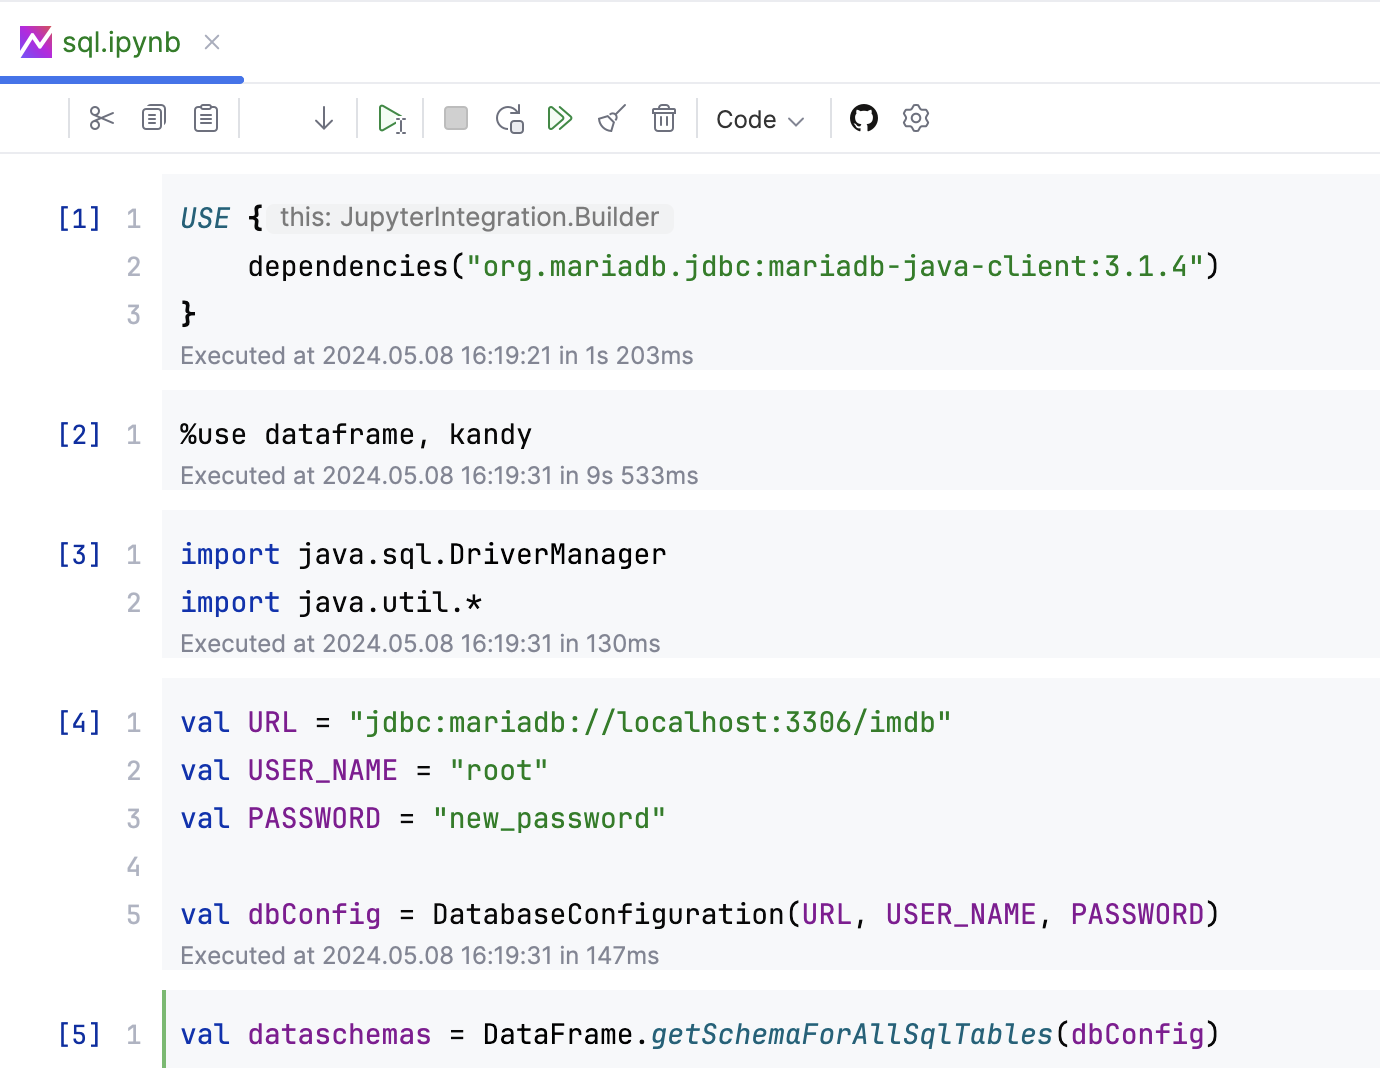
We suggest clicking the Run All button after restarting the kernel. By running all cells, the cells are executed in the correct order, recreating the necessary variables and functions within the memory.
Attached kernel mode
Attached kernel mode is a feature that enables deep integration between Kotlin notebooks and Spring-based applications, as well as other live applications. It is useful for backend developers who want to introspect and experiment with a live application's state directly from a notebook.
This mode allows you to launch a Kotlin Jupyter kernel from inside your own application process – typically a Spring Boot app – and then connect to it from IntelliJ IDEA. Once connected, the notebook runs directly within your Spring process, giving you full access to all beans, configuration, and application context.
Enable attached kernel support
To enable support for attached kernel mode, toggle the kotlin.notebook.allow.attached.kernel registry key in IntelliJ IDEA.
Press Ctrl+Shift+A.
Type "Registry" and press Enter.
Find the
kotlin.notebook.allow.attached.kernelkey and enable it.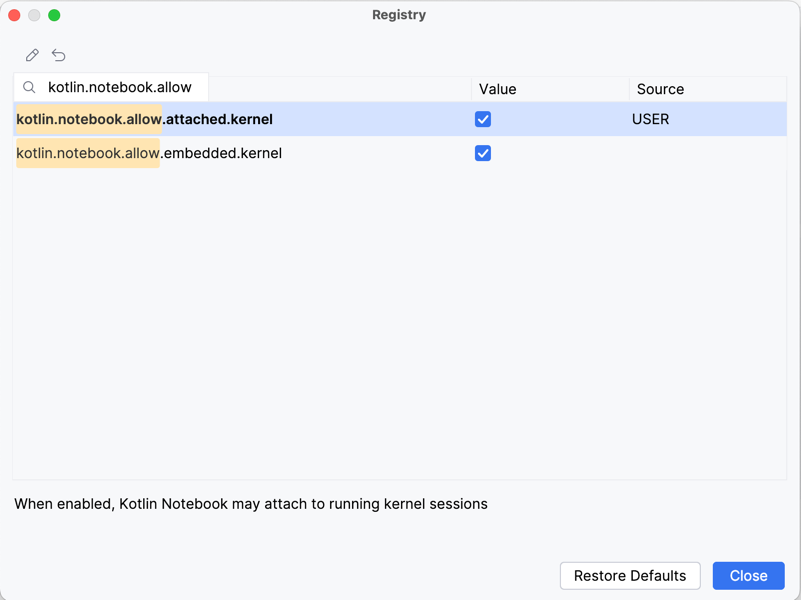
Configure your Spring Boot project
Once you enabled support for attached kernel mode, add a development-only dependency to your Spring Boot project:
This starter sets up everything needed to run a Kotlin Jupyter kernel inside your application. When the application starts, it hosts the notebook kernel and exposes an endpoint that IntelliJ IDEA can attach to.
Connect to your application
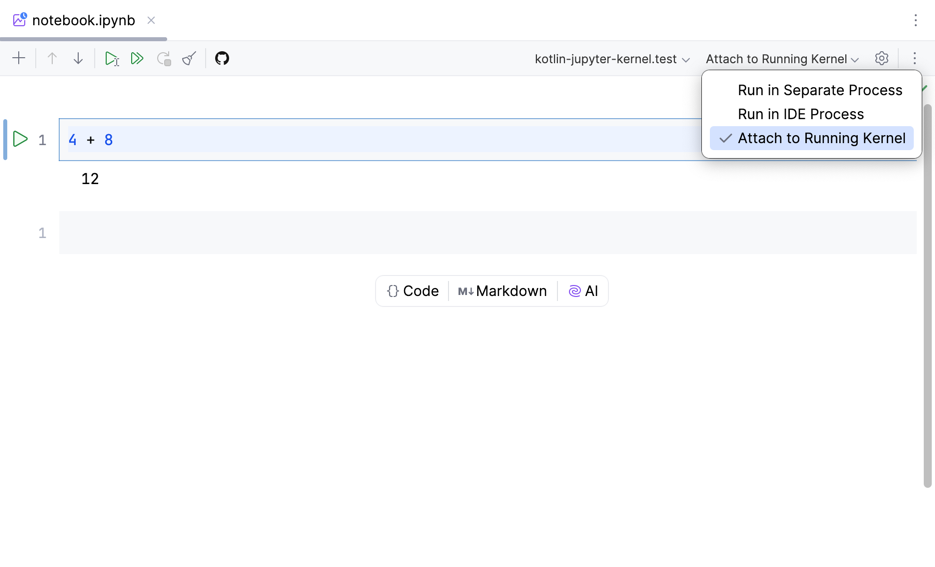
From the notebook, you can connect a Kotlin notebook to your running app. To make the connection, create a new Kotlin notebook in IntelliJ IDEA and select Attach to Running Kernel from the notebook toolbar. The notebook session will operate inside the context of your app, allowing you to:
Access any Spring beans directly from cells
Interact with application services, repositories, and configurations in real time
Call live application logic and see side effects immediately
Prototype business logic or inspect diagnostics within the IDE
To learn more, check out this presentation about the new Spring integration by Roman Belov. For more details, see this YouTrack issue, which tracks this feature's ongoing development.