Ktor
Ktor is a web application framework for creating connected systems. You can use it to create server-side as well as client-side applications. It supports multiple platforms, including JVM, JavaScript, and Kotlin/Native.
IntelliJ IDEA provides the following capabilities for working with Ktor projects:
A wizard for creating new projects.
A dedicated run configuration for running and debugging Ktor projects.
Navigating between routes across a project.
Generating tests for routes and adding sample code for Ktor plugins.
Code editing assistance, including completion and renaming route names.
Generating OpenAPI specifications.
Migrating projects to the latest Ktor version.
Create a new Ktor project
On the Welcome screen, click New Project.
Otherwise, go to in the main menu.
In the New Project wizard, choose Ktor from the list on the left.
On the right pane, you can specify the following settings:
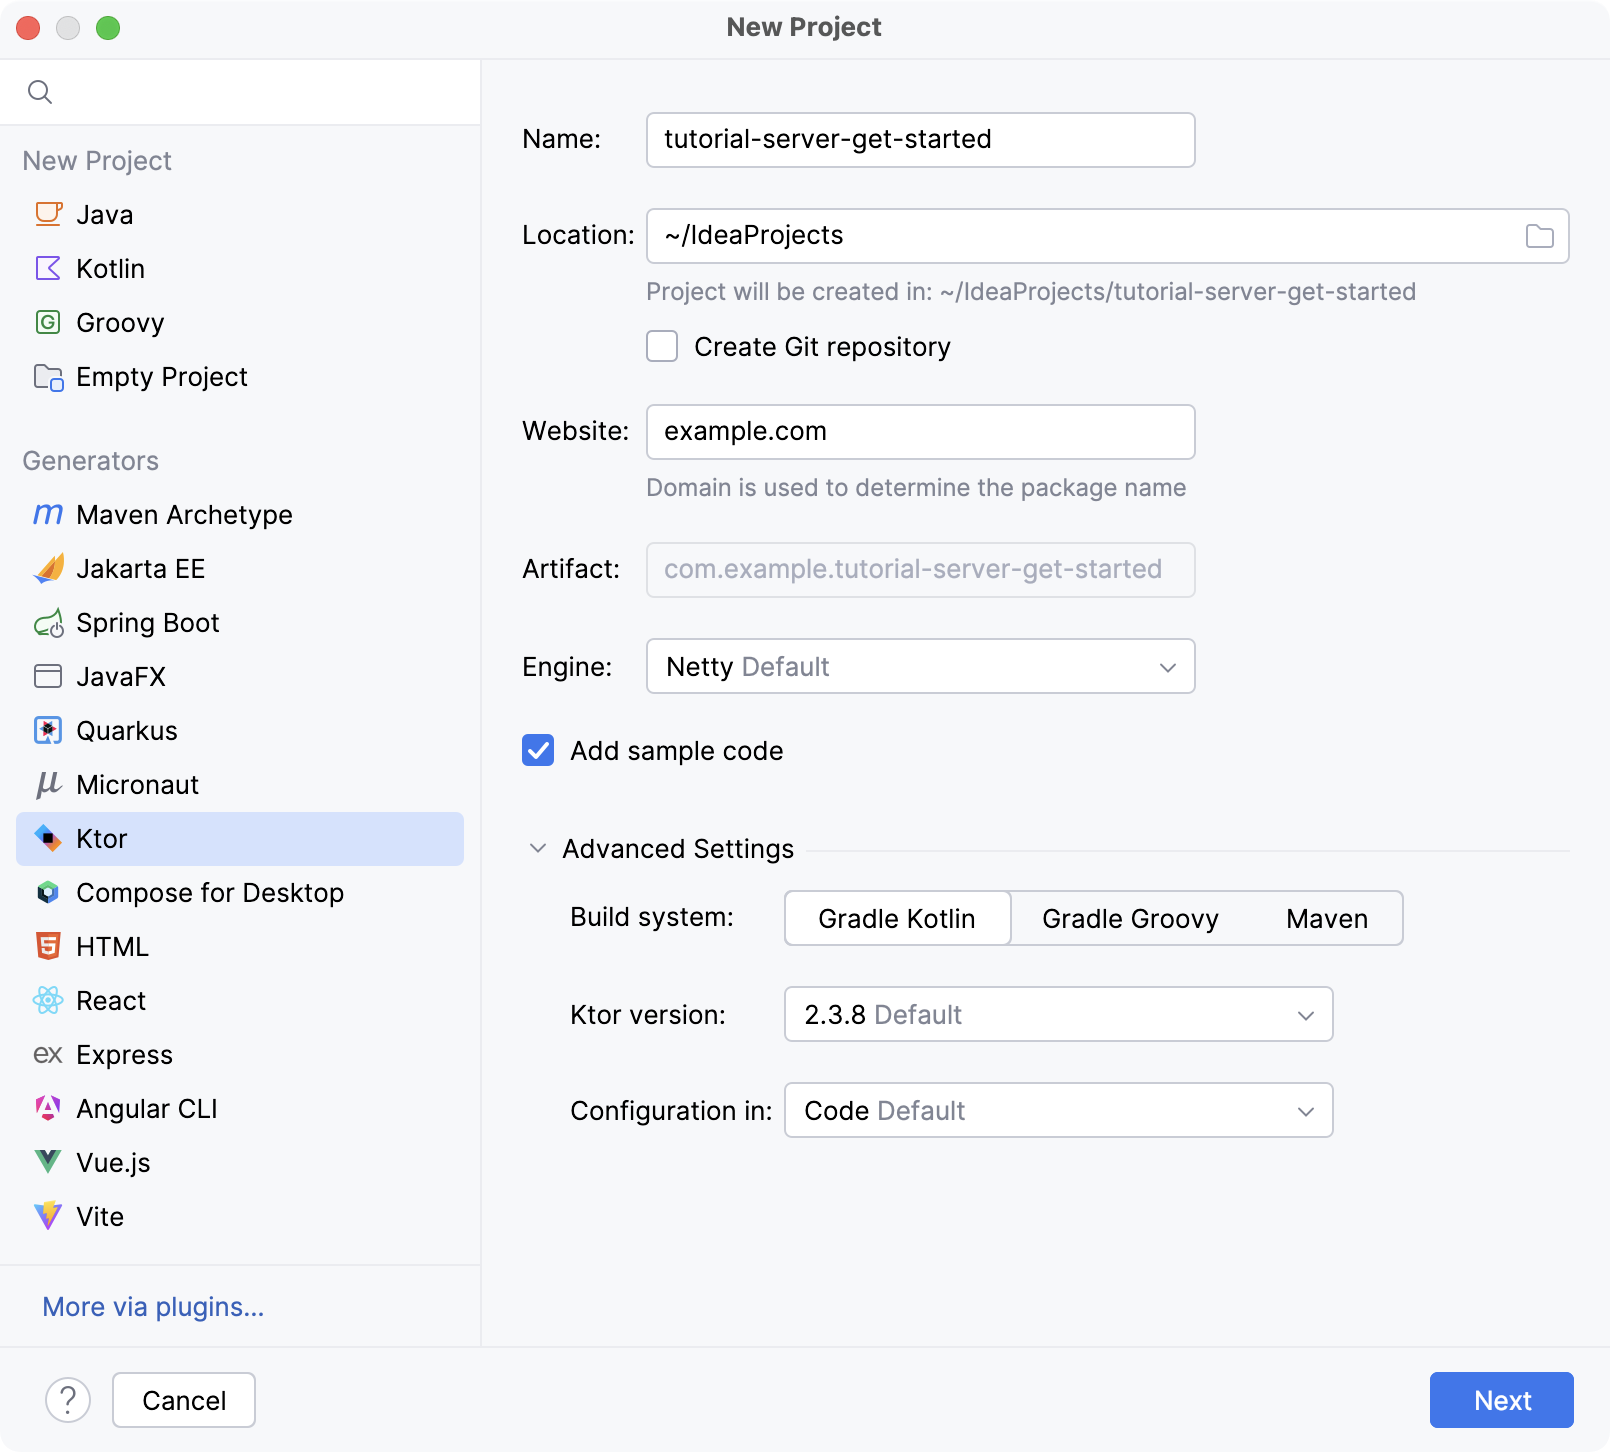
Name: Specify a project name.
Location: Specify a directory for your project.
Build System: Choose the desired build system. This can be Gradle with Kotlin or Groovy DSL, or Maven.
Website: Specify a domain used to generate a package name.
Artifact: This field shows a generated artifact name.
Ktor version: Choose the required Ktor version.
Engine: Select an engine used to run a server.
Configuration in: Choose whether to specify server parameters in code, in a HOCON or Yaml file.
Add sample code: Use this option to add sample code for plugins, which will be added on the next page.
On the next page, you can choose a set of plugins - building blocks that provide common functionality of a Ktor application, such as authentication, serialization and content encoding, compression, cookie support, and so on.
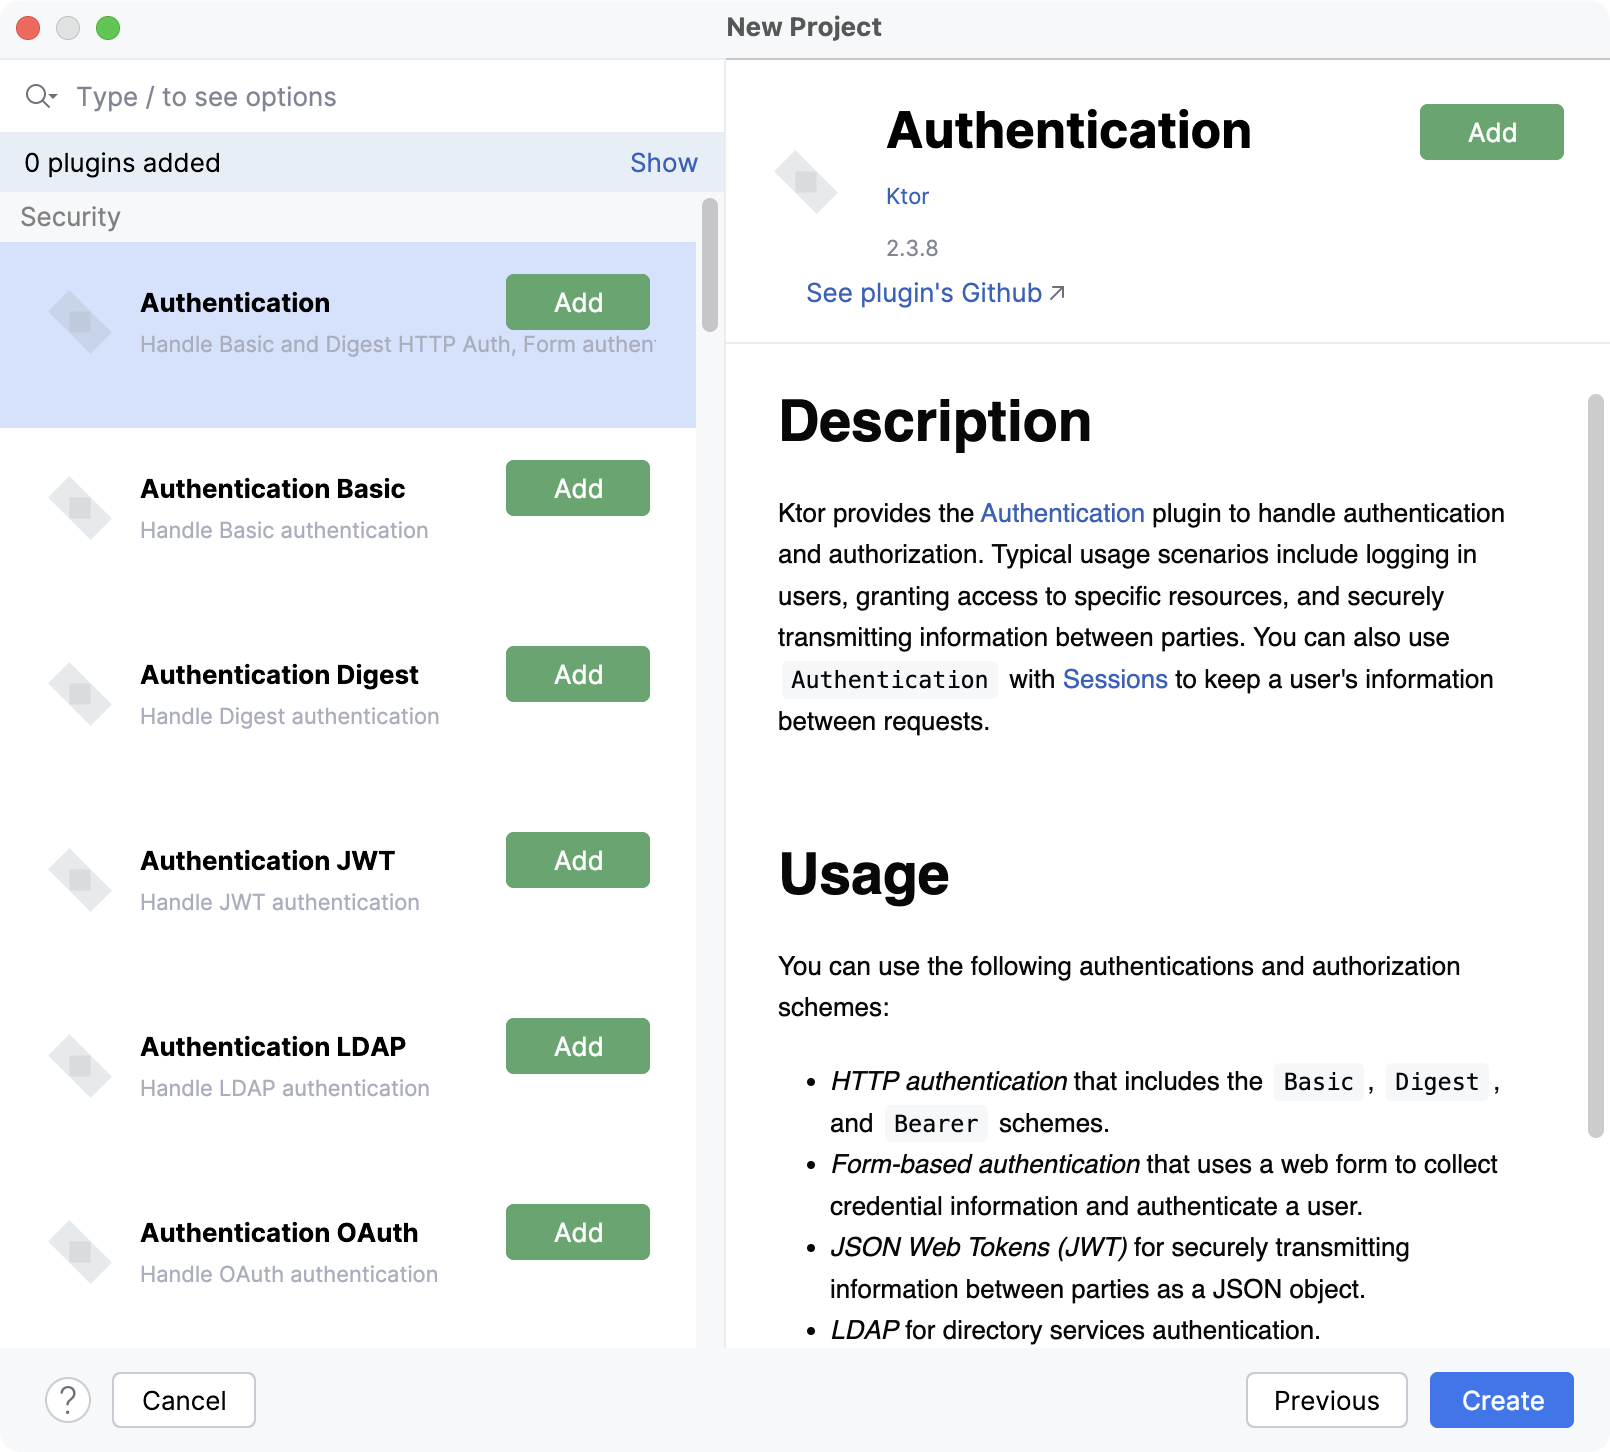
Click Create and wait until IntelliJ IDEA generates a project and installs the dependencies.
Run a Ktor application
You can run a server Ktor application in one of the following ways:
Using the gutter icon next to the
mainfunction.Using the dedicated Ktor run configuration.
To run the application from the editor, follow these steps:
Click the gutter icon next to the
mainfunction and choose Run 'ApplicationKt'.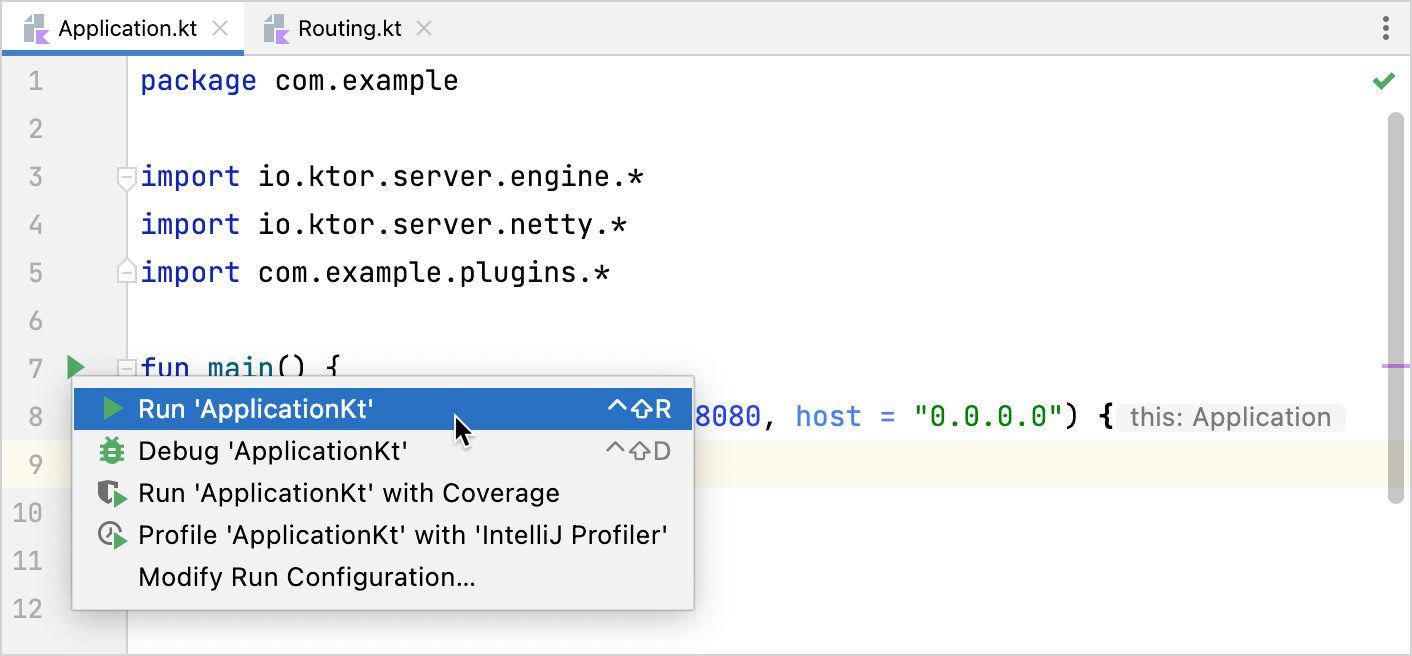
Wait until IntelliJ IDEA runs the application. The Run tool window should show the following message:
INFO ktor.application - Responding at http://0.0.0.0:8080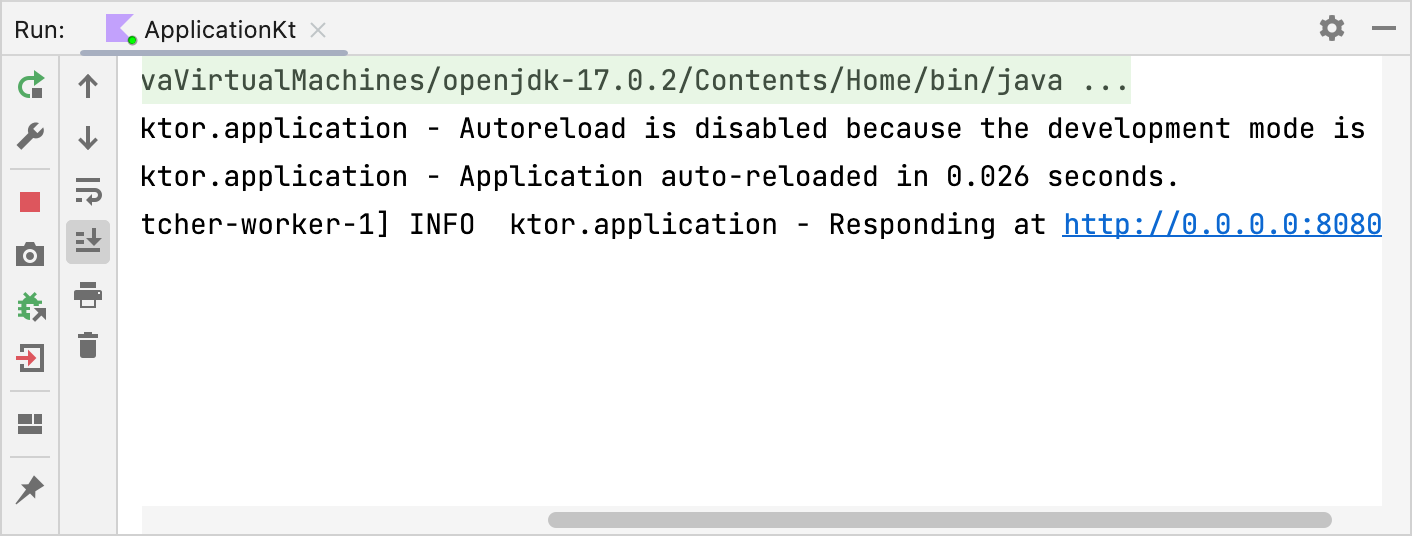
This means that the server is ready to accept requests at the http://0.0.0.0:8080 address.
Navigation
Find routes with Search Everywhere
To find a specific route in your application using Search everywhere, follow the steps below:
Press Shift twice to open the search window.
Start typing a route name.

To narrow down your search, click the Filter icon
on the window toolbar and select URLs.
Navigate between a route and its usages
To navigate between a route and its usages in a project, do one of the following:
Place the caret at the desired path or URL and press Ctrl+B.
Keeping Ctrl pressed, hover over the path or URL. When a URL turns into a hyperlink, click it without releasing the key.
Click the
icon next to the path or URL and choose Go to declaration or usages from a popup.
IntelliJ IDEA will show related paths/URLs:
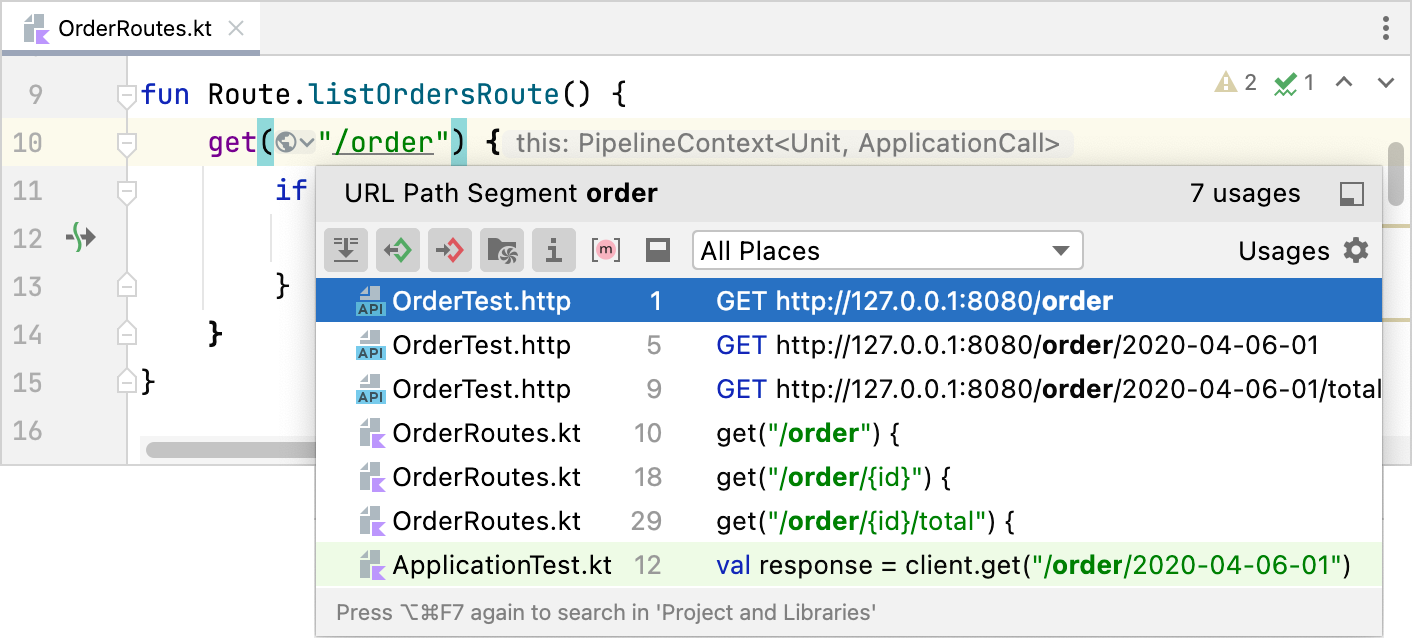
Show routes in the Endpoints tool window
To see all HTTP or WebSocket endpoints defined in your Ktor application, use the Endpoints tool window:
Click the
icon next to the path and choose Show all endpoints of module from a popup.

In the invoked Endpoints tool window, you can see all the routes defined in your application.
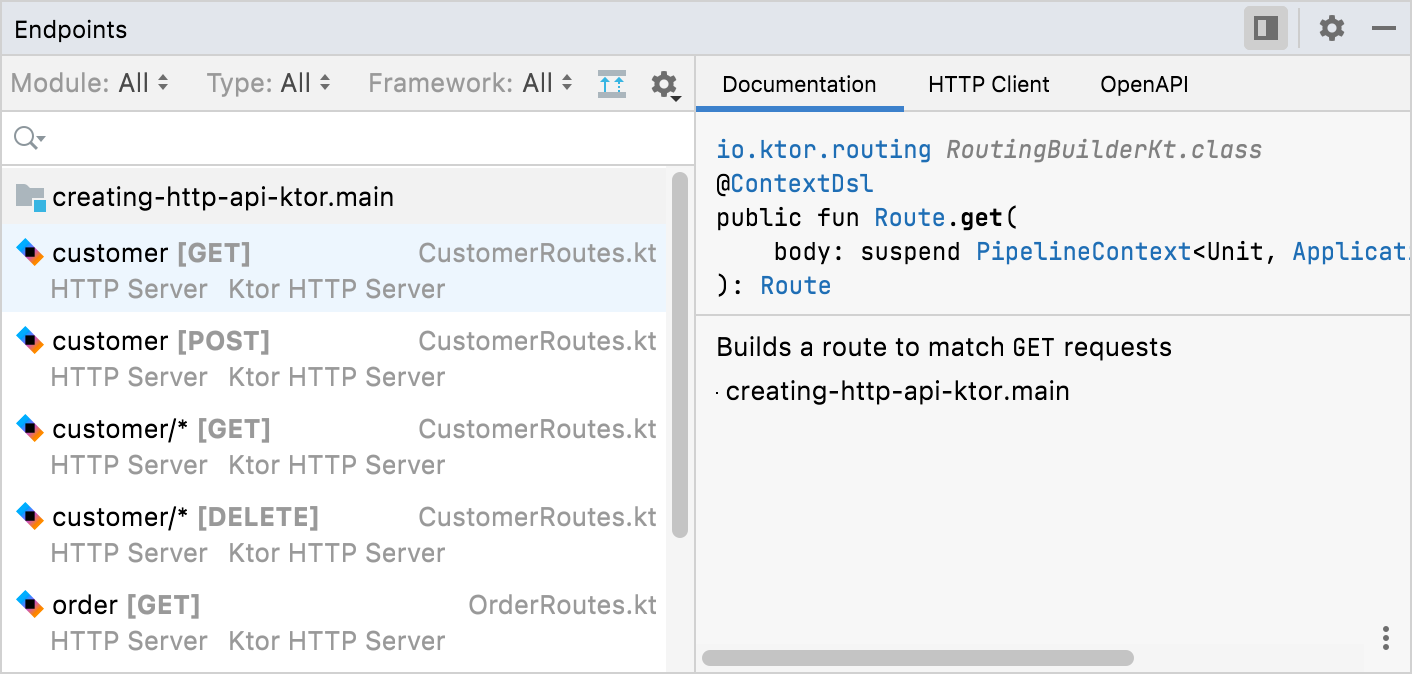
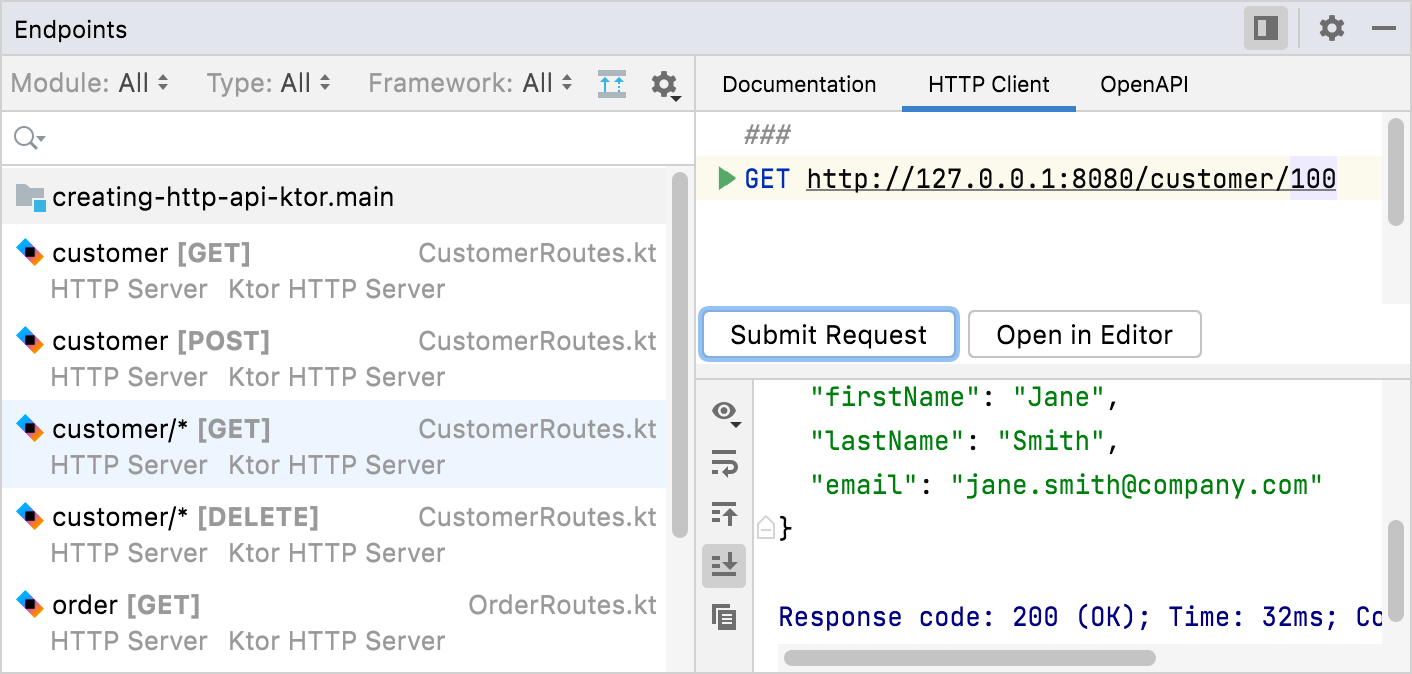
If a Ktor server is running, you can make a request using the HTTP Client to see a response immediately or open it in the editor.
On the OpenAPI tab, you can see an OpenAPI specification for this route.
Generate code
Generate code for plugins
IntelliJ IDEA allows you to generate code for Ktor plugins using the code completion popup:
Place the caret inside a module, start typing
installand then choose the desired plugin from the list.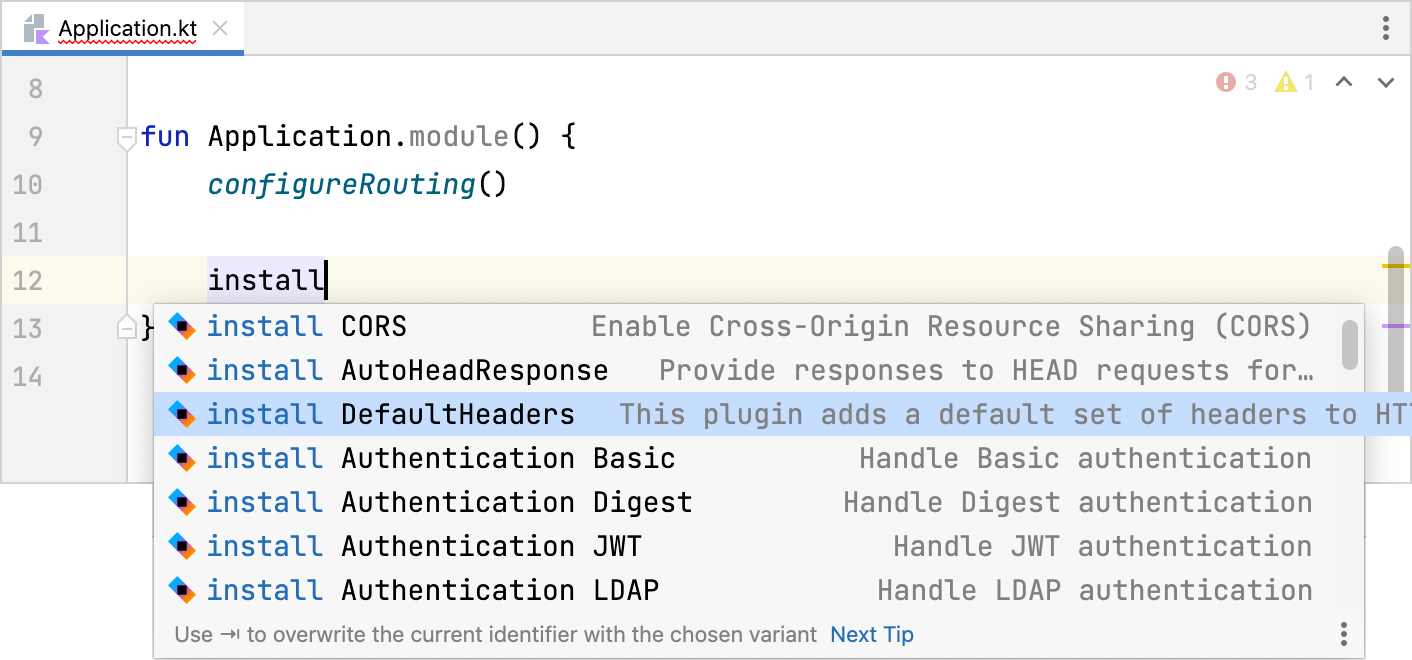
Press Enter. IntelliJ IDEA generates code for the selected plugin and adds the required dependencies to the build script.
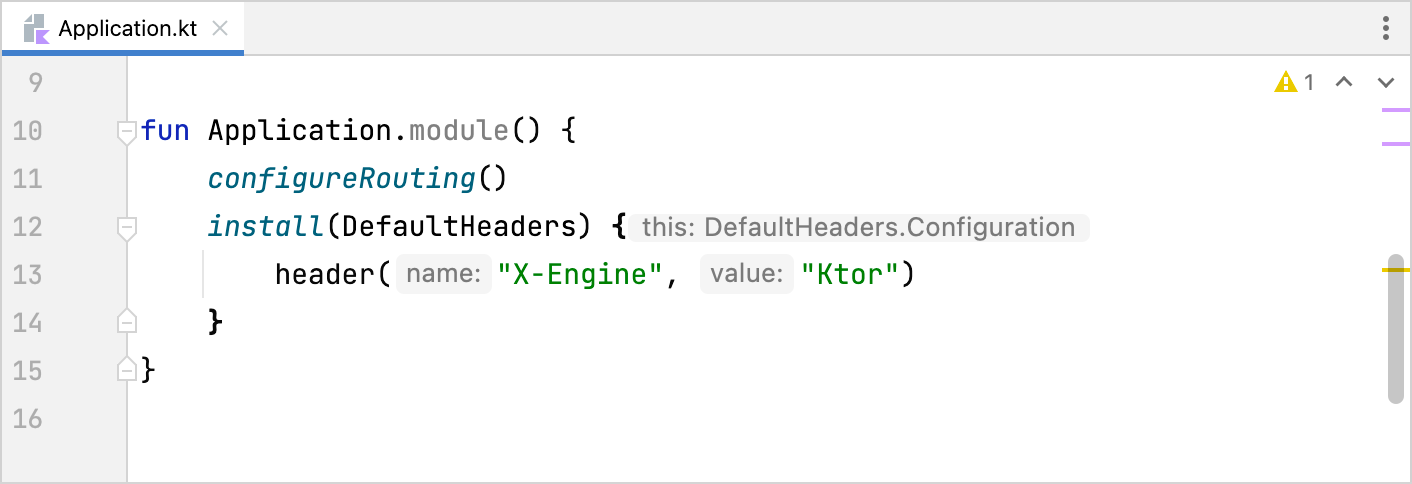
Generate HttpClient
IntelliJ IDEA provides the ability to quickly add the HttpClient to your project:
Start typing ktor-client, choose this action from the list, and press Enter.
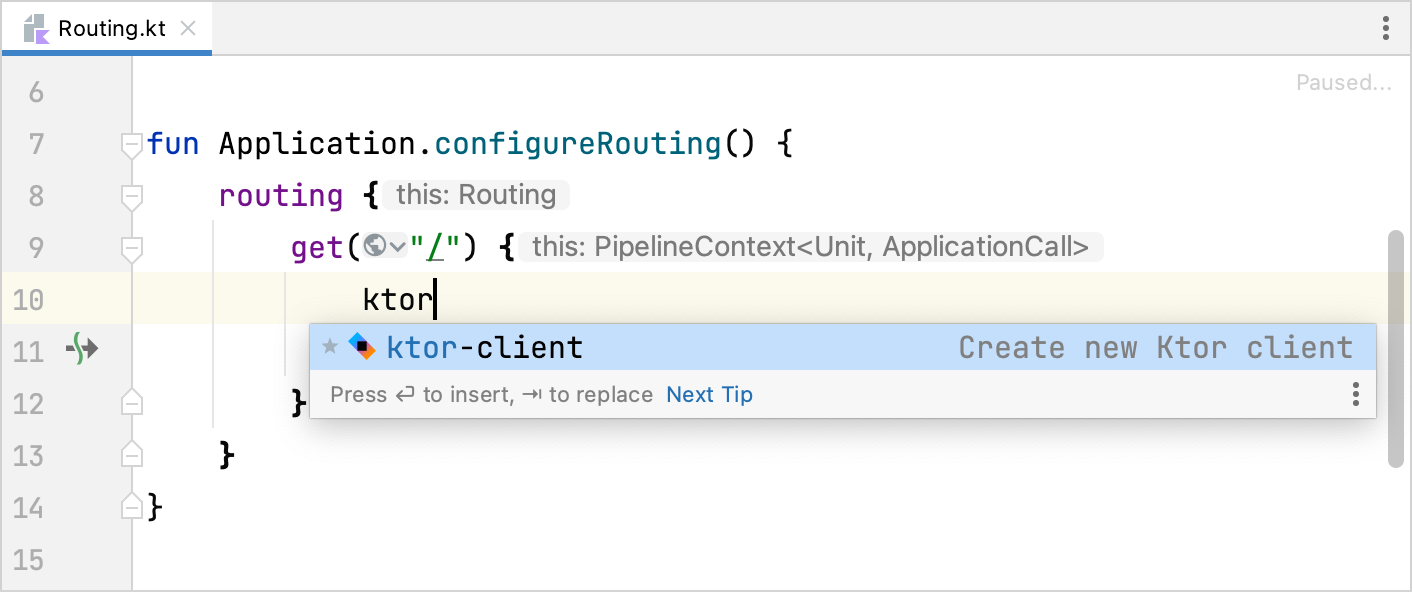
IntelliJ IDEA creates the
HttpClientinstance and adds the required client dependencies to the build script.
Create tests
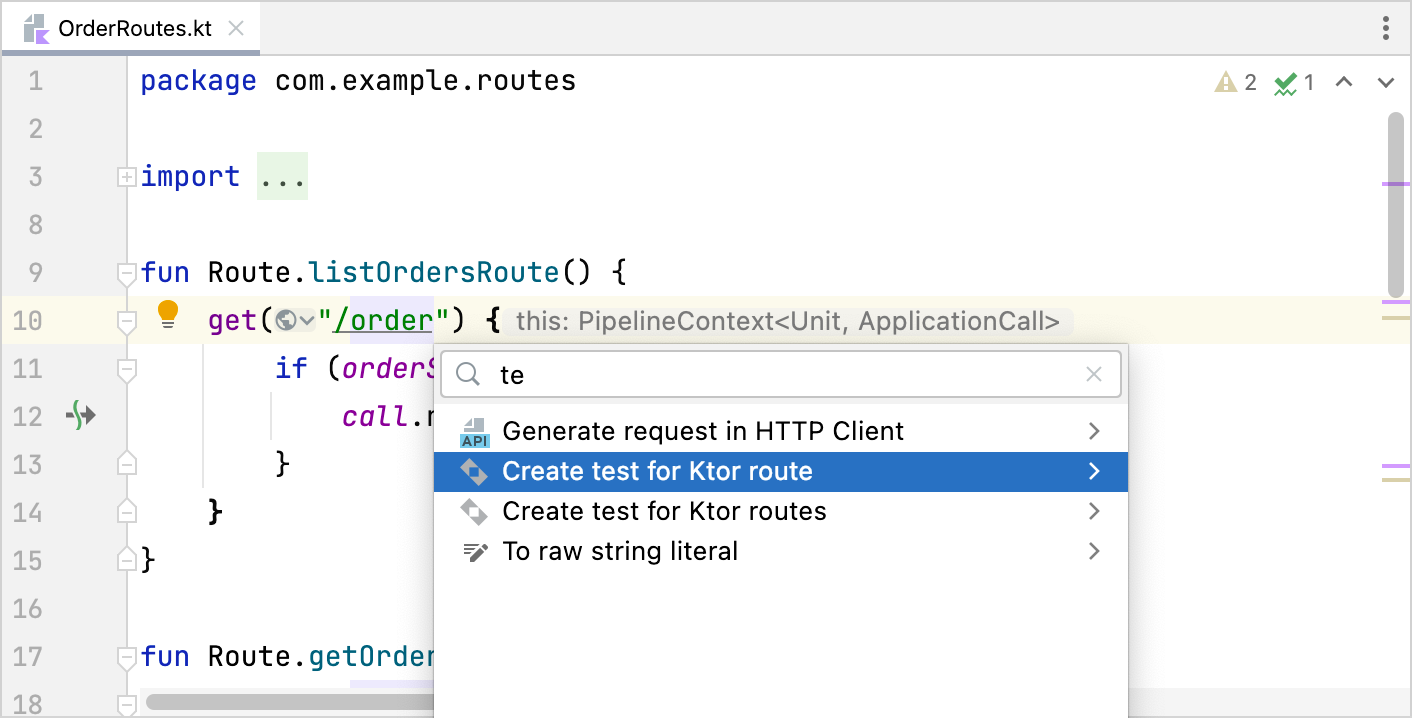
IntelliJ IDEA allows you to generate tests for modules, groups of routes, or individual routes. This functionality is supported for both HTTP and WebSocket endpoints. To generate tests, follow the steps below:
Place the caret at the desired module or route, press Alt+Enter, and choose one of the following actions:
Create test for Ktor module
Create test for Ktor routes
Create test for Ktor route
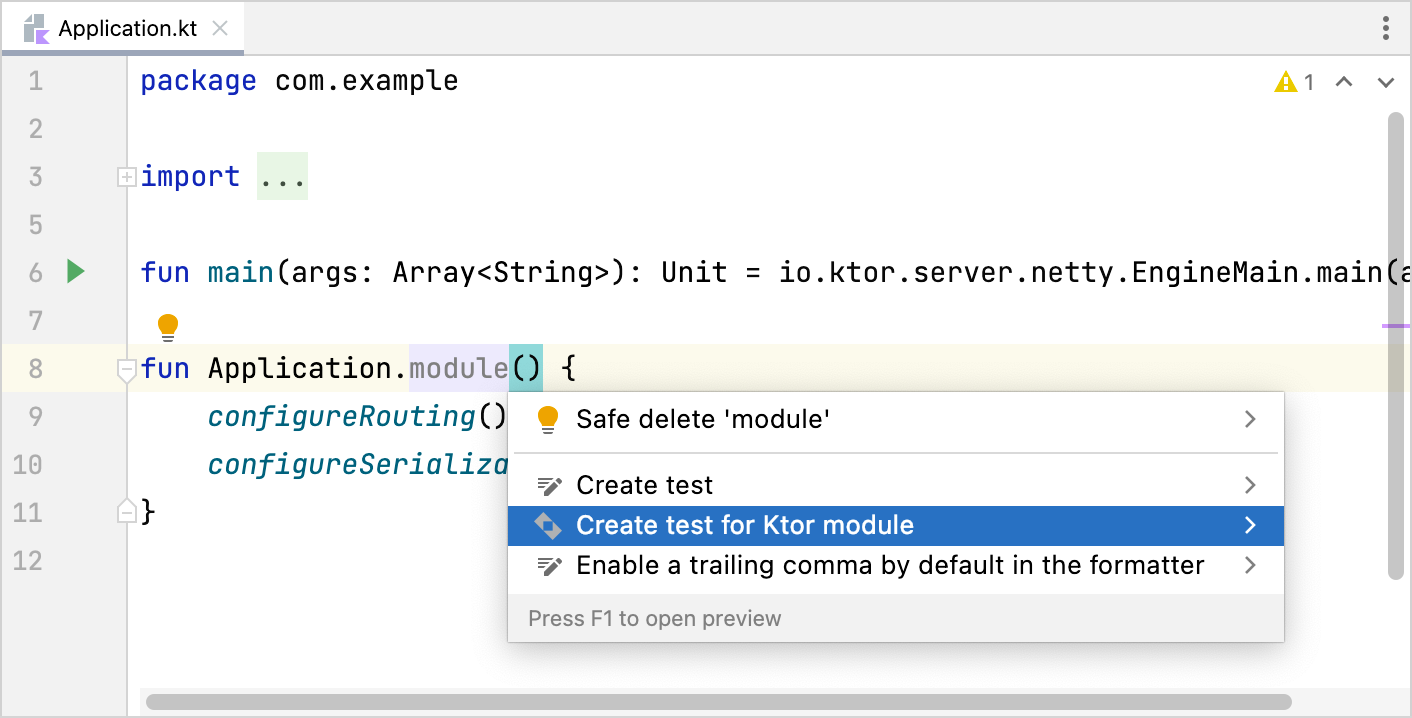
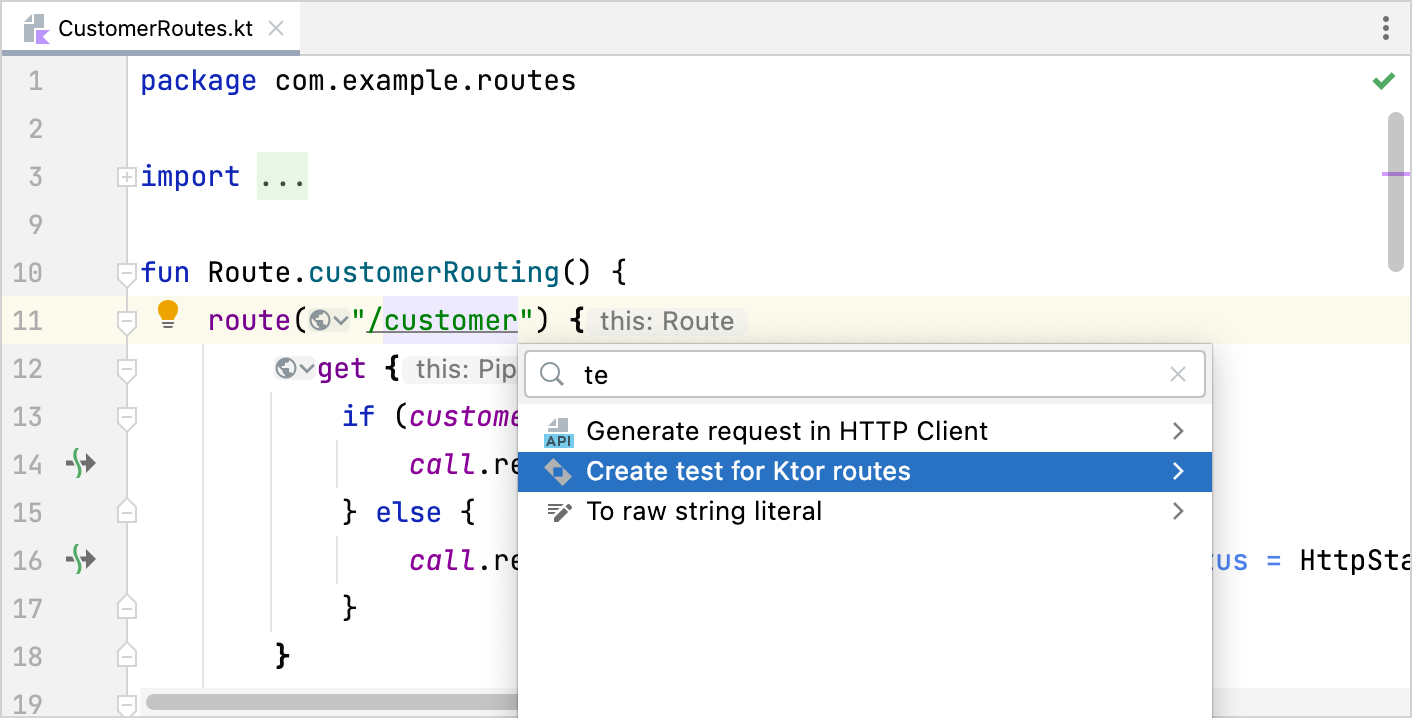
In the invoked dialog, you can specify a test class name, choose the desired routes, and edit individual test names.
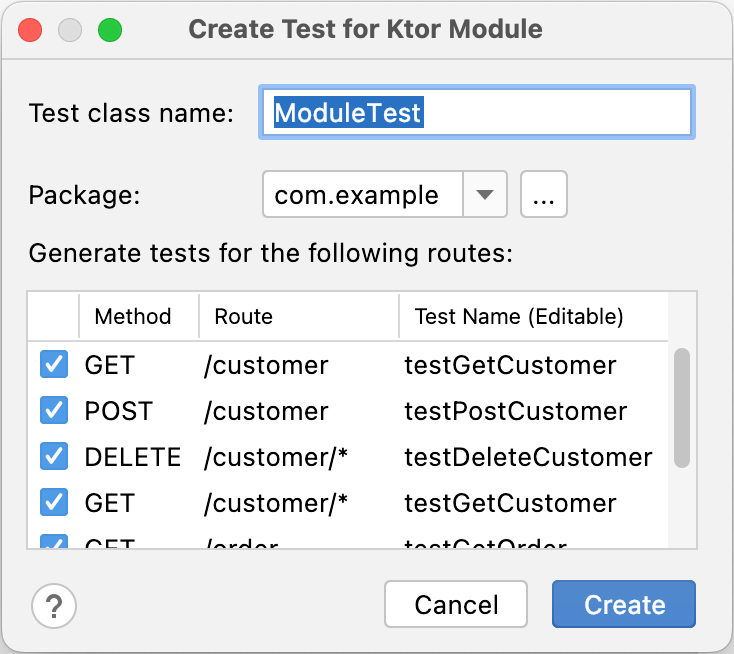
Click OK.
IntelliJ IDEA will create a test class containing tests requests for the selected routes.
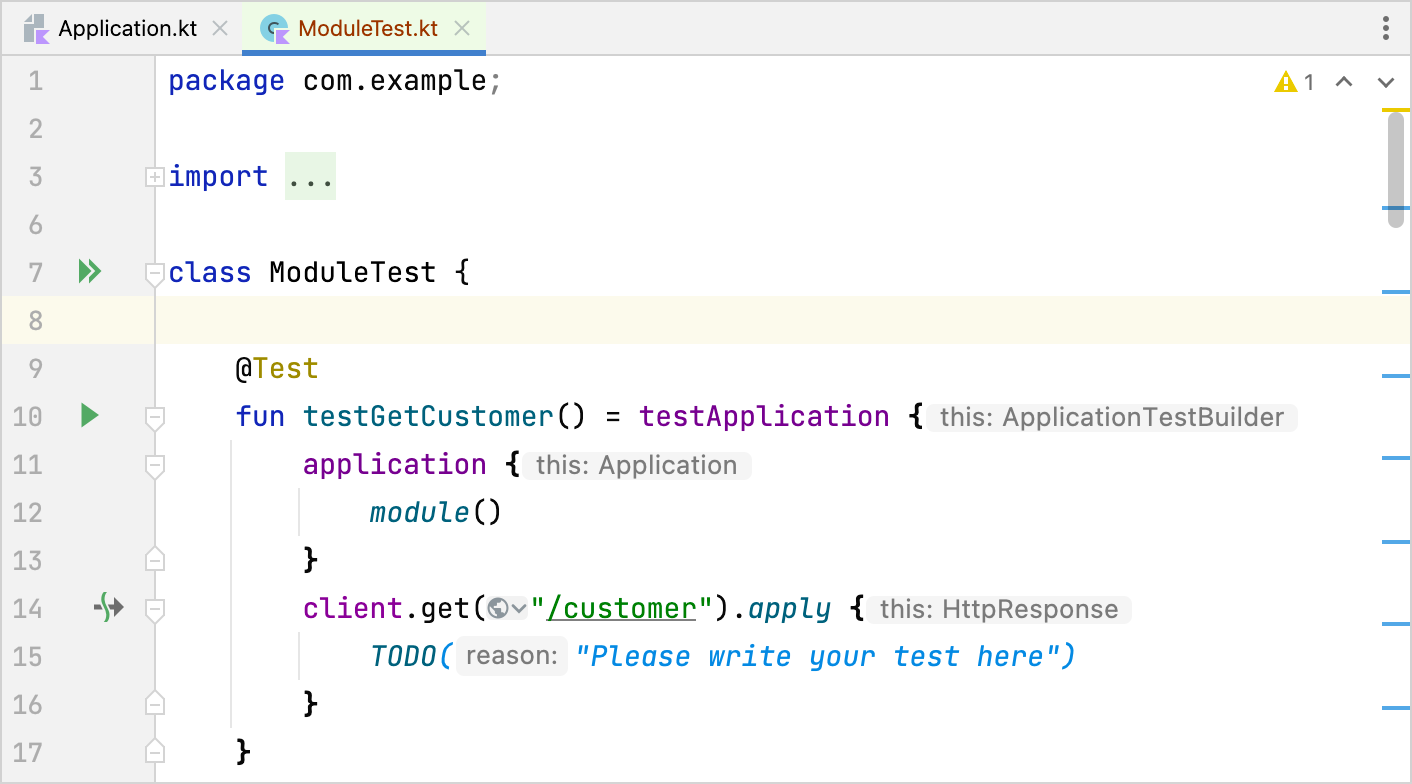
You can learn how to test a Ktor server from Testing.
Edit code
Complete route names
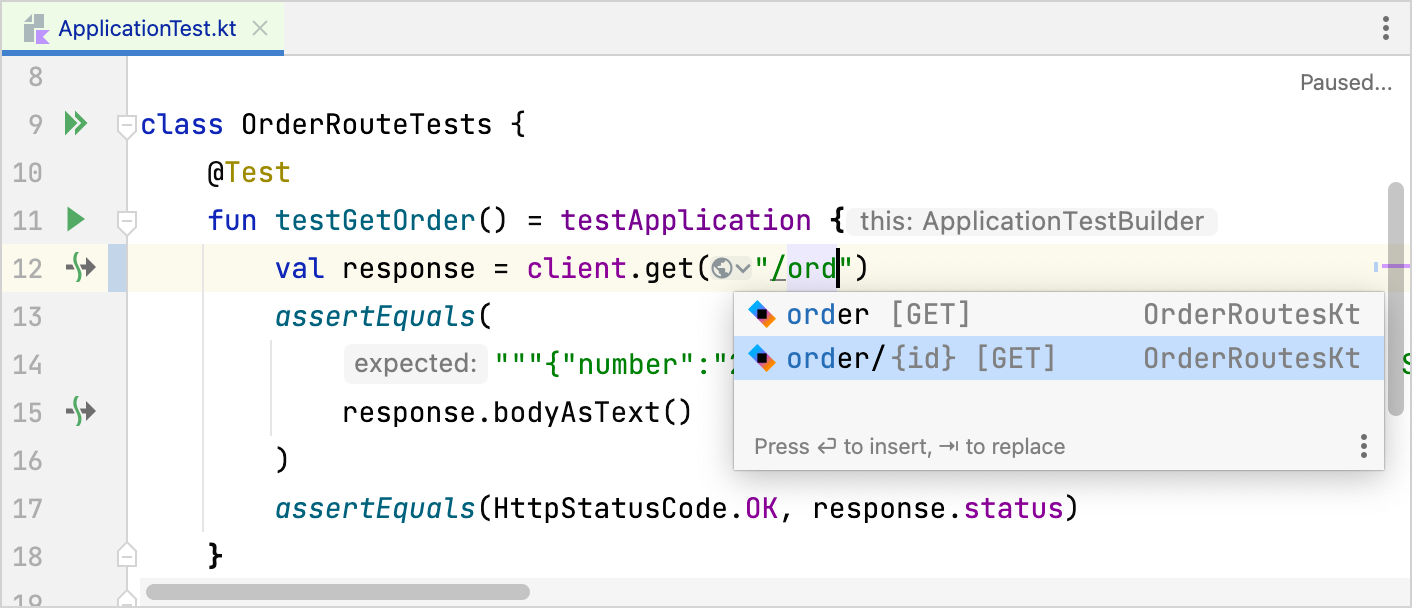
IntelliJ IDEA allows you to complete the names of routes:
Place the caret at the parameter that accepts a URL and press Ctrl+Space. The editor will show you the available routes.
Complete configuration properties
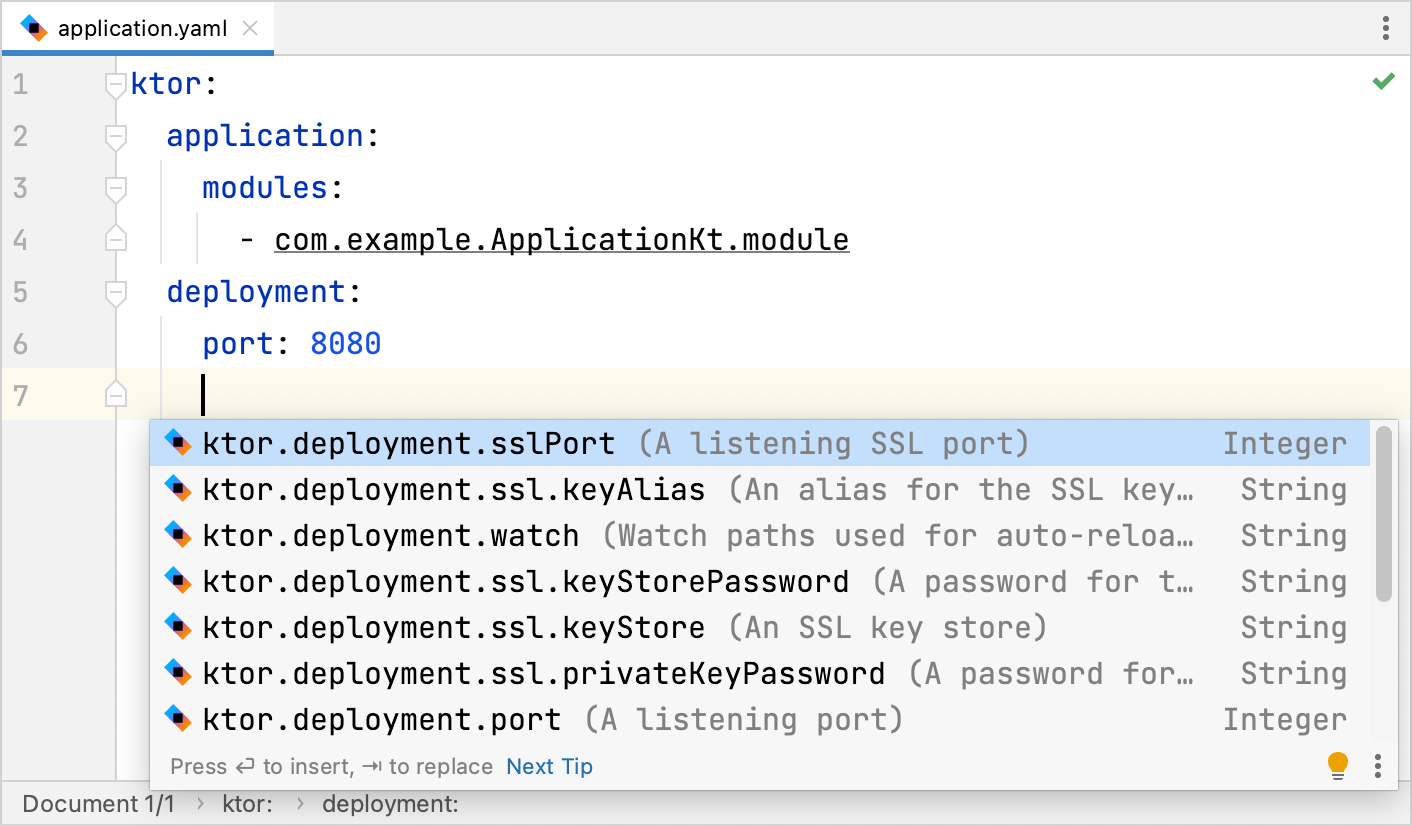
If your project stores configuration in a YAML file, you can use autocompletion for property names:
Place the caret at any place in the configuration file and press Ctrl+Space. The editor will show you all configuration properties available for this group.
Rename routes
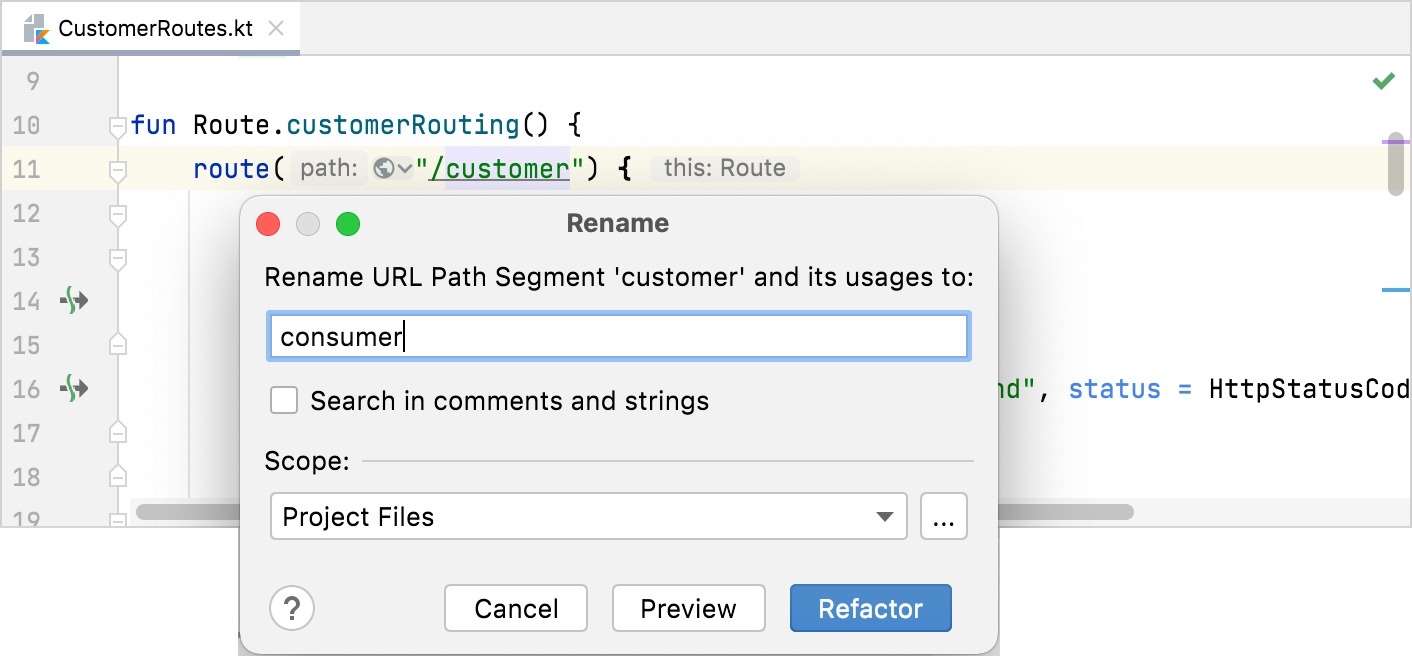
In IntelliJ IDEA, you can use rename refactoring to rename routes:
Place the caret at the route name and press Shift+F6.
Specify a new route name and click Refactor.
Extract an application module
To extract code placed inside embeddedServer to a separate application module, follow the steps below:
Place the caret at the
embeddedServerfunction call and press Alt+Enter.Choose Extract Application module from the current embeddedServer block and press Enter.
In the invoked dialog, specify a module name and click Extract. IntelliJ IDEA creates an extension function on the
Applicationclass and passes a reference to this function as themoduleparameter, for example:fun main() { embeddedServer(Netty, port = 8080) { routing { get("/") { call.respondText("Hello, world!") } } }.start(wait = true) }fun main() { embeddedServer(Netty, port = 8080, module = Application::module).start(wait = true) } fun Application.module() { routing { get("/") { call.respondText("Hello, world!") } } }
OpenAPI
An OpenAPI Specification (OAS) is a description format for REST APIs. The Ktor plugin provides the ability to generate OpenAPI documentation for server-side Ktor applications. The plugin generates paths for all application endpoints defined using both string path patterns or type-safe routes. For generating better OpenAPI docs, the plugin analyzes the code of endpoints in a server application, for example:
The path and query request parameters are used to generate parameters taking into account parameter types.
The response status, content type, and headers are used to describe responses.
Response body handlers are used to generate the OpenAPI schema and, if possible, the examples. For object responses, the plugin generates corresponding definitions in the components section.
Documentation comments for a specific route are used as endpoint description s.
Generate an OpenAPI specification
To generate an OpenAPI specification for a Ktor application, follow the steps below:
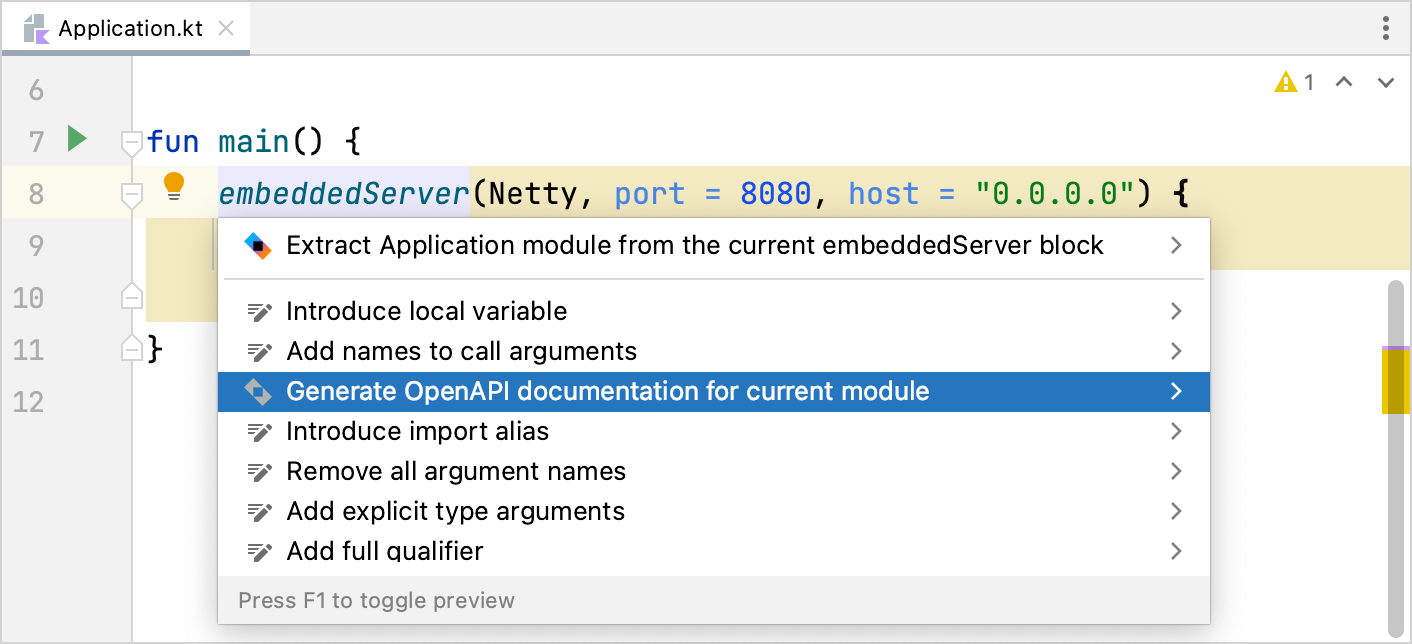
Place the caret at the embeddedServer function call and press Alt+Enter.
Select Generate OpenAPI documentation for current module from the popup and press Enter.
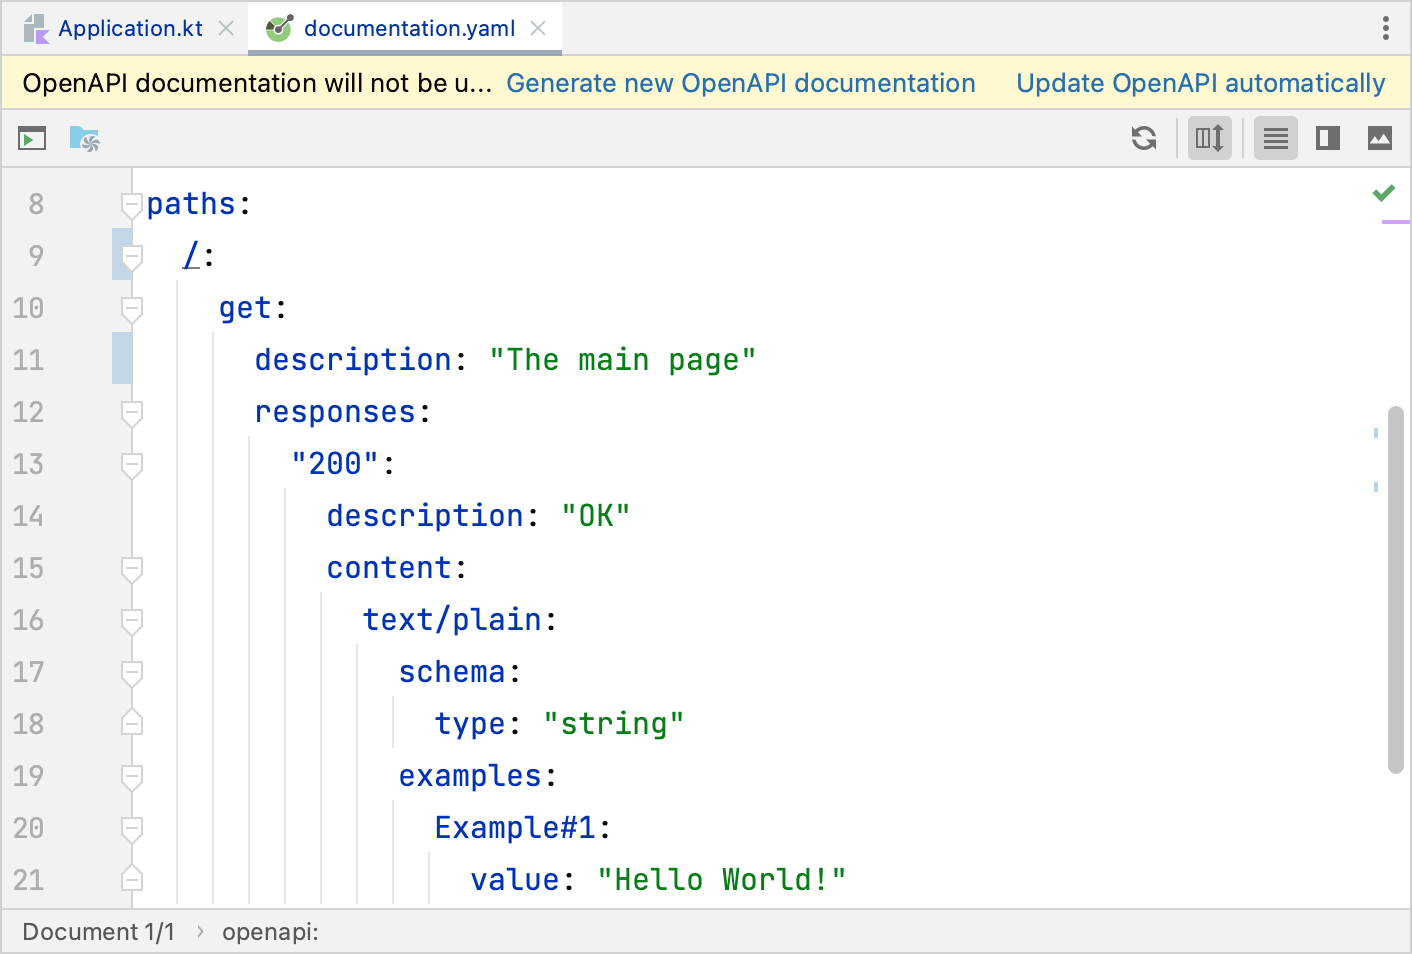
Wait until IntelliJ IDEA will generate an OpenAPI specification in application resources by the following path: resources/openapi/documentation.yaml.
Preview OpenAPI and test your application
You can preview an OpenAPI specification using the integrated Swagger UI as described in Preview an OpenAPI specification. The generated Swagger UI can be used to test your application's endpoints as follows:
Expand the desired endpoint in the preview and make a request.
Test endpoints in the HTTP editor
IntelliJ IDEA allows you to test HTTP and WebSocket endpoints using the HTTP client in code editor:
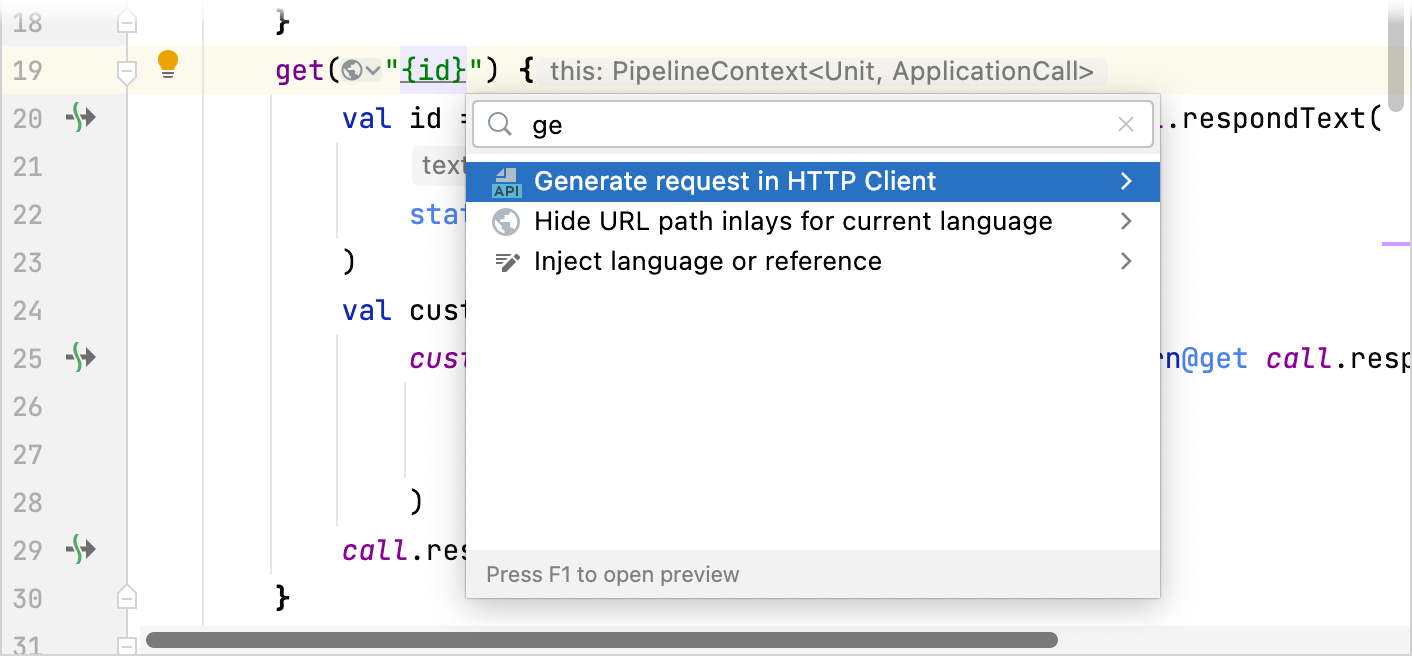
Place the caret at the desired path, press Alt+Enter, and choose Generate request in HTTP Client.
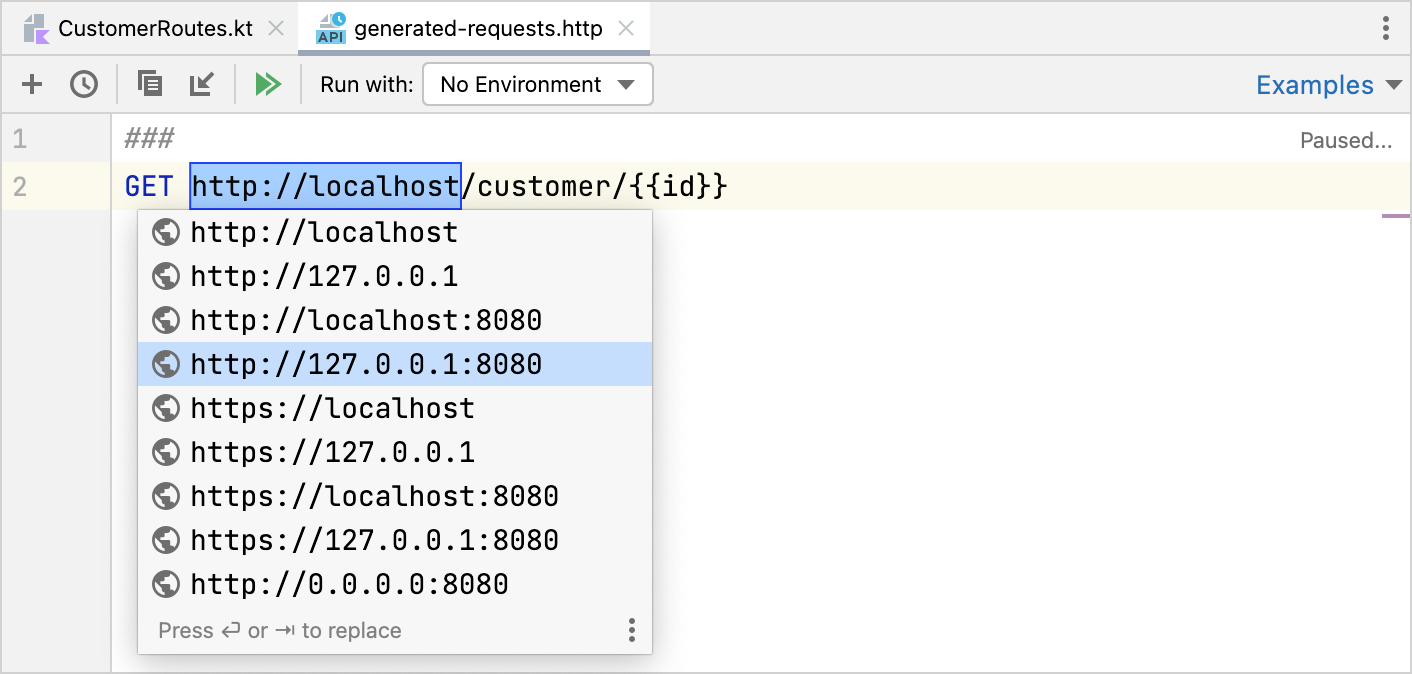
In the opened file, adjust request parameters.
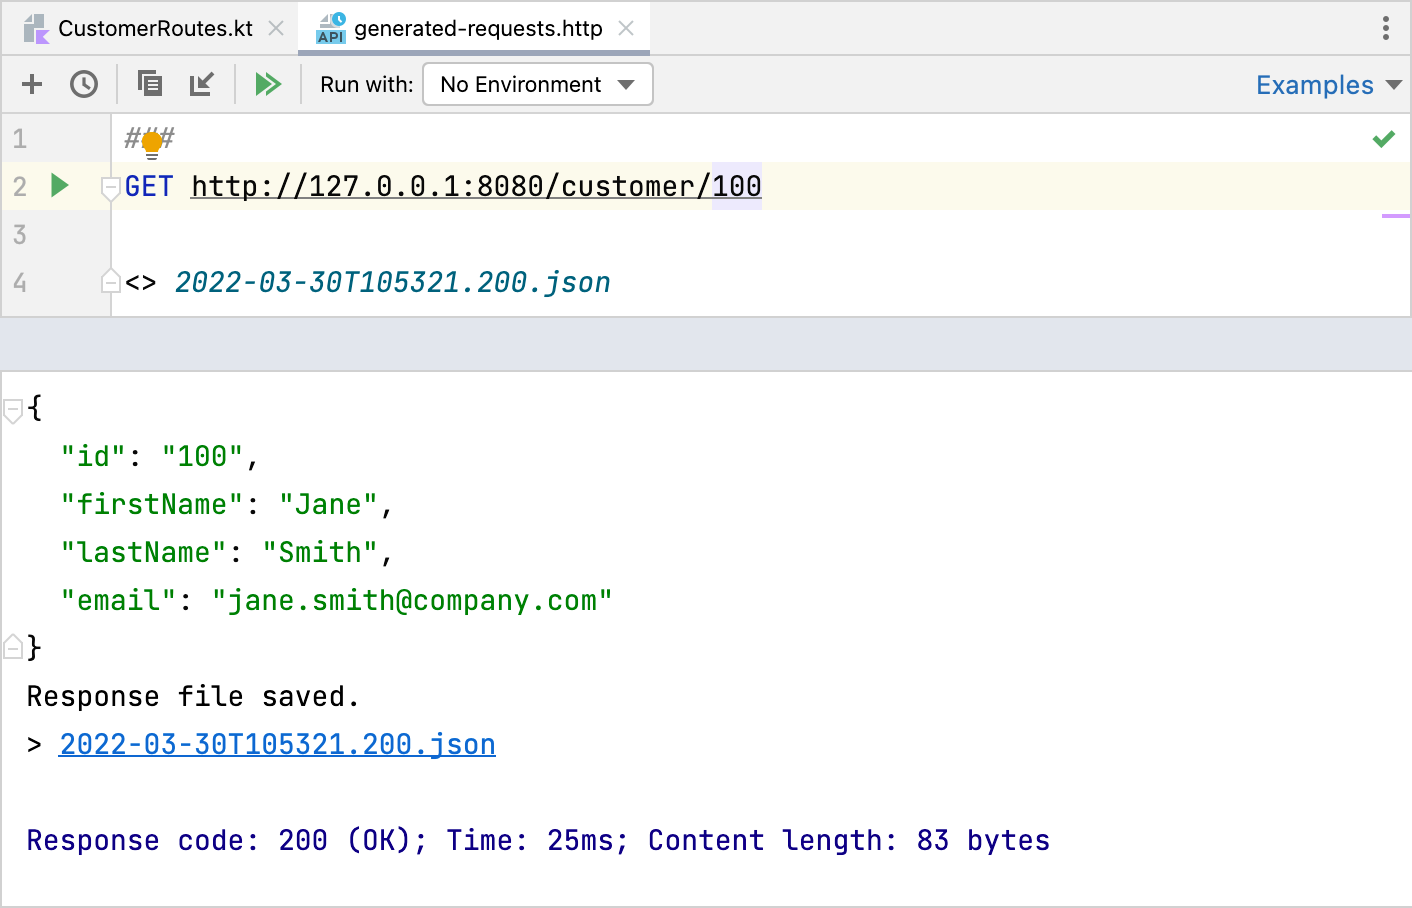
Click
in the gutter to make a request.
Migrate projects
Migrate a project
In IntelliJ IDEA, you can migrate your Ktor project to the latest version in one of the following ways:
When opening a project that uses a previous Ktor version, IntelliJ IDEA suggests you migrate this project or a specific module to the latest version.

You can migrate a project/module or click Actions to configure a migration level or cancel migration and disable this popup.
Press Ctrl+Shift+A, find the Migrate Ktor to Latest Version action, and press Enter.
Configure a migration level
To configure a migration level or disable migrations at all, use a corresponding option on the page.