Local TMS
Local TMS is a lightweight and agile way to store and manage your test data well suited for teams regardless of their size. Local TMS stores test data as a collection of t.md and r.md files right in the project. This approach allows for branching, versioning, reviewing, and better integration with automated tests.
Take a look at this short video to see how local TMS works:
Enable local TMS
Press Ctrl+Alt+S to open settings and then select .
Set the Markdown checkbox under TMS.
If your project already has any t.md files in it, they will be displayed in the Markdown tab of the TMS tool window.
Create a test suite
In the Project tool window (Alt+1), select the directory in which you want to create the test suite, press Alt+Insert, and select Test Suite from the menu.
Alternatively, right-click the directory and select .
Give the test suite a name and press Enter.
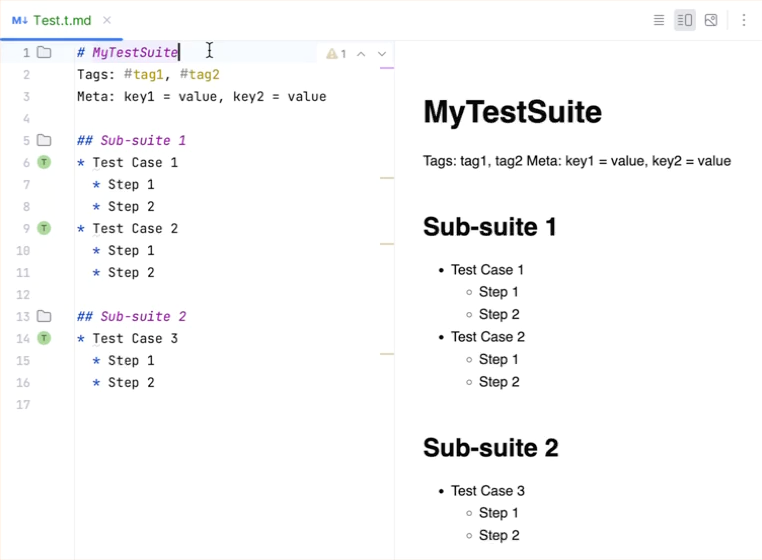
Test suite files have the following format:
The heading contains the test suite name.
Tags and metadata are specified using
TagsandMetakeywords right after the element declaration. Tags and metadata can then be used as criteria for filtering TMS items.Each element (suite, sub-suite, and case) can have its own tags and metadata.
Tags and metadata are inherited from a suite or a sub-suite to its respective test case(s). Inherited tags and metadata are shown for the test cases in the TMS tool window.

List items are test cases.
Letters
SandCfollowed by numbers represent an ID assigned to a test suite or case. Assigning an ID for the test case is recommended, and optional for the test suite.Nested list items are test steps.
Create a test run
Test runs are stored in r.md files as part of your project. They are not required to correspond to a test case and can consist of arbitrary steps.
In the Project tool window (Alt+1), select the directory in which you want to create the test run, press Alt+Insert, and select Test Run from the menu.
Alternatively, right-click the directory and select .
Select the test cases that should be checked during this test run.
Manage a test run
For each test case in a test run, you can specify its outcome and who performed the test.
Go to the test run file.
Specify the result, for example,
[ok]or[fail]and the agent id using the@sign, for example:* [ok] @my.user Test Case 1
Share test data through VCS
Test data stored in local TMS can be shared and versioned just like any other project files.
For more information about enabling and using version control in your project, refer to Version control topic.