Scala features
IntelliJ IDEA lets you use different Scala intention actions, inspections with quick-fixes, as well as convert your code from Java to Scala, and use different Scala templates while working in the IntelliJ IDEA. To learn more about how to use IntelliJ IDEA's editor in general, refer to Using code editor.
Working with Strings in Scala
IntelliJ IDEA with the Scala plugin, provides many tools to help with string manipulations in Scala programming This page highlights some of the most popular actions and shortcuts.
Triple-quote strings
If you want to include a quote character ('"') in a regular string, you need to escape it by writing a backslash in front of the character ('\"'). It is tedious if you have many quote characters in the string, and it may also lead to typos that are difficult to spot. Instead, you can convert your regular string into a triple-quote one. To do that, enter your string, press Alt+Enter and from the list of intentions, select Convert to """string""".
Multi-line strings
With the same Convert to """string""" intention you can convert a regular string with escaped newline characters ('\n') into a multi-line string. Press Alt+Enter to open the list of intentions. Select Convert to "string" and press Enter. You can use the same intention once again to revert it.
To enter a multi-line string from scratch, type triple quotes in the editor. If you press Enter, it will automatically invoke the stripMargin method. The stripMargin method removes the left part of a multi-line string up to a specified delimiter. The whitespaces are also preserved.
Multi-line strings settings
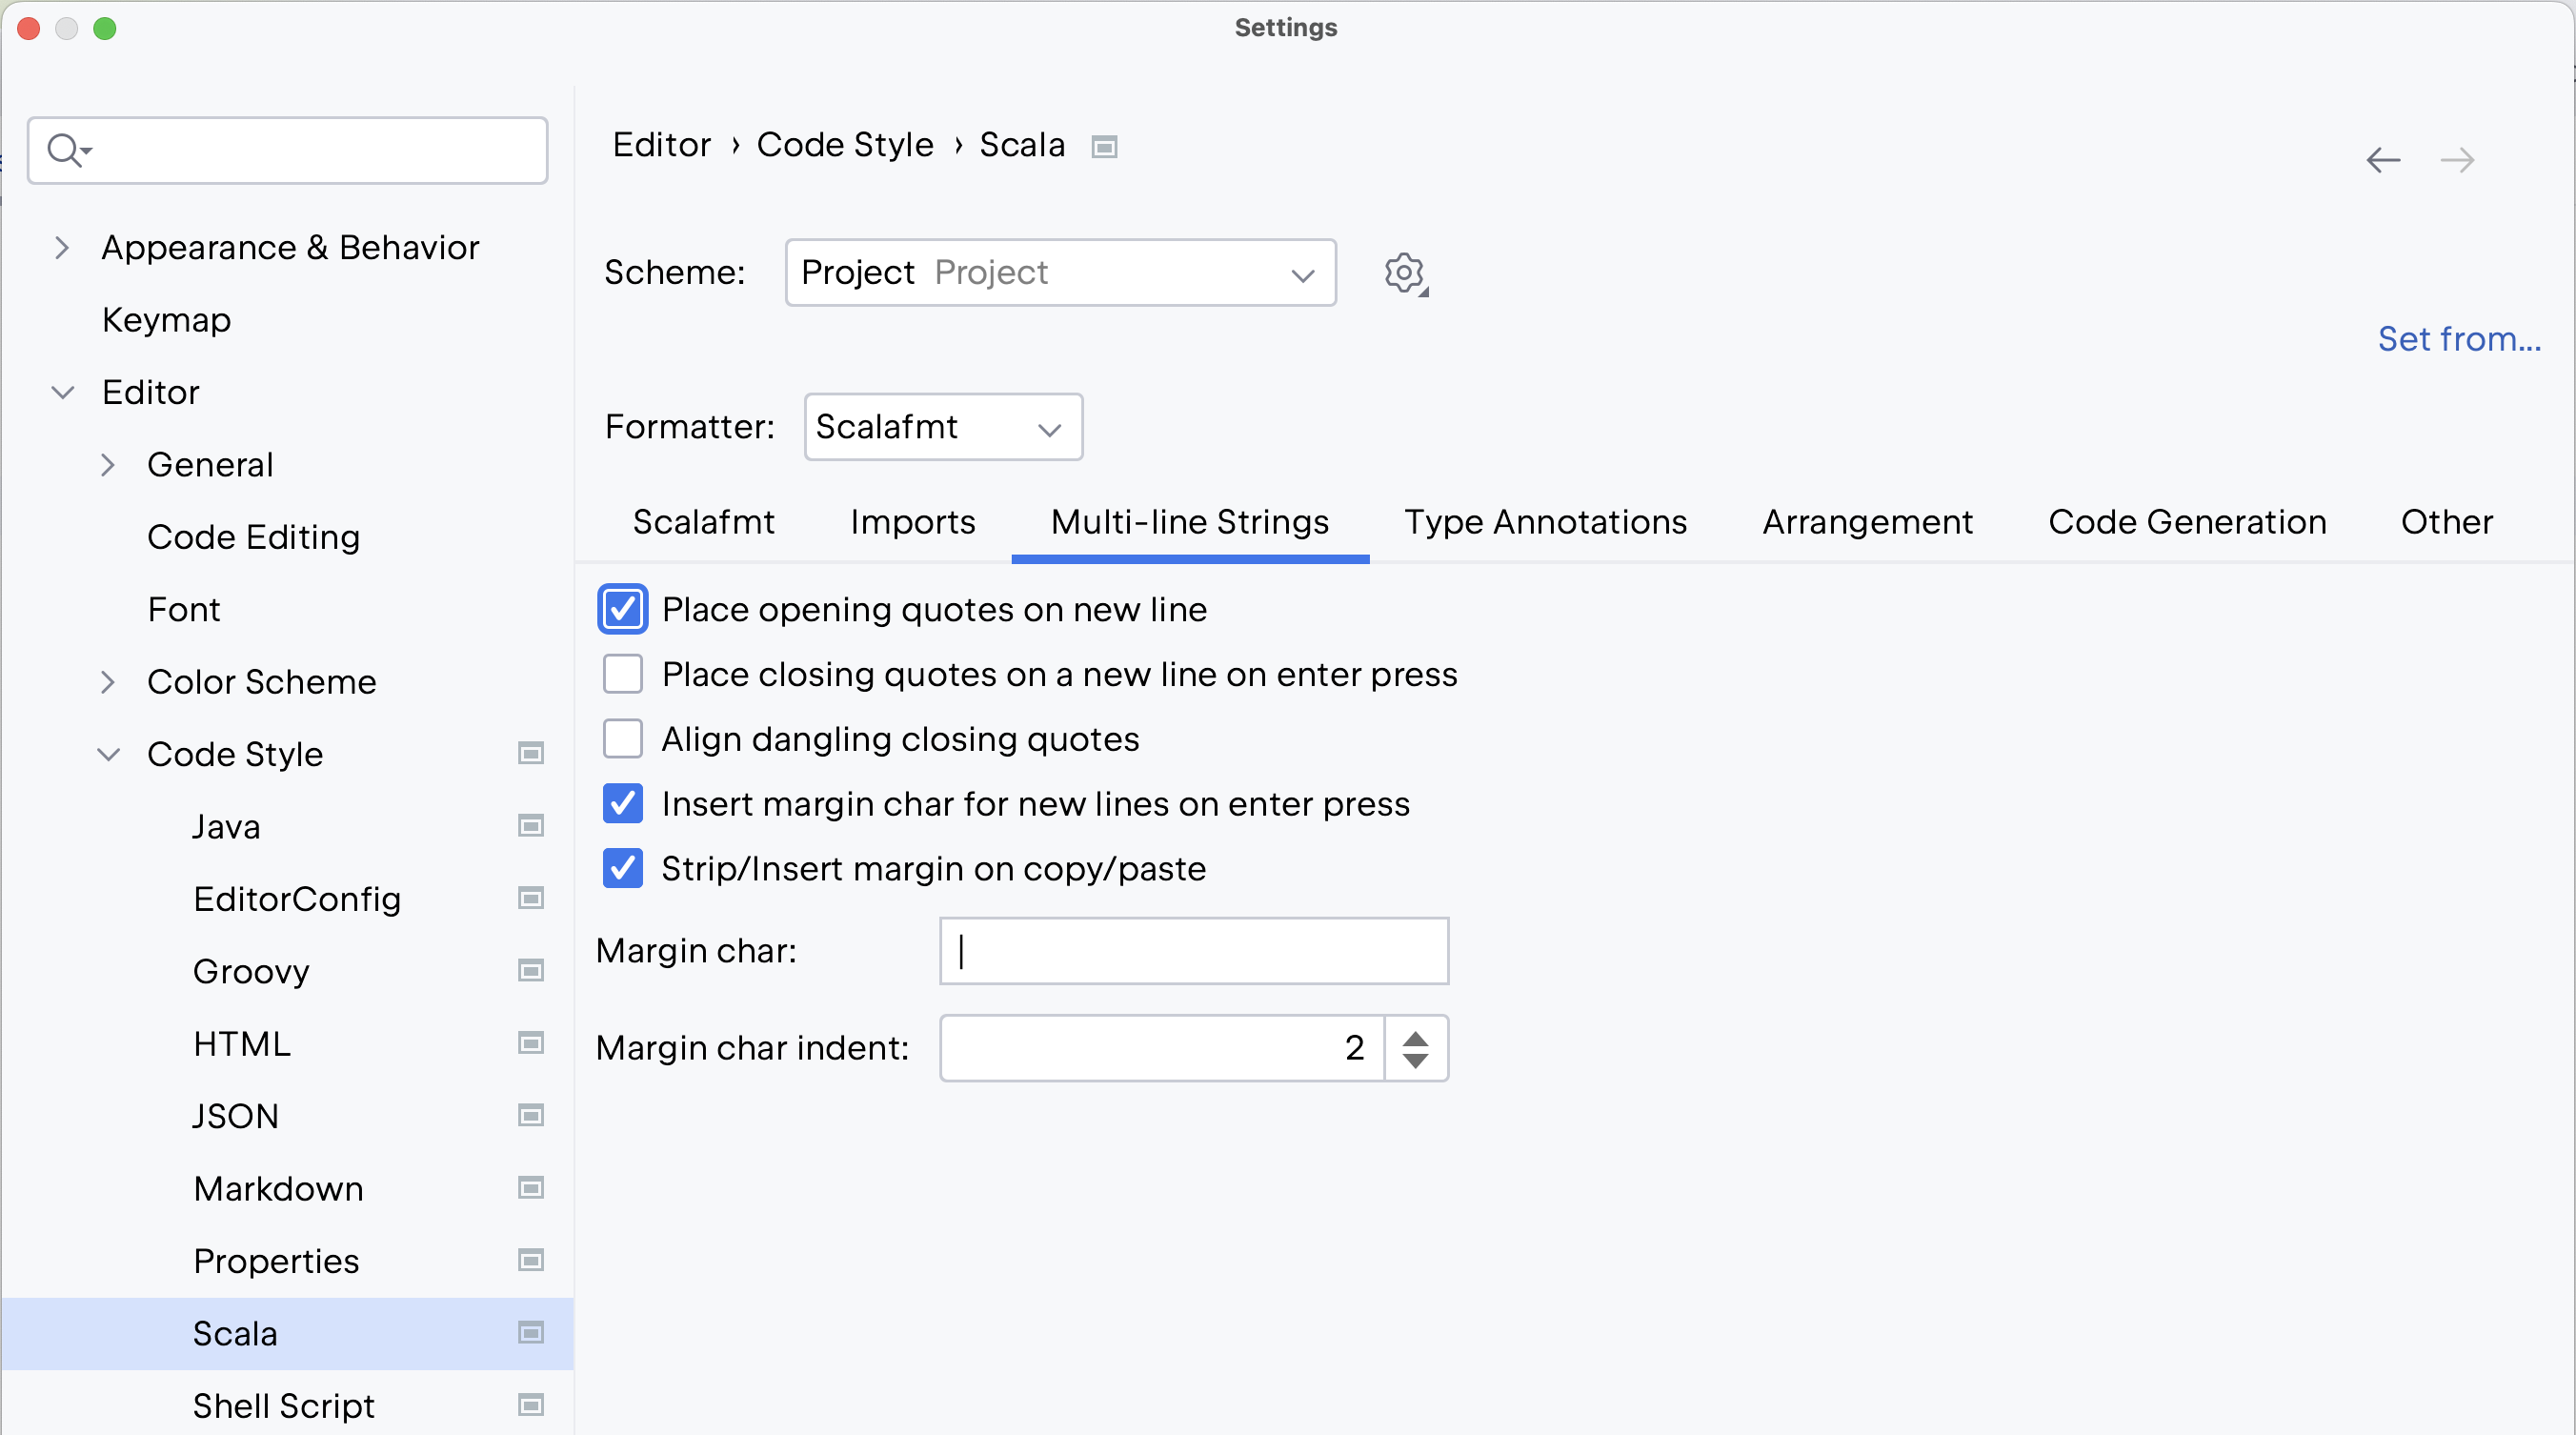
Use the Multi-line strings tab in Scala settings to set a different format for multi-line string options such as Margin char indent or disable a multi-line strings support.
Press Ctrl+Alt+S to open settings and then select . Then, on the Scala page, select the Multi-line strings tab. Edit the settings and click OK.
Convert simple string into the interpolated one adding a variable reference.
Concatenation with + +
An idiomatic Scala way to include computation results in strings is to use interpolation. If for some reason you decide to split your string into two and concatenate them with the computation result with '+' signs instead, move the cursor to the place where you want to have the string split, and from the list of intentions, select Insert gap with concatenation: (" + + ").
The 'replace '\r'' intention
This intention lets you keep the caret at the correct place on the next line in the multi-line strings regardless of what operating system you have at the moment. Enter a multi-line string, press Alt+Enter and select the appropriate intention from the list.

Inject Language/Reference
Use the Inject Language/Reference intention to insert a language or a reference into your multi-line string literals. For more information, refer to Language Injections.
Press Ctrl+Alt+S to open settings and then select .
On the Scala page, select the Multi-line strings tab.

Edit the settings and click OK.
Implicit hints
IntelliJ IDEA lets you enable, expand, and collapse editor hints for implicit conversions and arguments. These so-called implicit hints provide visual cues about implicits required in the given place in the code by the Scala compiler. The feature enhances code readability and debugging capabilities without actually altering the codebase.
In the main menu, go to (or press Ctrl+Alt+Shift +=). In the editor, right-click the hint and from the pop-up menu, select the appropriate action to expand the existing hint, disable the mode, or to see the implicit arguments.

Alternatively, while in the editor, you can press Ctrl+Alt+Shift+ + to enable the implicit hints. If you press the same shortcut again, IntelliJ IDEA expands the implicit hints to show you more detailed information. Press Ctrl+Alt+Shift+ - to collapse the hints.
Inlay hints
This section discusses inlay hints in the context of the Scala plugin and the Scala programming language. For a more general overview, please refer to Inlay Hints.
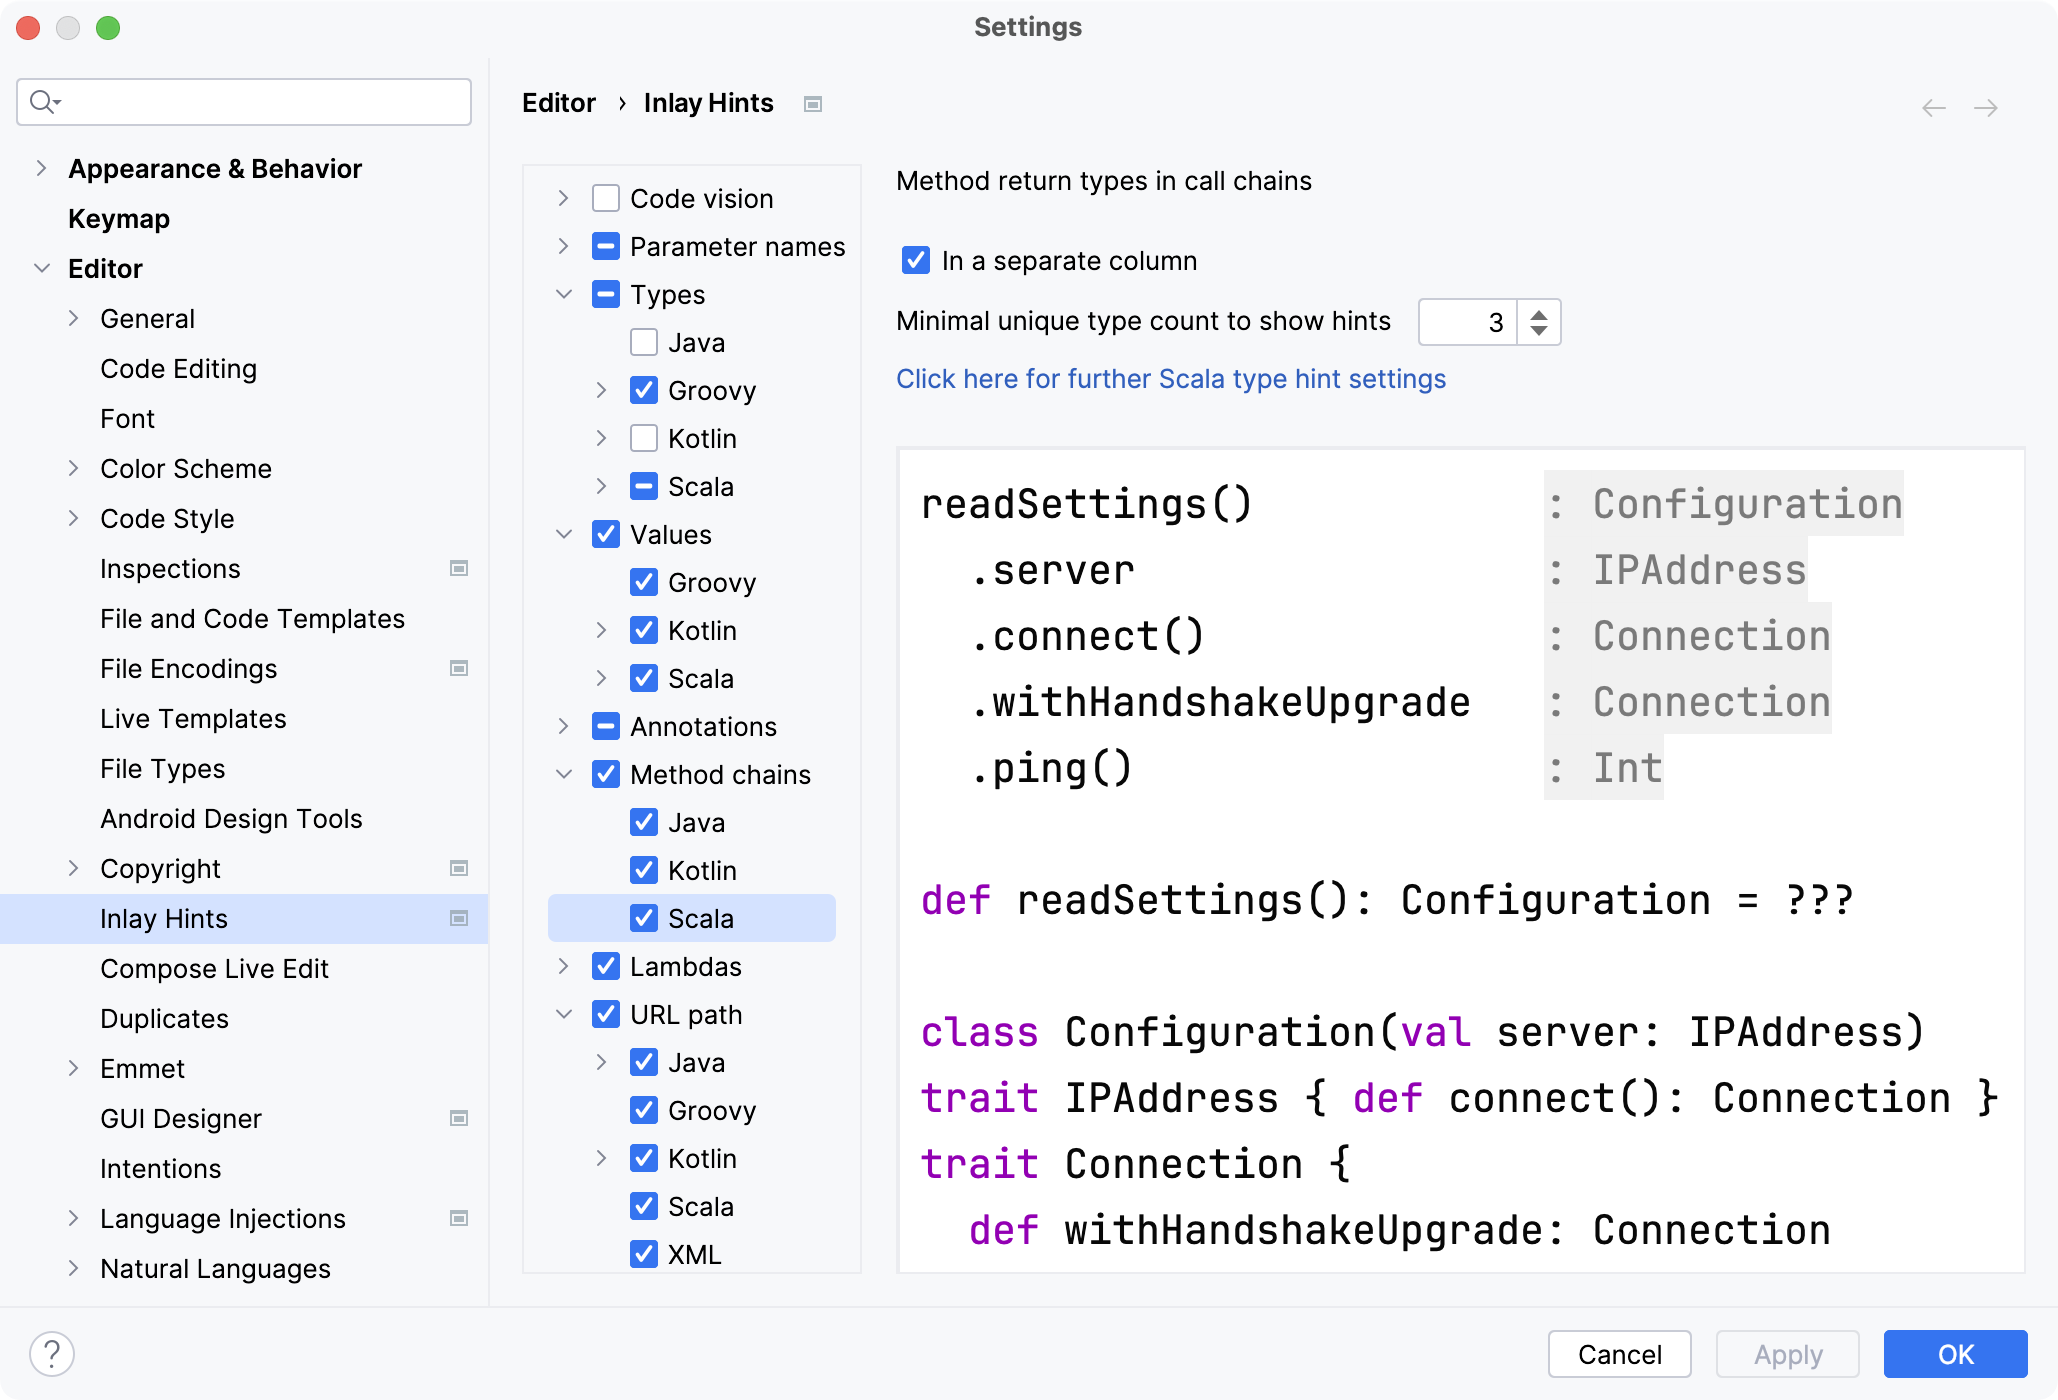
Inlay hints in IntelliJ IDEA are visual cues placed directly within the editor's code. They provide contextual information to make the code more readable and comprehensible without modifying the actual source code. These hints can be incredibly valuable, especially in languages like Scala, where the type inference system might lead to code that's concise but occasionally difficult to decipher at a glance.
In the Settings dialog (Ctrl+Alt+S) , go to .
Type hints
IntelliJ IDEA can display the inferred type of value as an inlay hint. This is particularly useful for values with complex types or when using generic functions.

Type mismatch hints
These inlay hints will appear if the result type of expression differs from the declared type of the value in which the result is supposed to be held.
Method chains
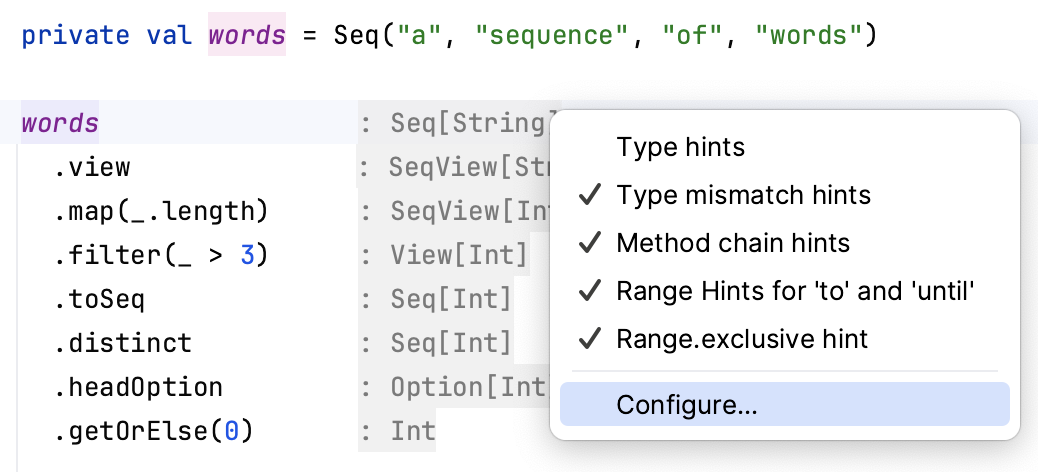
Scala collections offer a wide range of methods to transform data. Those methods can be chained together into sometimes quite a long sequence of transformations that step-by-step change both the type of the collection and the type of data held inside it. You can use inlay hints to keep track of that process.
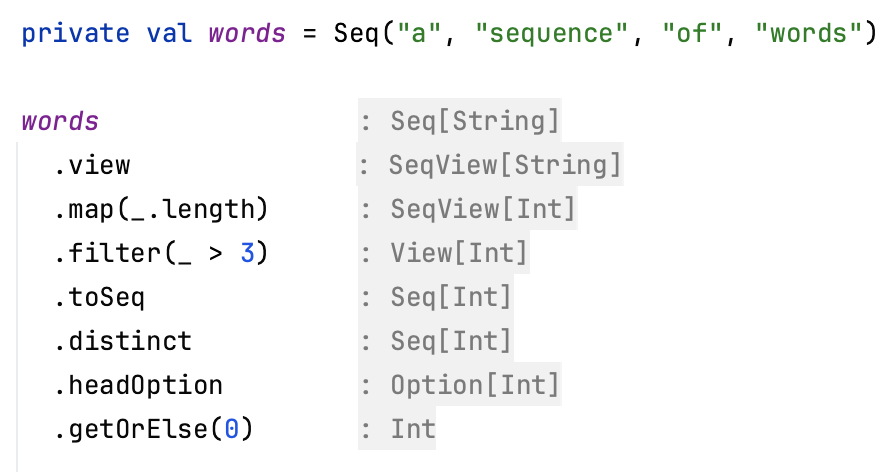
Enable and disable inlay hints from the context menu
You can enable or disable different types of inlay hints from the context menu: right-click hint and select the options.
The X-Ray Mode
With X-Ray, you can keep inlay hints and all the other additional information disabled or only partially enabled to the point where you feel comfortable, and then press Ctrl two times and hold it – all the other hints will appear and will be displayed only for the length of time you press Ctrl.
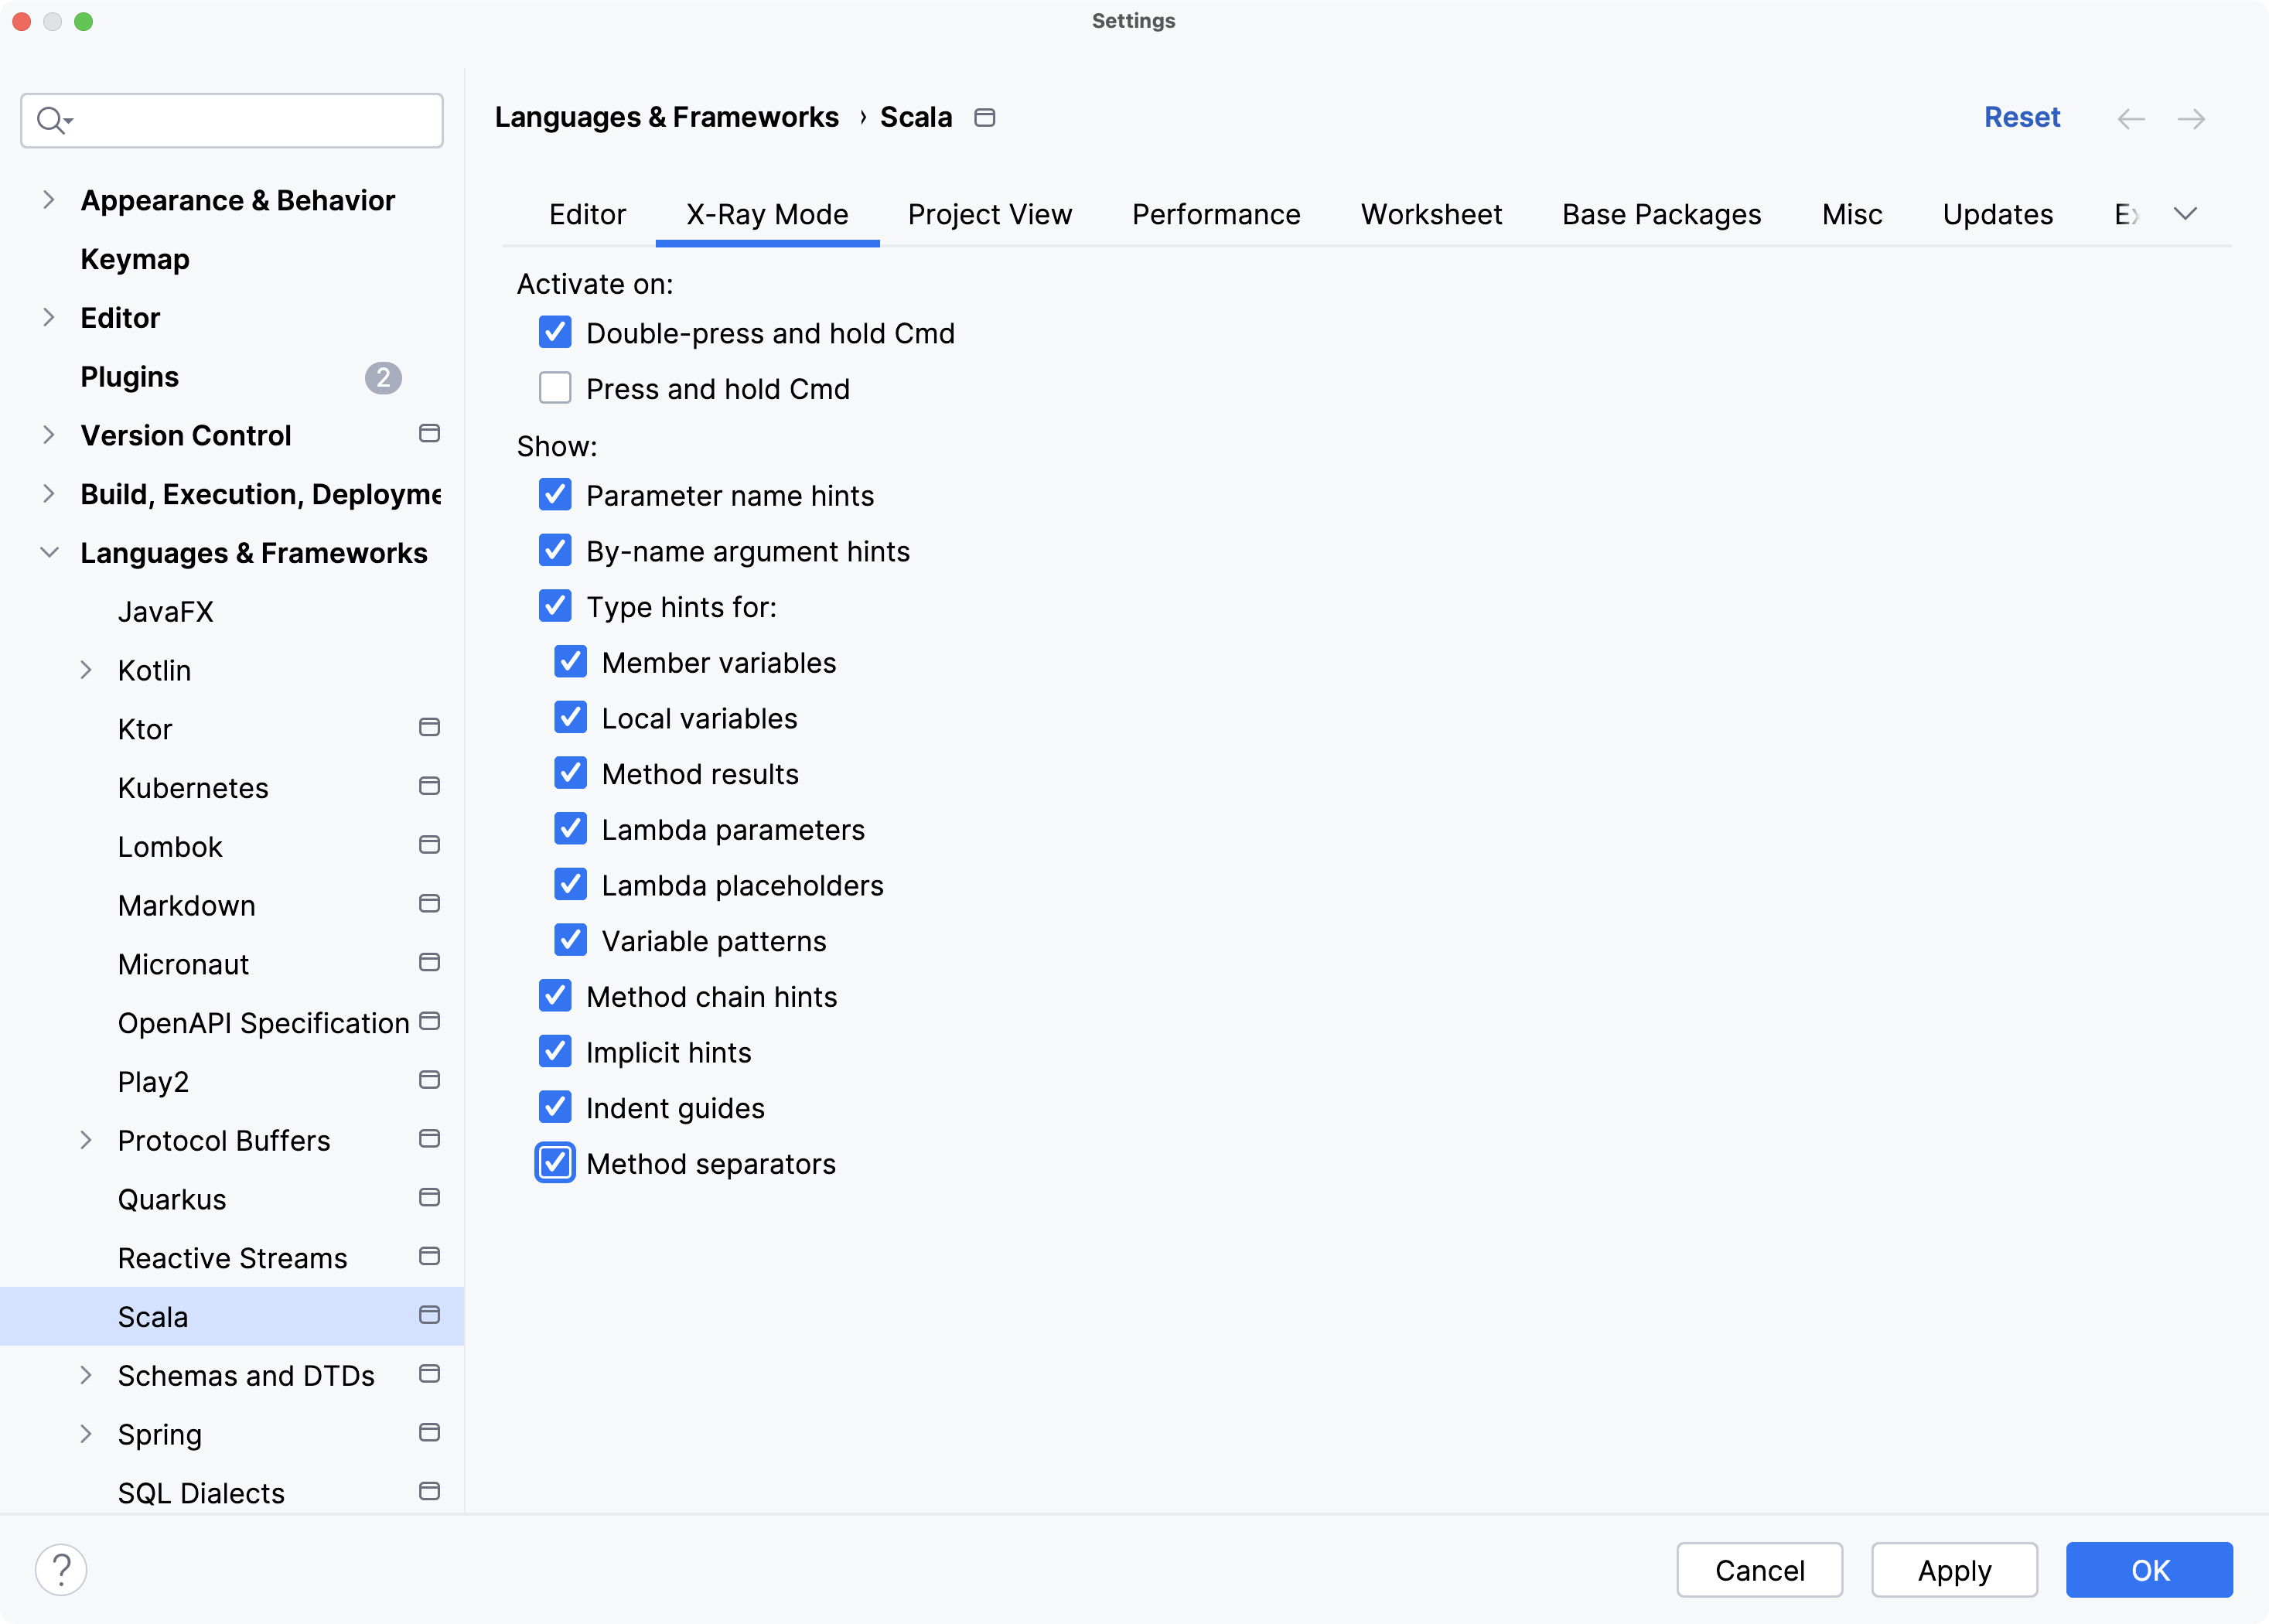
You can switch each type of the hint on and off in settings. Press Ctrl+Alt+S to open settings and then select . Note that each of them can be also turned on permanently in , and in for methods separators and indent guides. If a given type of additional information is turned on permanently, it will be displayed regardless of your X-Ray settings.
The X-Ray mode is also an alternative to two other actions: (Ctrl+Alt+Shift+=) and Show Type Info (Ctrl+Shift+P). In both cases, instead of memorizing the shortcuts for the respective actions, you can press Ctrl. On top of that, types displayed in hints are navigable – while pressing Ctrl, you can hover the cursor over them and click to go to the type declaration.
Find Usages for implicits
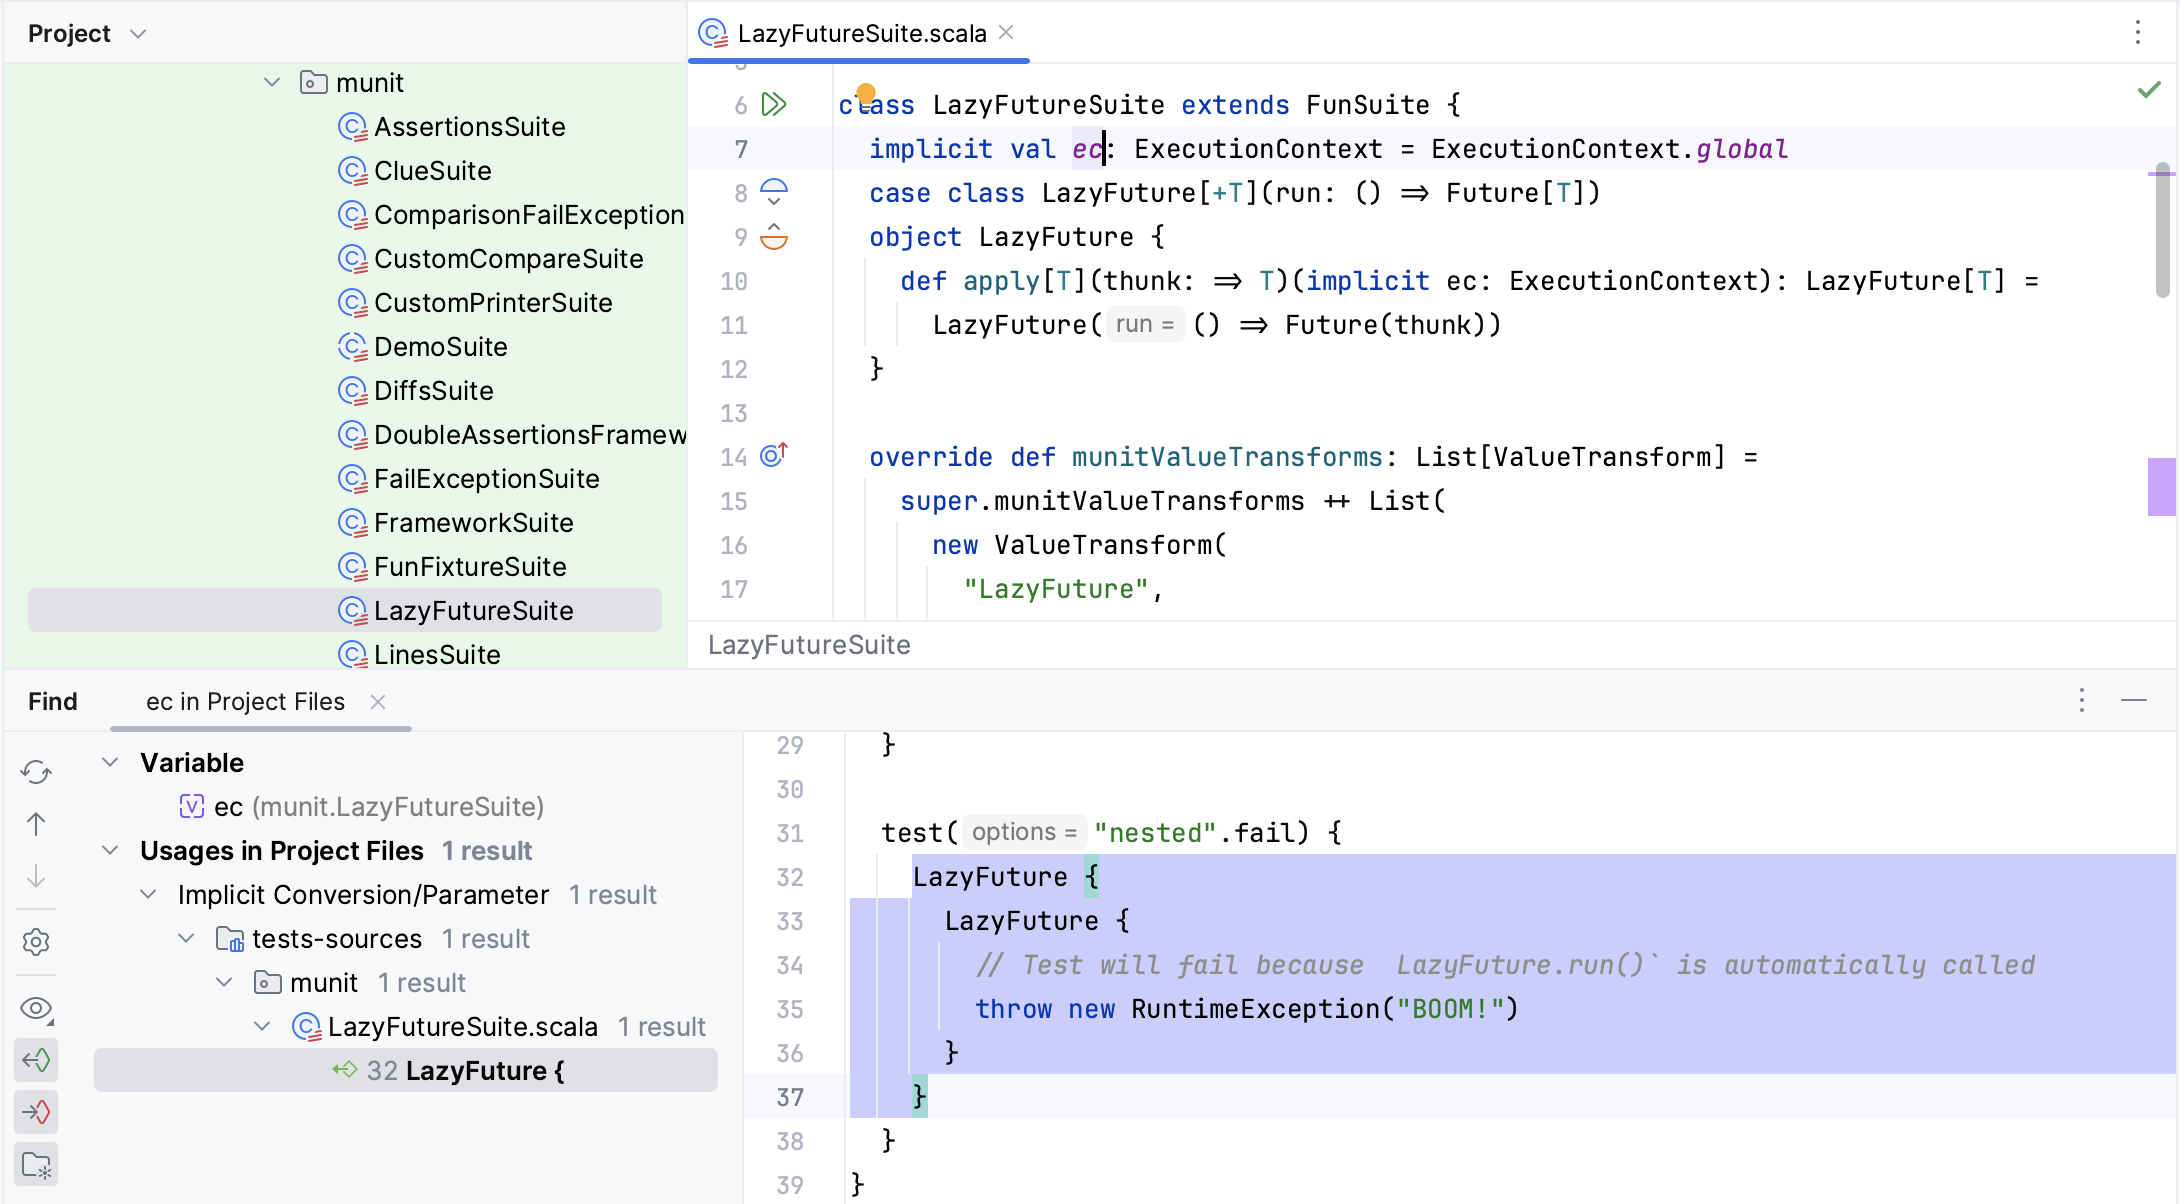
You can navigate from implicits definitions to their usages using the Find Usages action. In the editor, select the implicits definition and from the context menu, select Find Usages Alt+F7.
This capability relies on bytecode indexes, and can also be used to locate the following hidden elements that are not present in the source code as is:
apply/unapplymethod callsSingle Abstract Method (SAM) type instantiations
foreach/map/flatMap/filter/withFiltercalls via a for-comprehension
Auto-import for implicits
IntelliJ IDEA supports the auto-import for unresolved implicit conversions. Enter your code in the editor. Place the caret at the unresolved expression and press Alt+Enter and, from the list of the suggested options, select the conversion to import. As a result, IntelliJ IDEA adds the necessary import statements.
Implicit conversions
IntelliJ IDEA lets you invoke implicit conversion methods and arguments.
List implicit conversions
Select an expression and press Ctrl+Shift+Q (Ctrl+Q for macOS) to invoke the list of applicable implicit conversions. The list shows the regular scope displayed on the top and the expanded scope displayed on the bottom of the list.
If you need, make the implicit conversion method explicit. Press Alt+Enter and select Make explicit or Make explicit (Import method).
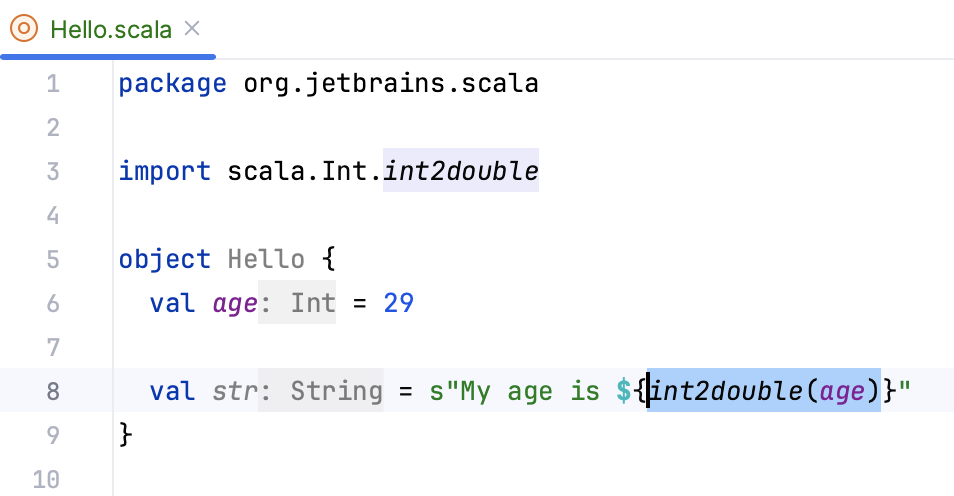
If you select Make explicit, IntelliJ IDEA returns a method call with the class name. It might be helpful if you need to make sure that the compiler imports a particular implicit conversion method that you originally wanted:
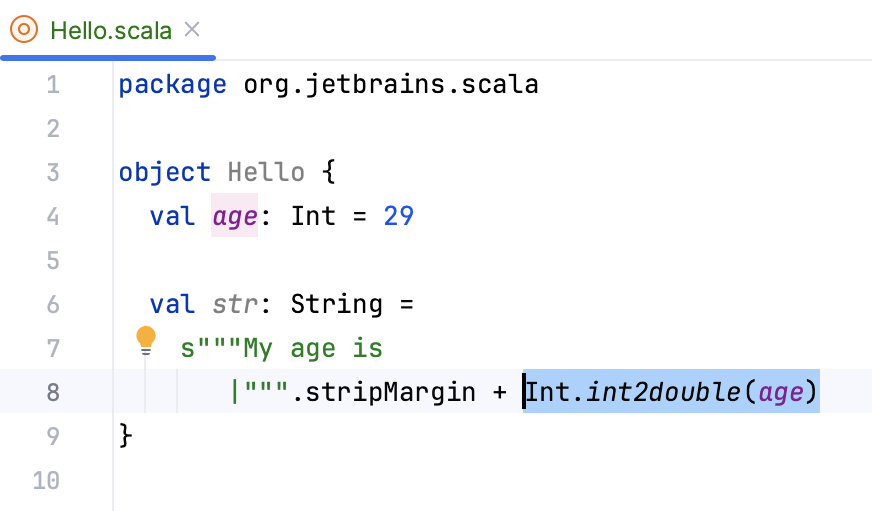
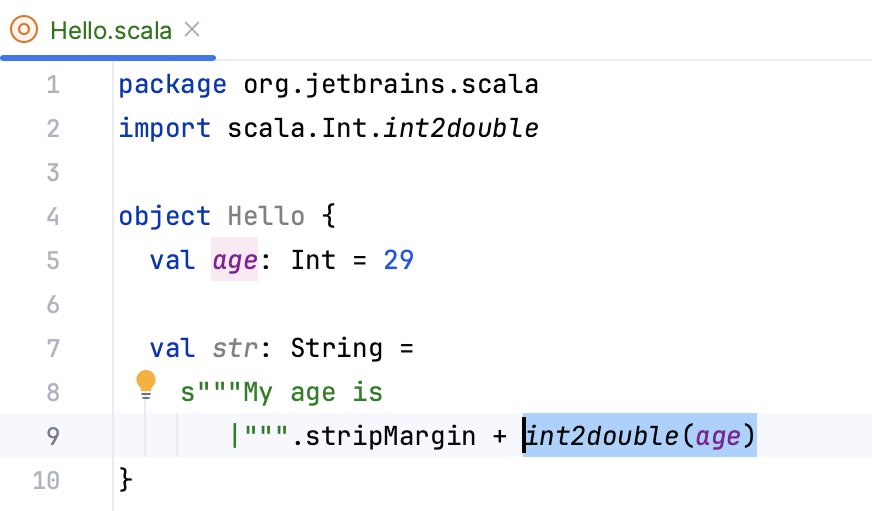
If you select Make explicit (Import method), the method is imported statically, and IntelliJ IDEA returns just its call without the class name. Also, the next time you open the list of useful implicit conversions you will see this method in the regular scope:
List implicit arguments
Place the caret at the method where implicit conversion was used and press Ctrl+Shift+P to invoke implicit arguments. It might be helpful for code analyzing when you want to find out what implicit arguments were passed to the particular call. It also lets you view the recursive implicit arguments.
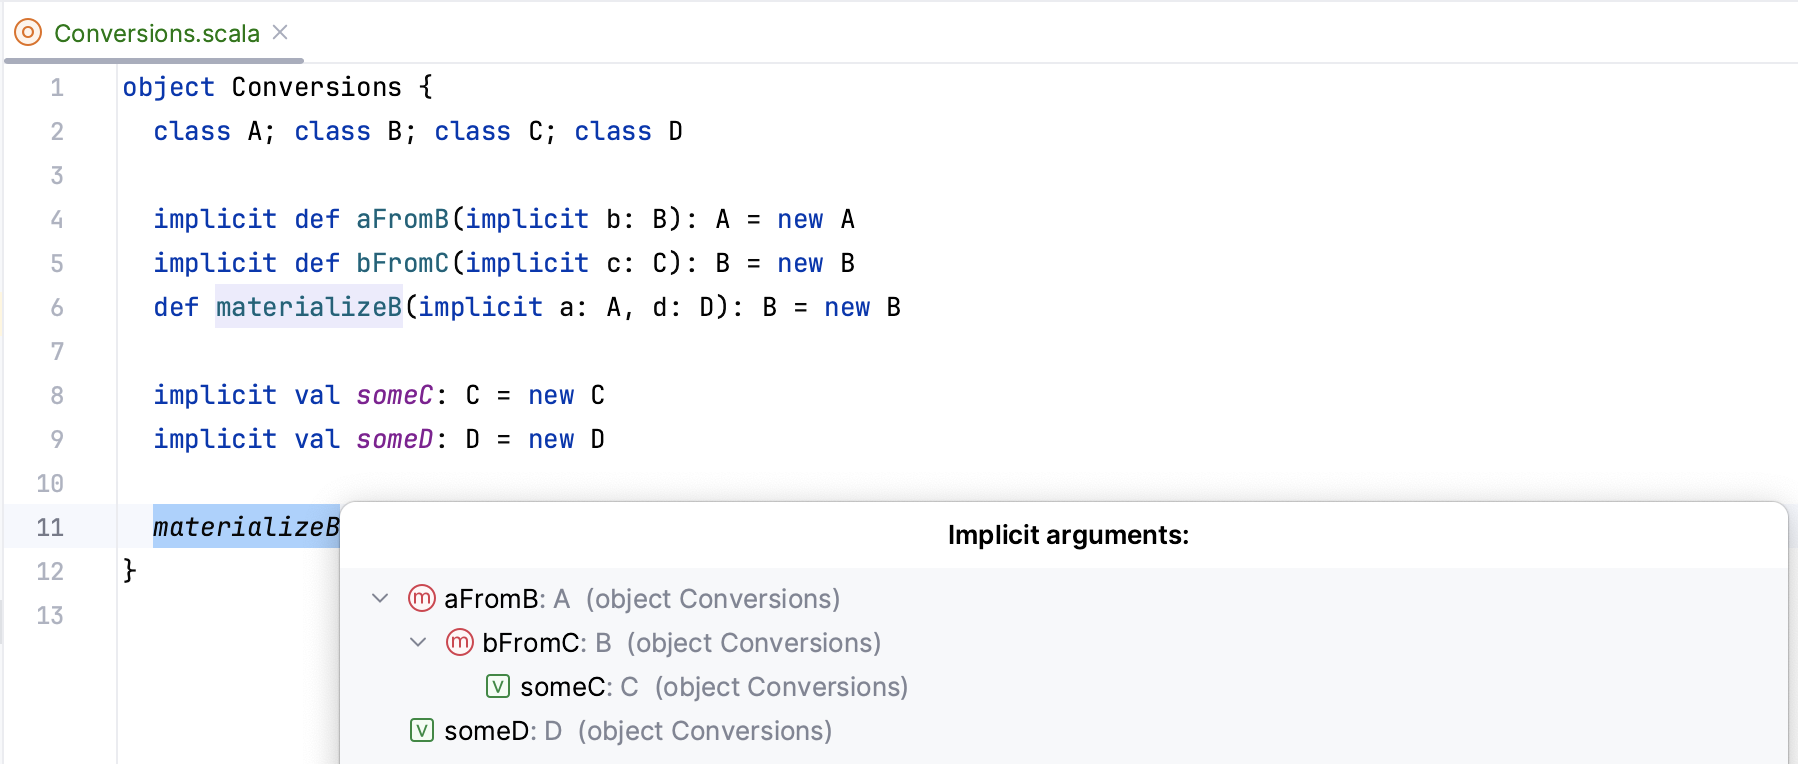
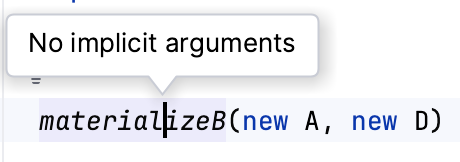
If IntelliJ IDEA cannot find method calls where implicit parameters were passed, it displays a pop-up message:
Type Info action
IntelliJ IDEA lets you work with type inferences using the Scala Show Type Info action.
To invoke the Show Type Info action in the editor, navigate to the value and press Ctrl+Shift+P.
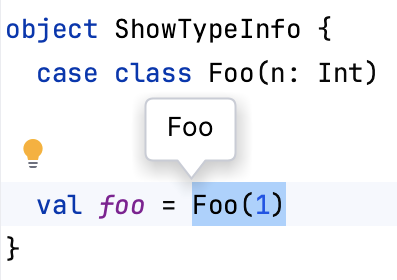
You can also see the type information on a value definition. Place the caret at a value definition and press Ctrl+Shift+P:
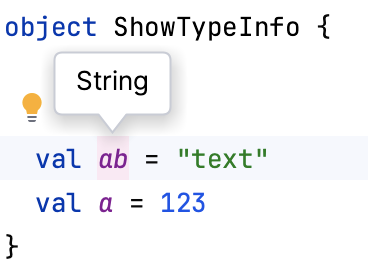
To add a type annotation, highlight the value, press Shift+Enter, and from the context menu, select Add type annotation to value definition. As a result, the type annotation is added.
To remove the type annotation, press Shift+Enter and select Remove type annotation from value definition.
Wrap and unwrap expressions
You can wrap or unwrap expressions in Scala code automatically as you type. Add an opening brace before the expression you want to wrap, and IntelliJ IDEA will add a closing brace automatically at the end of the expression. To unwrap an expression, delete the opening brace. IntelliJ IDEA will delete the closing brace automatically.
Code completion
You can use code completion for the following actions:
To import classes, press Shift+Enter on the code, select Import class. However, IntelliJ IDEA often recognizes what you need to import and displays a list of suggestions.
A name-based type suggestion for parameters. IntelliJ IDEA lets you automatically complete both the name and the type before actually adding a type reference.
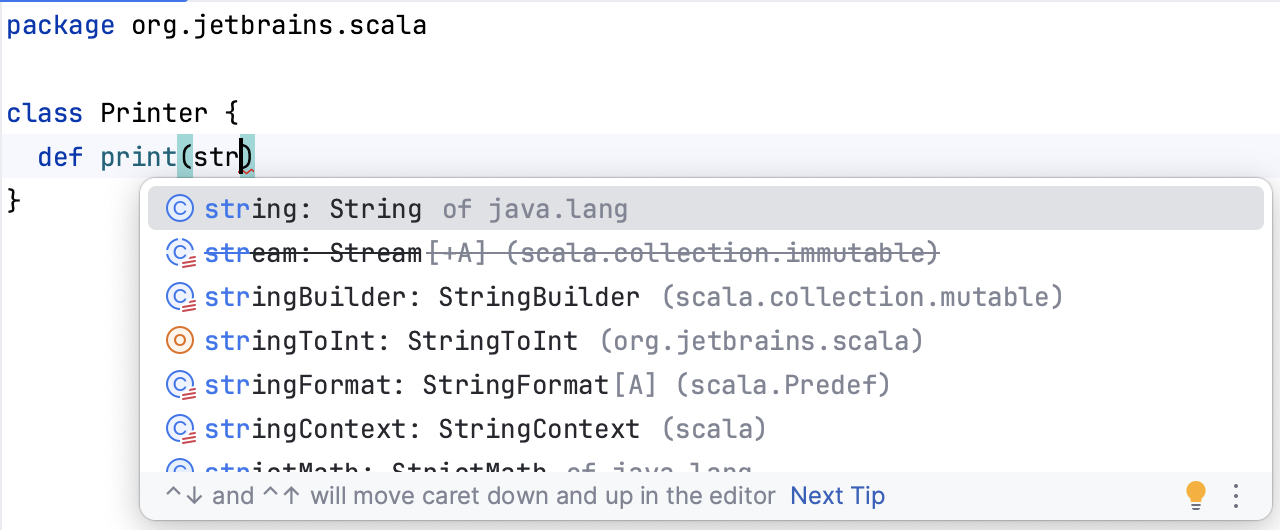
Invoke the Convert to interpolated string intention.
You can easily convert a regular string into the interpolated one using code completion after
$.Alternatively, select a value with concatenation in your string, press Alt+Enter, and select Convert to interpolated string.
If you have sealed types with subtypes, or Scala 3 enums, you can generate an exhaustive match checking for them. Note that auto-completion is available. As a result, the compiler checks a pattern match for all possible members of a sealed type.
You can complete code not only inside case clauses, but you can complete the whole case clause as well.
Create from usage
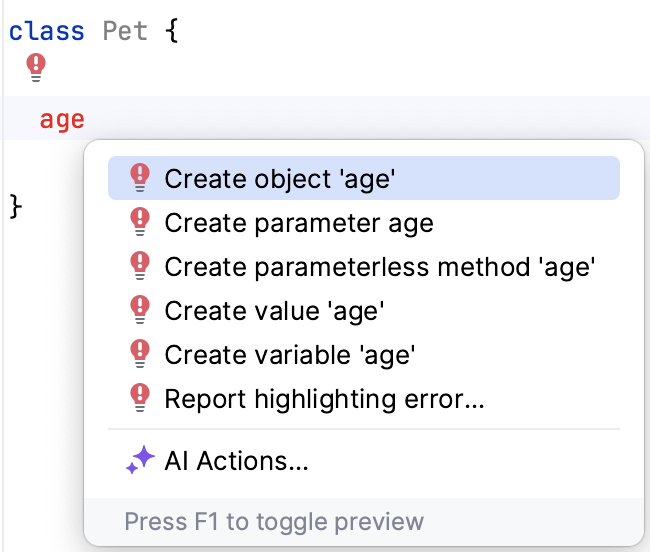
IntelliJ IDEA lets you create new code elements without declaring them first. To do that, type a name of a new code element and press Alt+Enter. Then, from the list of intentions, select the one you need.
Structure view
IntelliJ IDEA lets you view a structure of your code. Open the Structure tool window, and press Alt+7.
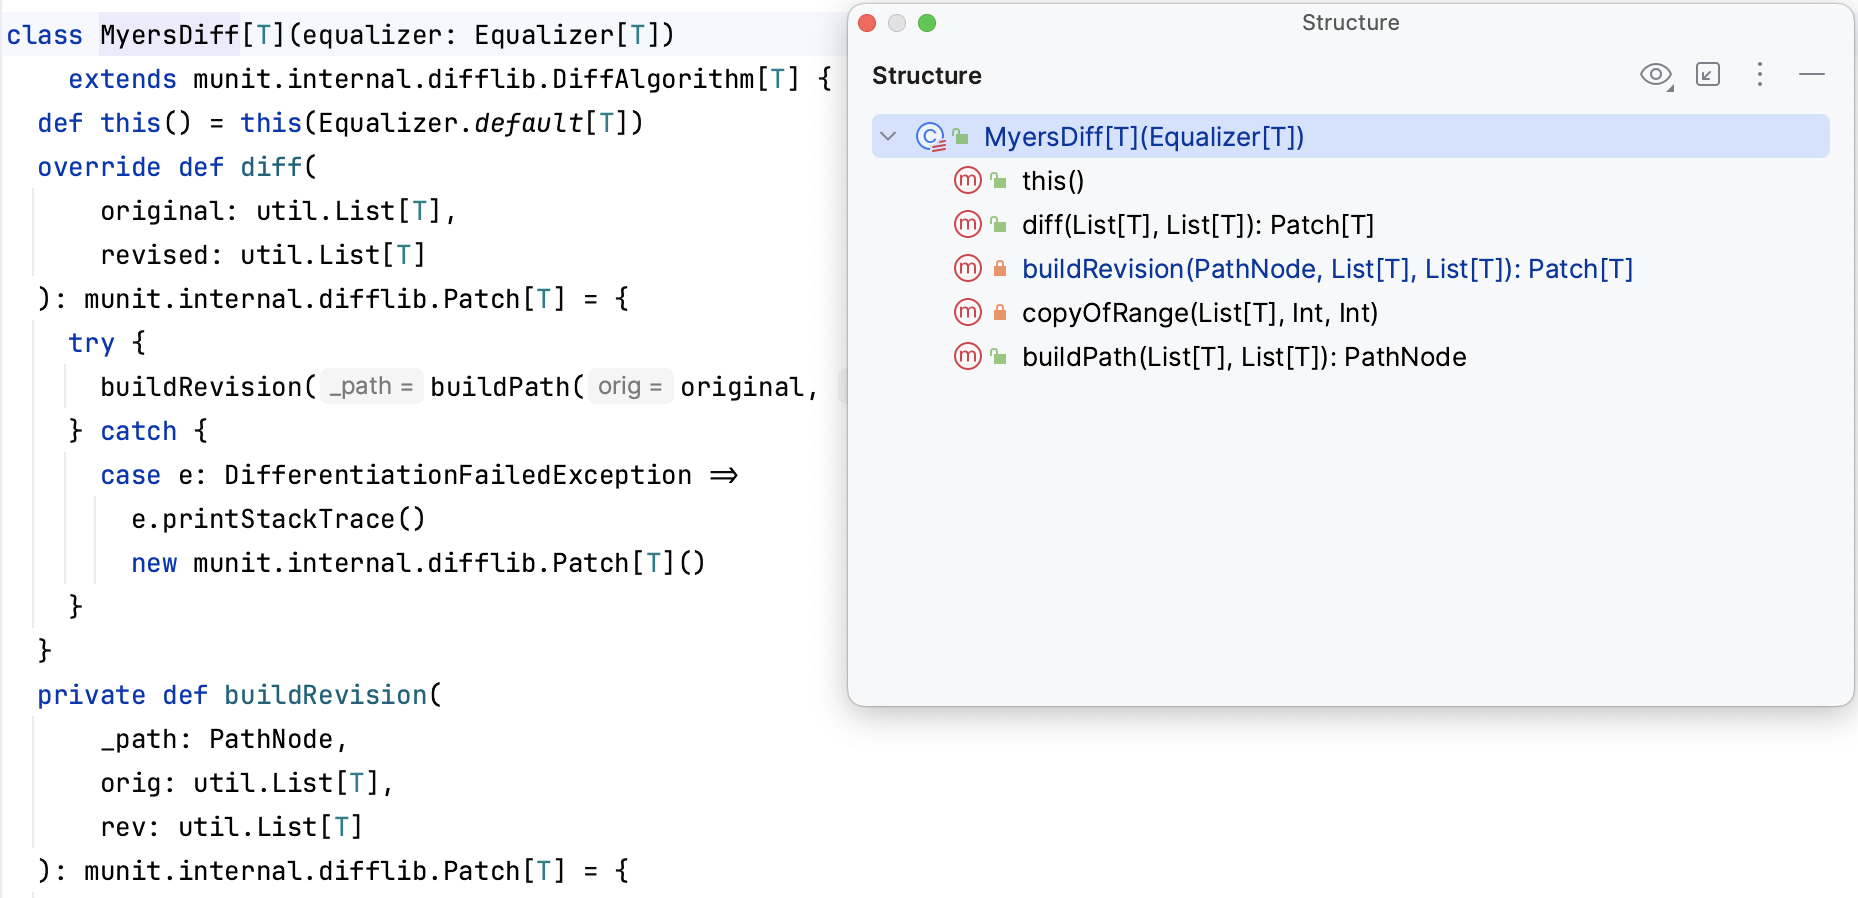
To navigate from the Structure tool window to the code item in the editor, press F4.
To highlight the code, press Ctrl+Enter.
Code generation
Use Alt+Insert to generate actions such as override, delegate, or implement methods.
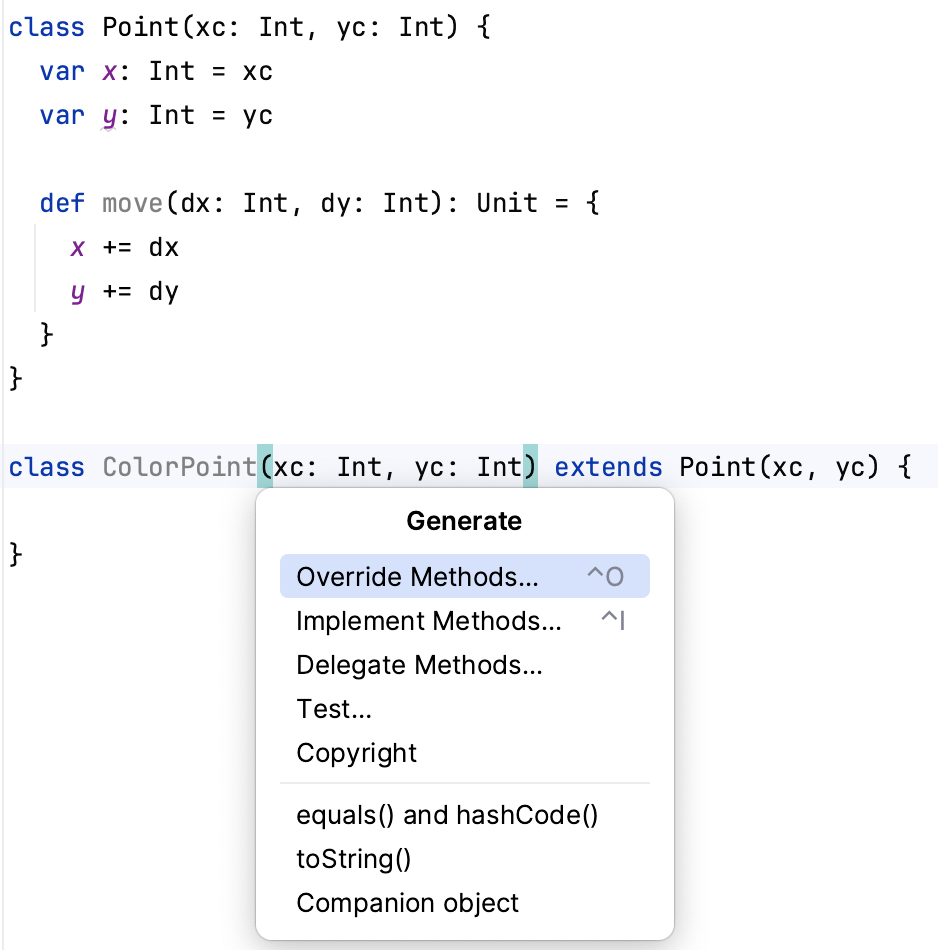
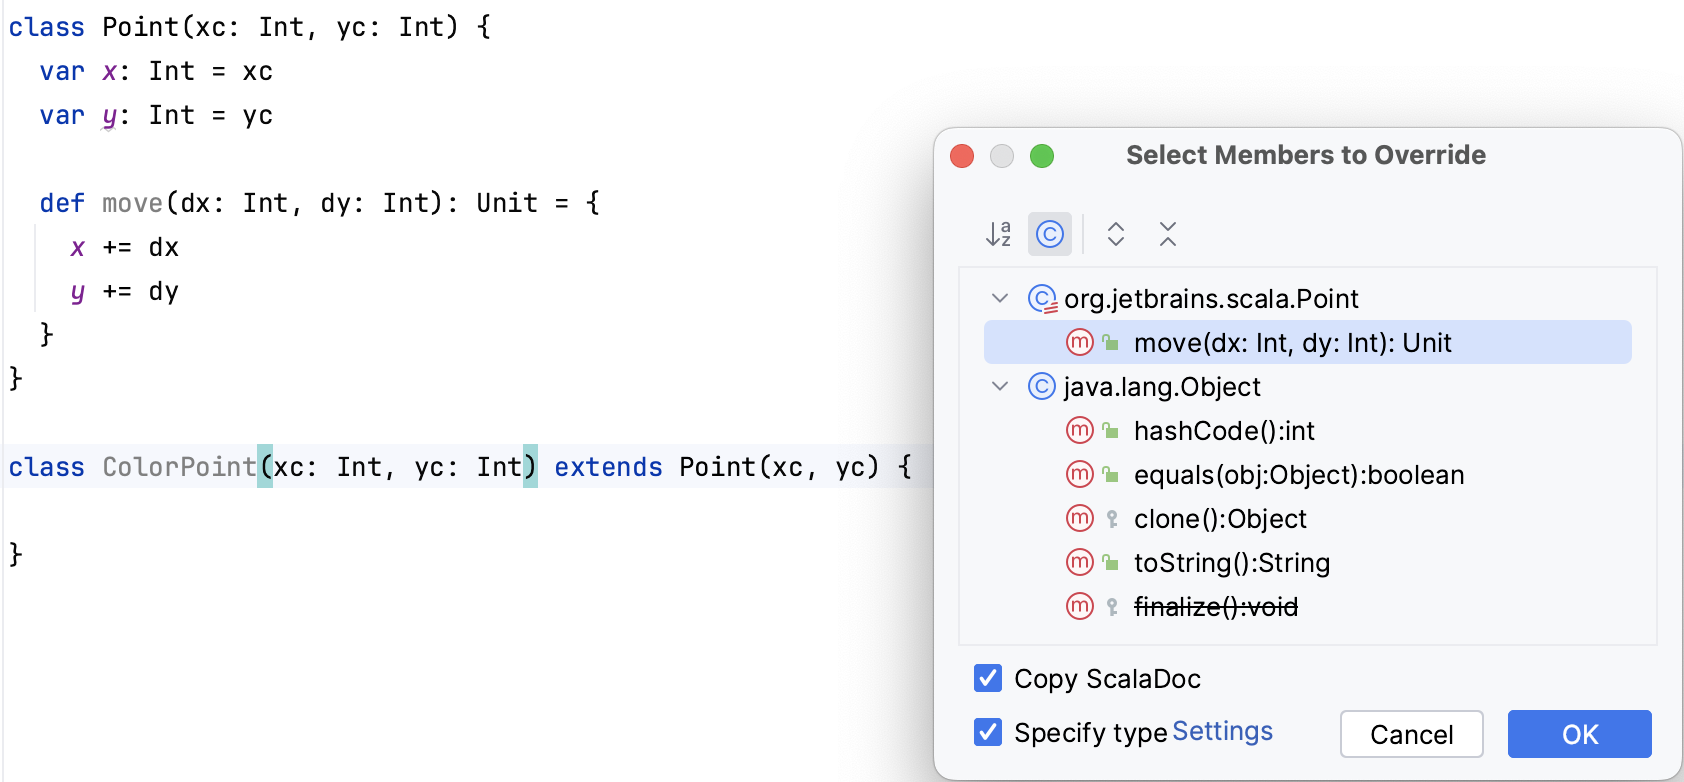
For example, select the Override methods action. IntelliJ IDEA displays a dialog with the list of methods that can be overridden. Select the one you need and click OK.
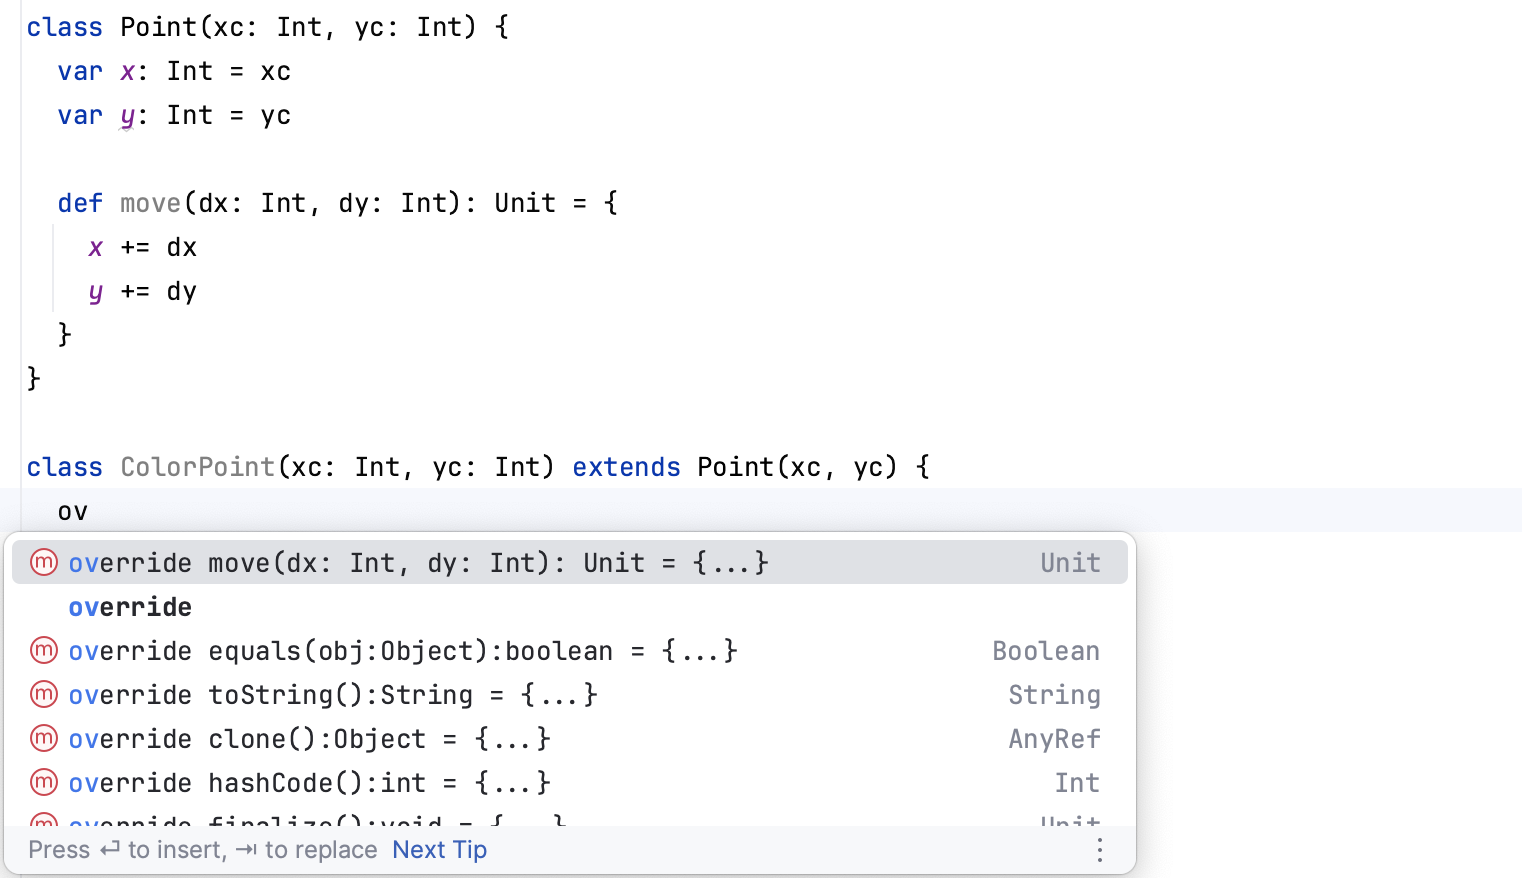
The corresponding completion works when you type the override keyword.
Live templates
To use predefined Scala templates, press Ctrl+J, and IntelliJ IDEA will display the list of available live templates for Scala. Select the one you need and press Enter.
You can also define a new template or edit the existing one. Select , and from options on the right, open the list of Scala templates.
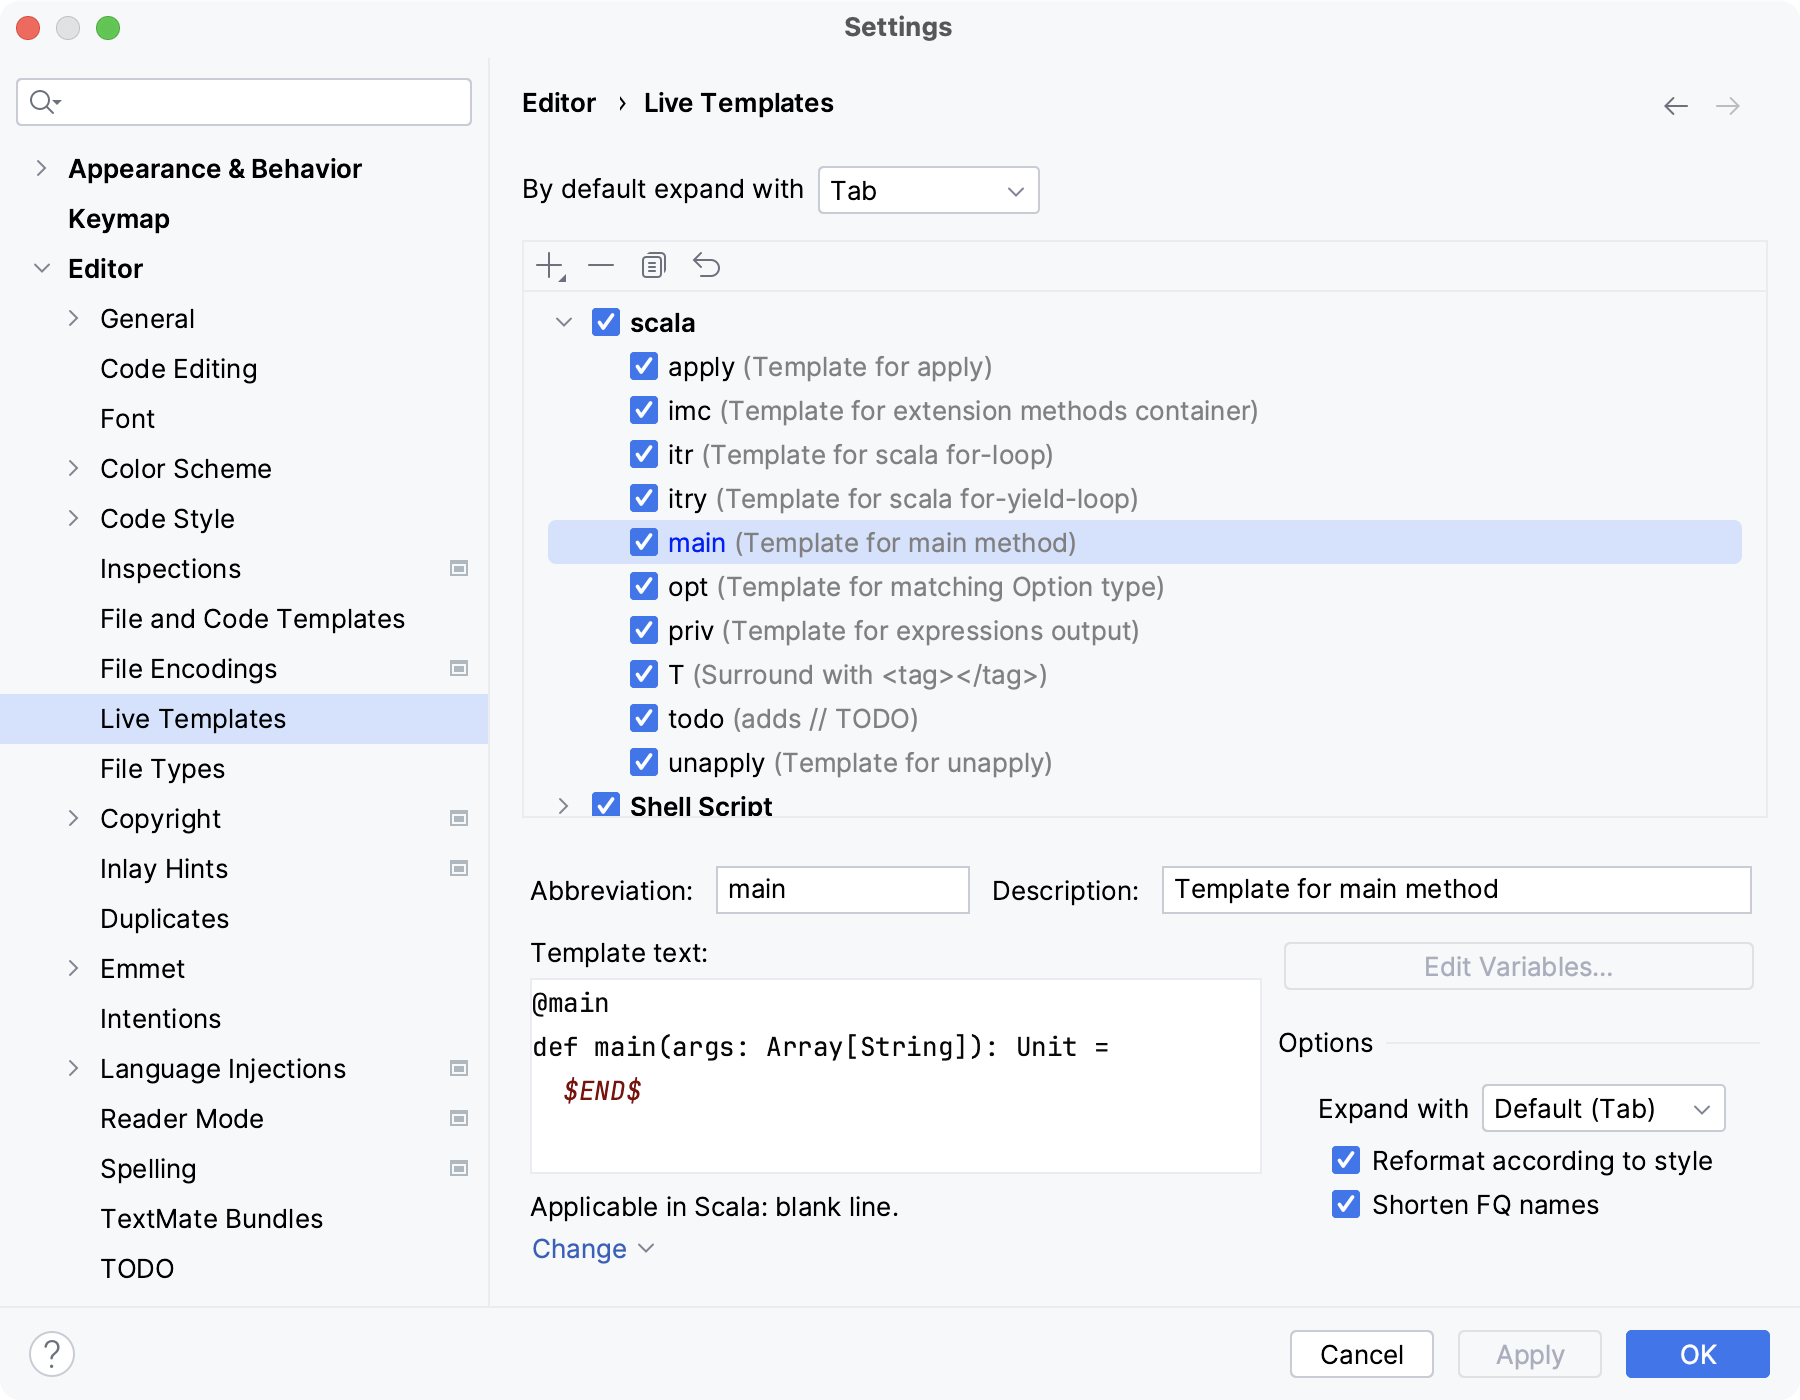
If you want to add a new template, click .
If you want to edit the existing template, select the one you need and change the default definitions.
Postfix completion
You can transform an already typed expression to another one based on the postfix you type after a dot.
To enable or disable the postfix completion or to see a list of postfix-specific predefined templates, their descriptions, and code samples, open the Postfix Completion page located in .
Inspections
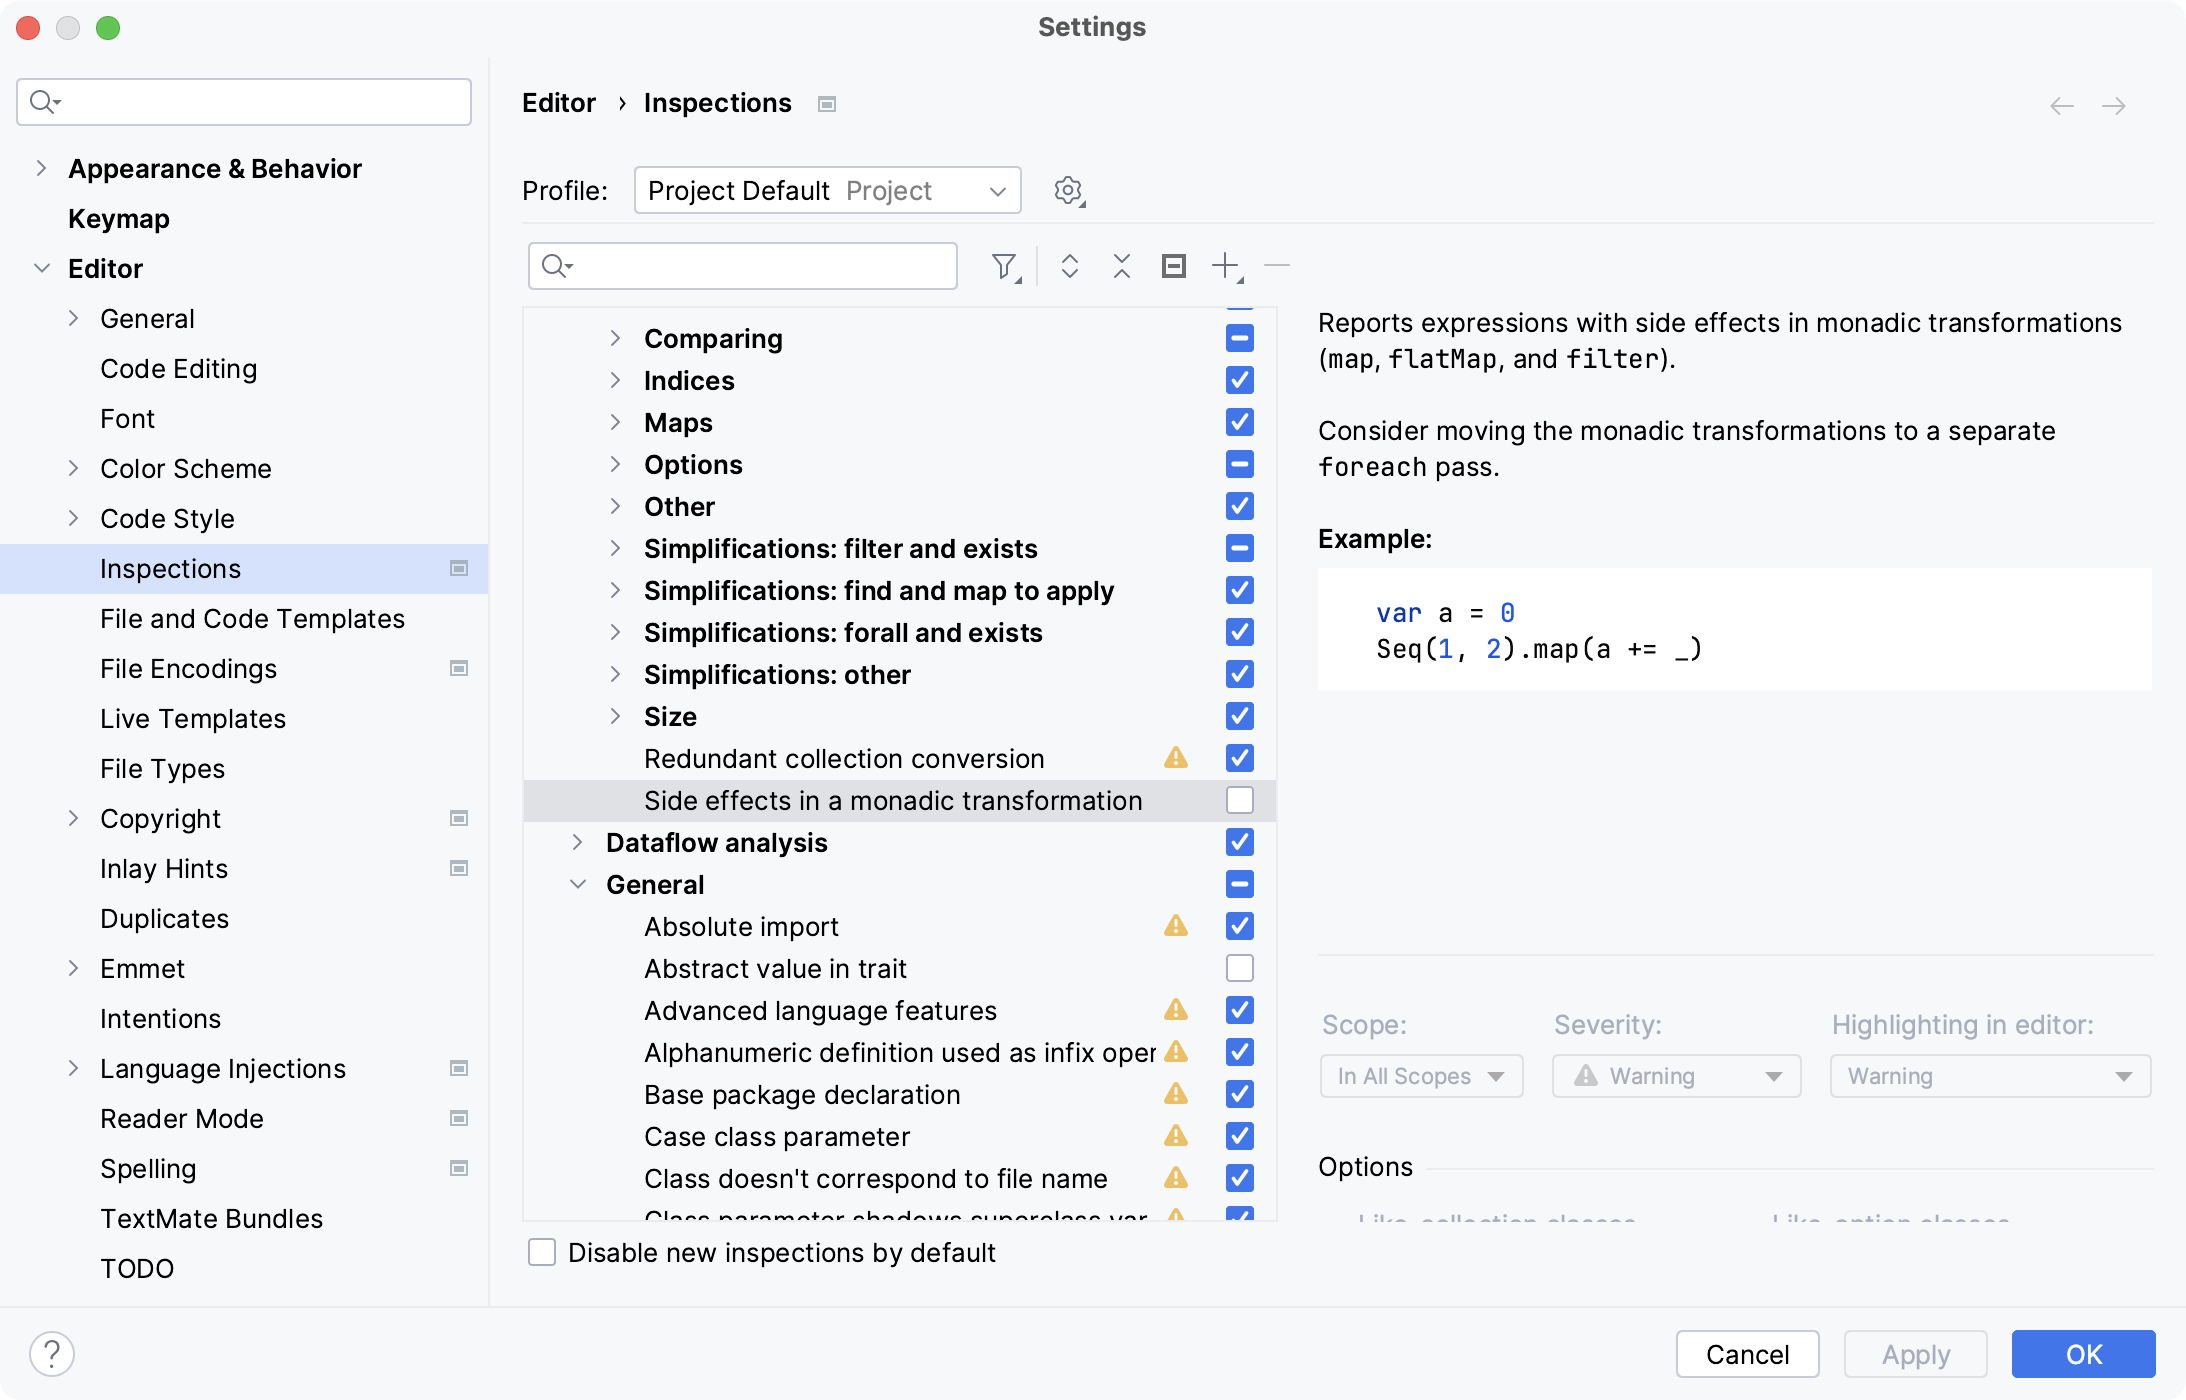
You can check the available inspections for Scala on the Inspections page in Ctrl+Alt+S. Since IntelliJ IDEA also supports Akka and Play, there are several inspections for them available as well.
Search Everywhere
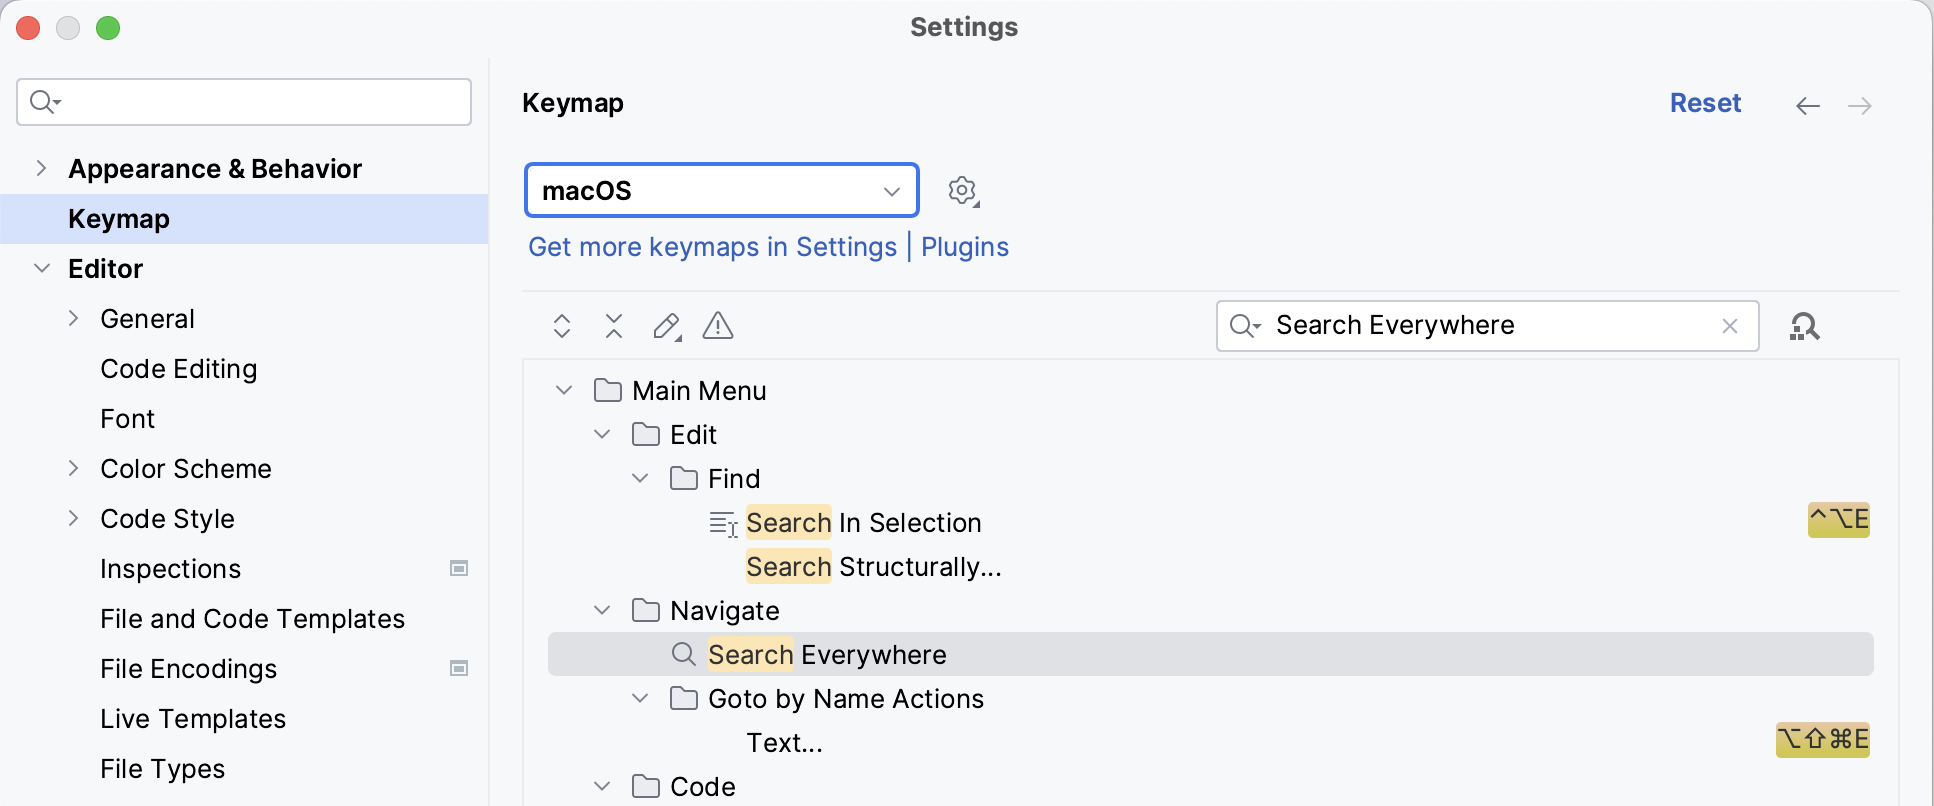
Just as in the case of many other programming languages supported by IntelliJ IDEA, Search Everywhere is a powerful feature that lets Scala developers navigate their code quickly. You can open it from the main menu: but we suggest that you go to , find Search Everywhere in the list of actions there, and bind it with a simple shortcut of your choice.
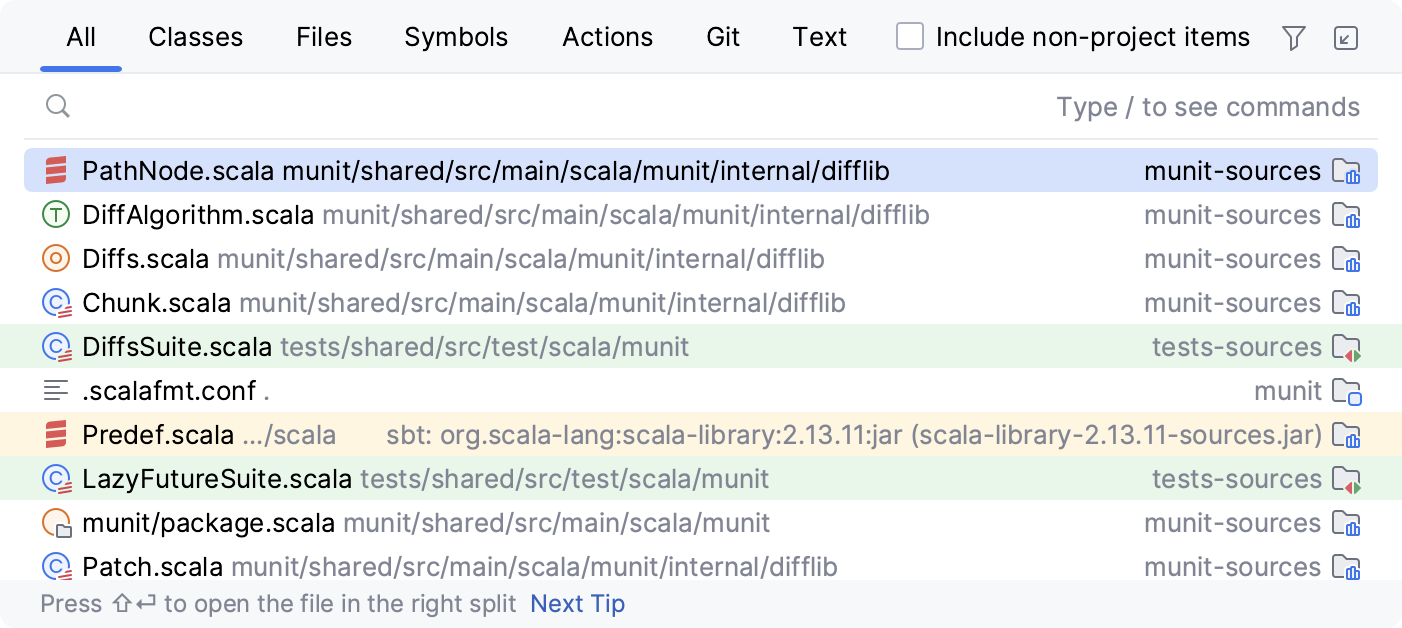
By default, Search Everywhere is opened in a popup and lets you search your codebase by the names of classes (including traits and objects), the names of files, the names of all symbols used in your code (fields, methods, variables, and so on), and by all of them at once. You can also search among actions of IntelliJ IDEA – there are many of them, and this is a good way to get to know what IntelliJ IDEA can do for you.
This list can be extended by plugins. For example, the Git plugin adds the ability to search for Git references. By clicking the icon the top-right corner of the pop-up window, you can move Search Everywhere to the bottom of the screen where you can also see how the symbol you search for looks in the code.
Code completion based on machine learning
Besides regular code completion features available for Scala code, you can enable the Scala code completion based on machine learning. It applies rules learned from the gathered data, which results in better suggestions.
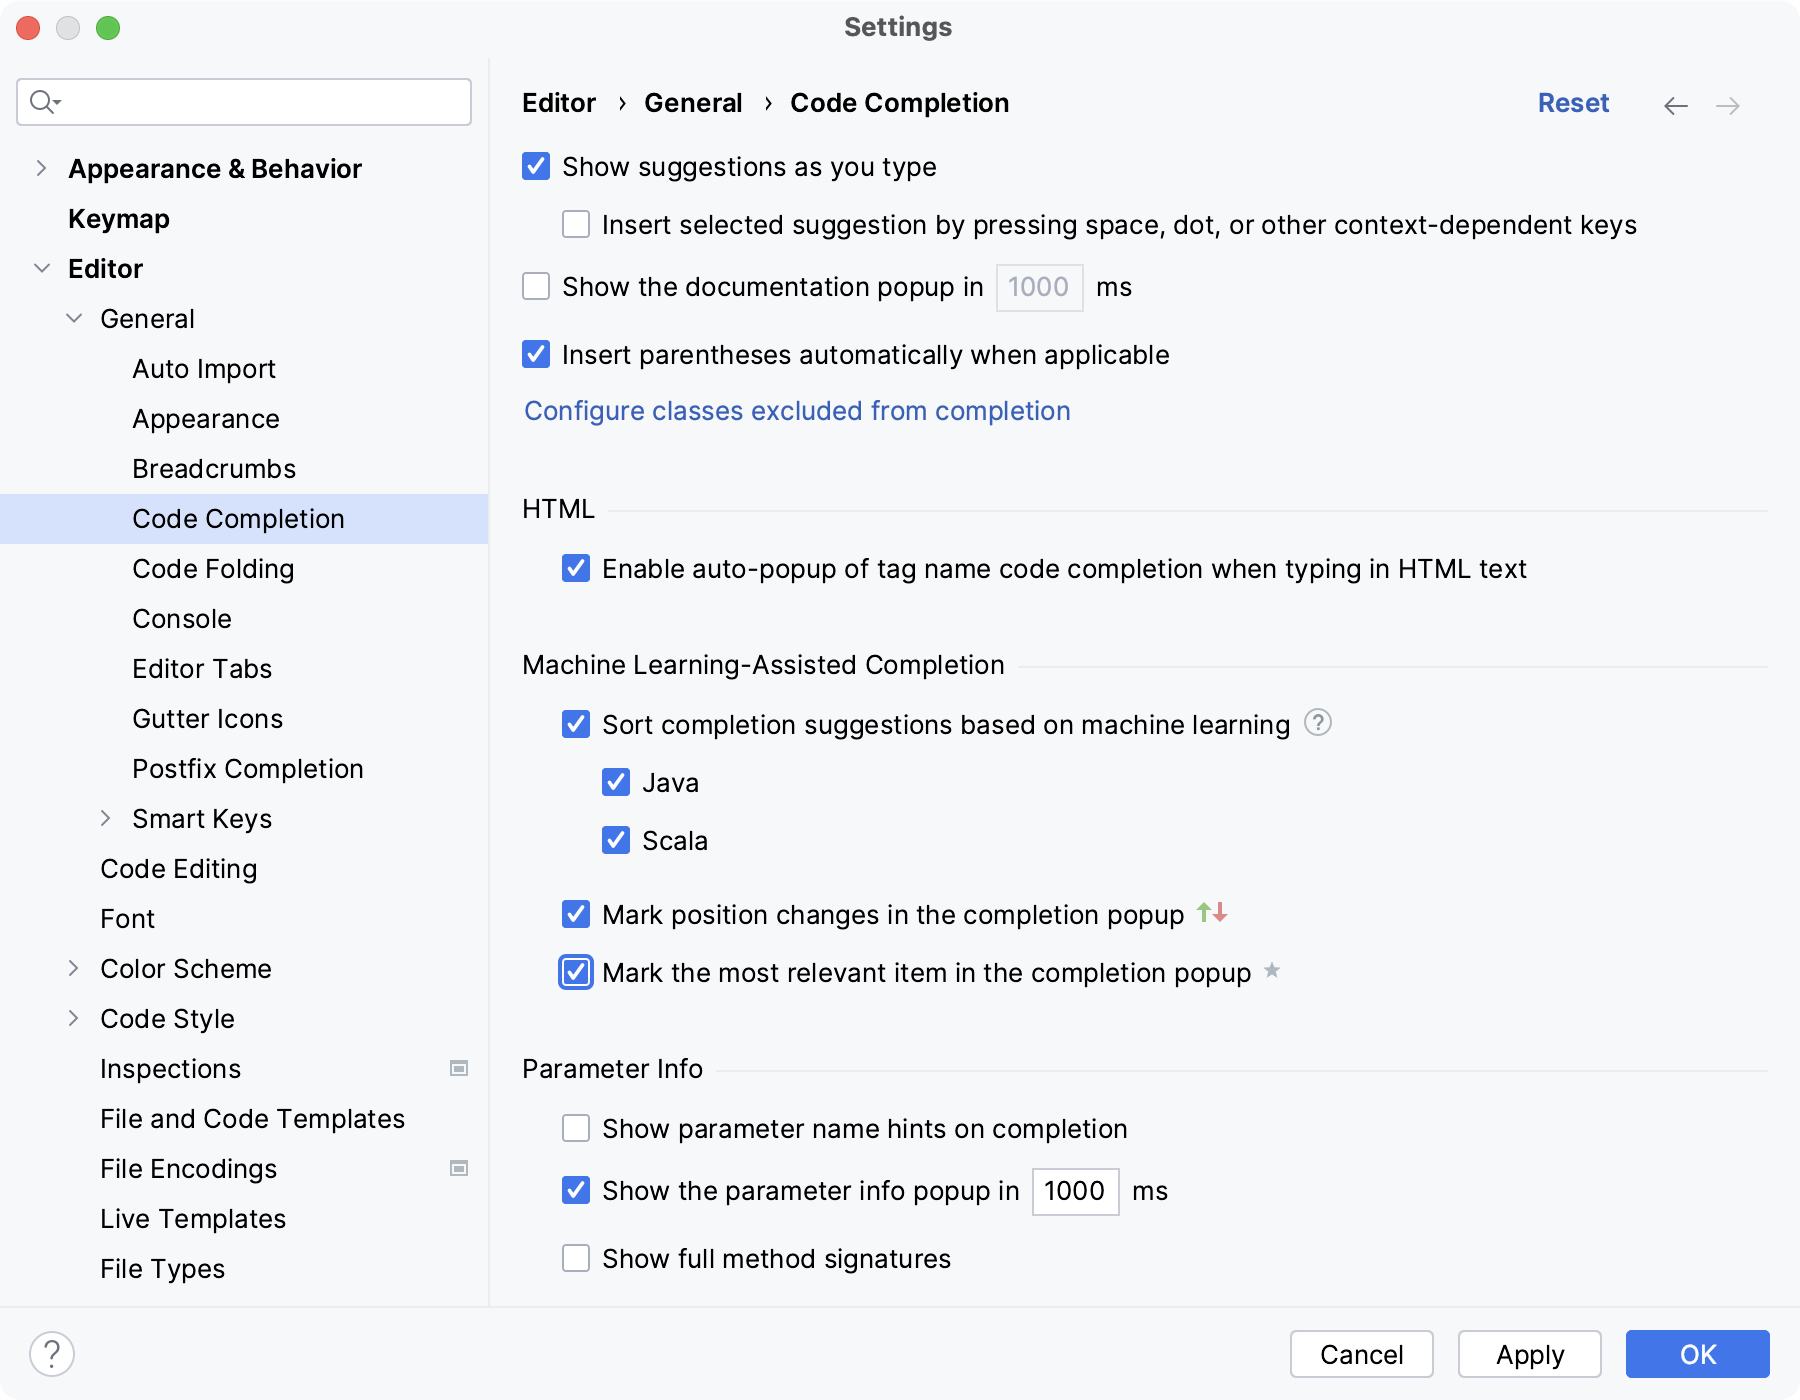
Press Ctrl+Alt+S to open settings and then select . From the options on the right, under the Machine Learning-Assisted Completion section, select Sort completion suggestions based on machine learning | Scala.
Configure sorting options if needed to see how machine learning affects the order of elements. However, since this feature is experimental, ranking may not change noticeably.
Indentation syntax support
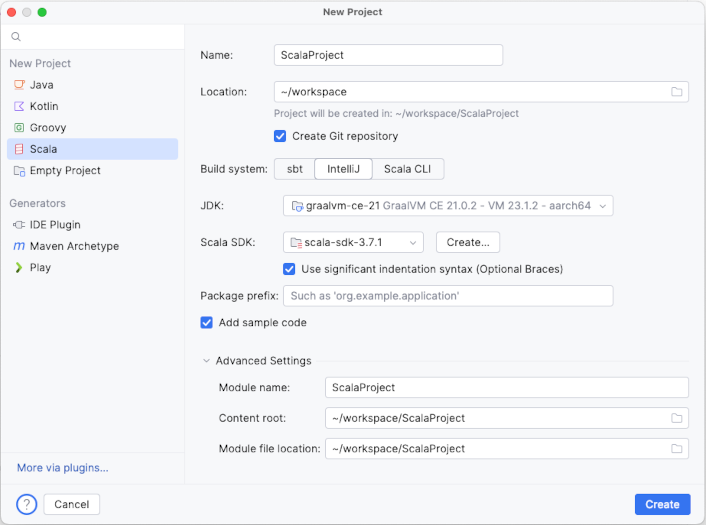
When you open the New Project wizard and choose Scala 3.x from the Scala version combobox, a checkbox will appear underneath: Use significant indentation braces (Optional Braces). By checking it, you tell IntelliJ IDEA that you want to write your new project with the new significant indentation. IntelliJ IDEA will parse your Scala 3 code according to the new syntax rules and highlight the code accordingly.
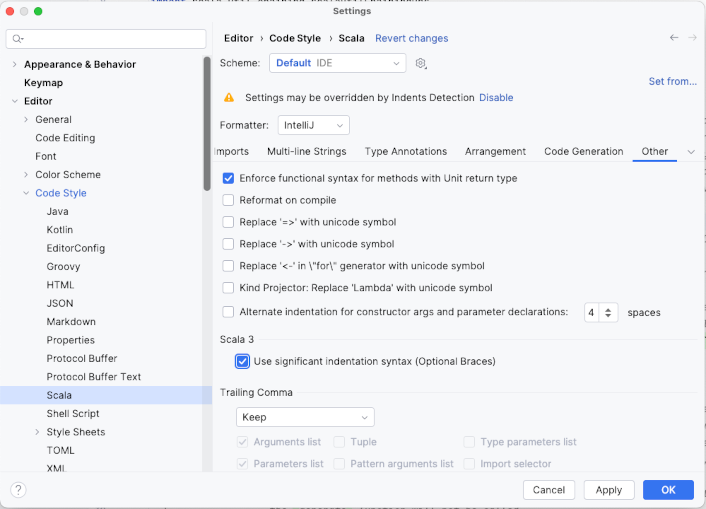
Similarly, if you open an already existing project written in Scala 3 with the new indentation-based syntax, you can enable its support in IntelliJ IDEA.
Press Ctrl+Alt+S to open settings and then select . scroll the list of tabs to the right, choose the Other tab, and the mark the Use significant indentation braces (Optional Braces) checkbox in the Scala 3 section.
Scala gutter icons
Icon | Description |
|---|---|
 | A gutter icon for a |
 | A gutter icon for a |
 | A gutter icon for an |
 | A gutter icon for an |
This feature helps you navigate between Scala's classes, traits, and opaque types, and their companion objects. If a given data structure has a companion object, i.e. an object of the same name in the same file, you will see a gutter icon to the left of it, and another to the left of the companion object. A small arrow over or beneath the icon will point to the direction in the file where you can find the companion object (if you look at the data structure's icon) or to the data structure (if you look at the companion object's icon). If you click on the gutter icon, the caret will jump to that place.
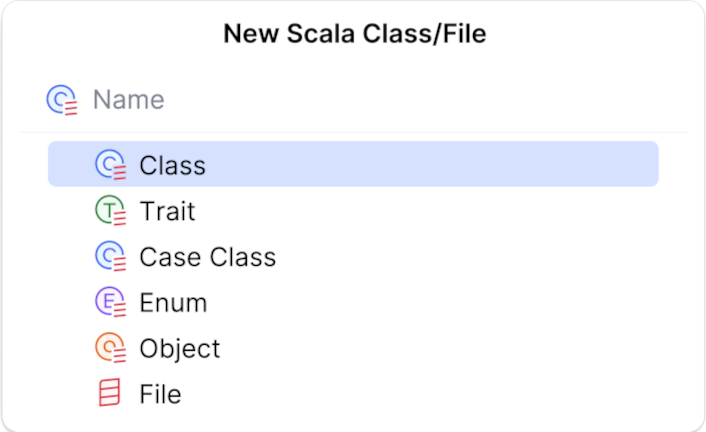
New Scala Class/File window and icons
Icon | Description |
|---|---|
An icon for a Scala file that contains only one | |
An icon for a Scala file that contains only one | |
An icon for a Scala file that contains only one | |
An icon for a Scala file that contains only one | |
An icon for a Scala file that contains only one | |
An icon for a Scala file that contains only one | |
An icon for a Scala file that contains only one | |
An icon for a Scala file that contains only one | |
An icon for a Scala file that contains more than one data structure. |
You can see those icons in the Project View and (some of them) in the New Scala Class/File window. This way, IntelliJ IDEA supports the practice of breaking Scala code into small functional chunks, each kept in its own file. Note that the name of the file must be the same as the name of the data structure. Also, note that the rule of having only one data structure in the file applies only to the top-level structures - within them you can have as many other nested structures as you want.
