Creating a Flask Project
Available only in PyCharm Professional: download to try or compare editions
Settings | Languages & Frameworks | Flask (CtrlAlt0S)
Flask project in intended for productive development of the Flask applications. PyCharm takes care of creating the specific directory structure, and settings.
In the main menu, go to File | New Project, or click the New Project button in the Welcome screen.

In the New Project dialog, do the following:
Select Flask as the project type.
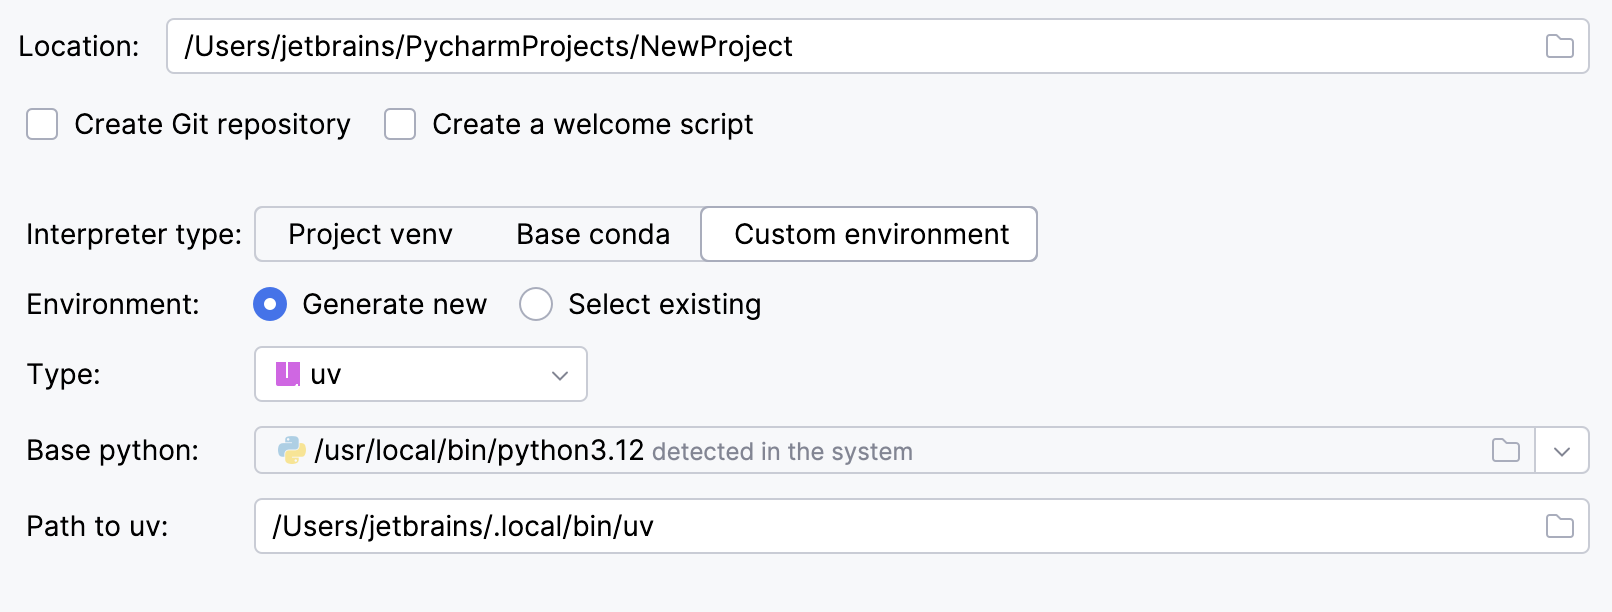
Specify the project location. The project name will be automatically derived from the folder name in the specified path.
Select Create Git repository to put the project under Git version control.
If you want to proceed with the Project venv or Base conda interpreter, select the corresponding option and click Create.
To configure an interpreter of another type or to use an existing environment, select Custom environment.
The following steps depend on your choice:
Generate new environmentSelect existing environmentcondaVirtualenvPipenvPoetryuv
Select the Python version from the list.
Specify the environment name.
Normally, PyCharm will detect conda installation.
Otherwise, specify the location of the conda executable, or click
to browse for it.

Select the base interpreter from the list, or click
and find the Python executable in your file system.
note
If you do not have the Python version in your system, you can download and install it.

This feature is available only on Windows and macOS.
Specify the location of the new virtual environment in the Location field, or click
and browse for the location in your file system. The directory for the new virtual environment should be empty.
Select the Inherit global site-packages checkbox if you want all packages installed in the global Python on your machine to be added to the virtual environment you're going to create. This checkbox corresponds to the
--system-site-packagesoption of the virtualenv tool.Select the Make available to all projects checkbox if you want to reuse this environment when creating Python interpreters in PyCharm.

Select the base interpreter from the list, or click
and find the Python executable in your file system.
note
If you do not have the Python version in your system, you can download and install it.

This feature is available only on Windows and macOS.
If you have added the base binary directory to your
PATHenvironmental variable, you do not need to set any additional options: the path to the pipenv executable will be autodetected.If PyCharm does not detect the pipenv executable, click Install pipenv via pip to allow PyCharm to install it for you automatically.
Alternatively, follow the pipenv installation procedure to discover the executable path and then specify it in the dialog.

Select the base interpreter from the list or click
and find the Python executable in your file system.
note
If you do not have the Python version in your system, you can download and install it.

This feature is available only on Windows and macOS.
If PyCharm does not detect the poetry executable, click Install poetry via pip to allow PyCharm to install poetry for you automatically.
Alternatively, click Select path and choose the required file manually or specify the following path in the dialog, replacing
jetbrainswith your username:macOSWindowsLinux/Users/jetbrains/Library/Application Support/pypoetry/venv/bin/poetryC:\Users\jetbrains\AppData\Roaming\pypoetry\venv\Scripts\poetry.exe/home/jetbrains/.local/bin/poetryTo create a virtual environment within the project directory, select the Create an in-project environment checkbox.

Select the base interpreter from the list, or click
and find the Python executable in your file system.
note
If you do not have the Python version in your system, you can download and install it.

This feature is available only on Windows and macOS.
Normally, PyCharm will detect uv installation.
Otherwise, specify the location of the uv executable, or click
to browse for it.
condaOther environments
To reuse an existing conda environment:
Switch Type to Conda.
Normally, PyCharm will detect conda installation.
Otherwise, specify the location of the conda executable, or click
to browse for it.
Select the environment from the list. If you specified the path to conda manually, you may need to reload environments.

To reuse a Virtualenv, Pipenv, or Poetry environment:
Switch Type to Python.
Select the Python executable from the list or click
to browse for it.
Click
More Settings, and specify the following:
From the Template language list, select the language to be used.
In the Templates folder field, specify the directory where the templates will be stored, and where they will be loaded from. You can specify the name of the directory that doesn't yet exist; in this case, the directory will be created.
tip
If Flask is missing in the selected interpreter, PyCharm displays an information message that Flask will be downloaded.
Click Create.
PyCharm creates an application and produces specific directory structure, which you can explore in the Project tool window. Besides that, PyCharm creates a stub Python script with the name app.py, which provides a simple "Hello, World!" example.
You can run the created application by pressing ShiftF10 Preview the run results.

Note that the application was run with the following Flask specific variables:
FLASK_APP=app.py– Defines an entry point of the Flask application - the target instance of theFlaskclass. When extending your Flask application and adding more modules and files, you might need to pass some non-defaultFLASK_APPvalues. You can pass a module name, a path to the target Python file, or any combination of modules, scripts, andFlaskclass instances, for example,FLASK_APP=access_management.access:app2, where:access_management– the module nameaccess– the target file in the moduleapp2– theFlaskclass instance inaccess.
For more information about the
FLASK_APPvariable, refer to Flask CLI documentation.FLASK_ENV=development– Sets one of possible environments.FLASK_DEBUG=0– Controls the built-in Flask debug mode. With this mode enabledFLASK_DEBUG=1, the development server will be automatically reloaded on any code change enabling continuous debugging. For more information about Flask debugger, refer to Flask Debug Mode.
You can change Flask specific variables by editing the corresponding parameters of the Flask Server Run/Debug configuration.
When you've enabled Flask support in your project, the Python console starts acting as a Flask console. Use code completion to enter and execute Flask-specific commands.
