Change UI language and region
Starting from version 2024.2, ReSharper provides a localized user interface in Chinese, Japanese, and Korean.
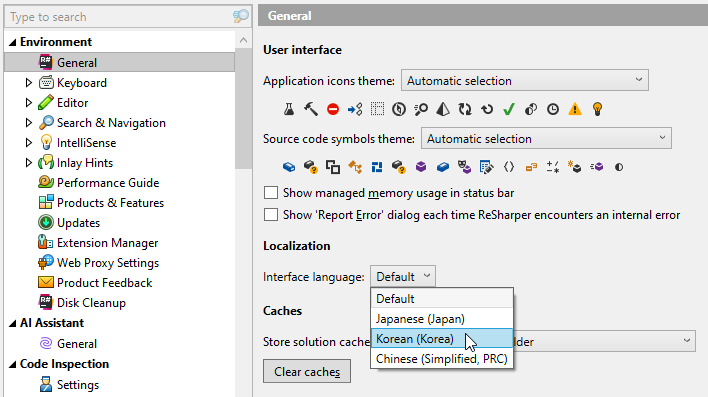
Select ReSharper | Options from the main menu or press Alt+R O, then choose Environment | General on the left.
Choose the desired language in the Localization section, under Interface language:

Click Save at the bottom of the Options dialog. After the restart of Visual Studio, the language of ReSharper user interface elements will be changed.
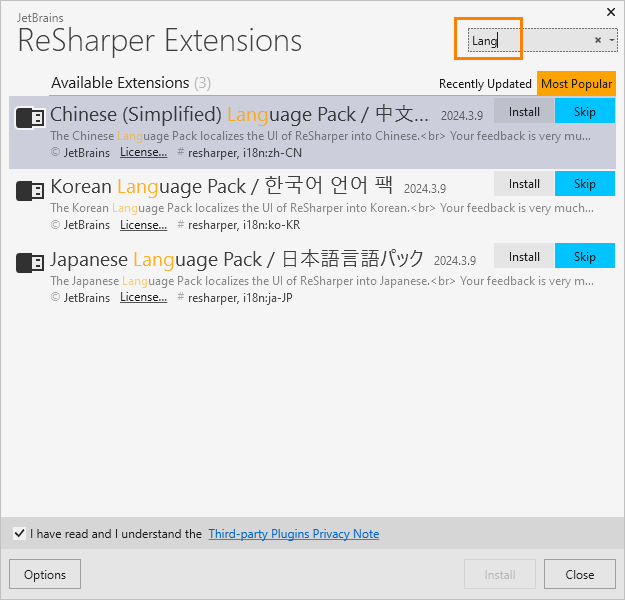
Each user interface language is implemented as a ReSharper extension. If you do not see languages in the Interface language selector, make sure that the corresponding plugins are available: choose ReSharper | Extension Manager from the menu and start typing Language in the search box to locate the language extensions.

If you do not see language pack plugins in the ReSharper Extension Manager, please make sure that the .NET Products Gallery package source is enabled on the Environment | Extension Manager page of ReSharper options Alt+R, O.
The region preference affects how ReSharper work by adapting to regional specifications. For example, it can change the URLs used to access various services, switch to a region-specific LLM provider for AI Assistant, or route traffic through a local proxy. Such adjustments optimize ReSharper performance and ensure that its functionality complies with local regulations.
On the first start after the ReSharper installation, you will be prompted to choose the region where you are located. If necessary, you can change the region later in options.
Select ReSharper | Options from the main menu or press Alt+R O, then choose Environment | General on the left.
Select the required region from the Region list.