Create a decorator
The Decorator design pattern is used to dynamically add additional behavior to an object. In addition, by using interfaces, a decorator can be used to unify types in a manner similar to multiple inheritance.
tip
For more information about the decorator pattern, refer to the following Wikipedia article.
Let’s take an example – suppose you have two objects, called Bird and Lizard, that you want to put into a Decorator:
class Bird
{
  public void Fly()
  {
    ...
  }
}
class Lizard
{
  public void Walk()
  {
    ...
  }
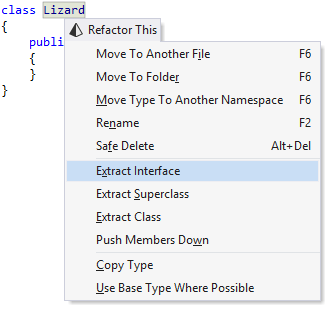
}Since a decorator cannot be inheriting from both of these classes, we can invoke the Extract Interface refactoring from the Refactor this menu for both of these objects to get their interfaces:
Calling this refactoring pops up a window asking us which members should appear in the interface:
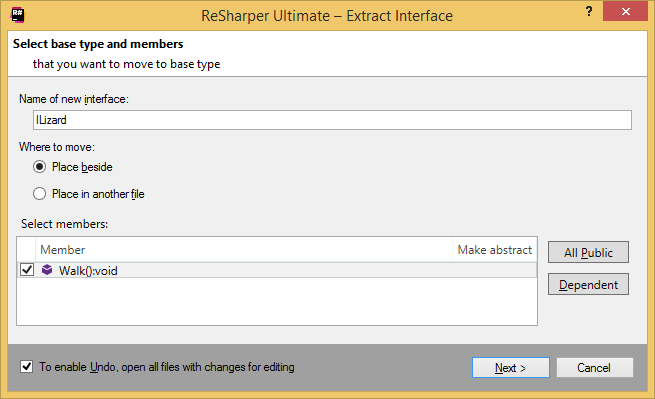
After we do this for both our classes, we end up with the following code:
internal interface IBird
{
  void Fly();
}
class Bird : IBird
{
  public void Fly()
  {
    ...
  }
}
internal interface ILizard
{
  void Walk();
}
class Lizard : ILizard
{
  public void Walk()
  {
    ...
  }
}With these interfaces, we can make a decorator. First, we declare a class called Dragon, indicating that it implements both IBird and ILizard:
class Dragon : IBird, ILizard
{
  ...
}
Now for the aggregated members. The easiest thing to do is to declare both of these as fields first, that is:
class Dragon : IBird, ILizard
{
  private Bird bird;
  private Lizard lizard;
}Now, we can use apply a quick-fix to unused fields and initialize both of them from constructor parameters:
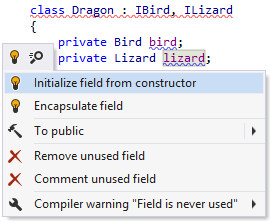
After this, our class will look as follows:
class Dragon : IBird, ILizard
{
  private Bird bird;
  private Lizard lizard;
  public Dragon(Bird bird, Lizard lizard)
  {
    this.bird = bird;
    this.lizard = lizard;
  }
}And now for the finishing touch – we want to generate delegating members for both bird and lizard. This is easy — we open the Generate menu and choose Delegating Members:
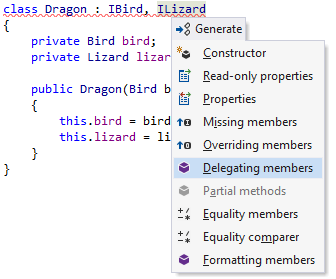
ReSharper then asks us which members we need to delegate:
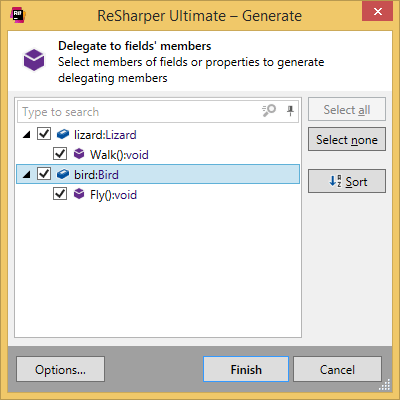
And here is the end result:
class Dragon : IBird, ILizard
{
  public void Fly()
  {
    bird.Fly();
  }
  public void Walk()
  {
    lizard.Walk();
  }
  private Bird bird;
  private Lizard lizard;
  public Dragon(Bird bird, Lizard lizard)
  {
    this.bird = bird;
    this.lizard = lizard;
  }
}
That’s it! Our decorator is ready.