Tool windows
Tool windows provide access to useful development tasks: viewing your solution structure, running and debugging your application, integration with version control systems and other external tools, code analysis, search, and navigation, and so on. By default, tool windows are attached to the bottom and sides of the main window. However, you can rearrange and even detach them to use as separate windows, for example, on another monitor.
Some tool windows are always available (for example, Explorer and Structure), some are activated when a specific plugin is enabled, and some appear only when you perform a certain action (for example, Run, Debug, and Find).
Open a tool window
To show or hide a tool window, do one of the following:
From the main menu, select a tool window under .
Use the corresponding shortcut, for example, Alt+1 to open the Solution Explorer. If there is no shortcut for a tool window, you can assign it as described in Customize keyboard shortcuts.
Click the corresponding tool window button on the tool window bar.
Hover the mouse pointer over the quick access button
/
in the lower left corner of the main window and select a tool window.
Hide the active tool window
Press Shift+Escape or select from the main menu. Press Shift+Escape again to show the hidden tool window.
Hide all tool windows
This can help you focus on the editor.
Press Ctrl+Shift+F12 or select from the main menu. Press Ctrl+Shift+F12 again to show the hidden tool windows.
Also, you can use the Maximize Editor action that expands area of the editor tab and shrinks areas of split tabs. And alternative action Normalize Splits that allocates equally the split tabs and the editor tab.
Navigate between the editor and a tool window
To change focus from a tool window to the editor, press Escape.
To change focus from the editor back to the last active tool window, press F12 or select from the main menu.
Tool window bars and buttons
Tool window bars on the edges of the main window contain buttons to show and hide tool windows. Right-click a tool window button to open its context menu, where you can change the viewing mode and move the tool window. You can also drag tool window buttons to rearrange tool windows on the bars.
Show or hide tool window bars
Click the quick access button
in the lower left corner of the main window to hide the tool window bars. The button changes to
and you can click it to show the tool window bars.
Alternatively, select or clear Tool Window Bars from the main menu under .
Tool window components
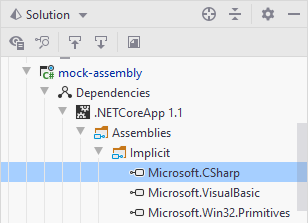
Generally, all tool windows have a title bar, a toolbar, and a content pane.
Some tool windows are also separated using tabs or a dropdown selector in the title bar, based on the functionality that it covers. Select to show tabs. Disable this option to show a dropdown menu.
The title bar contains the tool window options menu for changing the viewing mode and the position of the tool window. You can also access these options by right-clicking the title bar or the tool window button. Some tool windows can have other options in this menu, depending on the functionality (for example, to sort, filter, and group items listed in a tool window).
Click to hide the tool window and use other buttons that may be on the title bar, for example:
and
to expand and collapse the contents of the tool window
to locate and select the file from the editor in the tool window
Actions from the tool window toolbar are usually also available in the main menu and context menus. Some of them can also be executed with a default shortcut. You can assign shortcuts for actions as described in Customize keyboard shortcuts.
For all tool windows that display tree-like structures (for example, Solution Explorer) you can display vertical lines that mark indent levels in tree views and help you better understand the hierarchy of the components in your solution. To display these lines, enable Show tree indent guides on the Appearance and Behavior | Appearance page of the IDE settings Ctrl+Alt+S.

You can use the following shortcuts to manage JetBrains Rider's tool windows:
Hide Active Tool Window | Shift+Escape |
Hide All Tool Windows | Ctrl+Shift+F12 |
Jump to Last Tool Window | F12 |
Alt+1 | |
Alt+2 | |
Alt+3 | |
Alt+4 | |
Alt+5 | |
Alt+7 | |
Alt+8 | |
Alt+9 | |
Alt+0 | |
Alt+0 | |
Ctrl+Alt+2 | |
Ctrl+Alt+4 | |
Alt+Shift+7 | |
Alt+Shift+8 | |
Alt+F12 | |
Ctrl+Alt+3 |
For the full list of JetBrains Rider keyboard shortcuts, see Keyboard shortcuts in predefined keymaps.