SSH
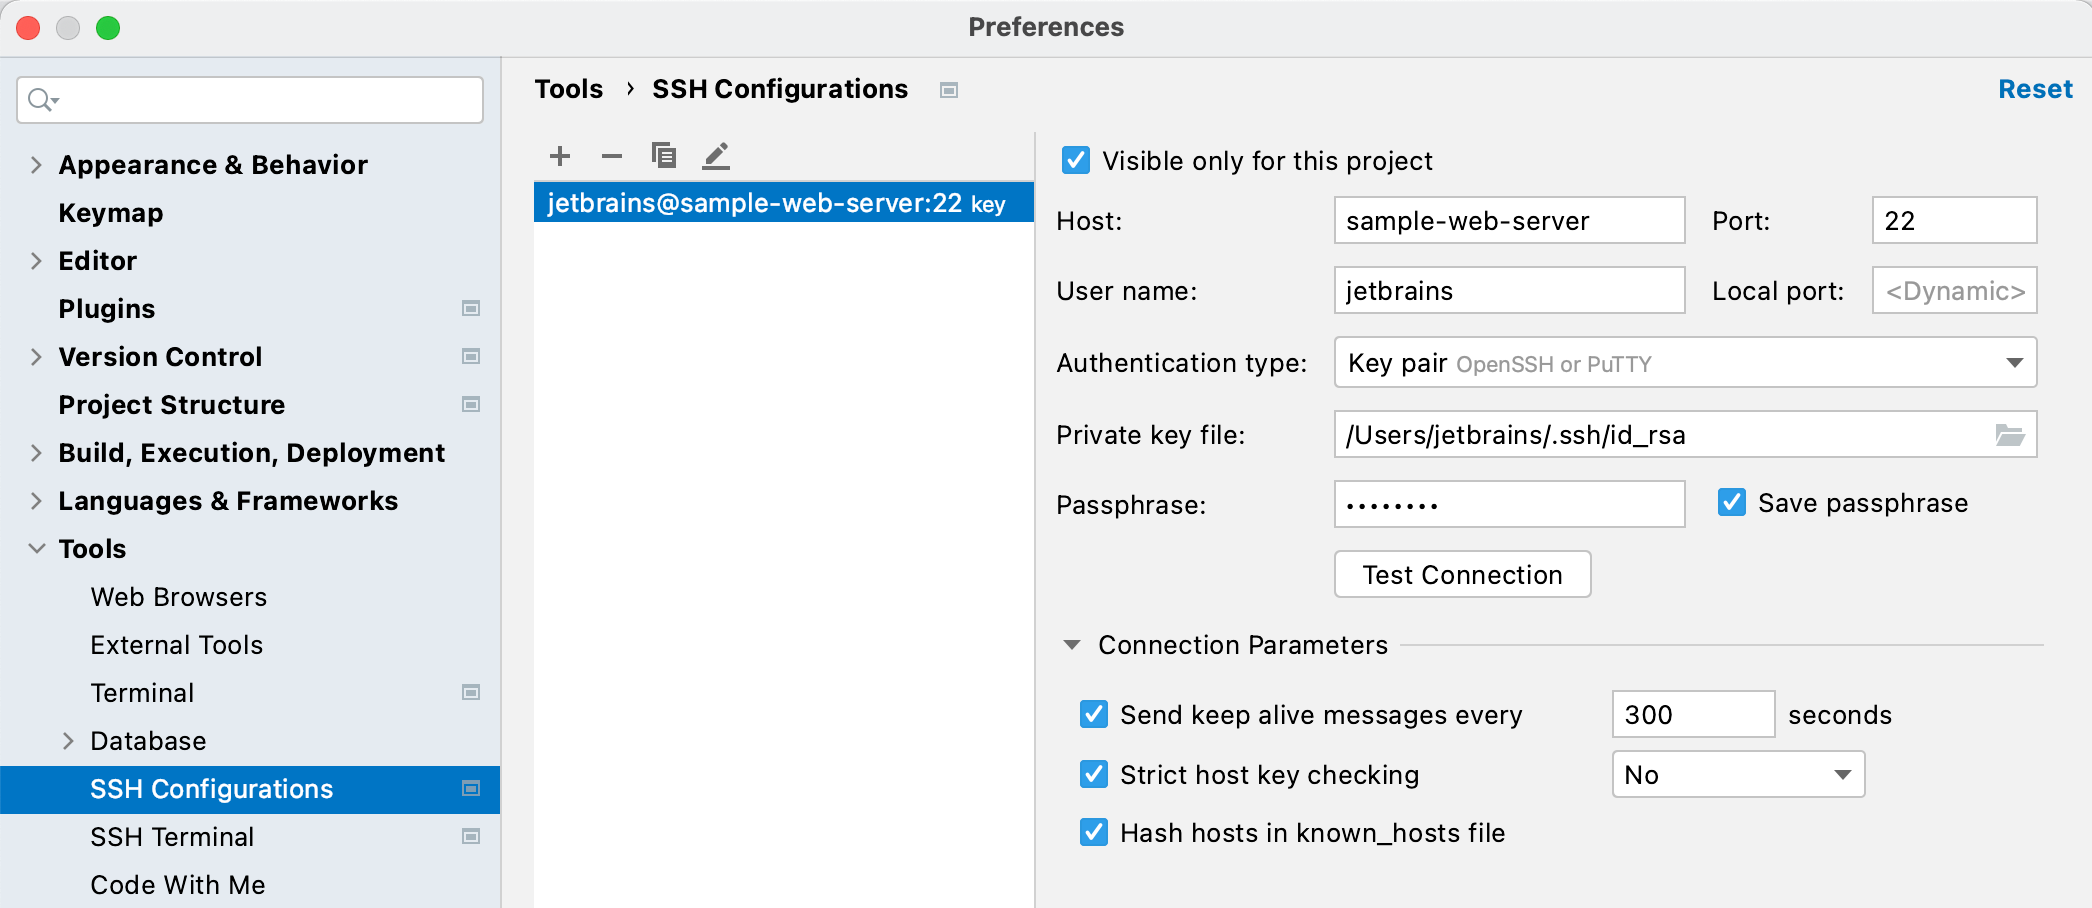
Add SSH configurations: Settings | Tools | SSH Configurations
Start an SSH session from the main menu: Tools | Start SSH Session
Configure SSH terminal: Settings | Tools | SSH Terminal
RubyMine allows you to work with remote machines using SSH. You can create predefined SSH configurations and use them to run remote SSH sessions, configure a remote Ruby interpreter, or connect to databases.
Before working with remote machines using SSH, make sure that SSH access is enabled on a remote server. You can use several authentication methods, for example:
Use a remote host's username and password for authentication.
Generate the SSH public/private key pair on your local machine and add the public key to the remote host.
If the SSH public/private key pair exists on your local machine and the public key is uploaded to the remote host, you can add the private key to the ssh-agent.
You can create the predefined SSH configurations and reuse them within a specific project or across all your projects. To create a new SSH configuration, follow the steps below:
Press CtrlAlt0S to open the IDE settings and then select Tools | SSH Configurations.
Click the
button to add a new configuration.
If you do not want to share the configuration between projects, make sure that the Visible only for this project option is enabled.
Specify the required parameters depending on the Authentication type.
 PasswordKey pairAuthentication agent
Host/Port: The hostname/IP address and port used to connect to a remote machine.
User name: The username used to authenticate on a remote machine.
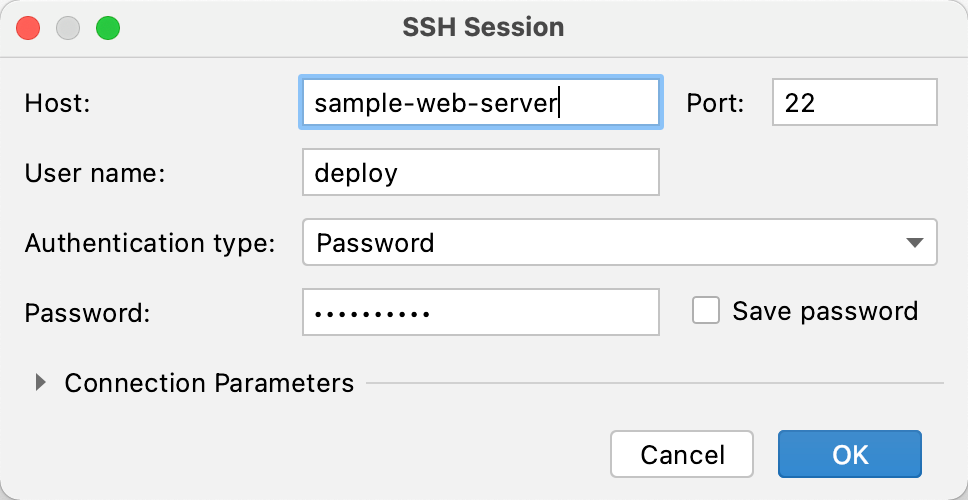
Authentication type: In this field, select the Password value to authenticate a user with a password.
Password: Specify a password used to access a remote machine.
Host/Port: The hostname/IP address and port used to connect to a remote machine.
User name: The username used to authenticate on a remote machine.
Authentication type: In this field, select Key pair.
Private key file: Specify a path to a private key file stored on a local machine.
Passphrase (optional): Specify a passphrase used for the specified private key.
Host/Port: The hostname/IP address and port used to connect to a remote machine.
User name: The username used to authenticate on a remote machine.
Authentication type: In this field, select OpenSSH config and authentication agent to use ssh-agent running on a local machine.
Configure connection parameters.
Send keep alive messages every: Send regular packets to keep the SSH connection active. Without regular messages, the remote server might close the connection. Set the message period in seconds.
Strict host key checking: Specify how to handle new and changed host keys.
Yes: Never add new host keys to the user's known_hosts file and never allow connections to hosts with changed host keys.
Accept New: Always add new host keys to the user's known_hosts file but never allow connections to hosts with changed host keys.
No: Always add new host keys to the user's known_hosts file and allow connections to hosts with changed host keys.
Ask: Add new host keys to the user's known_hosts file only after confirmation and never allow connections to hosts with changed host keys. This is the default behavior.
Hash hosts in known_hosts file: Store new host records in hash format.
Click OK.
To start an SSH session on a remote host, follow the steps below:
From the main menu, choose Tools | Start SSH Session.
If you already have existing SSH configurations or running Vagrant instances, select the desired one in the invoked popup.

You can also choose Edit credentials to specify credentials manually.
(Optional) If you selected Edit credentials, specify the required parameters depending on the Authentication type, as described in Add an SSH configuration.

A new SSH session is opened in a separate tab.

To close the SSH session, click
on the terminal toolbar or right-click the current session tab and select Close Tab from the context menu.
tip
Learn more about the RubyMine terminal emulator from Terminal.
You can configure the following SSH terminal settings on the Tools | SSH Terminal page of the Settings dialog CtrlAlt0S:
Connection settings
Choose one of the following:
Current Vagrant: Select this option to connect to the running Vagrant instance.
SSH configuration: Select the existing SSH configuration to connect it to every time, or choose Select SSH configuration on every run to invoke the popup with available servers when executing Tools | Start SSH Session.
Default encoding
Select the desired encoding to be used in the SSH terminal.
RubyMine allows you to configure a remote Ruby interpreter by using SSH access and work with applications deployed on a remote server. This can be useful to run or debug a remote application, perform tests, and so on. Make sure that the following prerequisites are met for a remote server before configuring a remote interpreter:
SSH access is enabled.
The Ruby interpreter is installed.
Remote project sources are synchronized with local ones (for example, by using Capistrano or a remote server configuration).
You can now follow the steps below to configure a remote interpreter using SSH:
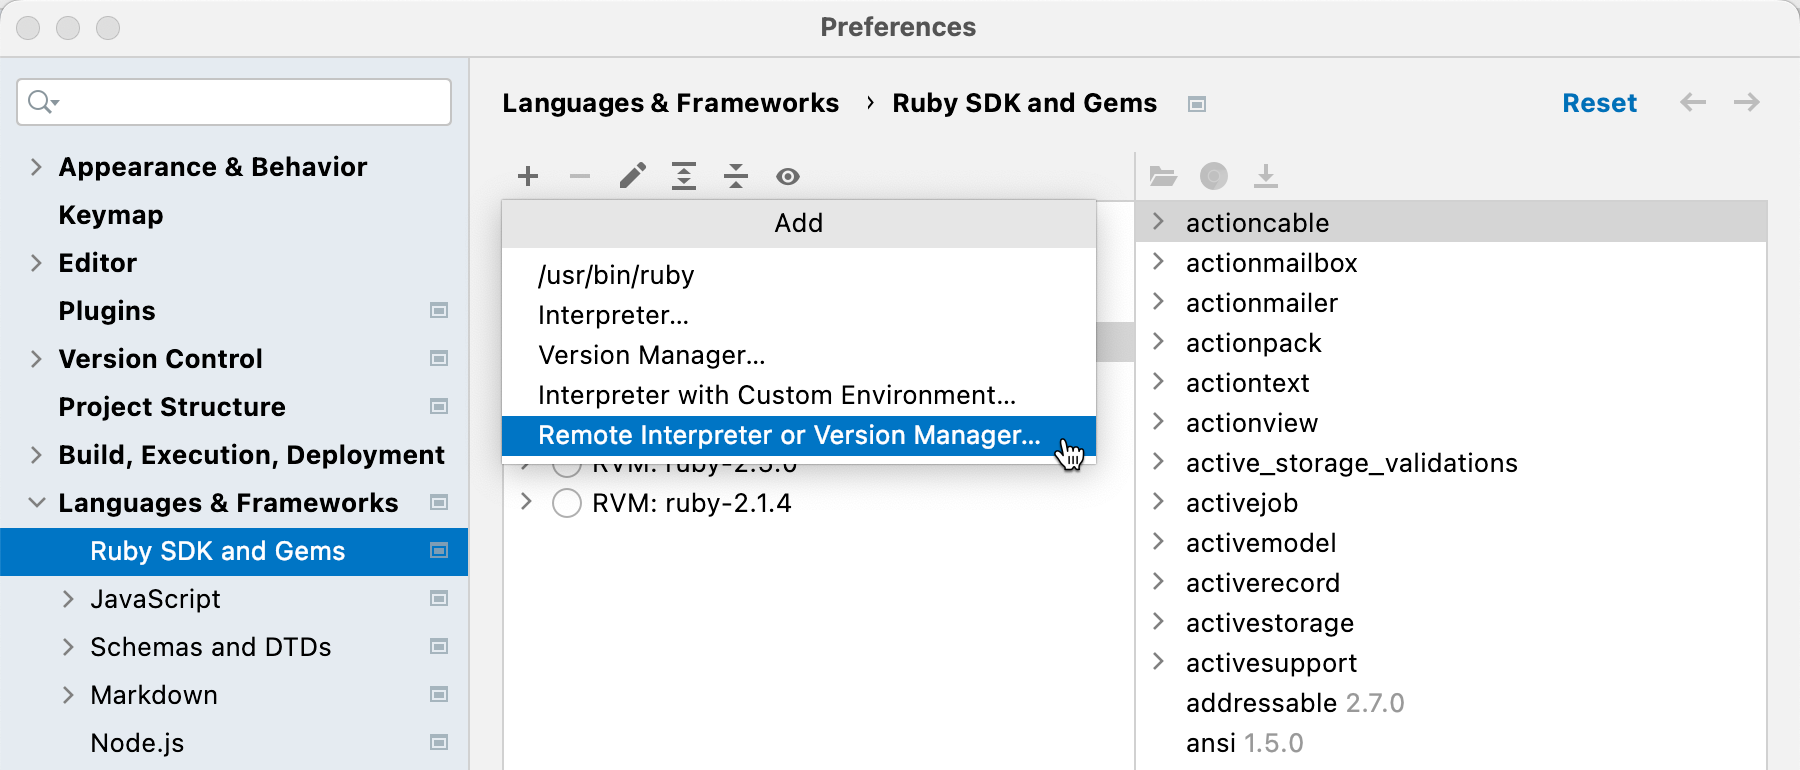
Open the Settings dialog CtrlAlt0S, go to the Language & Frameworks | Ruby SDK and Gems page.
Click the
and select Remote Interpreter or Version Manager in the drop-down:

In the invoked dialog, select SSH and specify the following settings:

SSH configuration: Select the existing SSH configuration or click the ellipsis button and create a new one.
Ruby or version manager path: Here you should specify the path to the Ruby interpreter or the version manager executable.
After you have specified all the settings, click OK.
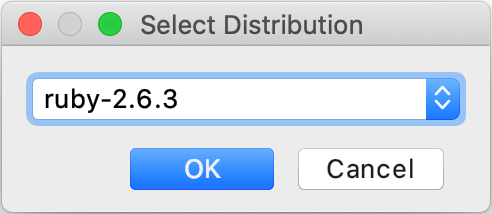
(Optional) If you specified a path to the version manager executable in the previous dialog, RubyMine suggests selecting the Ruby interpreter used to run a remote application.

Select the added SDK in the Ruby SDK and Gems page.

Specify mappings between files of a local and remote project. To do this, click the Edit Path Mappings
button. In the Edit Project Path Mappings dialog, specify the local and remote project root paths.

Thanks for your feedback!