Composite Build Configuration
Composite build configurations are "step-less" configurations designed to trigger multiple regular build configurations and track the results in a single place.
Composite configurations do not carry out any actual building routines.
Composite configurations aggregate all information from their dependencies and present them in a centralized manner.
Composite builds do not occupy build queue slots and do not require agents to run.
To switch a build configuration type, navigate to the Configuration settings | General tab.
In this tutorial, you will create multiple build configurations, bind them in a single build chain, and learn how you can benefit from turning the topmost build configuration of a chain into a composite configuration.
note
This example aims to illustrate the benefits of using composite build configurations. It does not dive into the specifics of creating projects and build chains. If you experience issues, refer to the following help articles:
In this step, you will create a project with an empty build configuration and a subproject with five build configurations that build, test, and publish .NET/.NET Framework projects under different platforms.
Create a project from the following GitHub repository (or its fork): TeamCity DotNet Samples. When importing a project, choose the Do not import settings, create project from scratch option.
Set the build configuration name to "Build All".
Do not select any steps suggested by TeamCity after it scans the repository. We will perform actual building tasks in separate configurations, and this initially created configuration will be used later to trigger all of them at once.
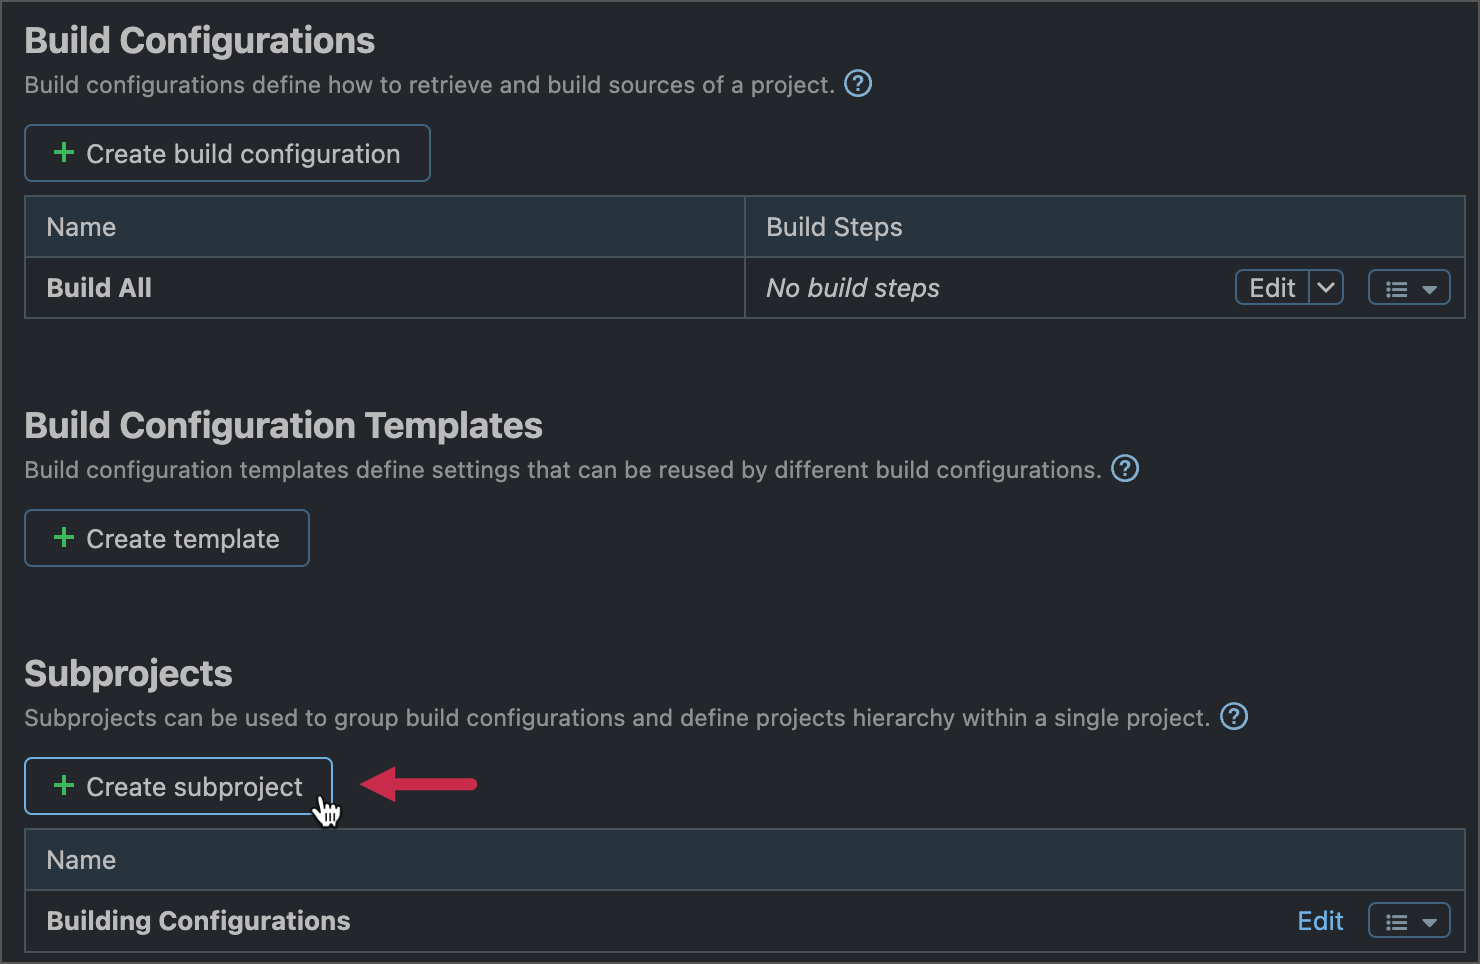
Go to Administration | <Your Project> and click Create Subproject. This subproject should target the same GitHub repository as in Step 1.
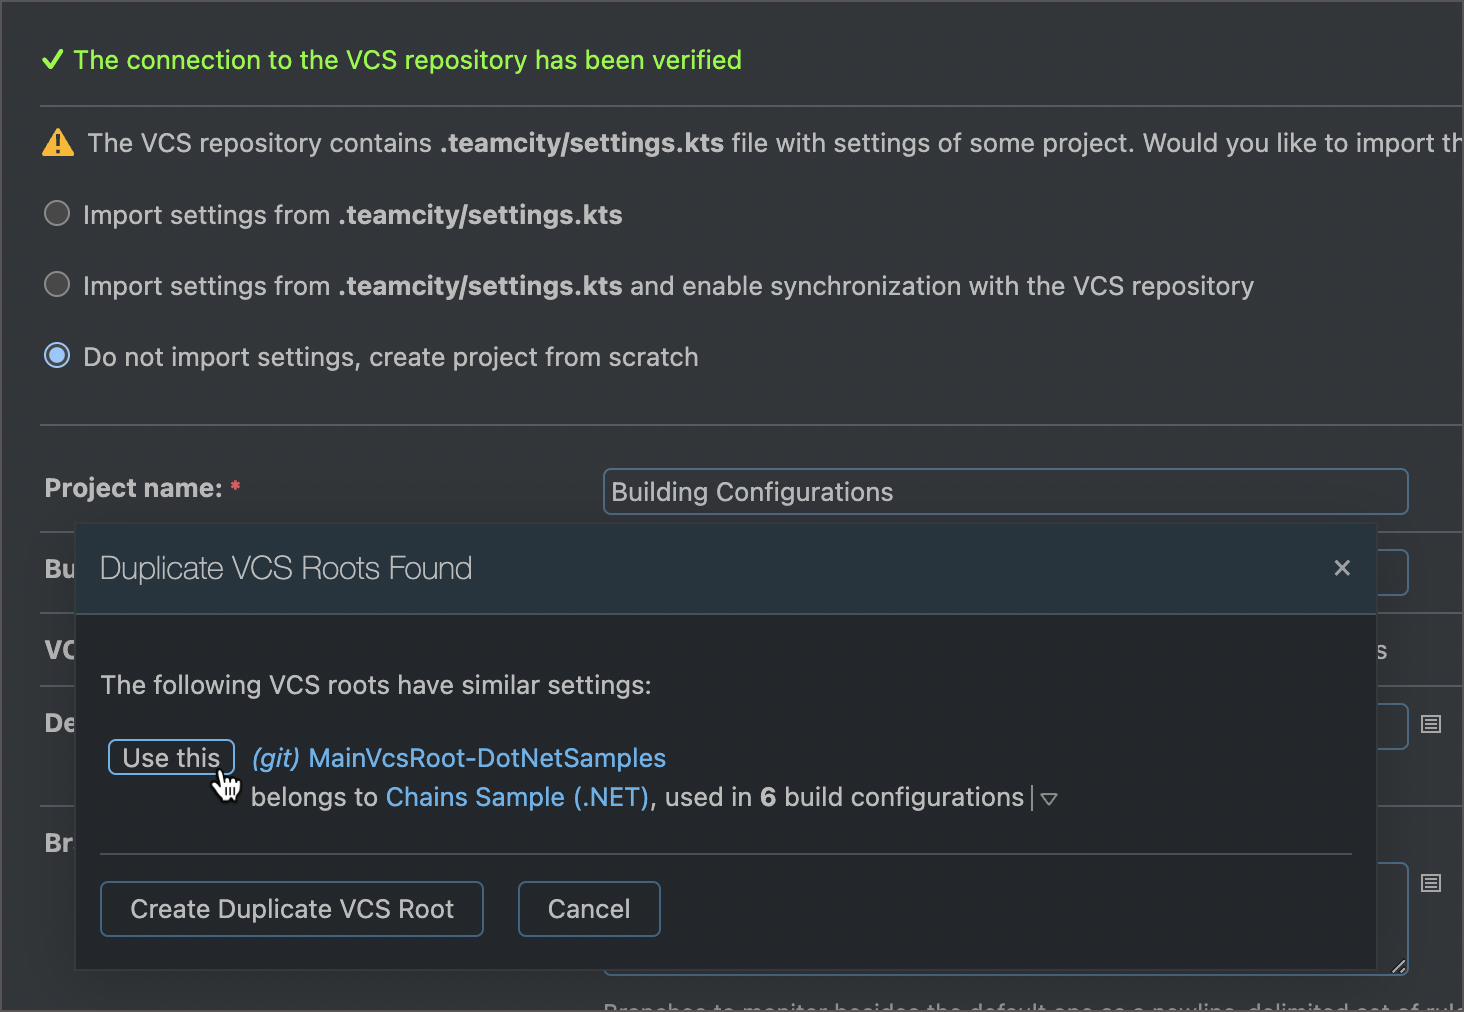
Since your subproject uses the same repository as the root project, TeamCity suggests that both projects share the same VCS root instead of creating a duplicate. Click Use this when prompted to agree.
In your new "Building Configurations" subproject, create five building configurations. All configurations should target the same repository as in Step 1 and use the shared VCS root (see Step 5).
Run Tests (Linux) — a configuration with a single .NET runner that tests the "Clock.Tests" C# project inside the .NET SDK container for Linux.
Run Tests (Windows) — a configuration with a single .NET runner that tests the "Clock.Tests" C# project on a Windows agent with a required .NET SDK installed.
Build Desktop (Windows) — a configuration with a single .NET runner that executes the "msbuild" command on the "Clock.Desktop" and "Clock.Desktop.Uwp" projects.
Build console & web (win-x64) — a configuration with two .NET steps.
One step executes the "publish" command on the "Clock.Console" project with the "win-x64" runtime option. The output directory for this step is set to "bin/Clock.Console/win-x64".
Another step executes the "publish" command on the "Clock.Web" project. The Runtime option for this step is "win-x64", the Output directory is "bin/Clock.Web/win-x64".
Build console & web (linux-x64) — same as the previous configuration, but the Runtime and Output directory settings of .NET steps are set to "linux-x64" and "bin/<ProjectName>/linux-x64" respectively.
Since these build configurations will be parts of a single build chain, you do not need automatically added build triggers to start all five build configurations independently whenever TeamCity detects changes in the remote repository. Go to Build configuration settings | Triggers and disable or delete triggers for all configurations (except for the "Build All" configuration owned by the topmost project).

Both "Build console & web" configurations should publish their "bin" folders. To do that, specify the
bin => binartifact paths in these configurations. Published artifacts will be later used by deployment configurations.
You should end up with five independent build configurations that perform build steps and an empty "Build All" configuration. Run each configuration to ensure they finish successfully. The Kotlin code below illustrates settings for all five build configurations and their parent TeamCity projects.
project {
    buildType(Building_1)
    subProject(Building)
}

object Building_1 : BuildType({
    id("Building")
    name = "Build All"

    vcs {
        root(DslContext.settingsRoot)
        showDependenciesChanges = true
    }

    triggers {
        vcs {
        }
    }

})


object Building : Project({
    name = "Building Configurations"
    buildType(Building_BuildConsoleWebLinuxX64)
    buildType(Building_BuildConsoleWebWinX64)
    buildType(Building_BuildDesktopWindows)
    buildType(Building_RunTestsLinux)
    buildType(Building_RunTestsWindows)
})
object Building_RunTestsLinux : BuildType({
name = "Run Tests (Linux)"
vcs {
root(DslContext.settingsRoot)
}
steps {
dotnetTest {
name = "Tests (Linux)"
projects = "Clock.Tests/Clock.Tests.csproj"
dockerImage = "mcr.microsoft.com/dotnet/sdk:7.0"
dockerImagePlatform = DotnetTestStep.ImagePlatform.Linux
}
}
triggers {
vcs {
enabled = false
}
}
requirements {
matches("teamcity.agent.jvm.os.family", "Linux")
}
})object Building_RunTestsWindows : BuildType({
name = "Run Tests (Windows)"
vcs {
root(DslContext.settingsRoot)
}
steps {
dotnetTest {
name = "Test (Win)"
projects = "Clock.Tests/Clock.Tests.csproj"
sdk = "7"
}
}
triggers {
vcs {
enabled = false
}
}
requirements {
matches("teamcity.agent.jvm.os.family", "Windows")
}
})object Building_BuildDesktopWindows : BuildType({
name = "Build Desktop (Windows)"
artifactRules = """
bin/Clock.Desktop/win/**/*.* => bin/Clock.Desktop.zip
bin/Clock.Desktop.Uwp/win/**/*.* => bin/Clock.Desktop.Uwp.zip
""".trimIndent()
params {
param("system.PublishDir", "../bin/Clock.Desktop/win/")
param("system.AppxPackageDir", "../bin/Clock.Desktop.Uwp/win/")
}
vcs {
root(DslContext.settingsRoot)
}
steps {
dotnetMsBuild {
name = "Build Desktop (Win)"
projects = """
Clock.Desktop/Clock.Desktop.csproj
Clock.Desktop.Uwp/Clock.Desktop.Uwp.csproj
""".trimIndent()
version = DotnetMsBuildStep.MSBuildVersion.V17
targets = "Restore;Rebuild;Publish"
sdk = "7"
}
}
triggers {
vcs {
enabled = false
}
}
requirements {
matches("teamcity.agent.jvm.os.family", "Windows")
}
})note
System properties in this build configuration specify directories where the "Publish" task should place the output. Learn more:
object Building_BuildConsoleWebWinX64 : BuildType({
    name = "Build console & web (win-x64)"
    artifactRules = "bin => bin"

    vcs {
        root(DslContext.settingsRoot)
    }

    steps {
        dotnetPublish {
            name = "Build Console (win-x64)"
            projects = "Clock.Console/Clock.Console.csproj"
            runtime = "win-x64"
            outputDir = "bin/Clock.Console/win-x64"
        }
        dotnetPublish {
            name = "Build web"
            projects = "Clock.Web/Clock.Web.csproj"
            runtime = "win-x64"
            outputDir = "bin/Clock.Web/win-x64"
        }
    }

    triggers {
        vcs {
            enabled = false
        }
    }

    requirements {
        exists("DotNetCoreSDK7.0_Path")
        exists("DotNetCoreRuntime7.0_Path")
    }
})
object Building_BuildConsoleWebLinuxX64 : BuildType({
name = "Build console & web (linux-x64)"
artifactRules = "bin => bin"
vcs {
root(DslContext.settingsRoot)
}
steps {
dotnetPublish {
name = "Build console"
projects = "Clock.Console/Clock.Console.csproj"
runtime = "linux-x64"
outputDir = "bin/Clock.Console/linux-x64"
args = "/p:PublishTrimmed=true /p:PublishSingleFile=true"
}
dotnetPublish {
name = "Build web"
projects = "Clock.Web/Clock.Web.csproj"
runtime = "linux-x64"
outputDir = "bin/Clock.Web/linux-x64"
}
}
triggers {
vcs {
enabled = false
}
}
requirements {
exists("DotNetCoreSDK7.0_Path")
exists("DotNetCoreRuntime7.0_Path")
}
})In this step you will create snapshot dependencies to bind build configurations in a single chain.

In the "Build Desktop (Windows") configuration settings, switch to the Dependencies tab and click Add new snapshot dependency. Check the "Run Tests (Windows)" build configuration to tell TeamCity it should run tests before launching this building configuration.
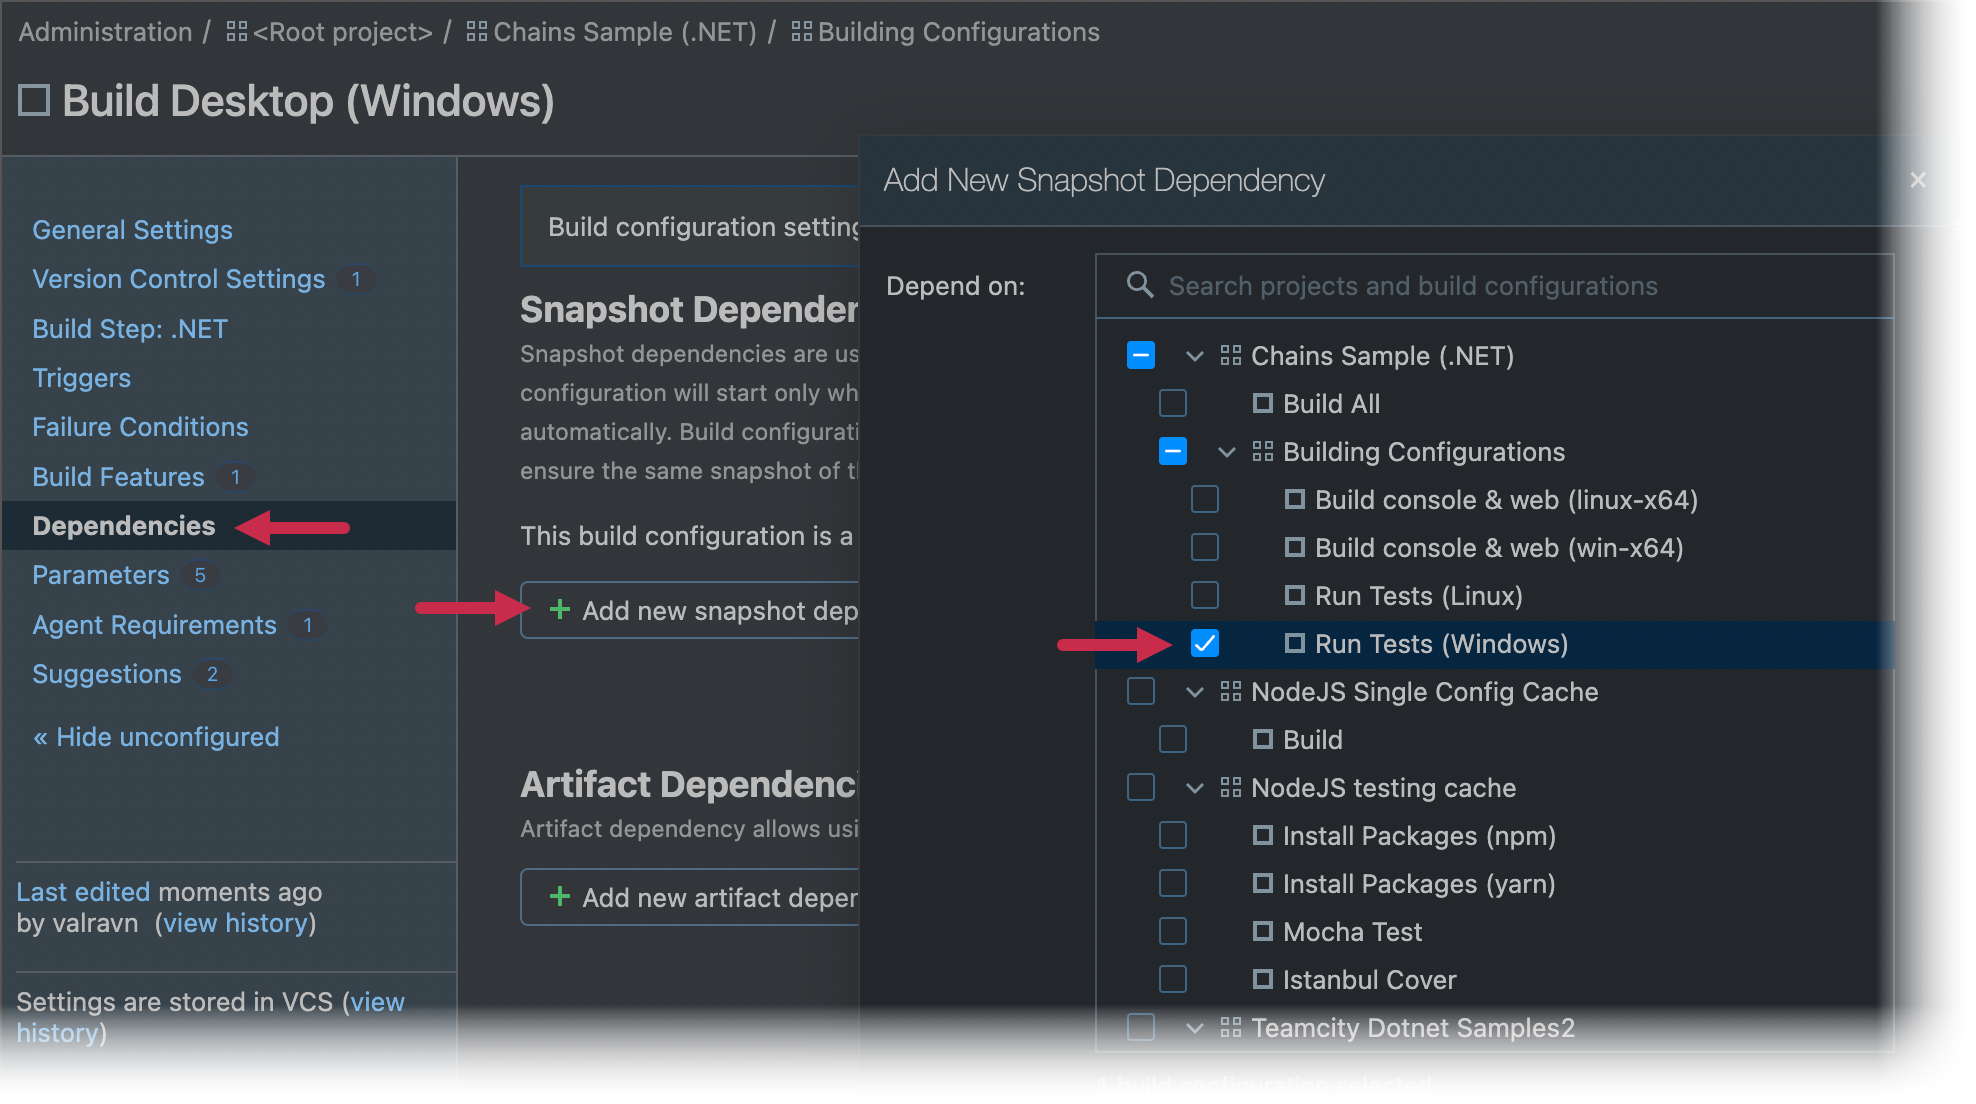
Repeat step 1 to set up snapshot dependencies for both "Build console & web ..." configurations. They should depend on corresponding "Run Tests..." configurations.
In the "Build All" configuration settings, add snapshot dependencies to all three "Build..." configurations.
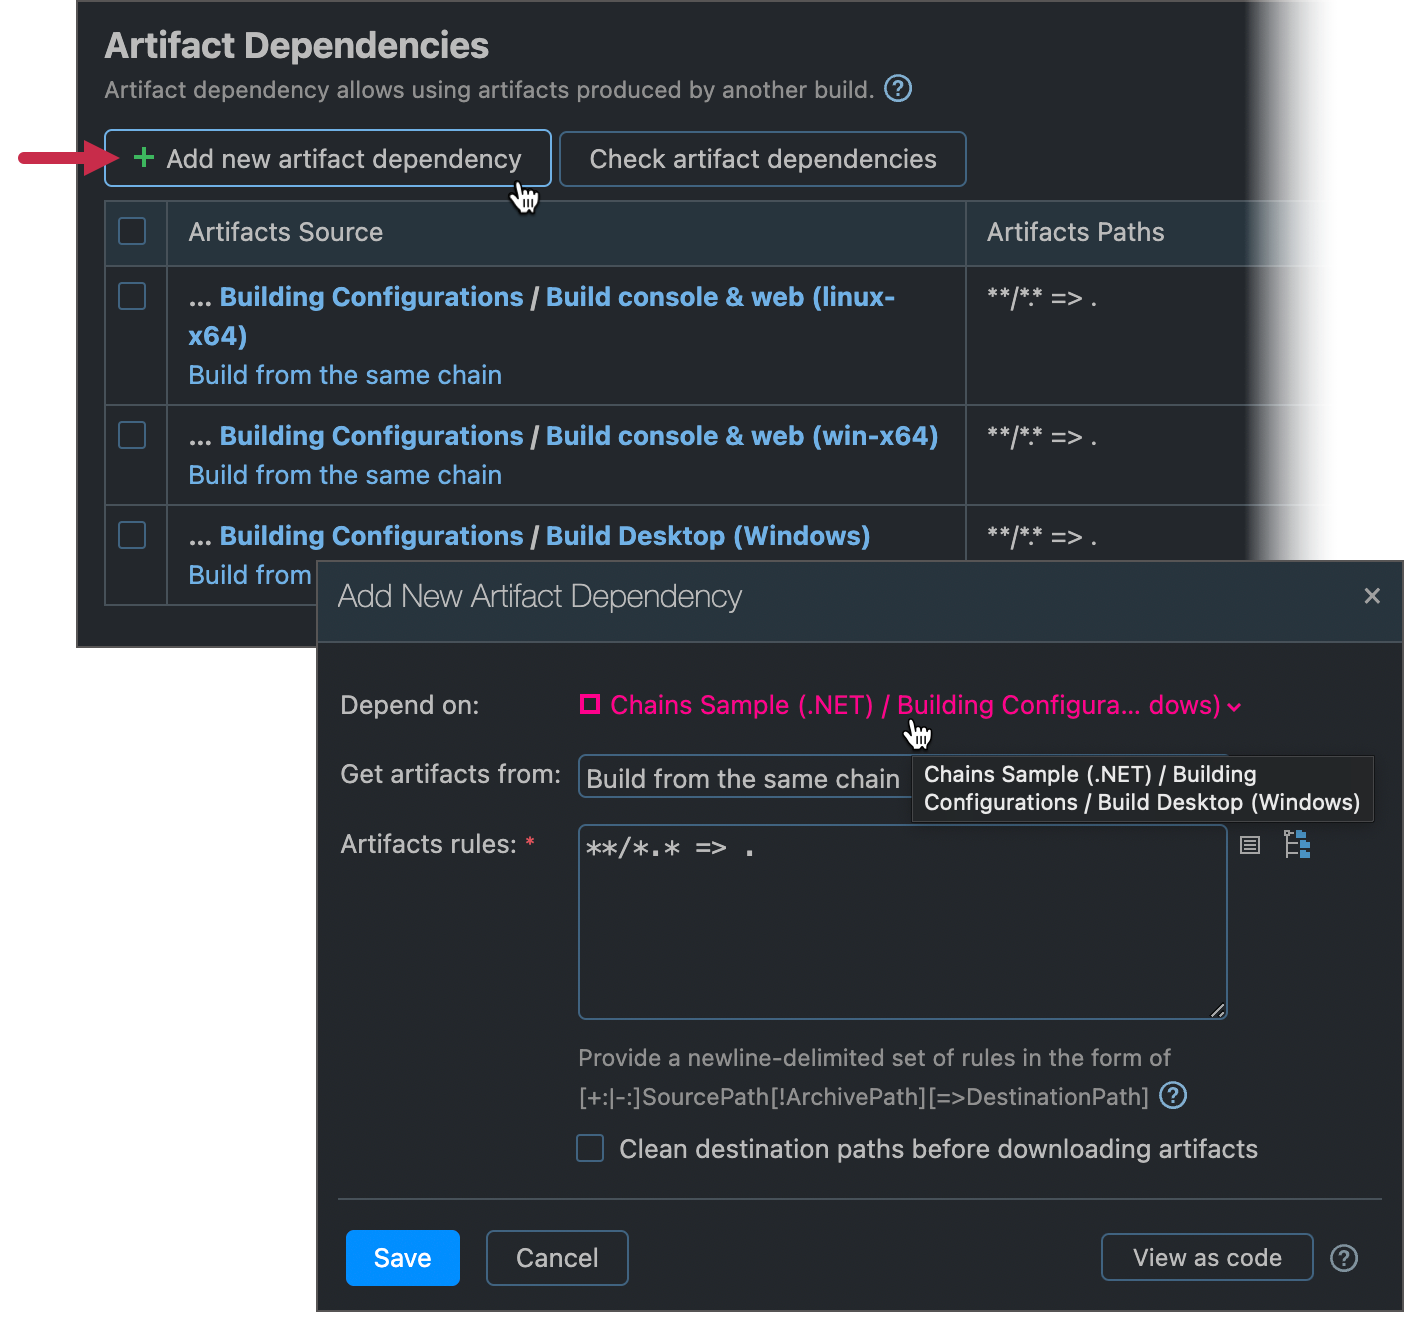
The three "Build..." configurations publish artifacts. To make them accessible from the topmost "Build All" configuration, you need to create artifact dependencies.
Navigate to <Build All settings> | Dependencies, click Add new artifact dependency, and create dependencies for all three "Build..." configurations. The Artifact rules setting in each artifact dependency should be
**/*.* => ..
Now that the "Build All" configuration can access to artifacts produced by individual "Build..." configurations, add the
bin/**/*.* => .artifact publishing rule in its general settings.
The Kotlin code below illustrates the final chain setup.
object Building_1 : BuildType({
    id("Building")
    name = "Build All"
    artifactRules = "bin/**/*.* => ."

    // ...

    dependencies {
        dependency(Building_BuildConsoleWebLinuxX64) {
            snapshot {
            }

            artifacts {
                artifactRules = "**/*.* => ."
            }
        }
        dependency(Building_BuildConsoleWebWinX64) {
            snapshot {
            }

            artifacts {
                artifactRules = "**/*.* => ."
            }
        }
        dependency(Building_BuildDesktopWindows) {
            snapshot {
            }

            artifacts {
                artifactRules = "**/*.* => ."
            }
        }
    }
})
object Building_BuildDesktopWindows : BuildType({
name = "Build Desktop (Windows)"
artifactRules = """
bin/Clock.Desktop/win/**/*.* => bin/Clock.Desktop.zip
bin/Clock.Desktop.Uwp/win/**/*.* => bin/Clock.Desktop.Uwp.zip
""".trimIndent()
// ...
dependencies {
snapshot(Building_RunTestsWindows) {
}
}
})object Building_BuildConsoleWebWinX64 : BuildType({
name = "Build console & web (win-x64)"
artifactRules = "bin => bin"
// ...
dependencies {
snapshot(Building_RunTestsWindows) {
}
}
})object Building_BuildConsoleWebLinuxX64 : BuildType({
name = "Build console & web (linux-x64)"
artifactRules = "bin => bin"
// ...
dependencies {
snapshot(Building_RunTestsLinux) {
}
}
})You can choose a build configuration type in the General tab of configuration settings. In this sample chain, you can change the "Build All" configuration type to "Composite".
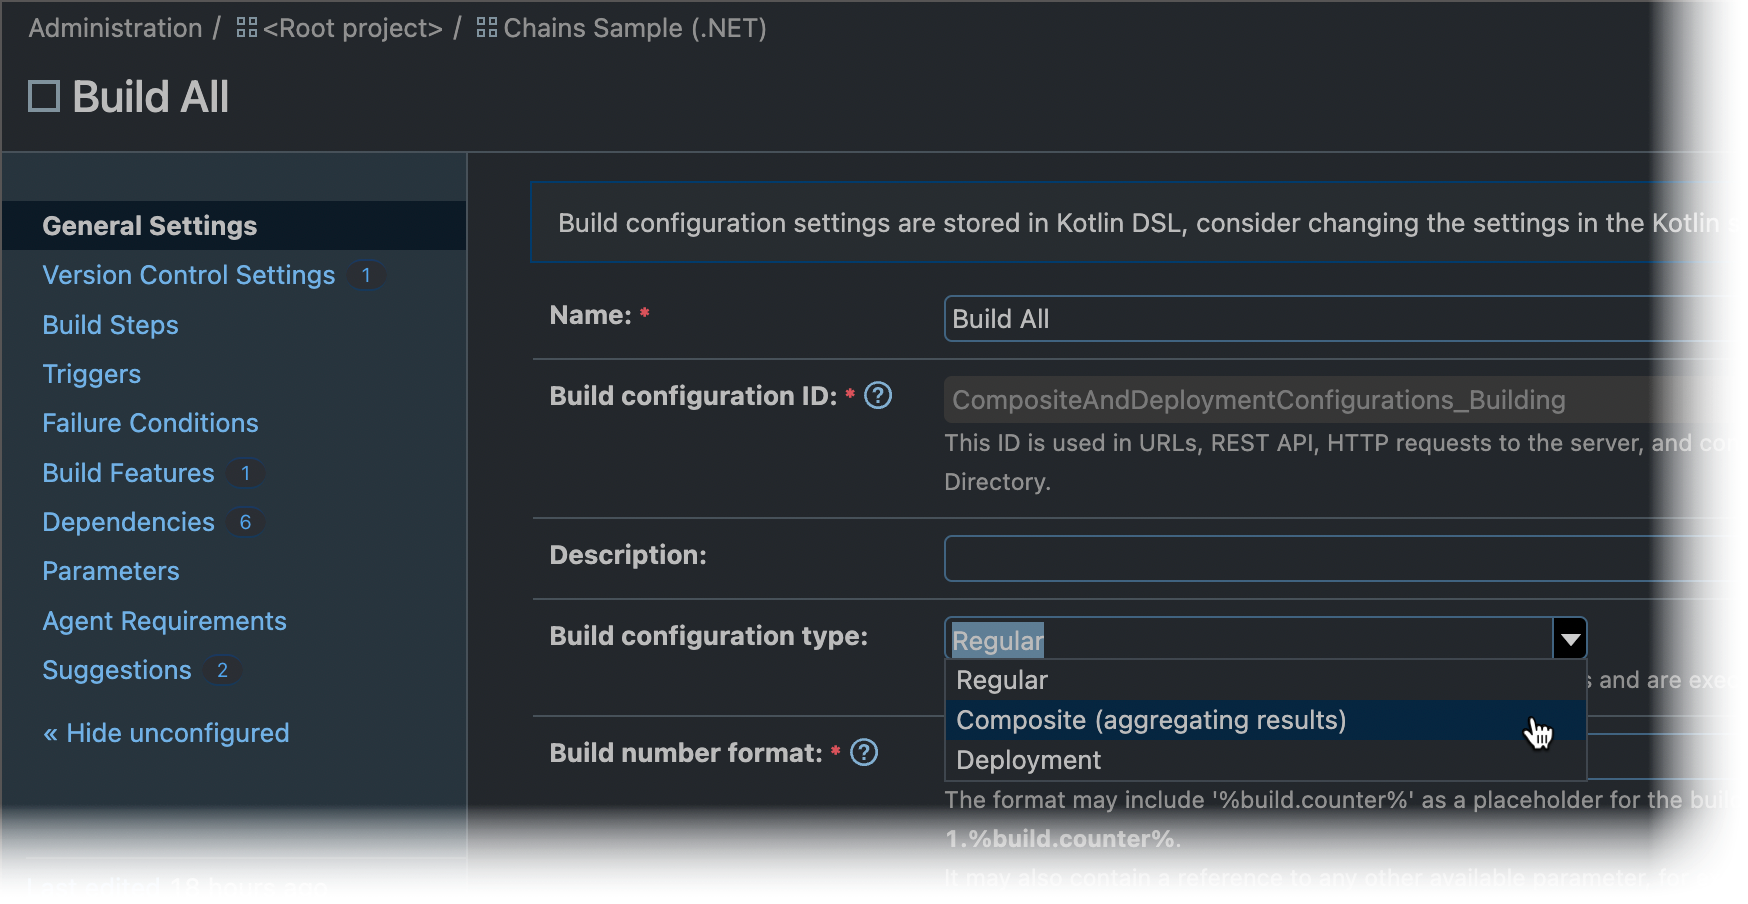
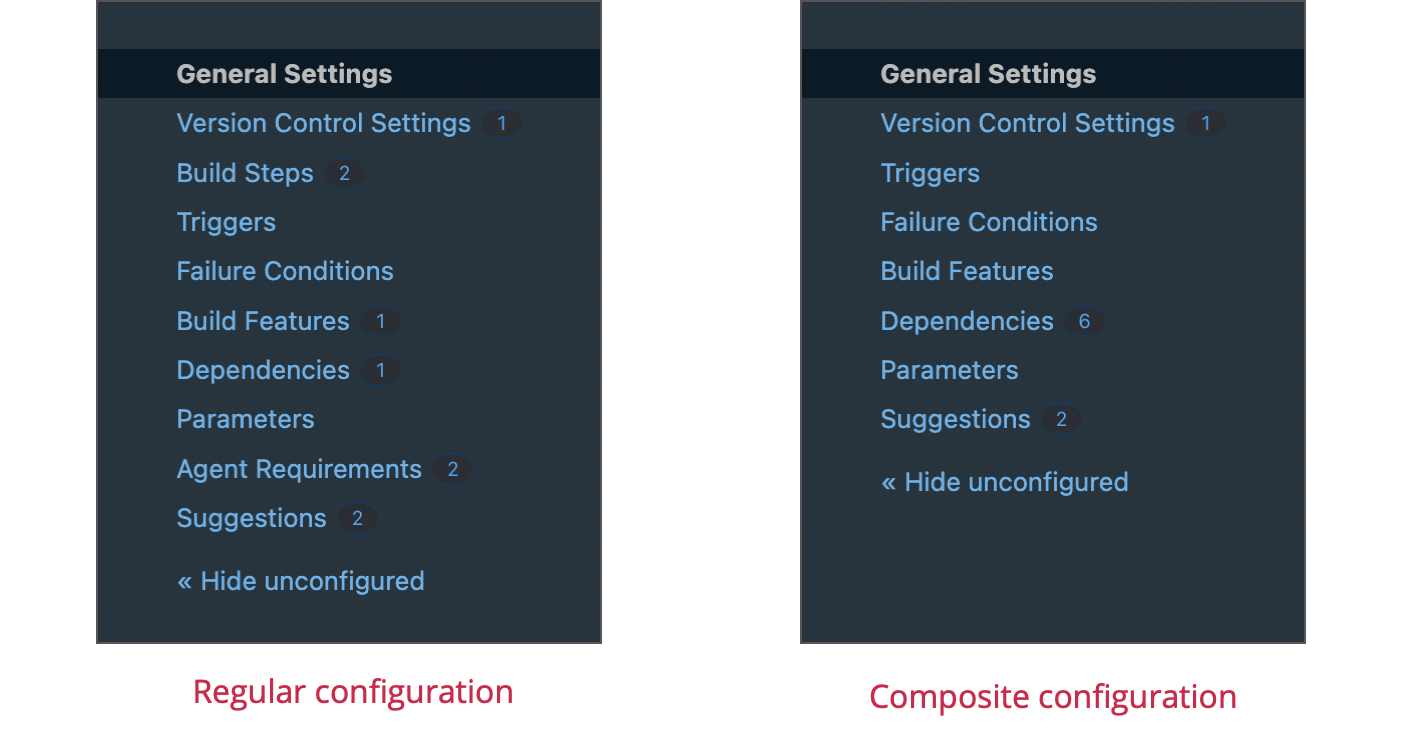
When compared to regular build configurations, composite configurations exhibit the following differences.
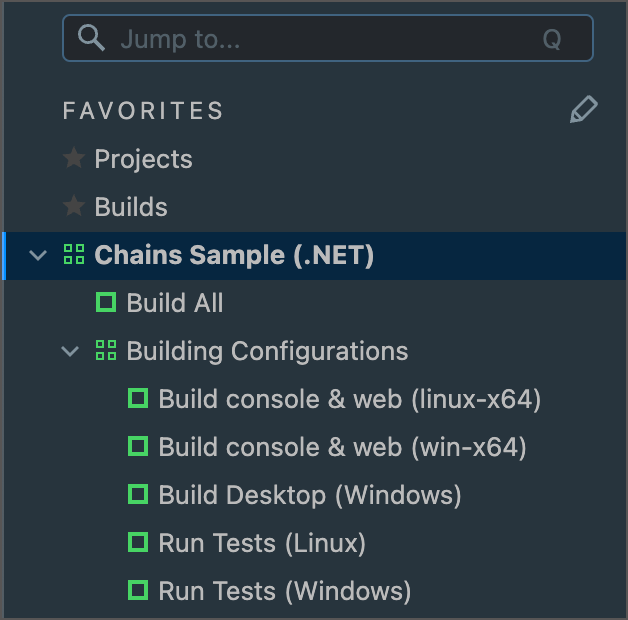
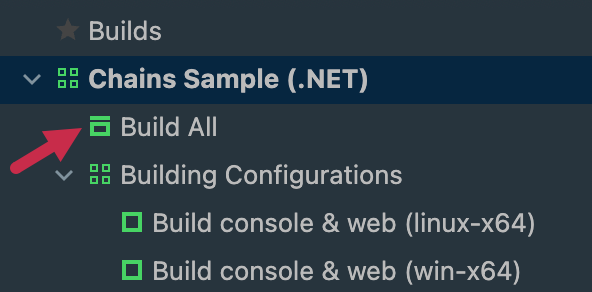
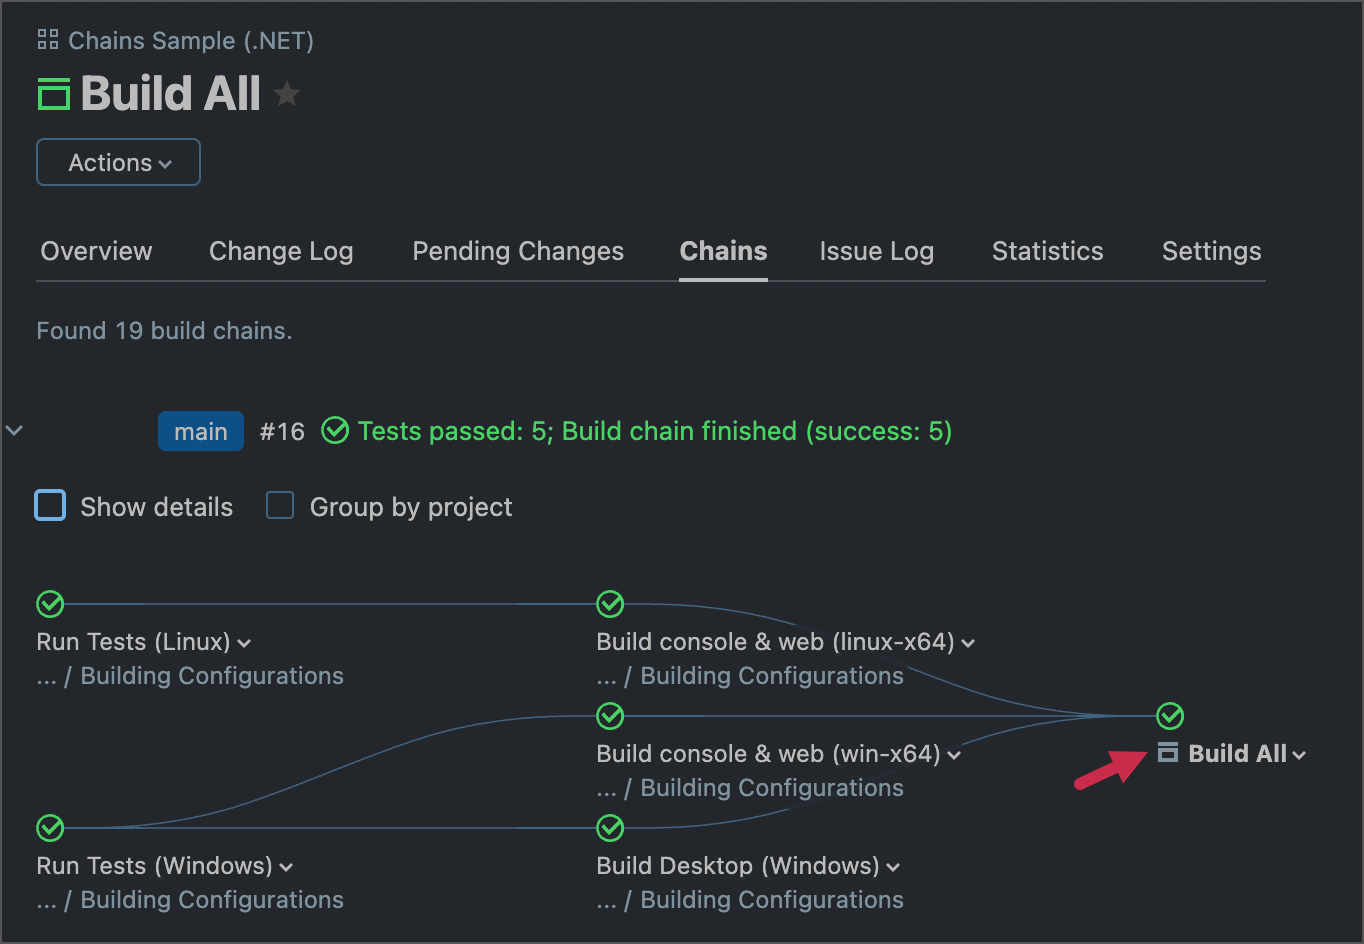
TeamCity uses different icons to help you differentiate regular and composite configurations.
In the navigation bar:
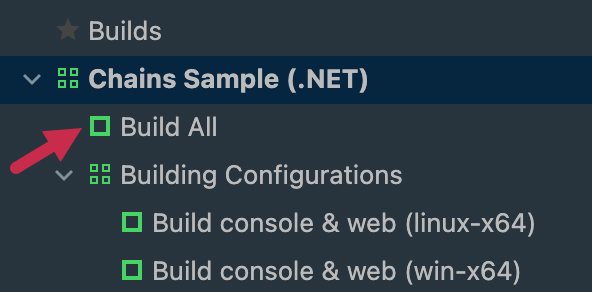
On the Build Configuration | Chains page:
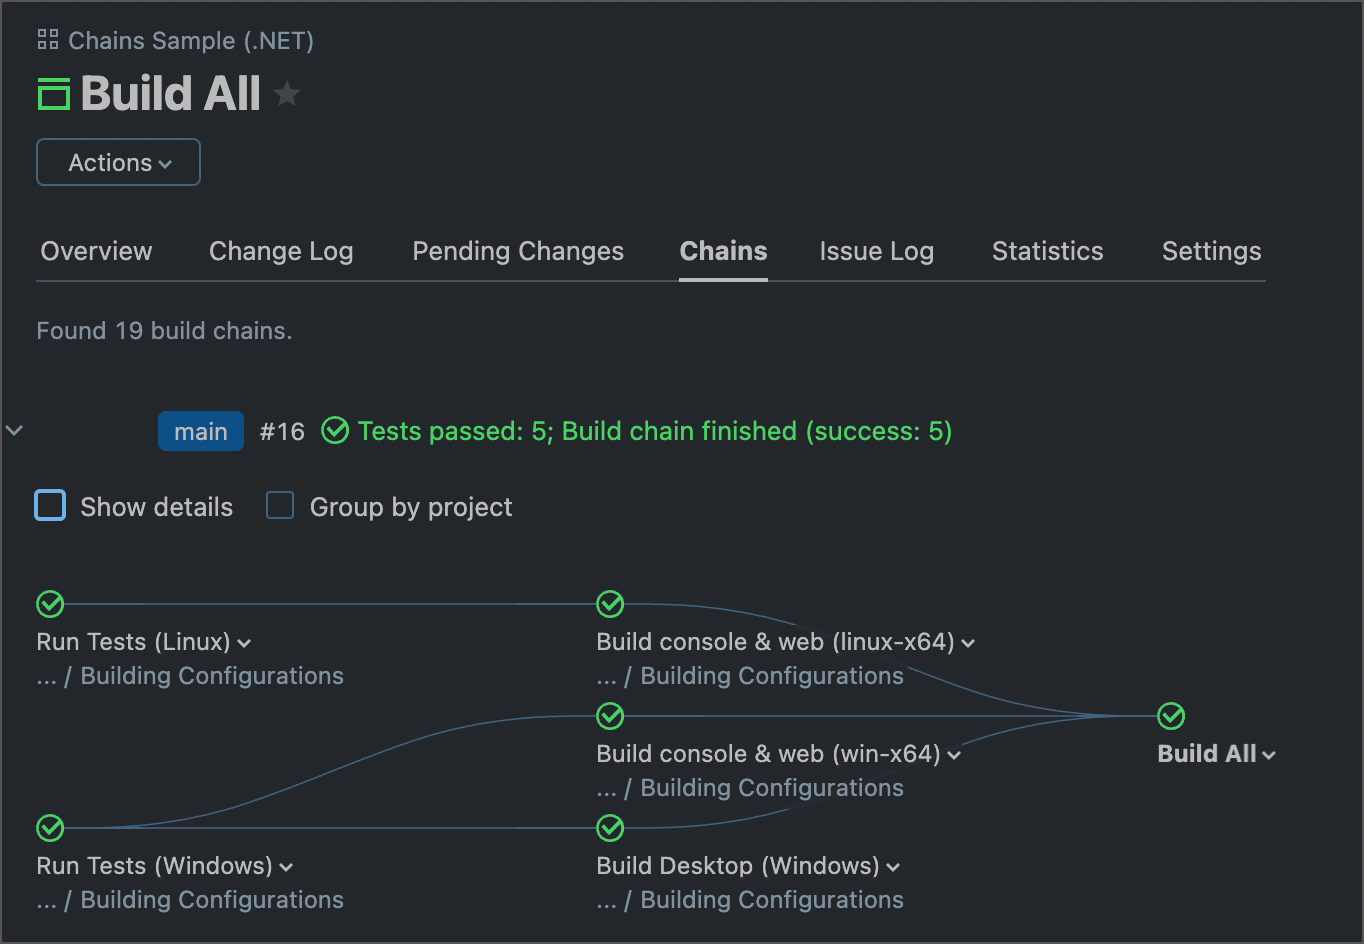
In the navigation bar:
On the Build Configuration | Chains page:
A composite build configuration aggregates results produced by other builds. It is not designed to carry out actual building routines. For that reason, composite configuration settings do not show Build steps or Agent requirements tabs.
Since a composite build configuration does not have any actual build steps to perform, it does not occupy a slot in a build queue.
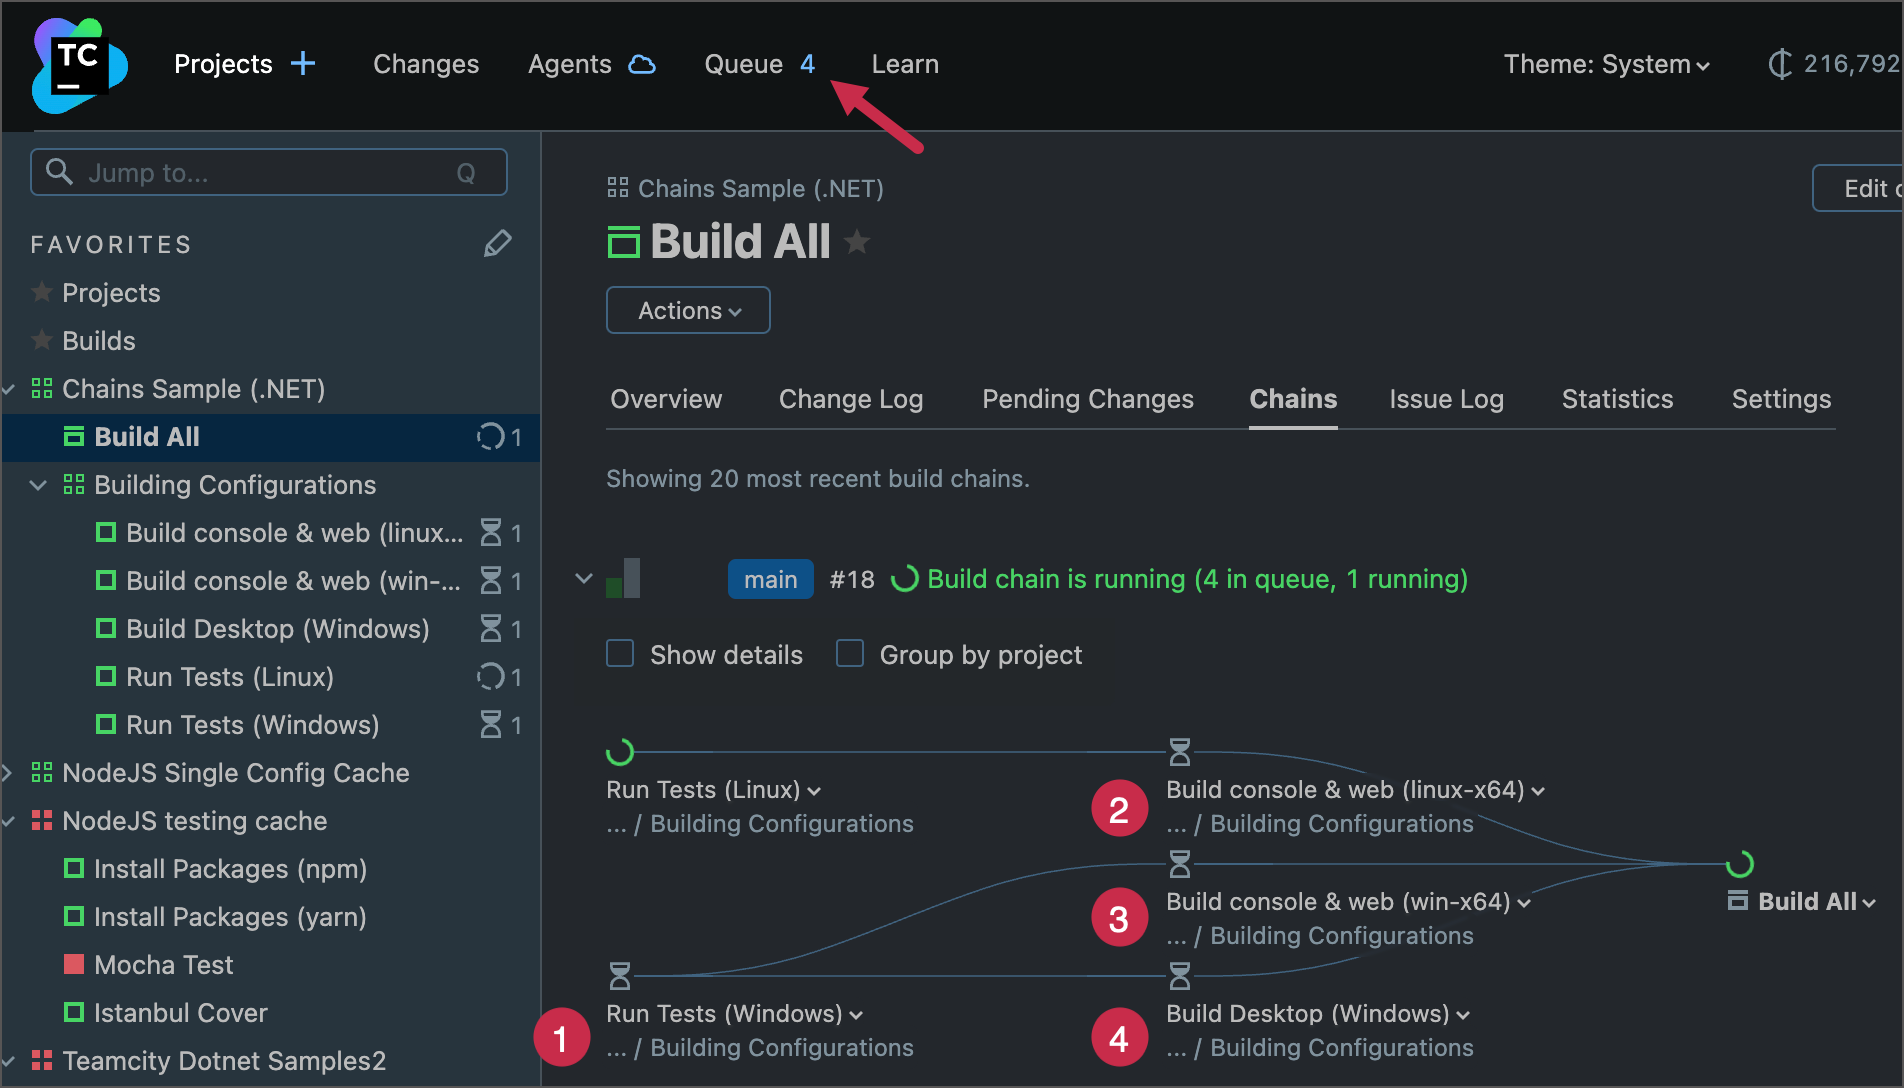
If you limit the number of simultaneously running composite builds, it will affect all dependencies as well. For example, suppose the current limit is 1, and a composite build is running. In that case, all dependency builds that belong to another queued composite build will wait for the ongoing build to finish.
When you stop a composite build or remove it from the queue, the entire build chain is stopped or removed.
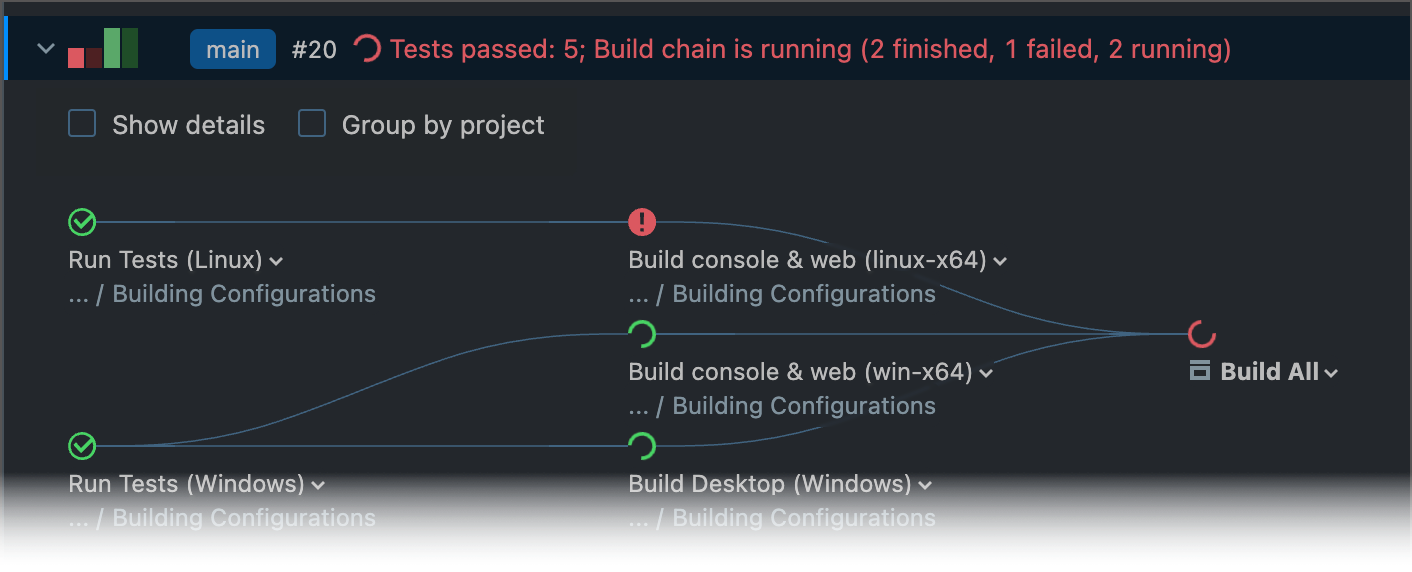
When the first dependency of a build chain starts, the composite build is shown as running. The build's status text, duration, and progress indicator reflect the aggregated parameters of every regular build in this chain.

If any build in a chain fails, the composite build reflects this so you can instantly spot the issue.
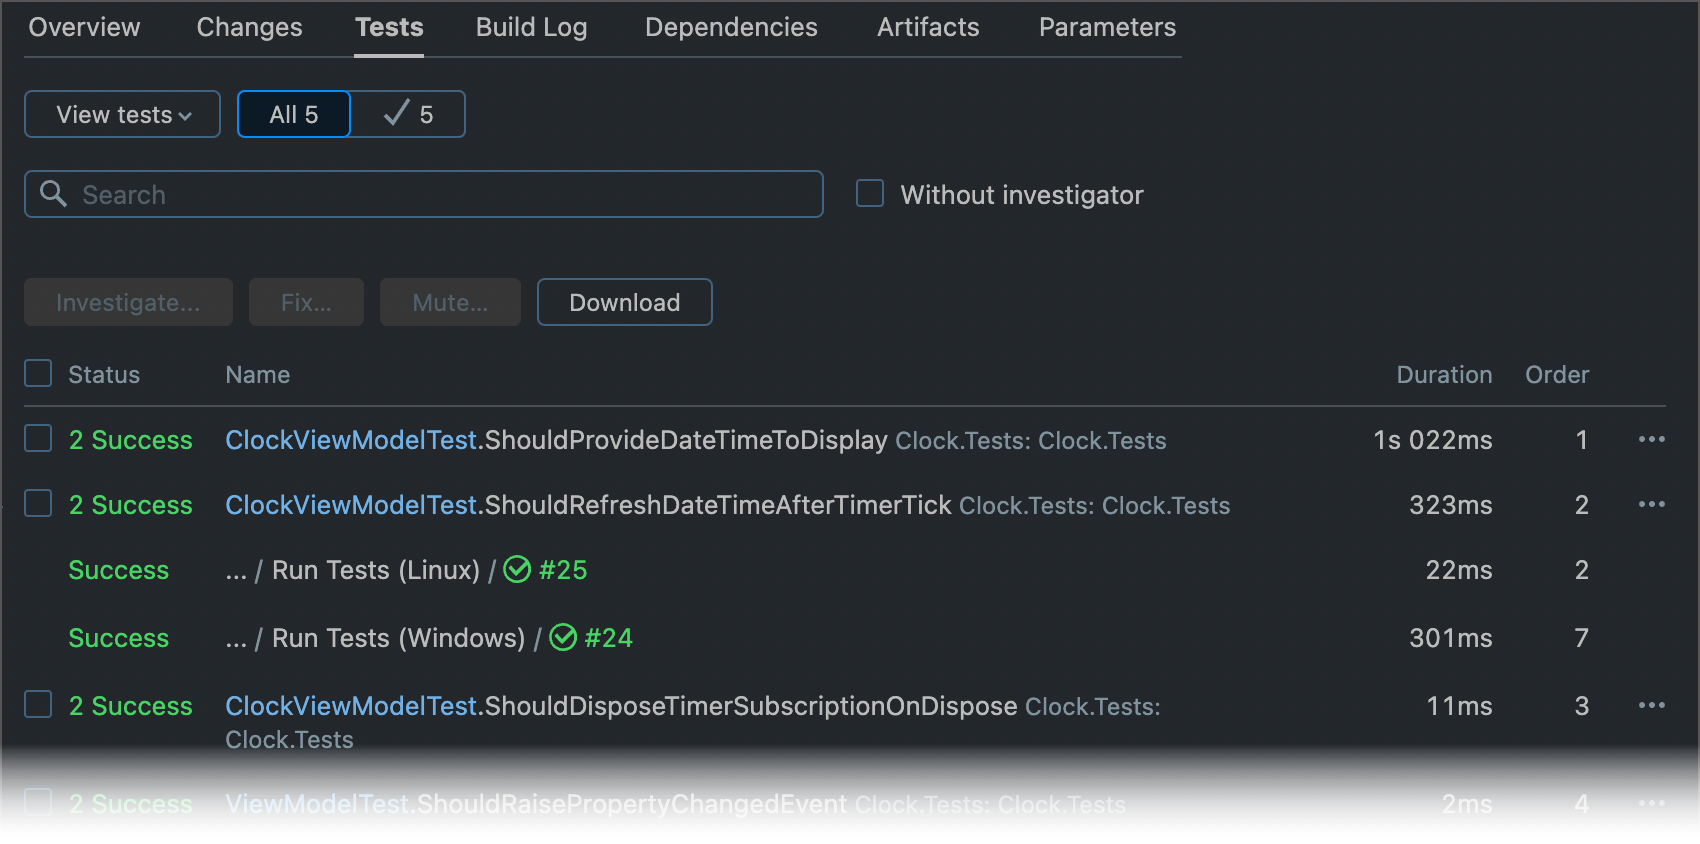
The Tests tab of a composite build aggregates tests and shows all passed, failed, muted, and ignored tests in a single place. The same applies to code coverage or results of code inspection/code duplicate analysis.
Neither regular nor composite builds aggregate artifacts from builds in their chains. To show artifacts produced by regular builds in the composite build's Artifacts tab, add corresponding artifact dependencies and set up required artifacts rules (see steps 4 and 5 in the Set Up a Build Chain section).
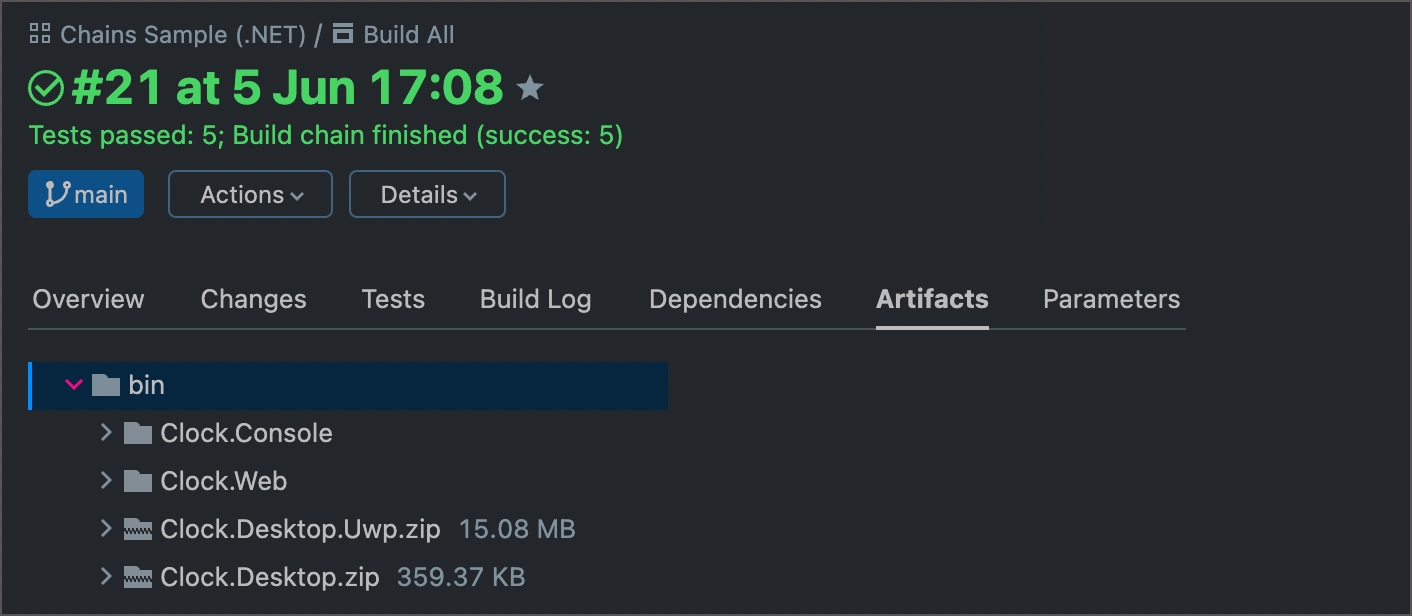
Since a composite configuration does not have its own artifacts, artifact clean-up policies need to be set in dependency configurations.
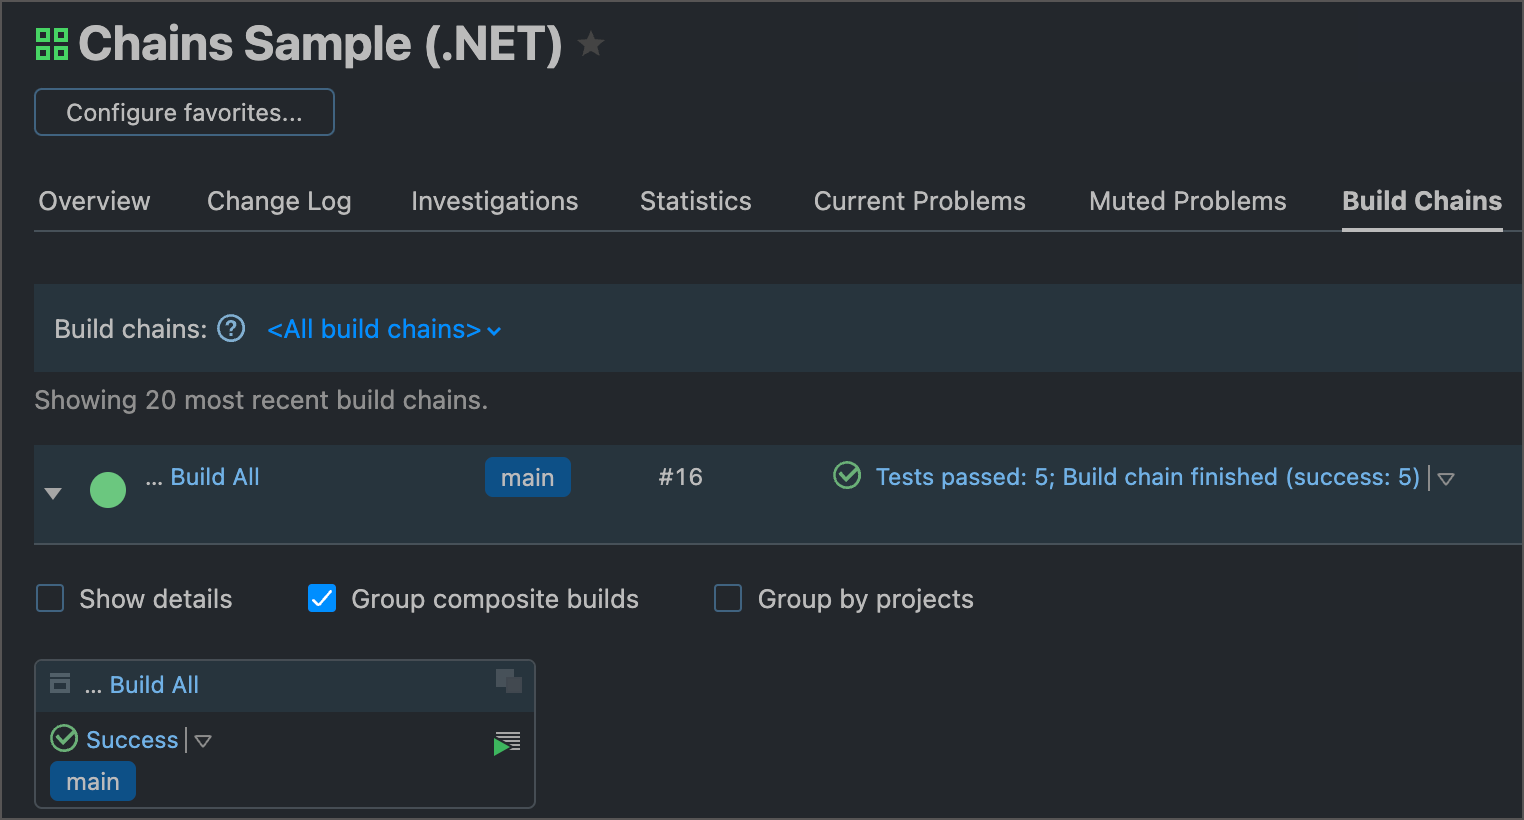
The Project | Build Chains page displays the Group composite builds option that allows you to collapse all parts of a build chain that end with a composite configuration into one visual element.
