Create an Oracle data source using OCI
For full information about Oracle, refer to the official documentation.
To download Oracle database software, refer to the official software downloads.
For more versions of Oracle JDBC driver, refer to the official JDBC driver downloads.
Download the following Oracle Instant Client (OCI) packages for your operating system from the Oracle Instant Client Downloads page at oracle.com:
Basic Package
SQL*Plus Package
JDBC Supplement Package
Download oraclepki.jar from Oracle Database 12.2.0.1 JDBC Driver & UCP Downloads page at oracle.com.
Prepare a ZIP archive with wallet files. For more information about downloading a wallet, refer to Download Client Credentials (Wallets) at docs.oracle.com.
WebStorm uses JDBC drivers to connect to the Oracle server through the TNS protocol. The following driver modes are available:
In Thin mode, the JDBC driver always connects to the TNS listener. In this mode, various versions of the JDBC driver can be used.
In OCI mode, the JDBC driver uses native libraries. In this case, the JDBC driver's version must be the same as the version of these native libraries.
Running Oracle instance with access permissions for your user.
Configured tnsnames.ora file. For full information about tnsnames.ora file, refer to the official documentation.
Open data source properties. You can open data source properties by using one of the following options:
In the Database tool window (View | Tool Windows | Database) , click the Data Source Properties icon
.
Press ShiftEnter.
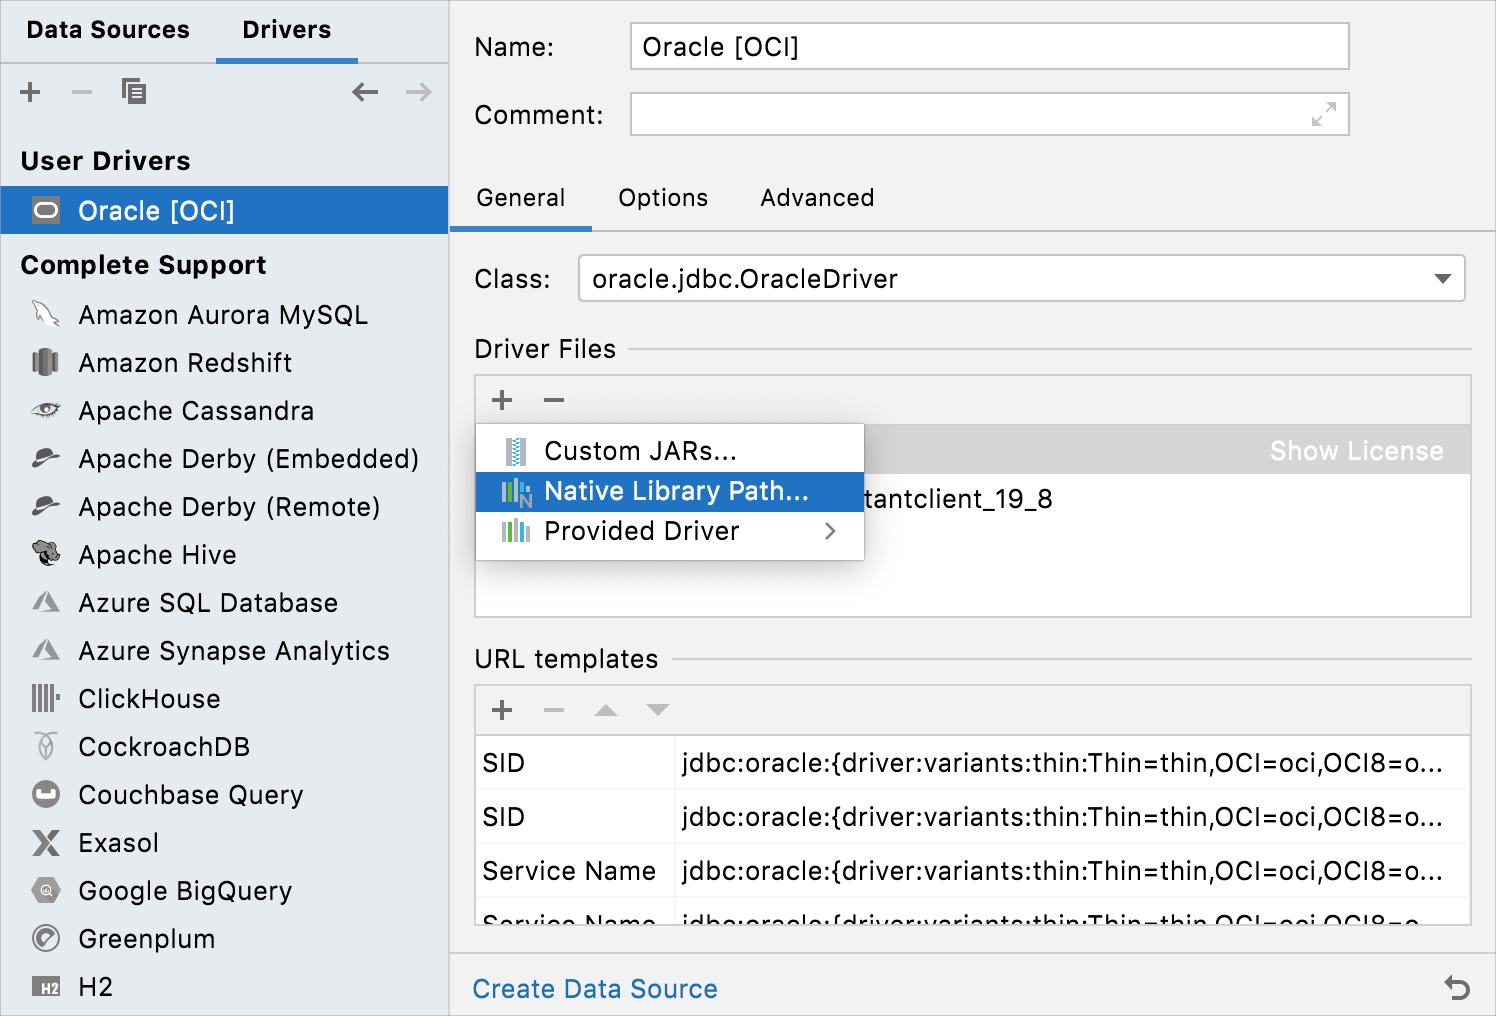
In the Data Sources and Drivers dialog, click the Drivers tab.
In the list of drivers, right-click the Oracle driver and select Duplicate.
Change the name of the duplicated Oracle driver (for example,
Oracle [OCI]).In the Driver Files pane, click the Add icon (
) and select Native Library Path.
In the file browser, navigate to the directory of the Instant Client files (for example, ~
/Oracle ) and click Open./instantclient_19_8 note
Versions of the driver and the instant client must be the same. For example, if you use the Oracle driver 19.8.0.0, the instant client must be of the same version. Otherwise, you will receive an error that the native library cannot be loaded.

To connect to the database, create a data source that will store your connection details. You can do this using one of the following ways:
In the main menu, go to File | New | Data Source and select Oracle.
In the Database tool window (View | Tool Windows | Database) , click the New icon (
) in the toolbar. Navigate to Data Source and select Oracle.

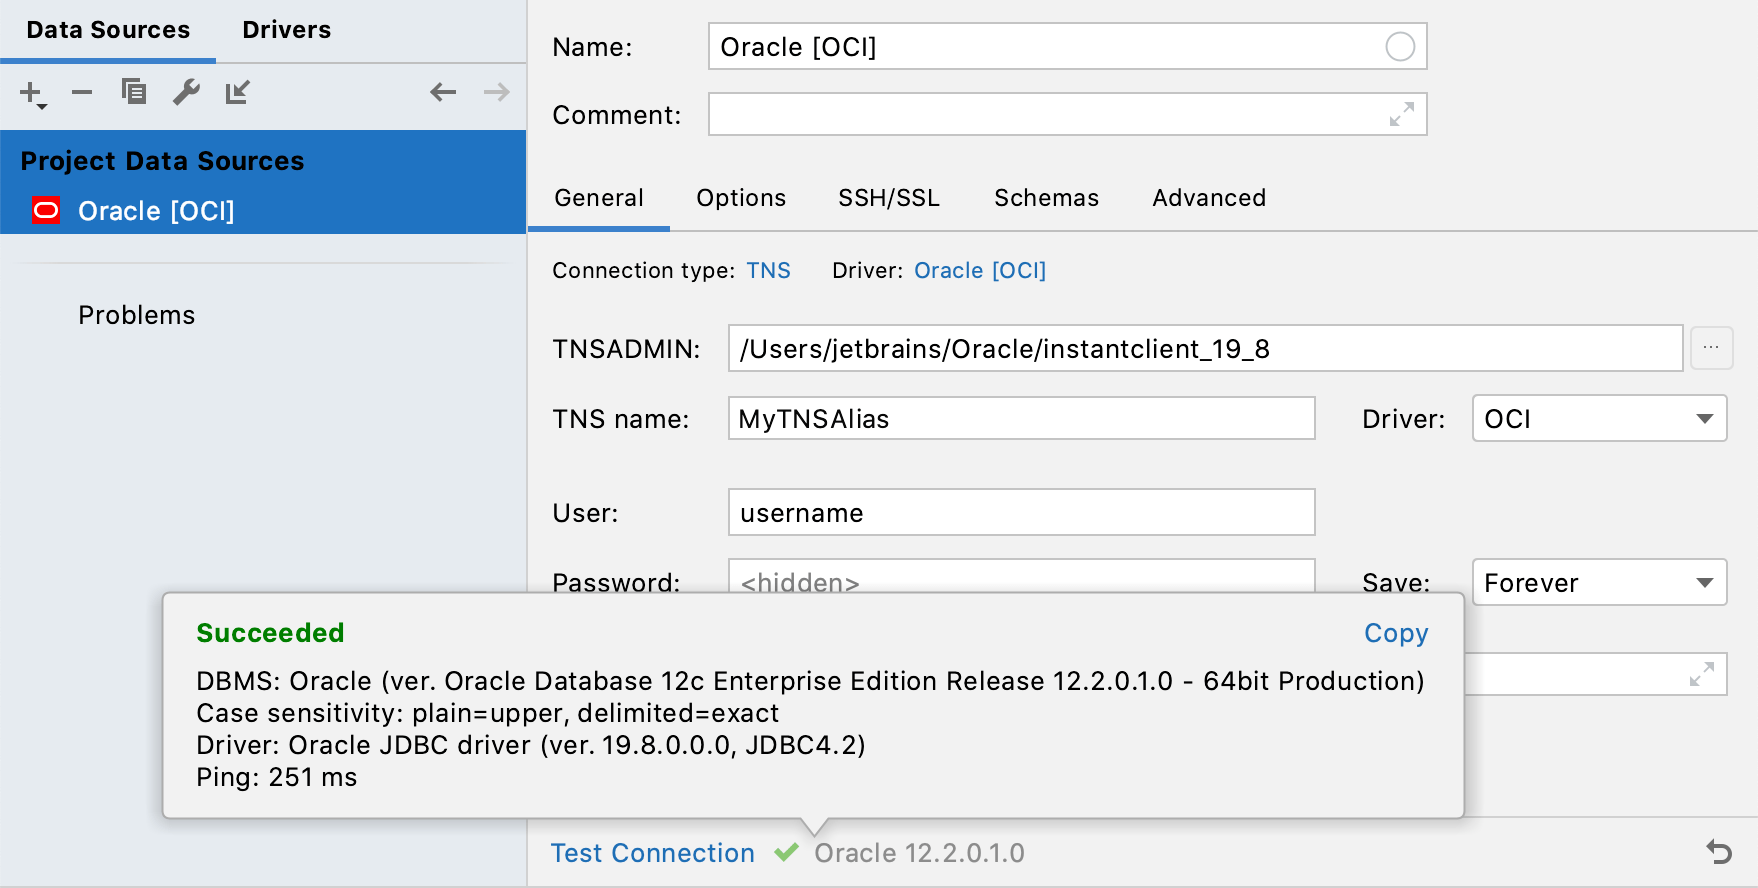
From the Connection type list, select TNS.
From the Driver list, select OCI.
Click the Driver link and select the driver entry that you created on Step 1 (in our case, Oracle [OCI]).
In the TNSADMIN field, click the browse button and navigate to the directory with the Instant Client files (in our case, ~
/Oracle )./instantclient_19_8 /network /admin In the TNS name field, use the automatic completion (CtrlSpace) to select which service name to use (see a value of an alias in the tnsnames.ora wallet file).
Specify credentials for the Oracle user.
Ensure that the database connection can be established using the provided details. To do this, click the Test Connection link at the bottom of the connection details section.

If you encounter any connection issues, refer to the Cannot connect to a database page.
(Optional) By default, only the default schema is introspected and available to work with. If you also want to work with other schemas, in the Schemas tab, select them for the introspection.

Click OK to create the data source.
Find your new data source in the Database tool window.
For more information about the Database tool window, see the corresponding reference topic.
tip
To see more schemas under your new data source node, click the N of M button and select the ones you need. WebStorm will introspect and show them.

For more information about working with database objects in WebStorm, refer to Database objects.
To write and run queries, open the default query console by clicking the data source and pressing F4.
To view data of a database object, open Data editor and viewer by double-clicking the object.
